Plan manpower
How to plan manpower.
In this topic, you'll get familiar with the process of planning manpower within the Workforce module. The topics covers the process of planning manpower, viewing existing planning, and downloading planning reports.
Workforce planning is activated in Administration () > Settings > Workforce.
Plan manpower
Perform the following steps to plan employee work.
Step 1: Select and configure a job site
Navigate to the Workforce page from the left-hand navbar of your Web App and select the Planning tab.
PERMISSIONS
You may access the Planning tab if you have the View "Planning" tab permission enabled for your role in Administration () > Role Permissions > Workforce.
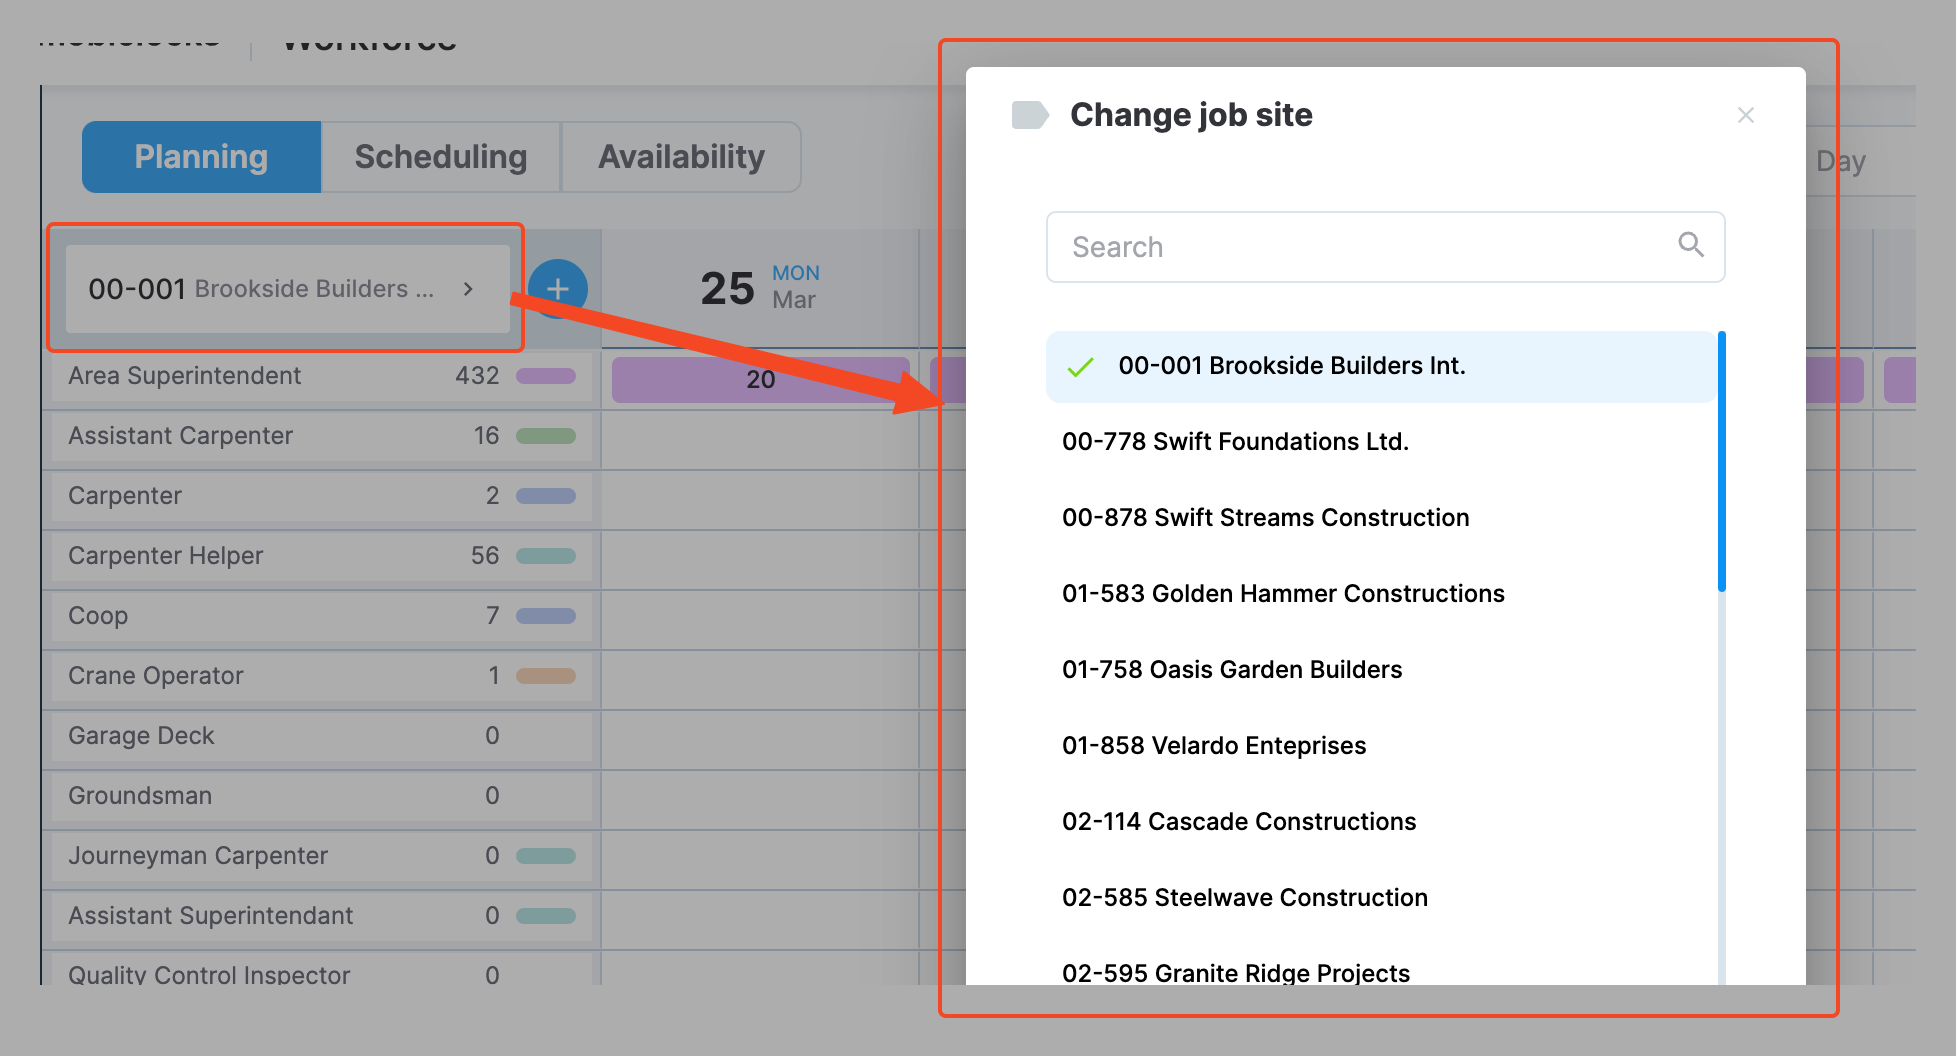
Select a job site from the left-hand navbar, as shown in the following screenshot.

Selecting a job site
Select the settings () icon to configure job site settings. The following settings are available.
Working days
Here, you specify the length of the working week for the selected job site. You have the following options:
- 5 days. If you choose this option, the last two days before the starting day of the payroll week specified for your MobiClocks environment will be marked as non-working and planning will be disabled for them.
- 6 days. If you choose this option, the last day before the starting day of the payroll week specified for your MobiClocks environment will be marked as non-working and planning will be disabled for that day.
- 7 days
NOTE
If you decrease the number of working days by, for example, switching from 7 to 6, all the planning that you had for the new non-working day will be removed.
Manpower unit
Choose the measurement unit that best fits your planning needs:
- Man-days.
- Man-hours.
You'll see how this works later in the Step 3: Plan employee work section.
Start and end dates
Here, you can specify start and end dates for the job sites, which can also be configured from job site settings.
NOTE
If you already have planned worked for a particular job site, modifying the job site's start or end date will not affect the planning. In Planning, you can plan work beyond the job site's timeline, so planning and job site's start and end dates are not dependent on one another.
After you're done configuring job site settings, select Save to apply the changes.
Step 2: Add manpower
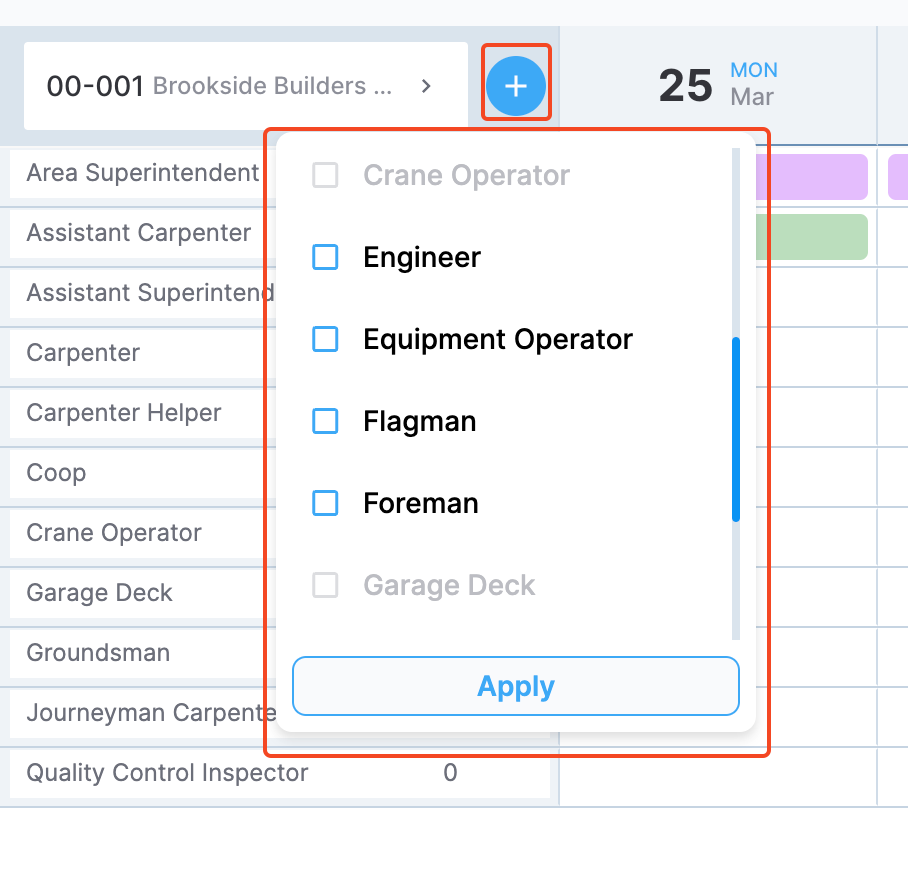
Select the plus (+) icon next to the job site name to choose the job titles you want to do planning for. Select one or more job titles and select Apply to add them under the job site. The following screenshot shows the job title selection dialog.

Selecting job titles
Any of the added job titles can also be removed by selecting the remove () icon next to the job title.
NOTE
If you remove a job title from your manpower, all the associated planning is deleted.
Step 3: Plan manpower
Now that you have configured your job site and selected the required manpower, you can start doing manpower planning. There are three methods for planning manpower, which are discussed next.
PERMISSIONS
You may add or edit manpower planning if you have the Create/edit planning permission enabled for your role in Administration () > Role Permissions > Workforce.
Plan day by day
One option to plan manpower is to select a cell in the Day view of the planning calendar and enter a value in the cell. For example, if you enter 5 in a cell next to the Assistant Carpenter job title, you thus plan5 Assistant Carpenter man-days or man-hours (depending on your measurement unit selection when configuring the job site) for a particular day.
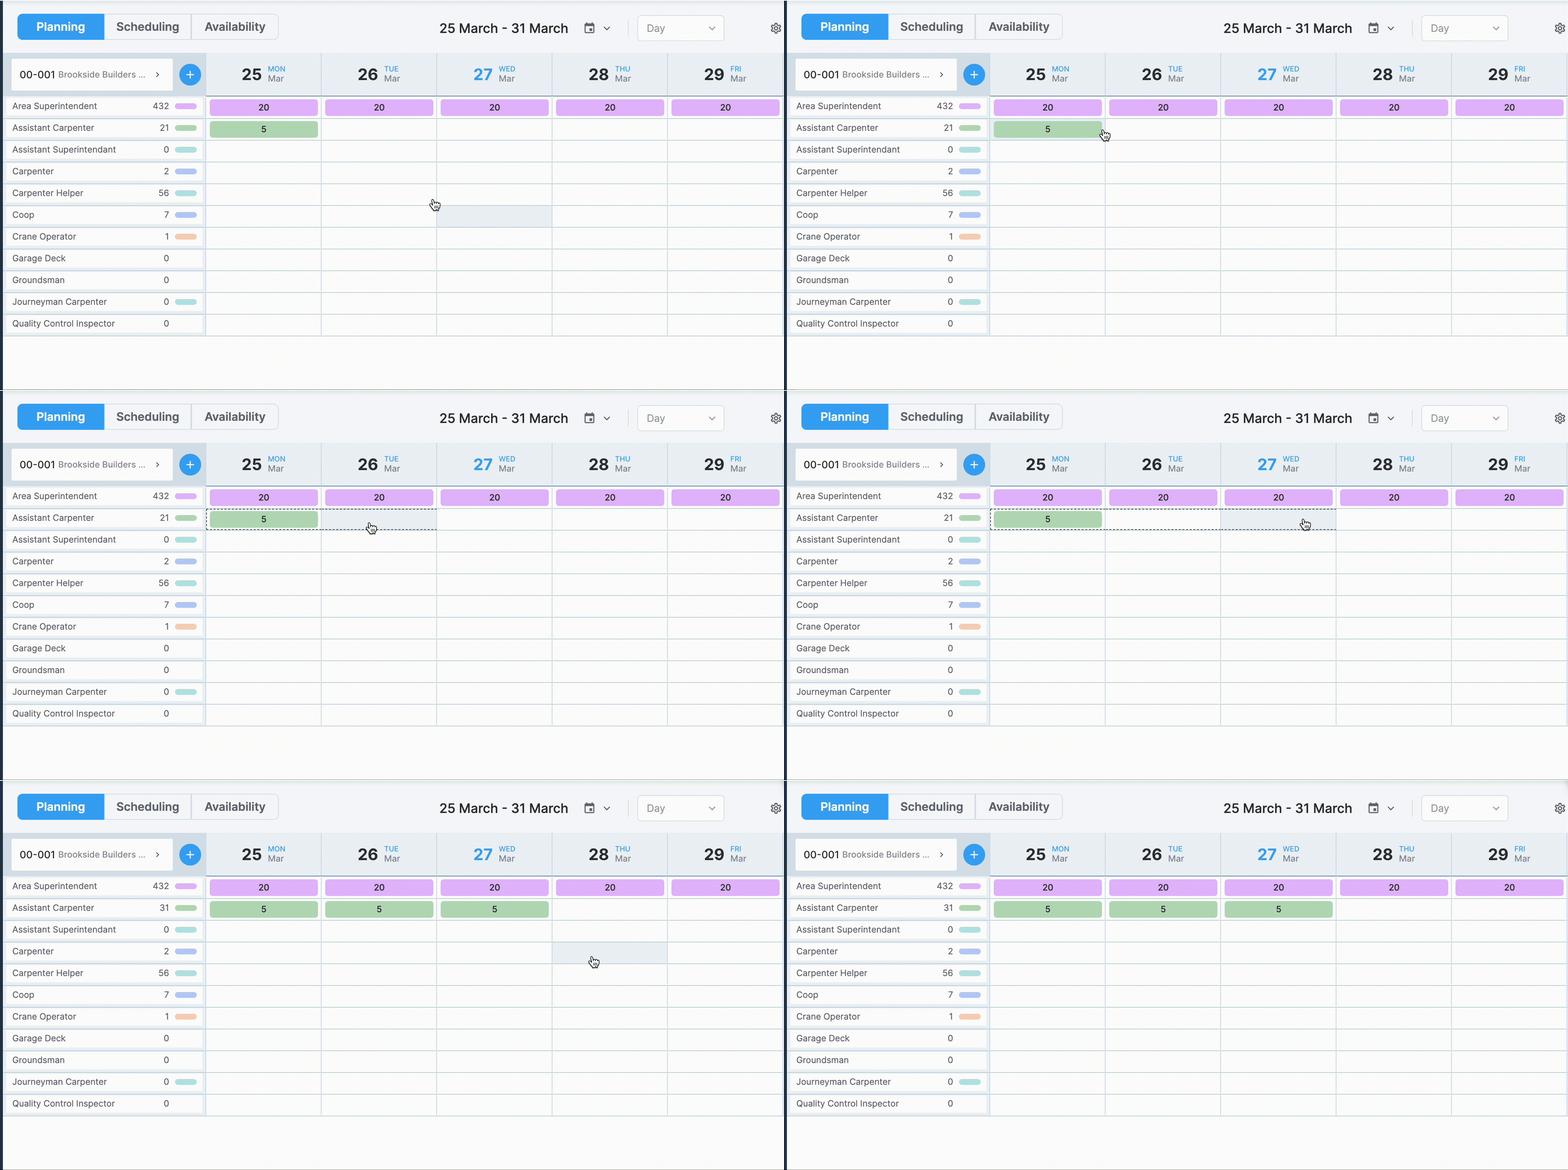
You can also expand a filled-in cell to duplicate the value to the cells next to it, as shown in the following GIF.

Expanding a cell to duplicate the value to other cells
Plan for a custom period
Follow these steps to plan manpower for a custom period:
- Select the plus (+) icon next to the job title you want to plan for.
- In the dialog that opens next, select the start and end dates (select from the calendar or enter manually) of the planning period. If the job site has start and end dates specified, you can inherit these values. However, note that you are not constrained by the job site's timeline and can plan beyond these dates as well.
- Lastly, specify the man-hours or man-days, depending on your measurement unit selection when configuring the job site), for each day of the planning period.
- Select Save to add the manpower planning to your calendar.
NOTE
If you plan for a period that already has man-days or man-hours specified, the existing values will be overwritten with the new ones.
Import planning
To import manpower planning, follow these steps:
- Select the Import button.
- Download the Excel template file and fill in the planning numbers.
- Attach the file.
- Select Upload to finalize.
View planning
To view manpower planning for a particular period, select the date picker () icon and specify the date range:
- Custom date range
- All planned dates. From the earliest date that contains manpower planning to the latest date that has one.
- This week
- This month
Next, you can apply one of the available calendar views:
- Day. In this view, you can view and edit manpower planning for any particular day.
- Week. In this view, each calendar cell represents one week and contains the sum of all the man-hours or man-days, depending on your measurement unit selection when configuring the job site), planned in that week.
- Month. In this view, each calendar cell represents one month and contains the sum of all the man-hours or man-days planned in that month.
NOTE
If the selected date range doesn't fit in your screen, use the horizontal scroll at the bottom of the page to navigate left or right.
Download a report
You can download a manpower report for each job site by selecting Download report in the upper-right corner of the Planning page. The report includes the same data you see in the planning calendar for the selected date range.
Updated 4 months ago