
Daily schedule overview
Get a daily overview of individual and crew schedules.
In the Workforce module, you have a Crew board section, where you have an overview of all the schedules for the selected day and job sites. In this topic, you'll learn what data is available on the Crew board and how you can customize the board to your preferences.
Crew board is activated in Administration () > Settings > Workforce.
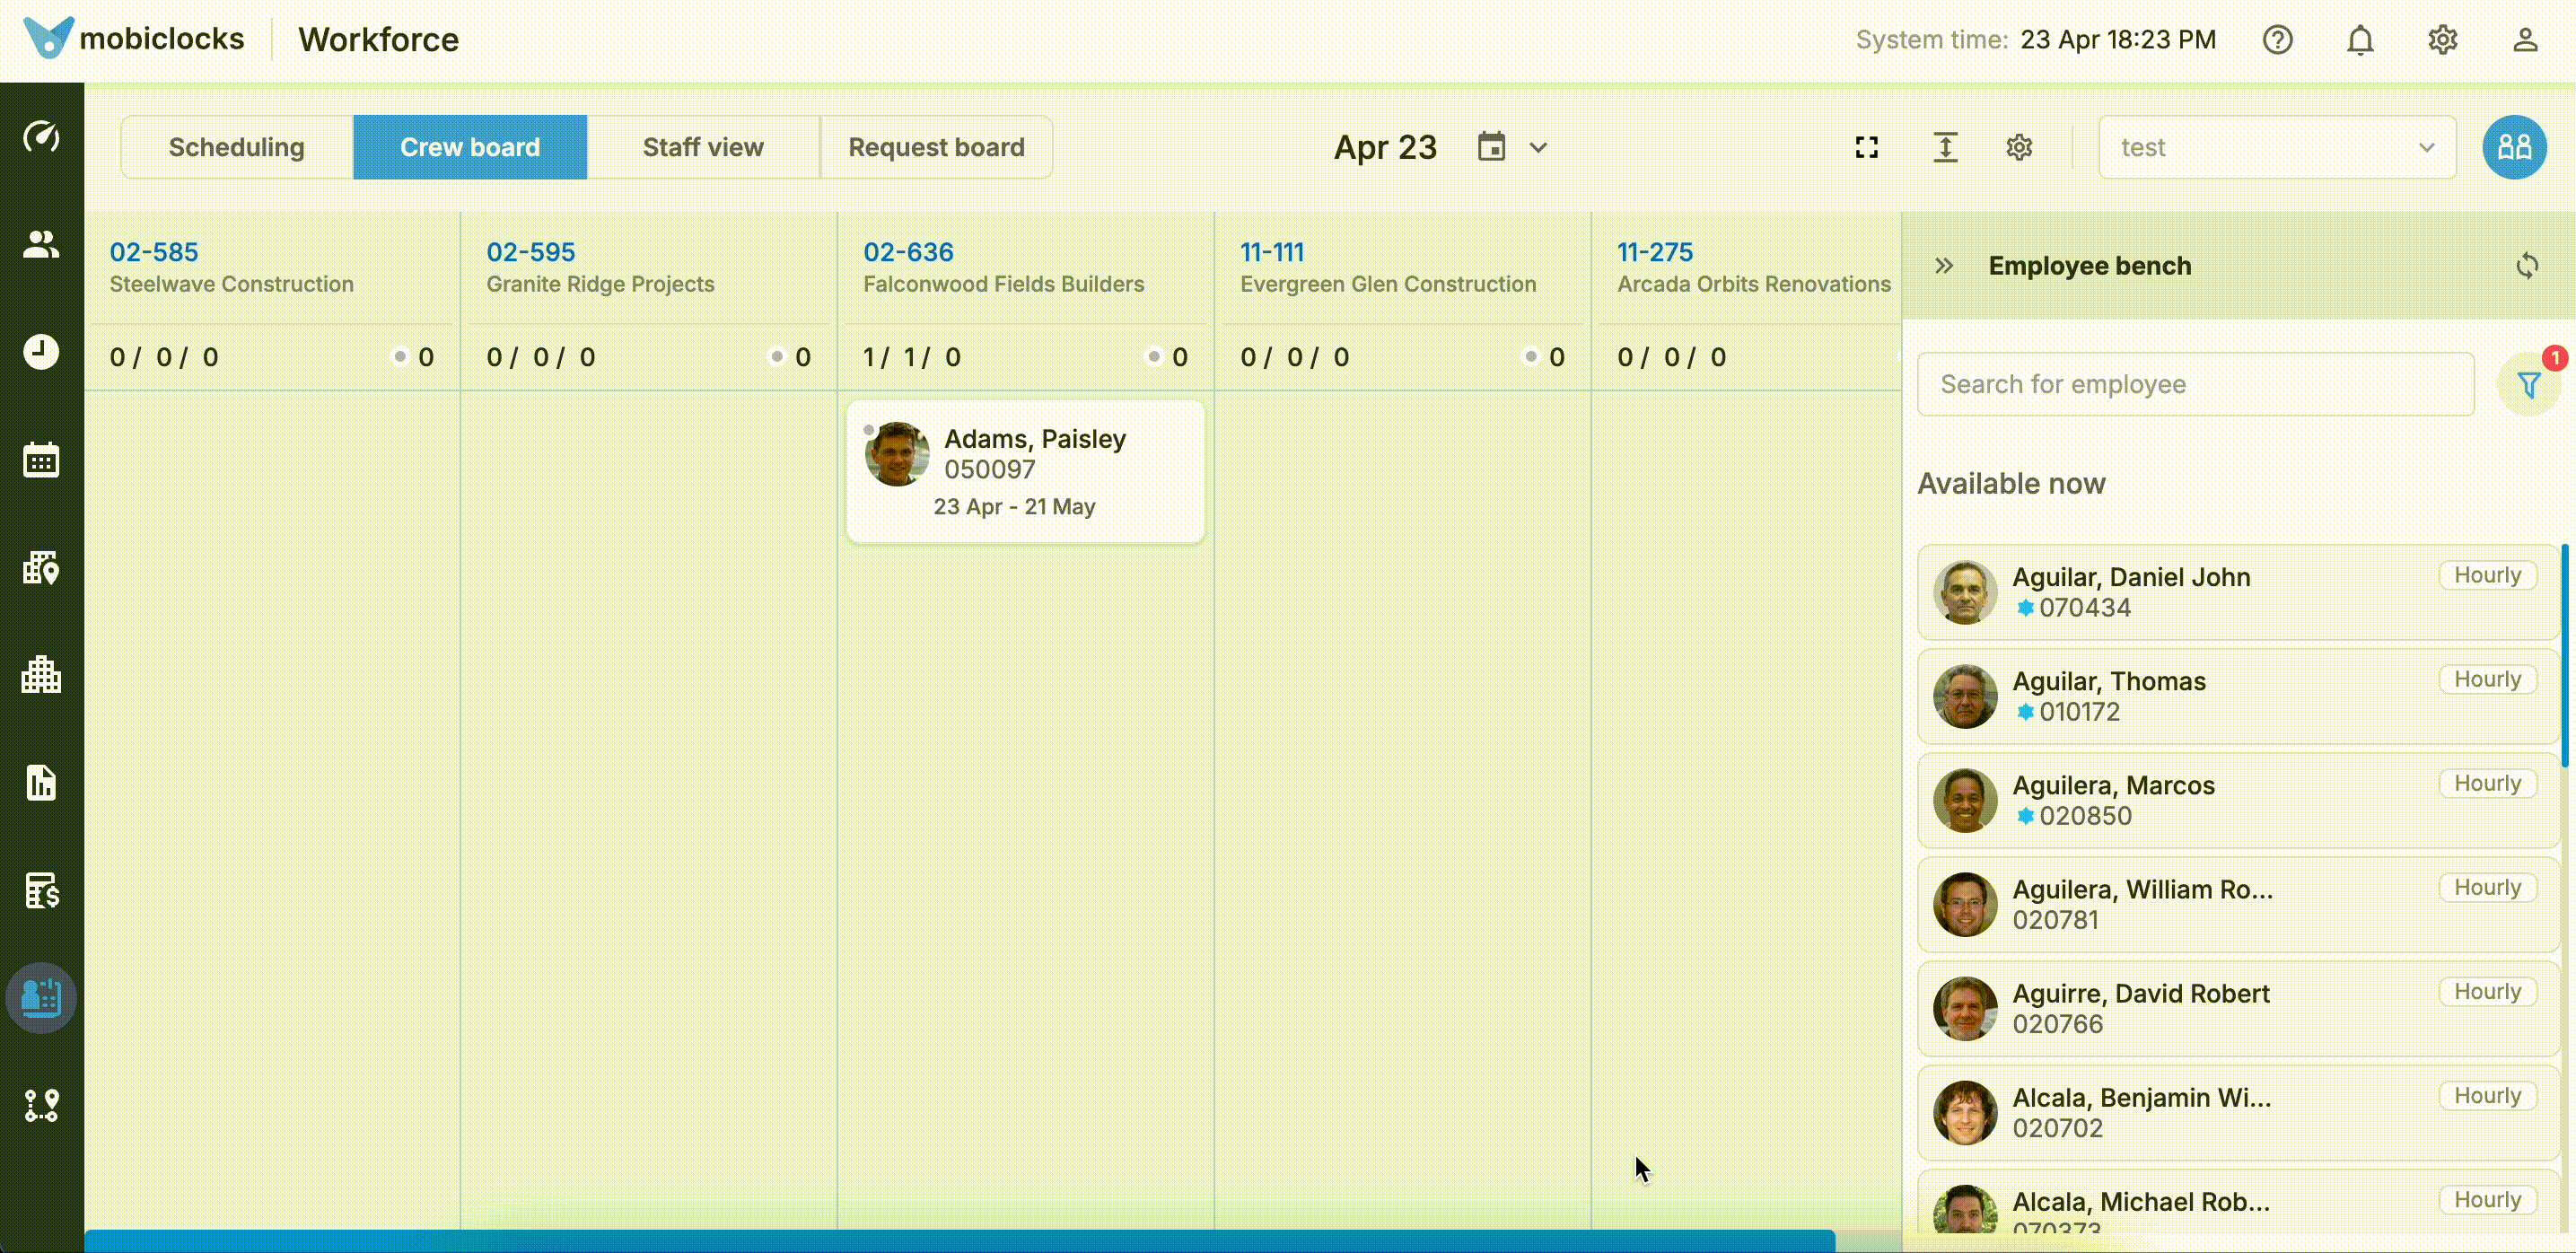
To get started, from the left-hand sidebar of your MobiClocks Web App, select the Workforce icon and navigate to the Crew board tab, as shown in the following screenshot.
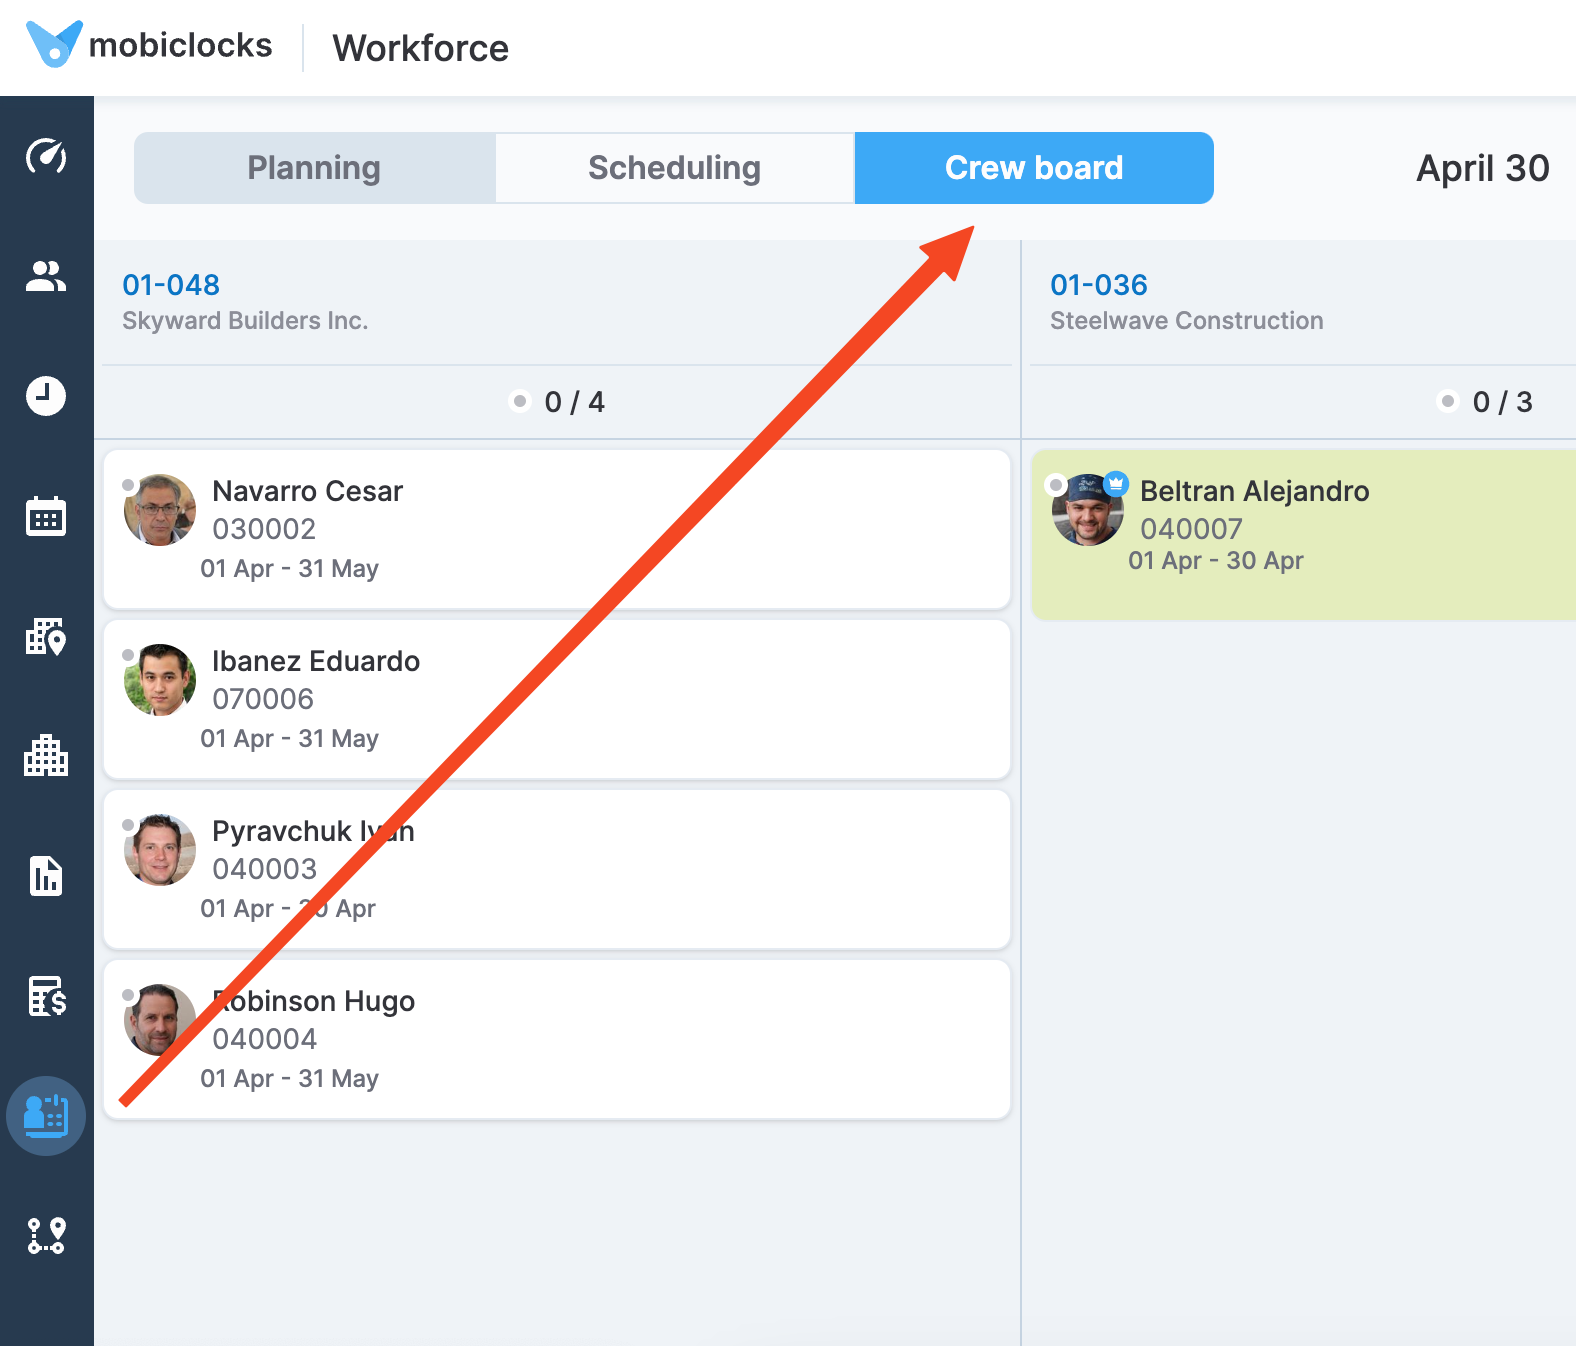
Navigating to Crew board
PERMISSIONSYou may access the Crew board if you have the View "Crew board" tab permission enabled for your role in Administration () > Role Permissions > Workforce.
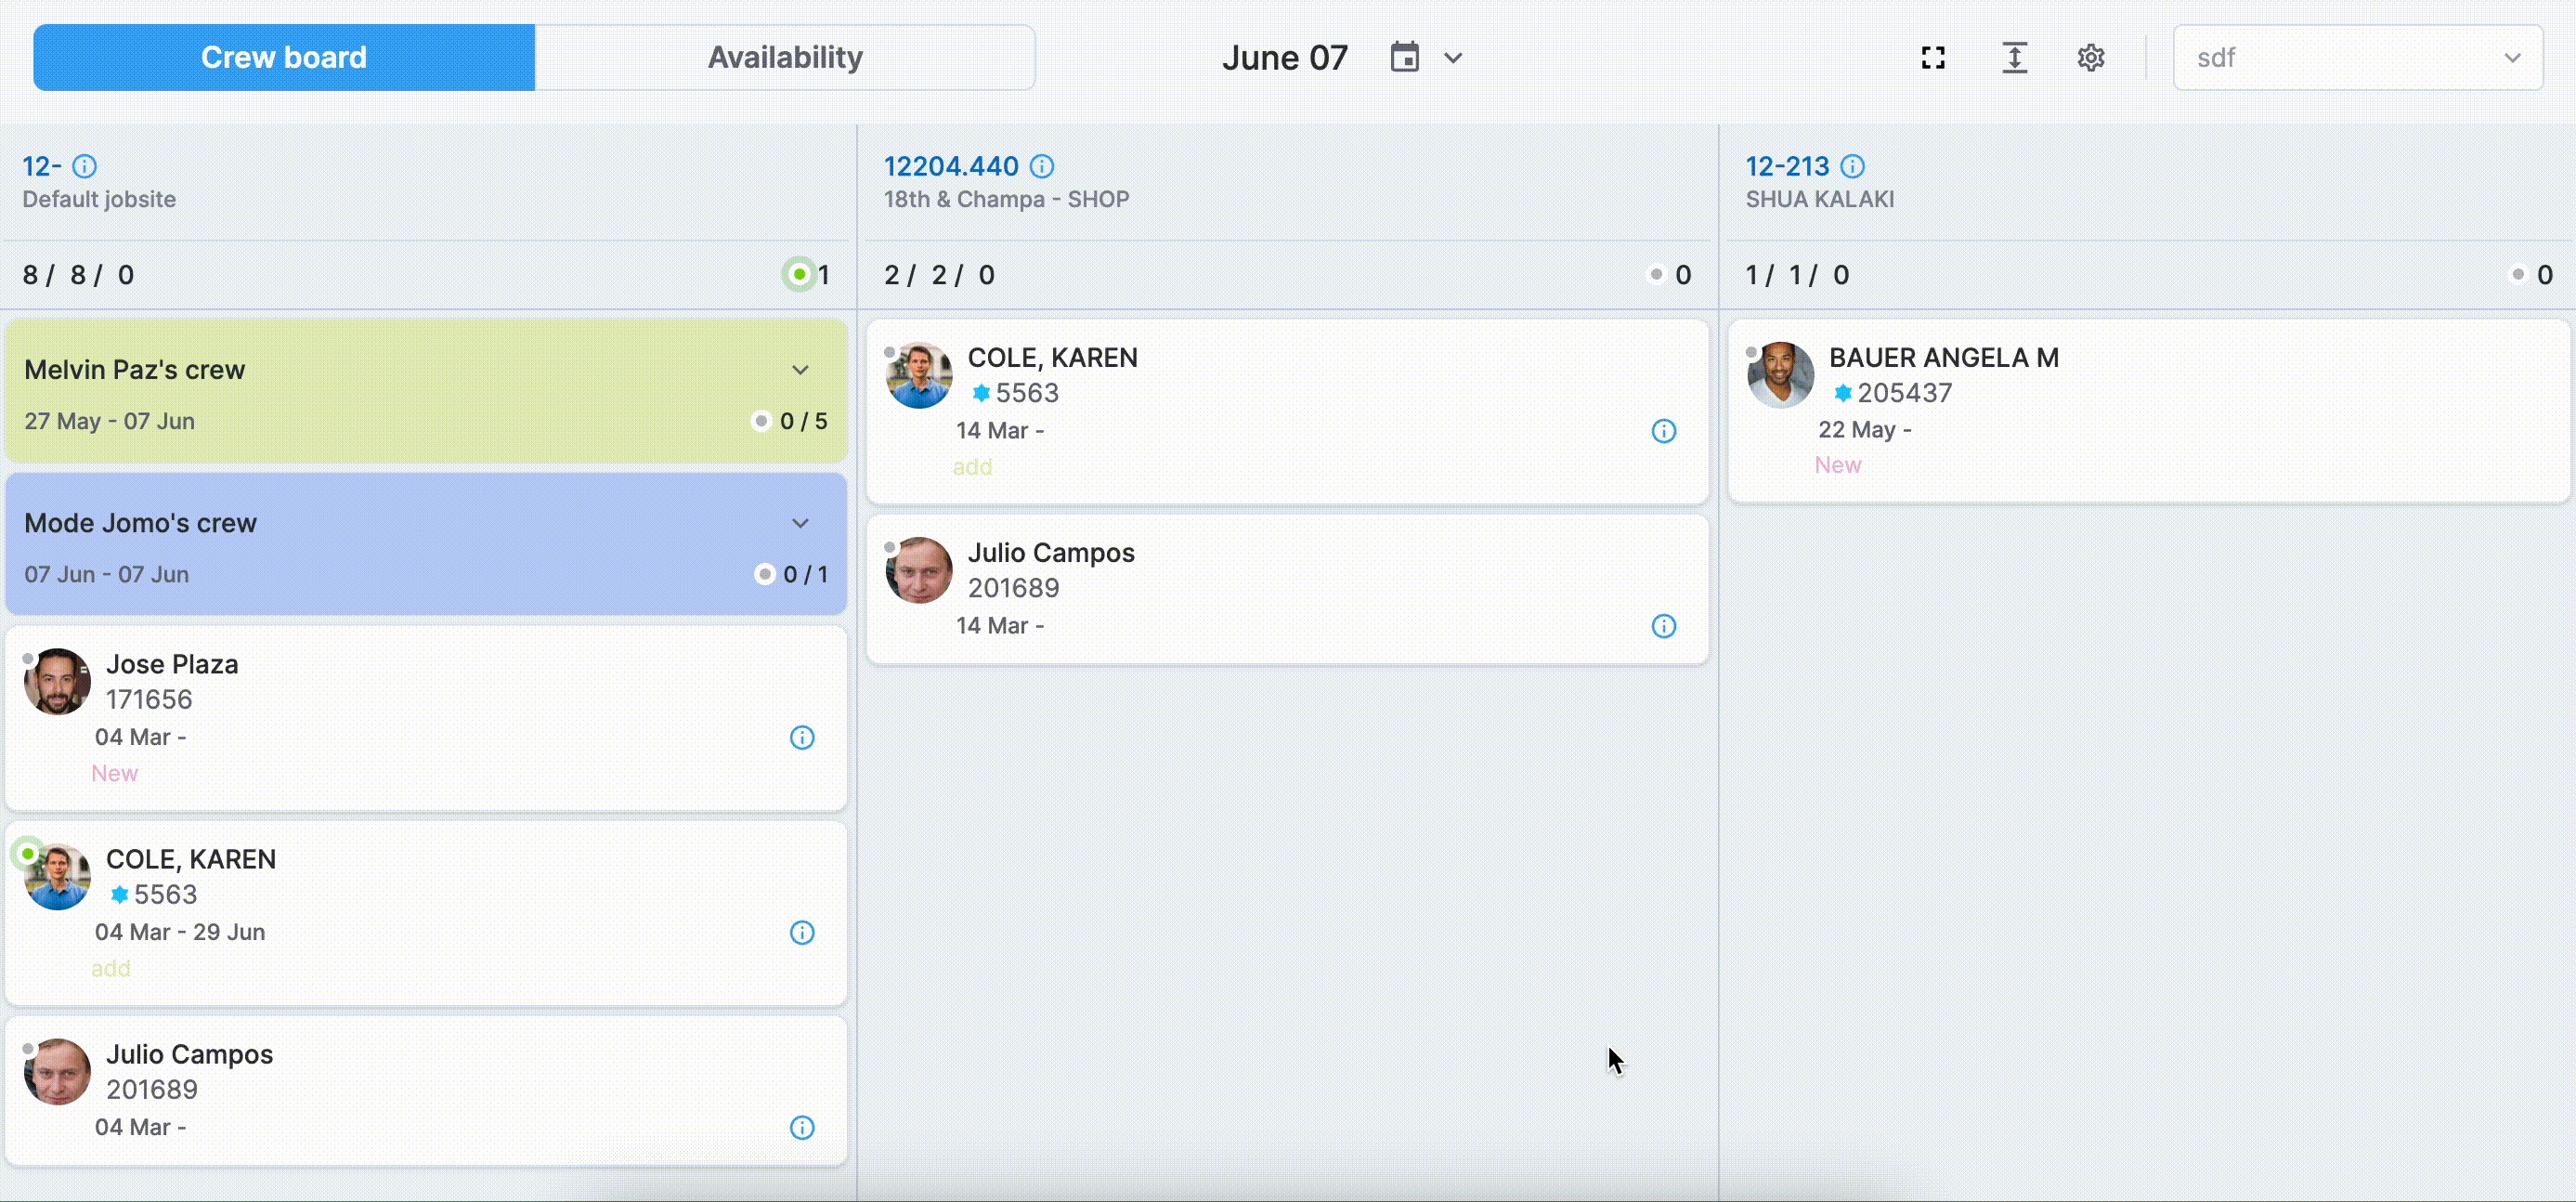
First, from the date picker at the top of the board, select a date. Each column on the board represents a job site. You can hover over the job site number to view certain job site details.
The numbers under the job site name shows the count of all employees, scheduled employees, and unscheduled employees. Also, there is a separate number on the right side that shows how many employees have been active (that is have punched at the job site) out of all the scheduled employees. If you are viewing today's schedules, the number shows the employees who are active at the moment. For past dates, the number shows how many employees have been active throughout the day.
In each column, you see all the individual and crew schedules that the job site has for the selected date.
These are the main elements of the board, and the following screenshot highlights them.
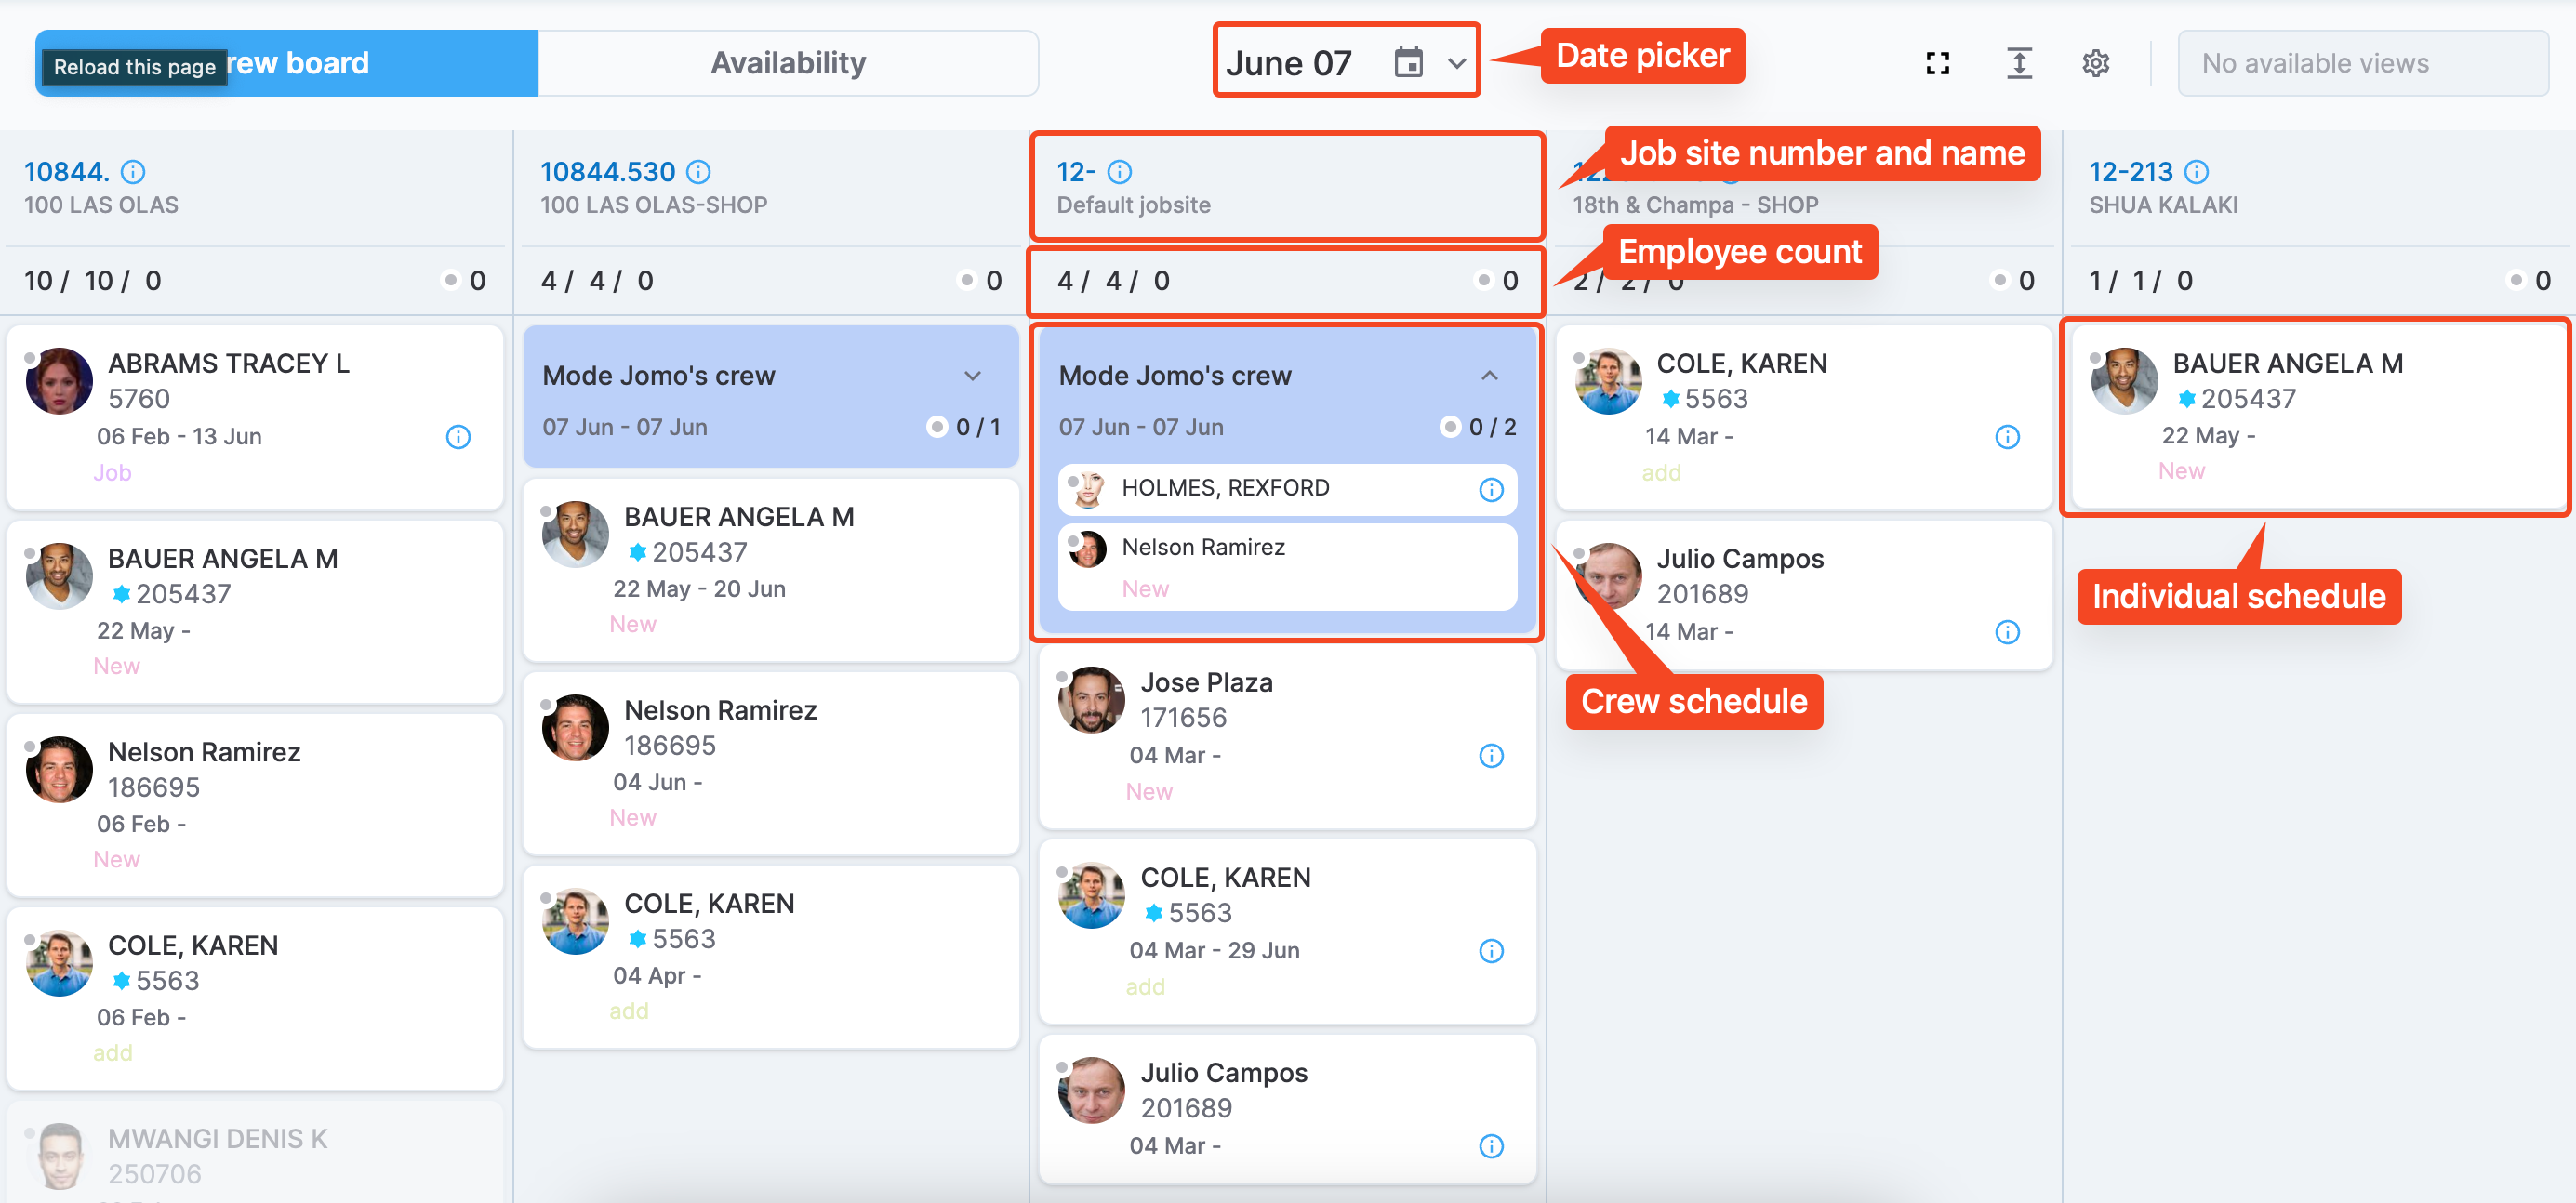
The main elements of the Crew board
Crew schedules can be expanded to view the full list of employees in the crew. There is also an expand all option available. Additionally, you can select the profile picture of the employee to access more details in the employee card.
By default, you see data for the first five job sites in your environment. However, you can filter job sites and create custom views.
The following sections discuss the functionality available on the Crew board that you can use to access and customize the data based on your needs.
Crew board actions
Move schedules
The following actions can be achieved by dragging and dropping board item from one location to another:
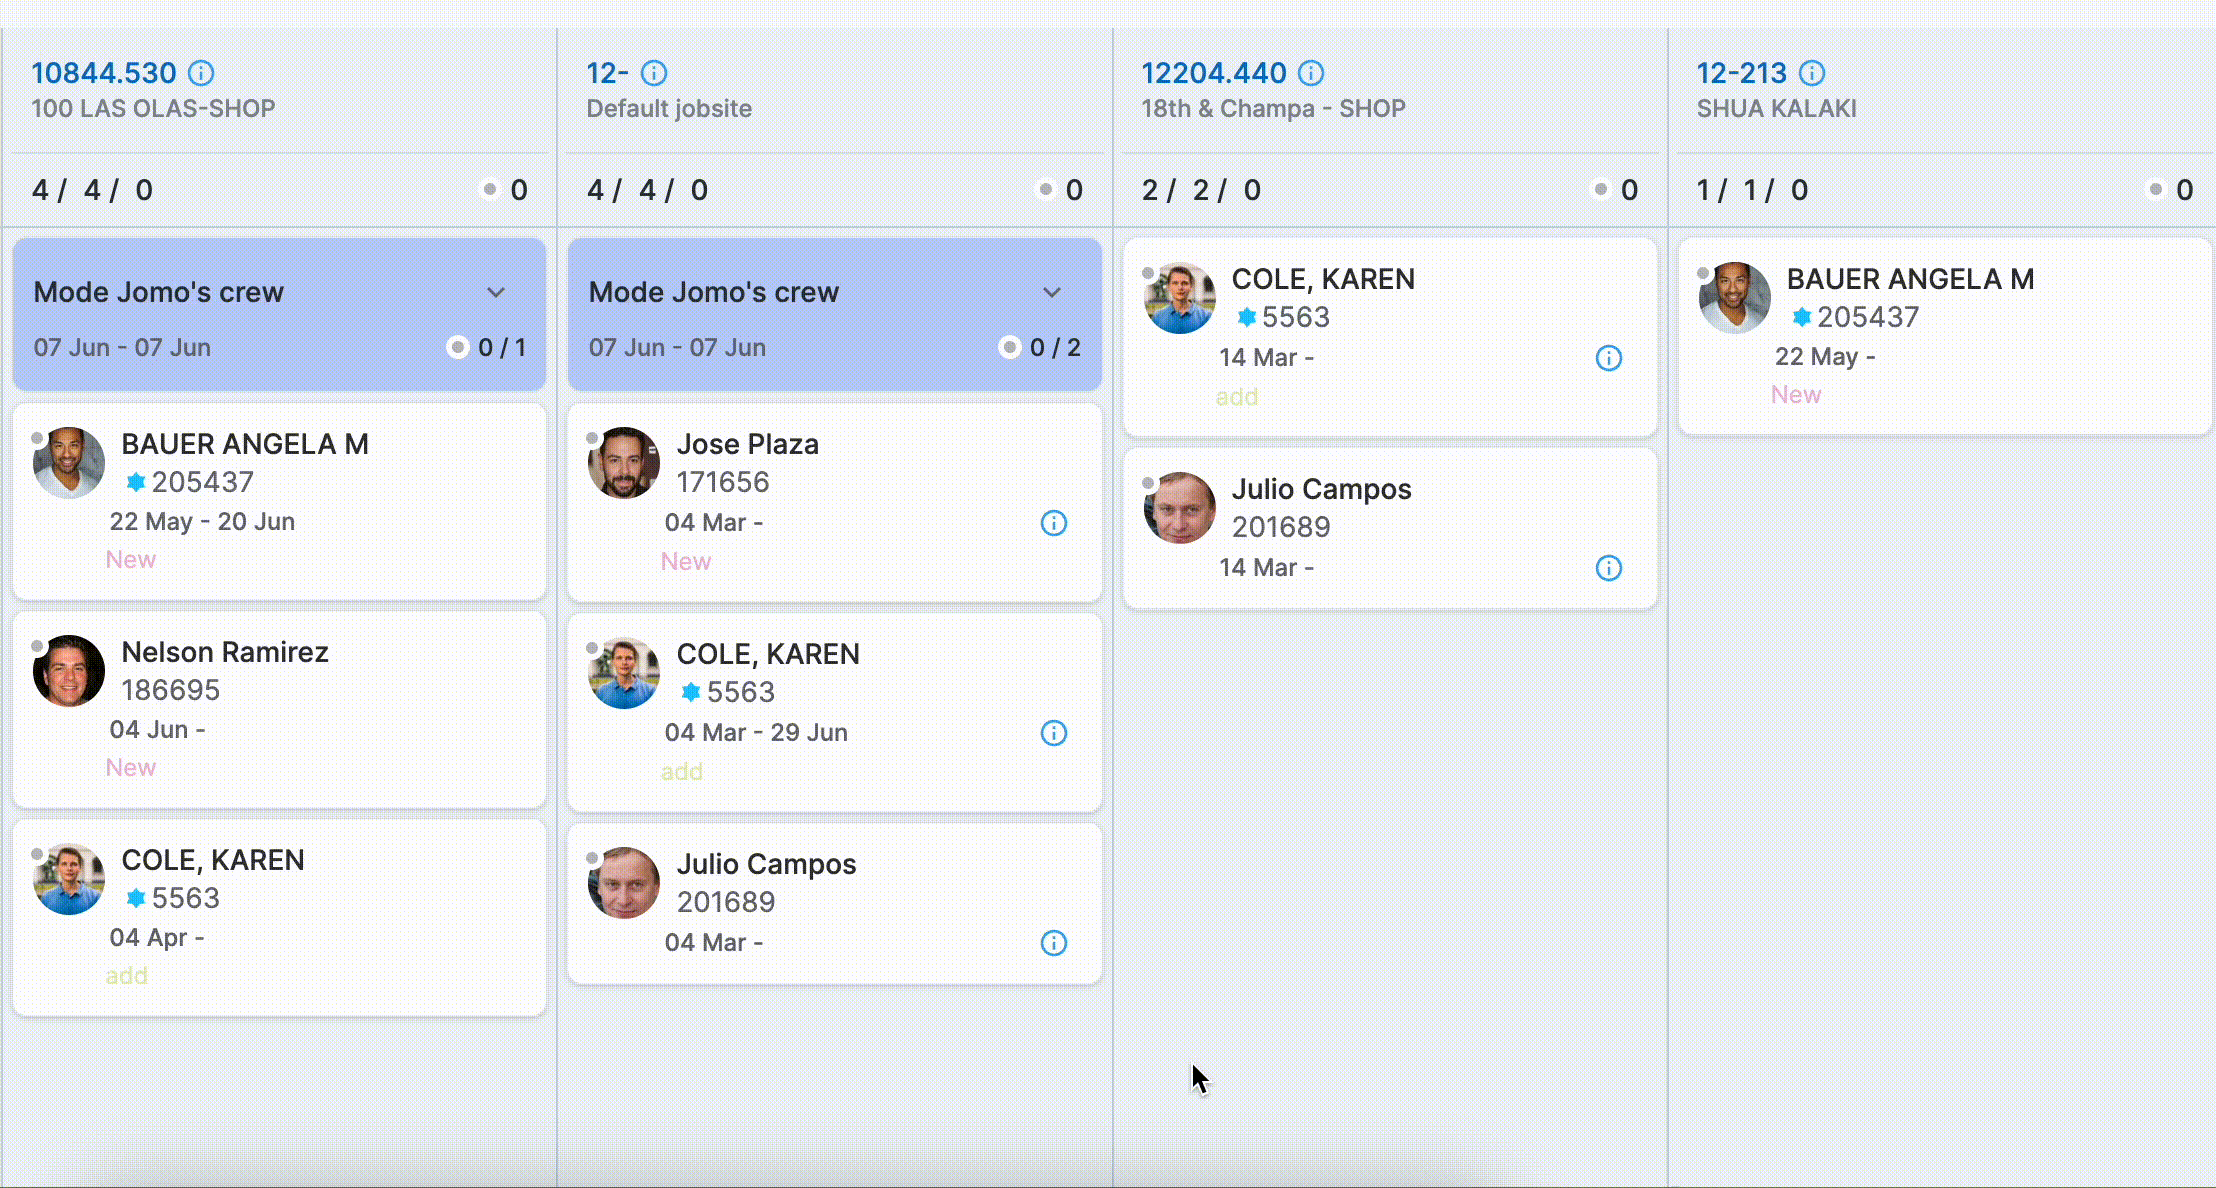
- Move an individual or crew schedule from one column to another to change the schedule's job site.
- Move an individual schedule to a crew schedule at the same or different job site to make it part of the crew schedule. Similarly, you can remove an individual schedule from a crew.
- Move an unscheduled employee to a job site or crew to create a new schedule.
When you move an item, a dialog opens with the details of the change as shown in the following screenshot.
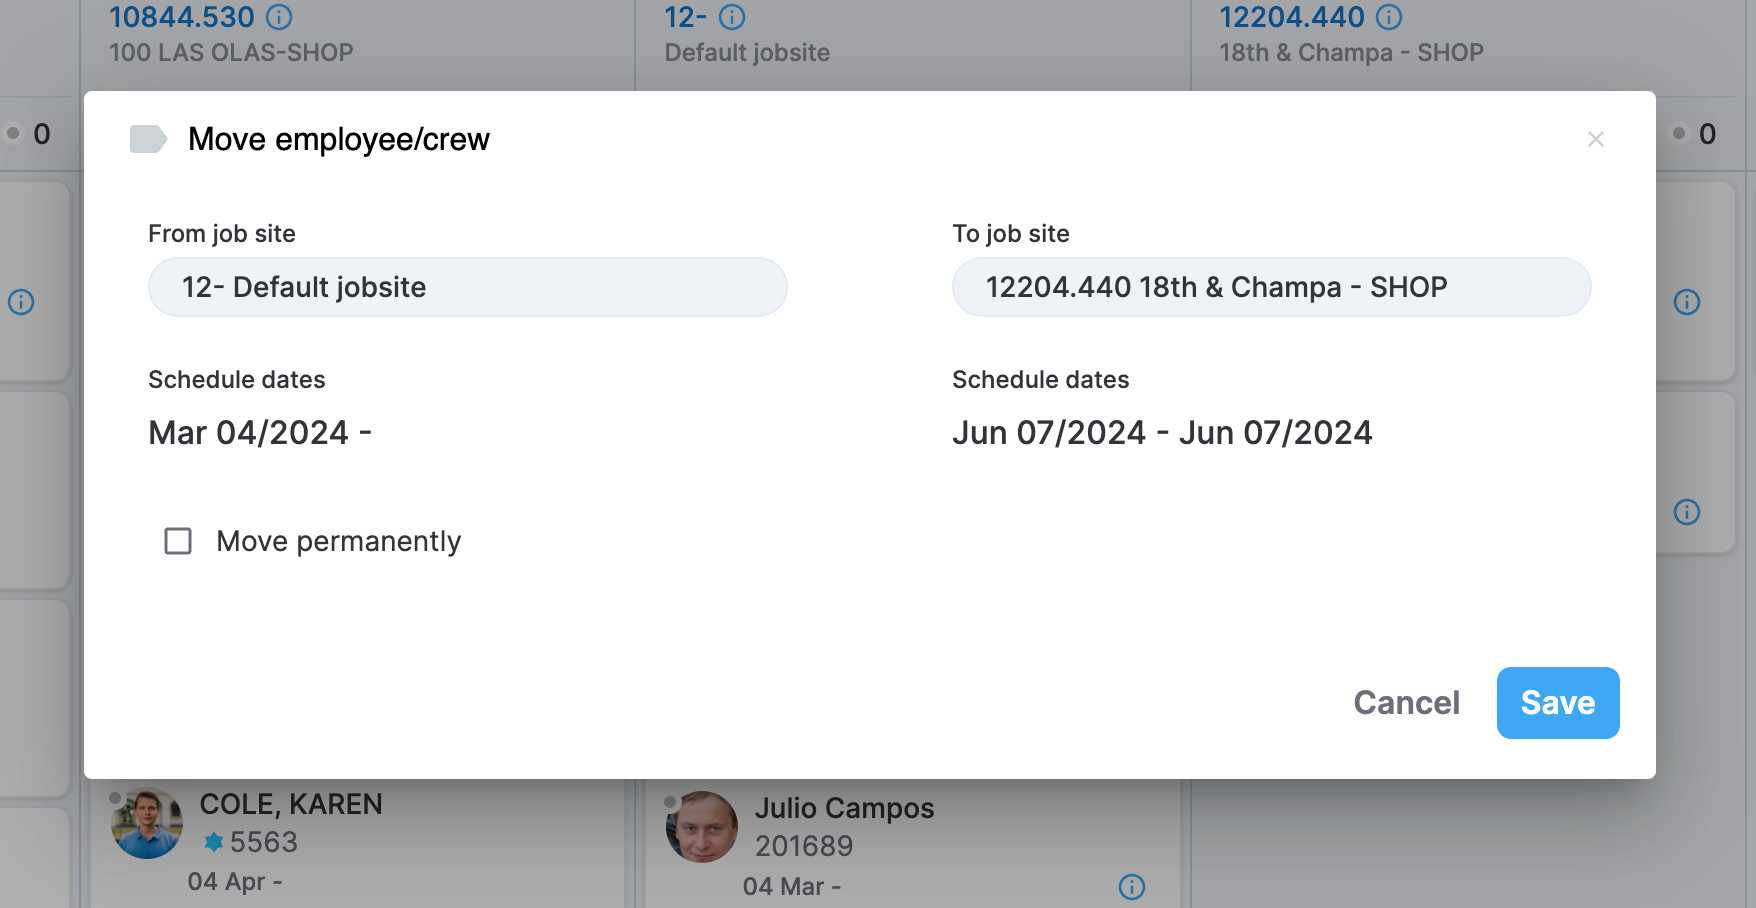
Moving a crew/employee
The current date of your crew board is automatically assigned as the new schedule date of the move, but you can edit it. Also, there is a Move permanently option that, if selected, removes all the existing scheduled from the original job site. If this option is not selected, all the existing individual or crew schedules remain and a new schedule is created at the new destination.
Reorder columns
You can drag and drop job site columns to reorder them on the board. The following GIF illustrates that.
Reordering columns on the board
Filter job sites
To filter the job sites you see on the board, perform the following steps:
- Select the gear icon () in the upper right corner of the board.
- In the dialog that opens next, select View settings.
- Select the job sites you want to include on the board.
- Select Apply to update the board.
Create views
Use views to create a custom selection of job sites in your board. Views are located in the upper right corner of the board, as highlighted in the following screenshot.
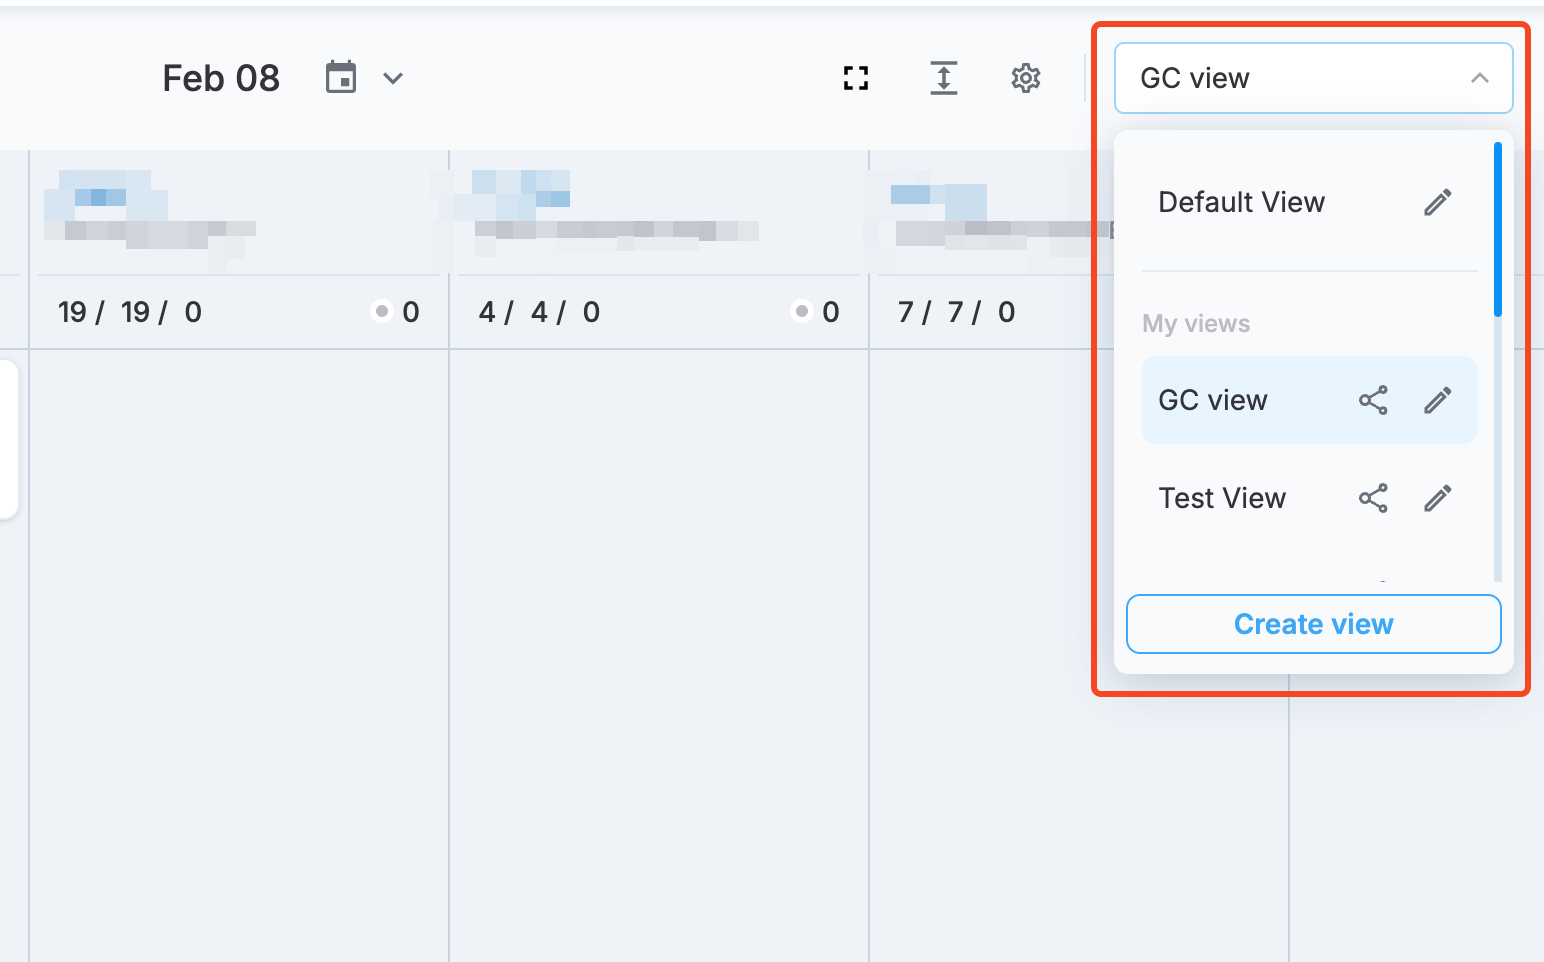
Views
Perform the following steps to create a new view:
- Select Create view.
- Specify a View name.
- Select the job sites you want to include in the view.
- Select Create to save the view
- Access the new view from the list of views.
Edit views
To edit an existing view, select the edit icon next to the view name in the list of views, as highlighted in the following screenshot.
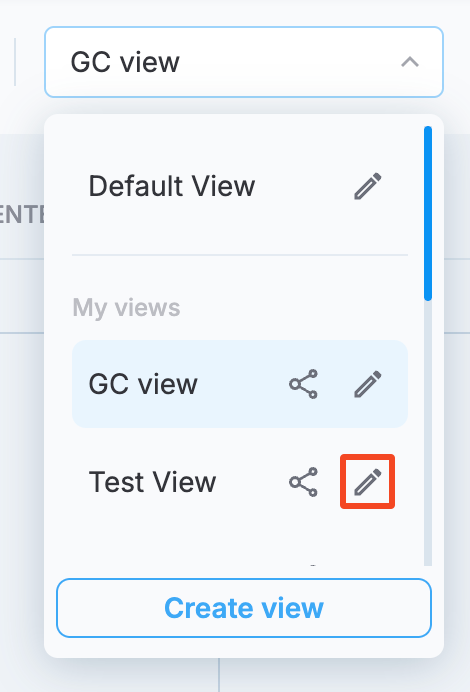
Editing views
The view editing dialog is similar to the view creation dialog discussed earlier. After you're done editing the view, select Save to save your changes. You also have the option of deleting the view using the Delete button. The following screenshot shows the view editing dialog.
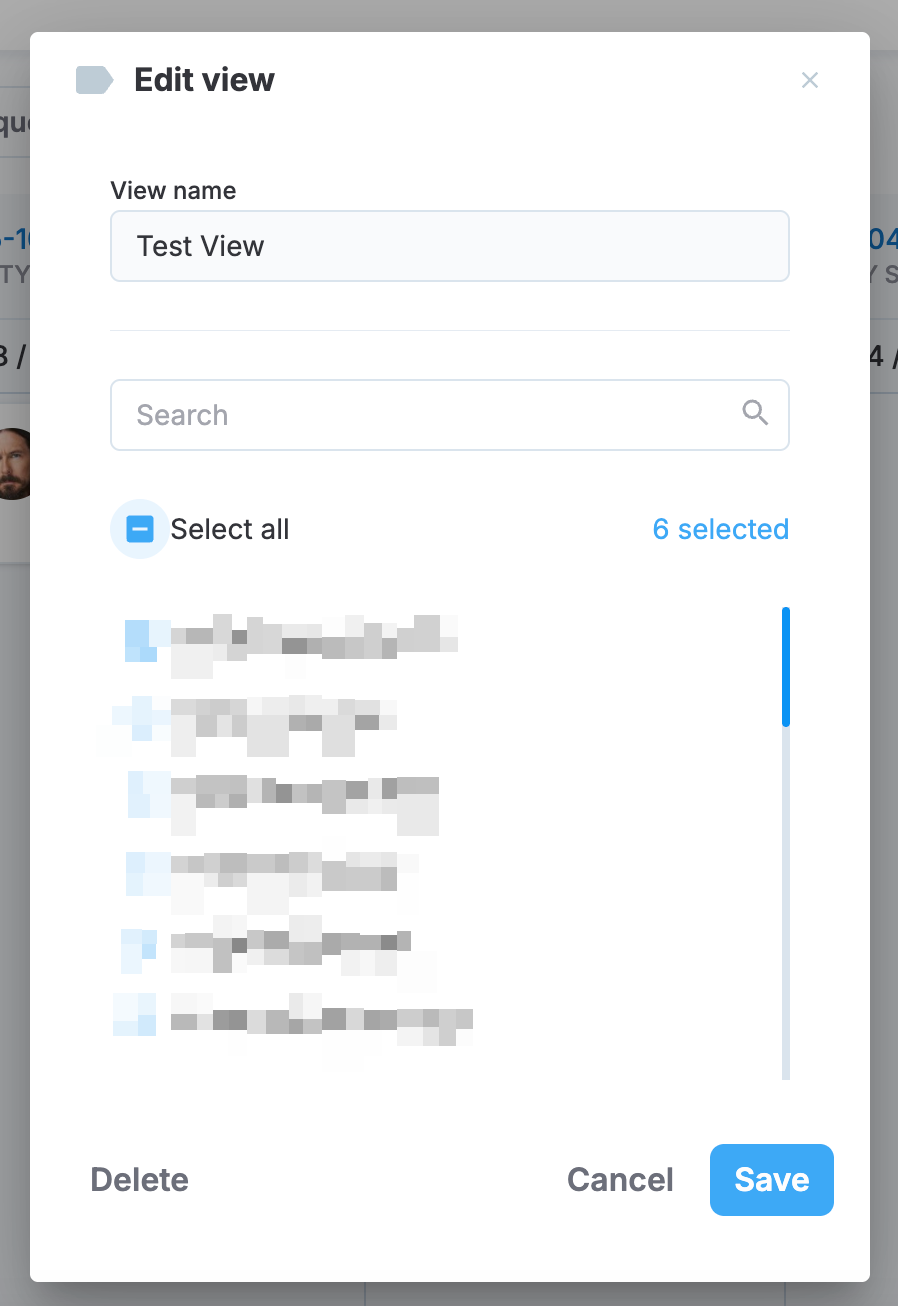
View editing
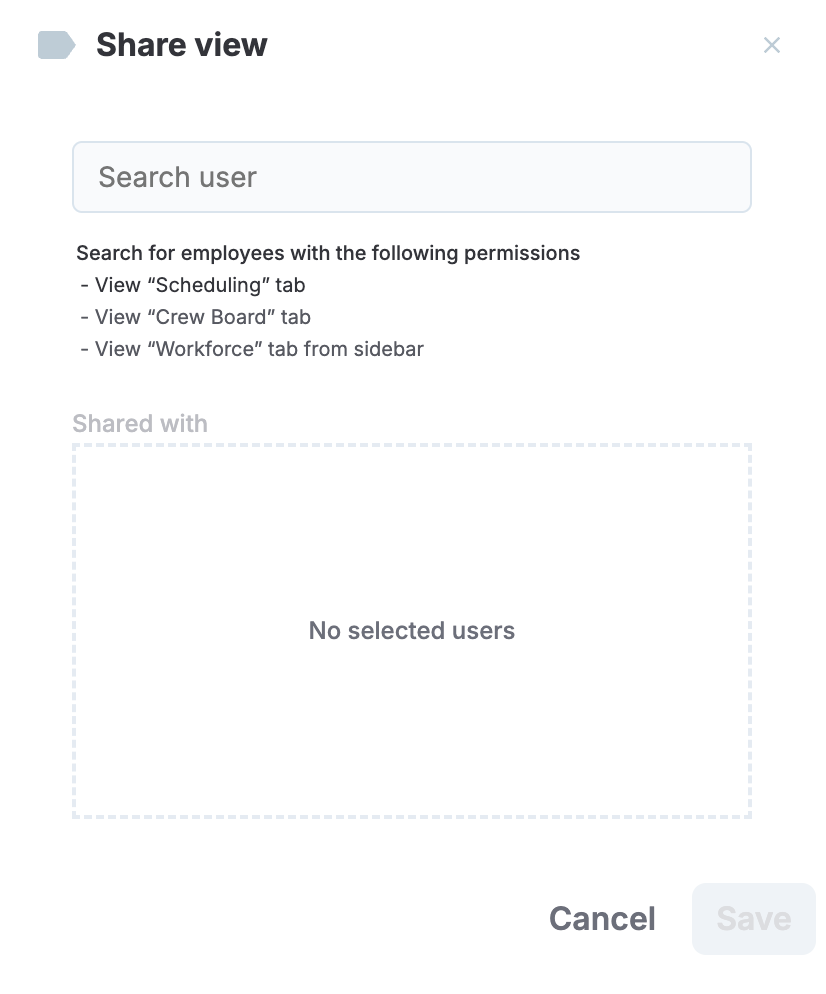
Share views
Share views with other users in your MobiClocks environment. Users that access your view will start seeing it in their list of views. To share a view, perform the following steps:
-
Select the share icon next to the view name in the list.
-
Search for users and Add them. Added users appear in the list under Shared with, as shown in the following screenshot.
Share view dialog
-
Select Save to share the view with all the selected users.
NOTEIf the creator of a view is removed from the MobiClocks environment, ownership of the view transfers to the first user with whom the view was shared.
The list of users can be modified later on. You may add more users or remove existing ones. Users can remove the views shared with them.
Expand/collapse all crews
Using the expand/collapse button in the upper right corner of the board, you can expand or collapse all the crew schedules at once. When a schedule is expanded, you can see the full list of crew members. The following GIF illustrates the actions.
Expanding and collapsing all crews
Enter full-screen
Using the full-screen button, you can expand the board to fit the entire screen of your device. The following screenshot highlights the button.
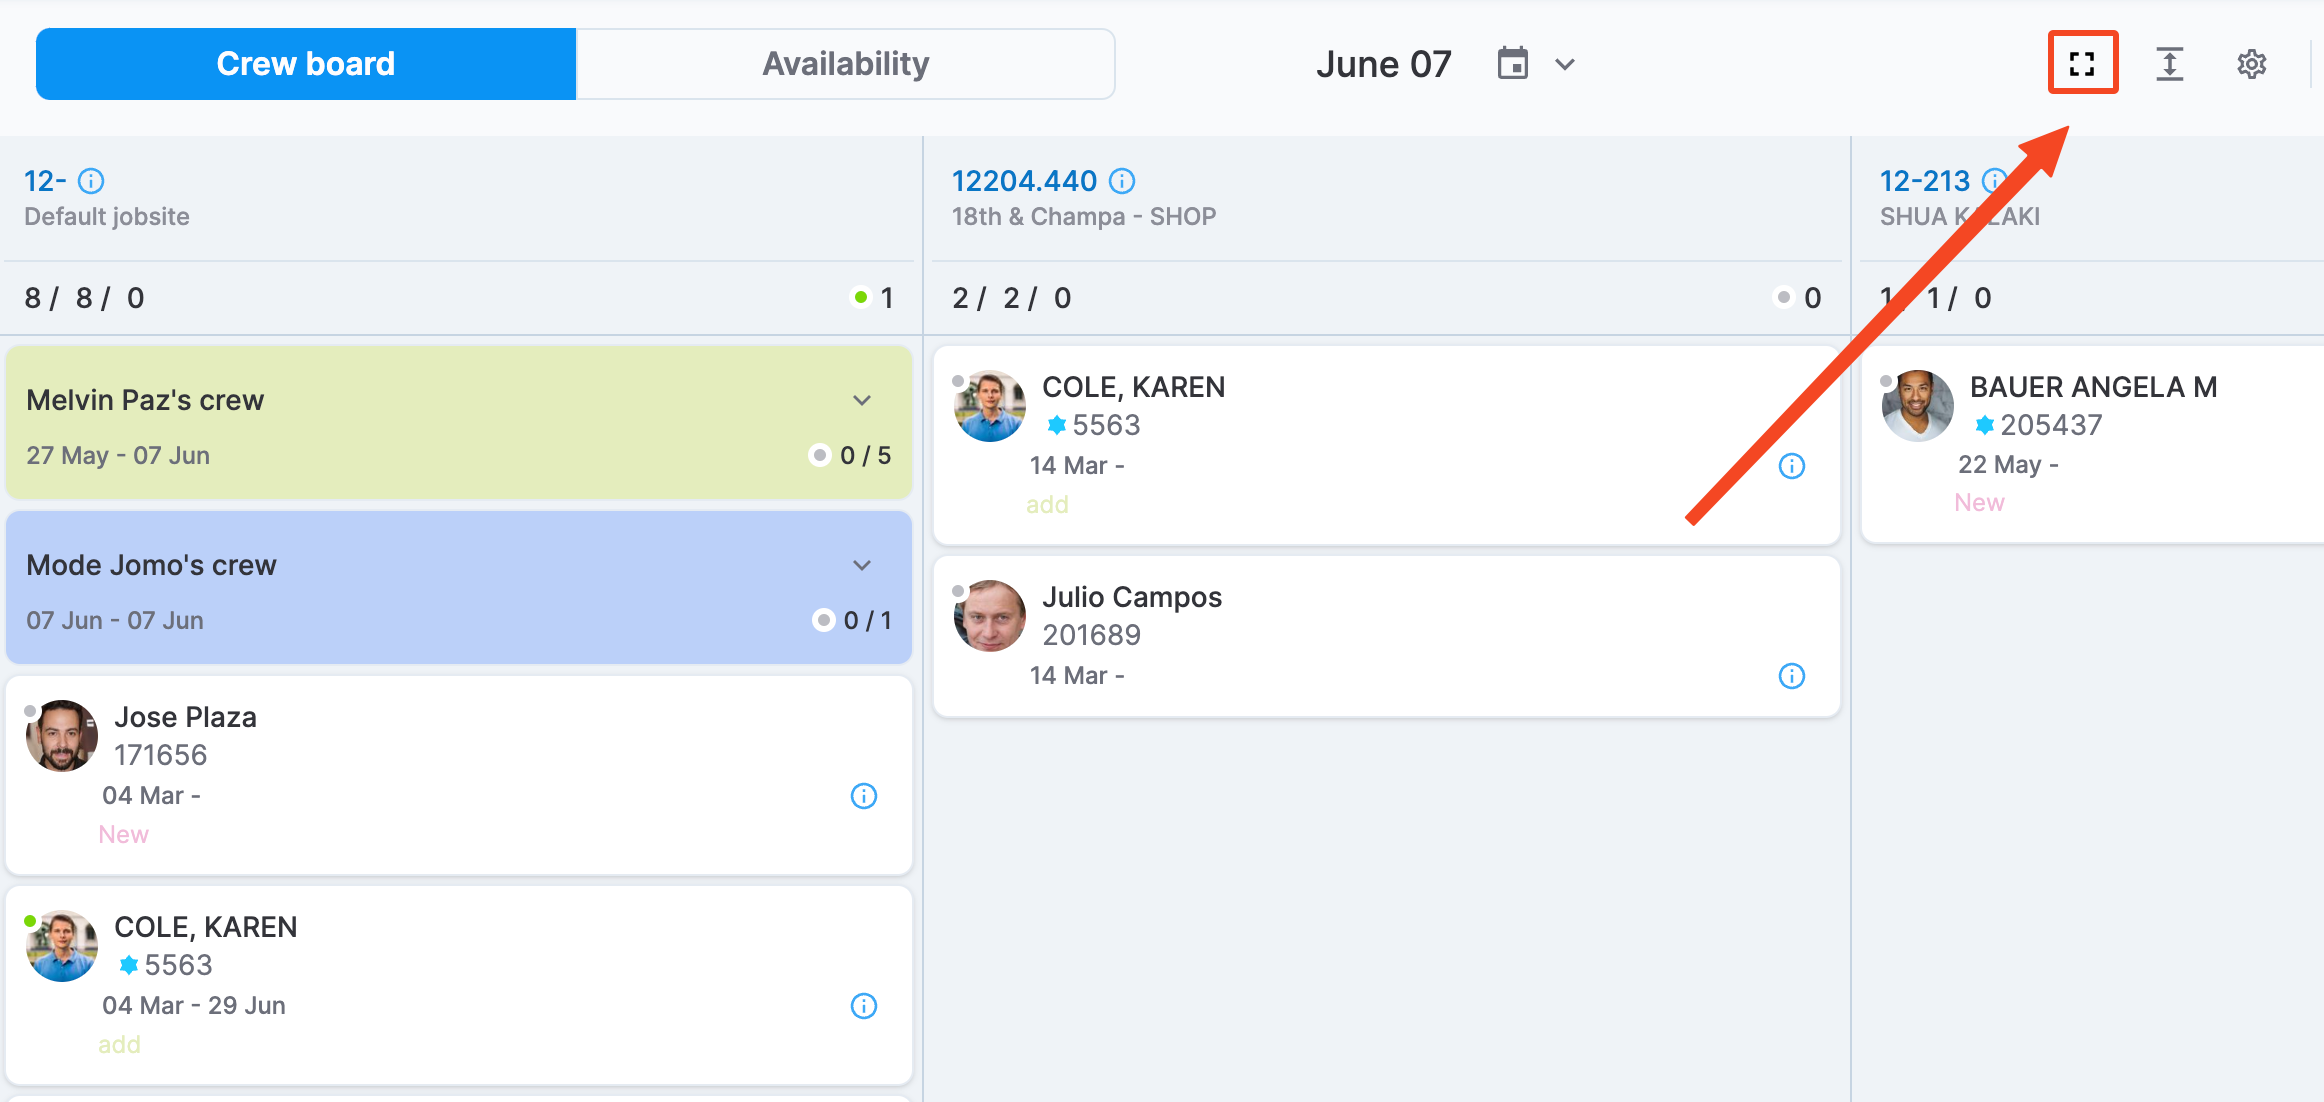
Full-screen button
The full-screen mode has settings that can be accessed through the gear icon () in the upper right corner of the board. Here, you can choose if Crew board data is updated automatically in full-screen mode and, if yes, how often it is updated.
Global search
The Global search feature in the Crew board functions similarly to that in the Scheduling tab, and all the functionality works the same way as described in the Scheduling documentation, including
- Accessing the search dialog
- Performing search
- Refining your search
- Search term highlighting
Refer to Global search for complete details on using these shared features.
Employee bench
Here, the Employee bench works similarly to that in Scheduling. Automatic and manual employee filtering follow the same logic.
However, you can only drop employee profiles under the job site columns, which opens an individual employee scheduling dialog with no dates prefilled. If you drop the profile on a crew schedule, the schedule is created under that crew with the crew's dates prefilled.
The following screenshot demonstrates the process of creating a schedule through drag-and-drop.
Creating a new schedule
Updated 6 months ago