
Acumatica
Construction management software.
Acumatica is an enterprise resource planning system for small- and medium-sized businesses. It offers products for financial management, project accounting, CRM, payroll management, and more. Construction is one of the key industries Acumatica focuses on, and you can integrate it with MobiClocks to serve as your data source or process payroll.
Hosting
Acumatica is a cloud-based solution and can be accessed through a web browser.
Setup and integration
Follow these steps to connect Acumatica with MobiClocks.
Step 1: Add a Client ID and Secret
In your Acumatica account, select Integration from the left-hand navbar and select Connected Applications. Select the plus (+) icon to add a new record and fill in the following fields:
- Client Name. Add a preferred name.
- Flow. Choose the
Authorization Codeoption. - Plug-in. Leave the
No Plug-Inoption.
Next, in the SECRETS tab of the application, select ADD SHARED SECRET to create a secret authentication key. Fill in the following fields in the dialog that opens next:
- Description. Add a custom description for the secret key.
- Expires On (Optional). Select an expiration date.
- Value. This is secret key that is generated automatically. Copy it before closing the dialog.
The following screenshot shows the dialog for adding a shared secret.
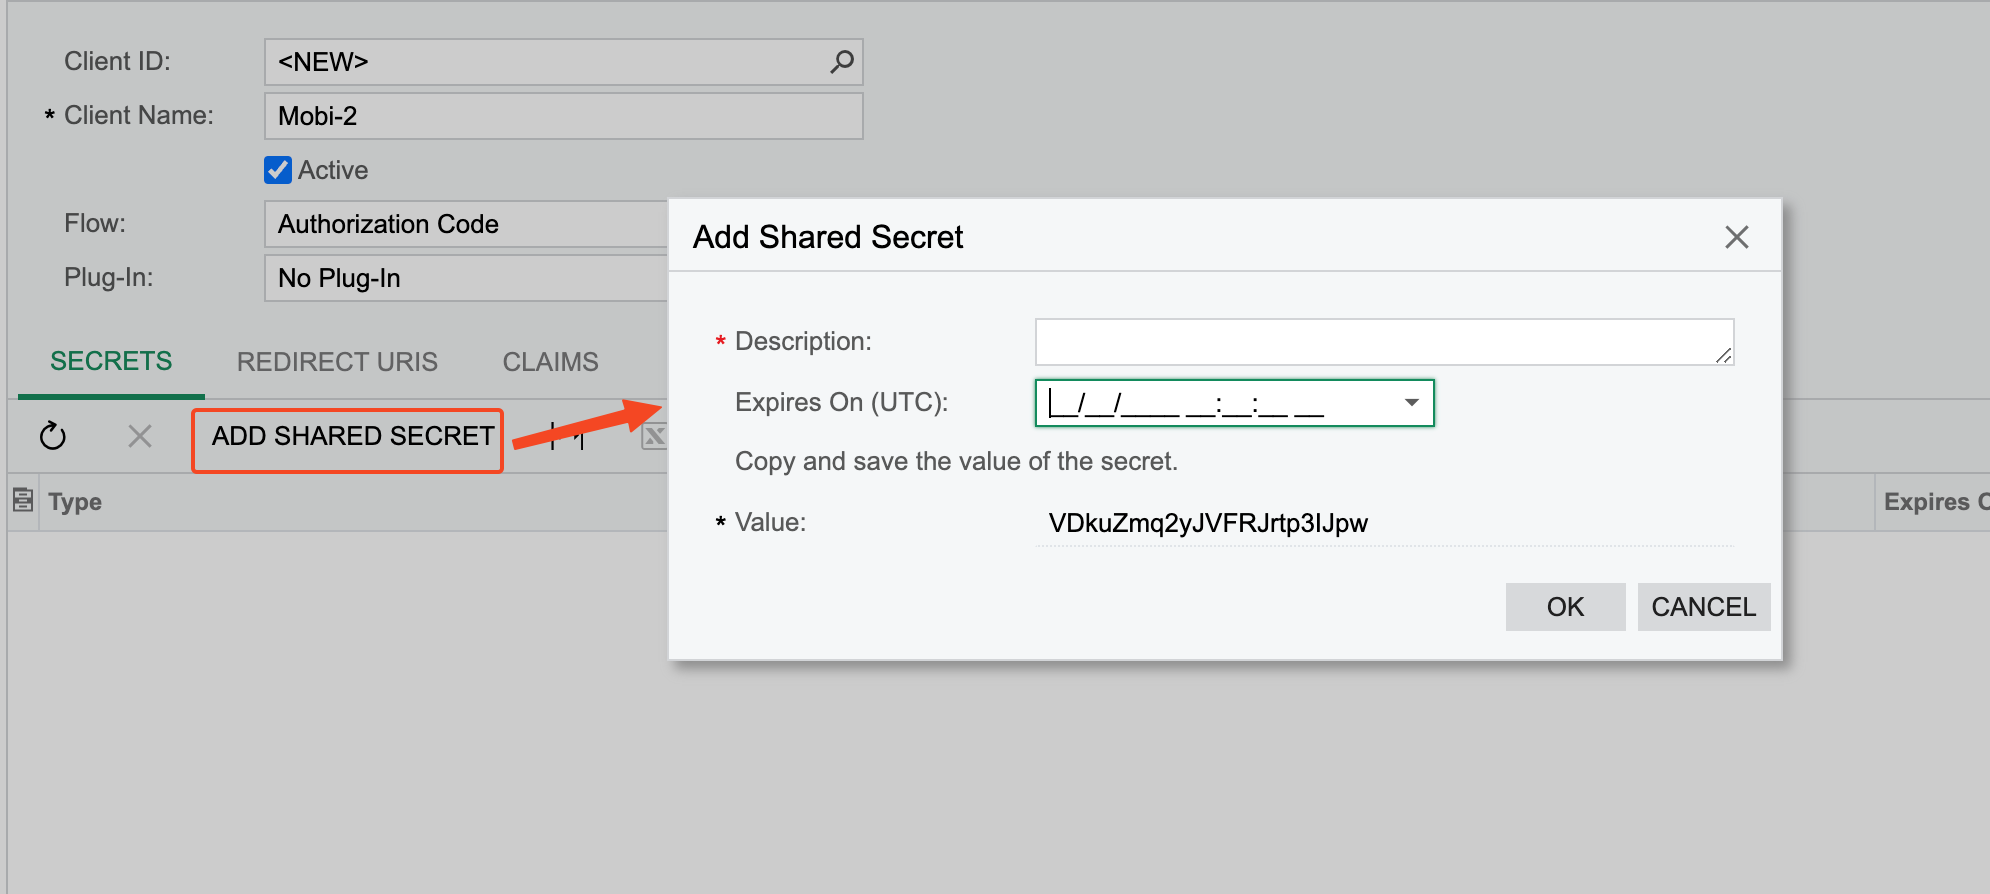
Adding a shared secret
Select OK to close the dialog and save the shared secret. Go to MobiClocks > Integrations > Acumatica > Setup > Acumatica Authentication and paste the secret key under Secret Key.
Lastly, go back to Acumatica and save the newly created application. Copy the generated Client ID from Acumatica and paste it under Client ID in MobiClocks > Integrations > Acumatica > Setup > Acumatica Authentication.
Step 2: Add a redirect URL
In the application that you created in Step 1, navigate to the REDIRECT URLS tab, select the plus (+) icon and add a redirect URL. The URL needs to consist of your MobiClocks URL joined with the following parameters: /api/acumatica/oauth2redirect. Thus, if your MobiClocks URL is, for example, https://mycompany.mobiclocks.com/, your redirect URL becomes <https://mycompany.mobiclocks.com/api/acumatica/oauth2redirect.
Step 3: Specify endpoints (Optional)
Acumatica has a default API endpoint that will be used by MobiClocks if you don't speicify anything else. However, you can also set up a custom endpoint if you want to control what data is shared with MobiClocks. To do that, follow these steps:
- In your Acumatica account, navigate to Integration > Web Service Endpoints.
- Select the Default endpoint from the list.
- In the endpoint details, select EXTEND ENDPOINT.
- Add a name and version for the new endpoint and select OK.
- Customize the endpoint based on your requirements.
- Copy the new endpoint name and paste it under Endpoint in MobiClocks > Integrations > Acumatica > Setup > Acumatica Authentication.
Step 4: Authenticate with Acumatica
You should now have Client ID, Secret Key, and Endpoint (if you've chosen to configure a custom endpoint) filled in under MobiClocks > Integrations > Acumatica > Setup > Acumatica Authentication. The last step is adding your Acumatica Domain. For example, if your Acumatica account URL is https://mycompany.acumatica.com/ your domain is mycompany.
After filling in the domain, perform the following steps:
- Select CONNECT to connect MobiClocks with Acumatica.
- Configure the connection permissions. It is recommended to keep the Offline Access checkbox selected so as not to have to reauthenticate again in the future.
- Select Yes, Allow to finalize.
The following screenshot shows the permissions configuration screen.
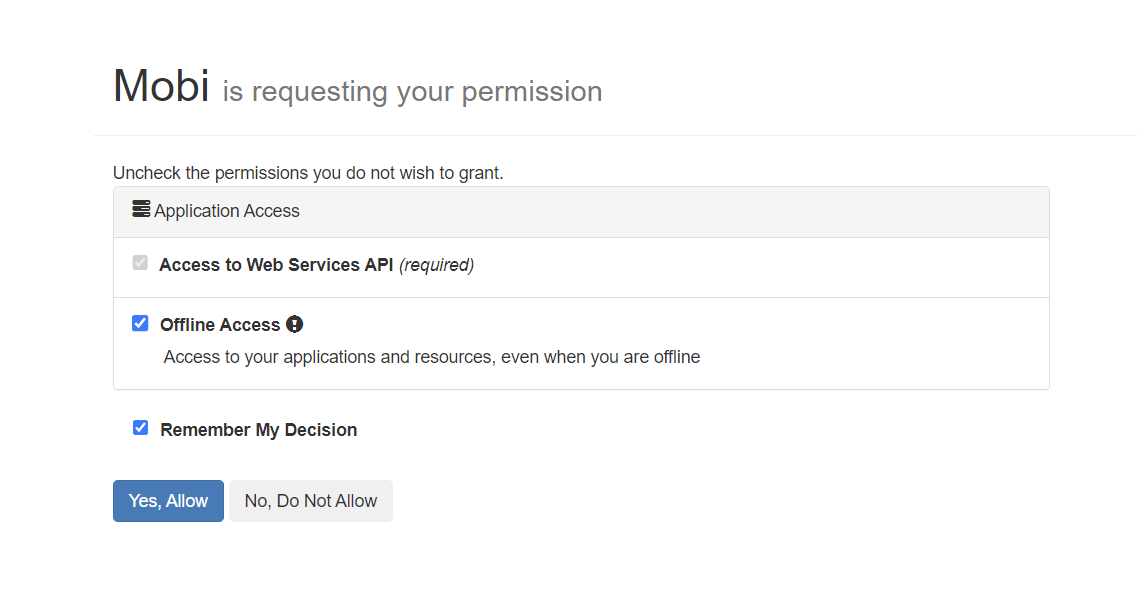
Acumatica permissions
Payroll publishing
The Acumatica integration supports payroll publishing.
Under Employee time activity publish settings (employee time activity corresponds to payroll in MobiClocks) in Integrations > Acumatica > Setup, you can specify if the Hold and Billable fields are going to be checked (marked as Yes) in the payroll published to Acumatica.
Cost code settings
If Track cost code billable field is enabled, a Billable field is added to the Cost Codes section of your Acumatica integration, letting you import billable cost codes from Acumatica as well as publish them to Acumatica as part of payroll.
Data sync and import
Acumatica can serve as a data source for your MobiClocks environment. The Acumatica integration supports data sync and import for the following modules:
- Employees. Imported to Employees.
- Job Sites. Imported to Job sites.
- Payroll Items. Imported to Administration > Payroll > Payroll Items.
- Cost Codes. Cost codes are assigned to individual job sites. If the imported cost code entry contains the job site it is assigned to, it is imported to the indicated job site. If not, the cost code is converted to a standard cost code and shared across all job sites.
Job site settings
You have additional job site sync settings under Integrations > Acumatica > Setup > Job site settings:
- Sync job site addresses. Choose if you want to sync job site addressalong with other job site properties.
- Auto-create job site geofence zone. Choose to automatically create a geofence zone around the job site address during sync. Note that the Geofence Auto-Apply setting under Administration () > Settings > General must be enabled to make this possible.
- Method. Determines how job site location information is synced from Acumatica to MobiClocks:
- By Address. Syncs physical address information (street, city, state, postal code) from Acumatica. MobiClocks will geocode these addresses to obtain coordinates for geofencing and mapping purposes.
- By Coordinates. Imports latitude and longitude coordinates directly from Acumatica. This option is useful when precise coordinates are available in Acumatica or when physical addresses may be unreliable or incomplete.
Merging entries
You have an Auto merge on import under Settings > General to merge duplicate manual and imported entries automatically. See Auto merge on import to learn more.
Automatic sync, import, and update
Acumatica supports automatic sync, import, and update for Employees, Job sites, Cost codes, and Payroll items. See Automatic, sync, import, and update to learn how to configure this feature.
Updated about 1 year ago