
Employee list
How the employees list is organized and what it includes.
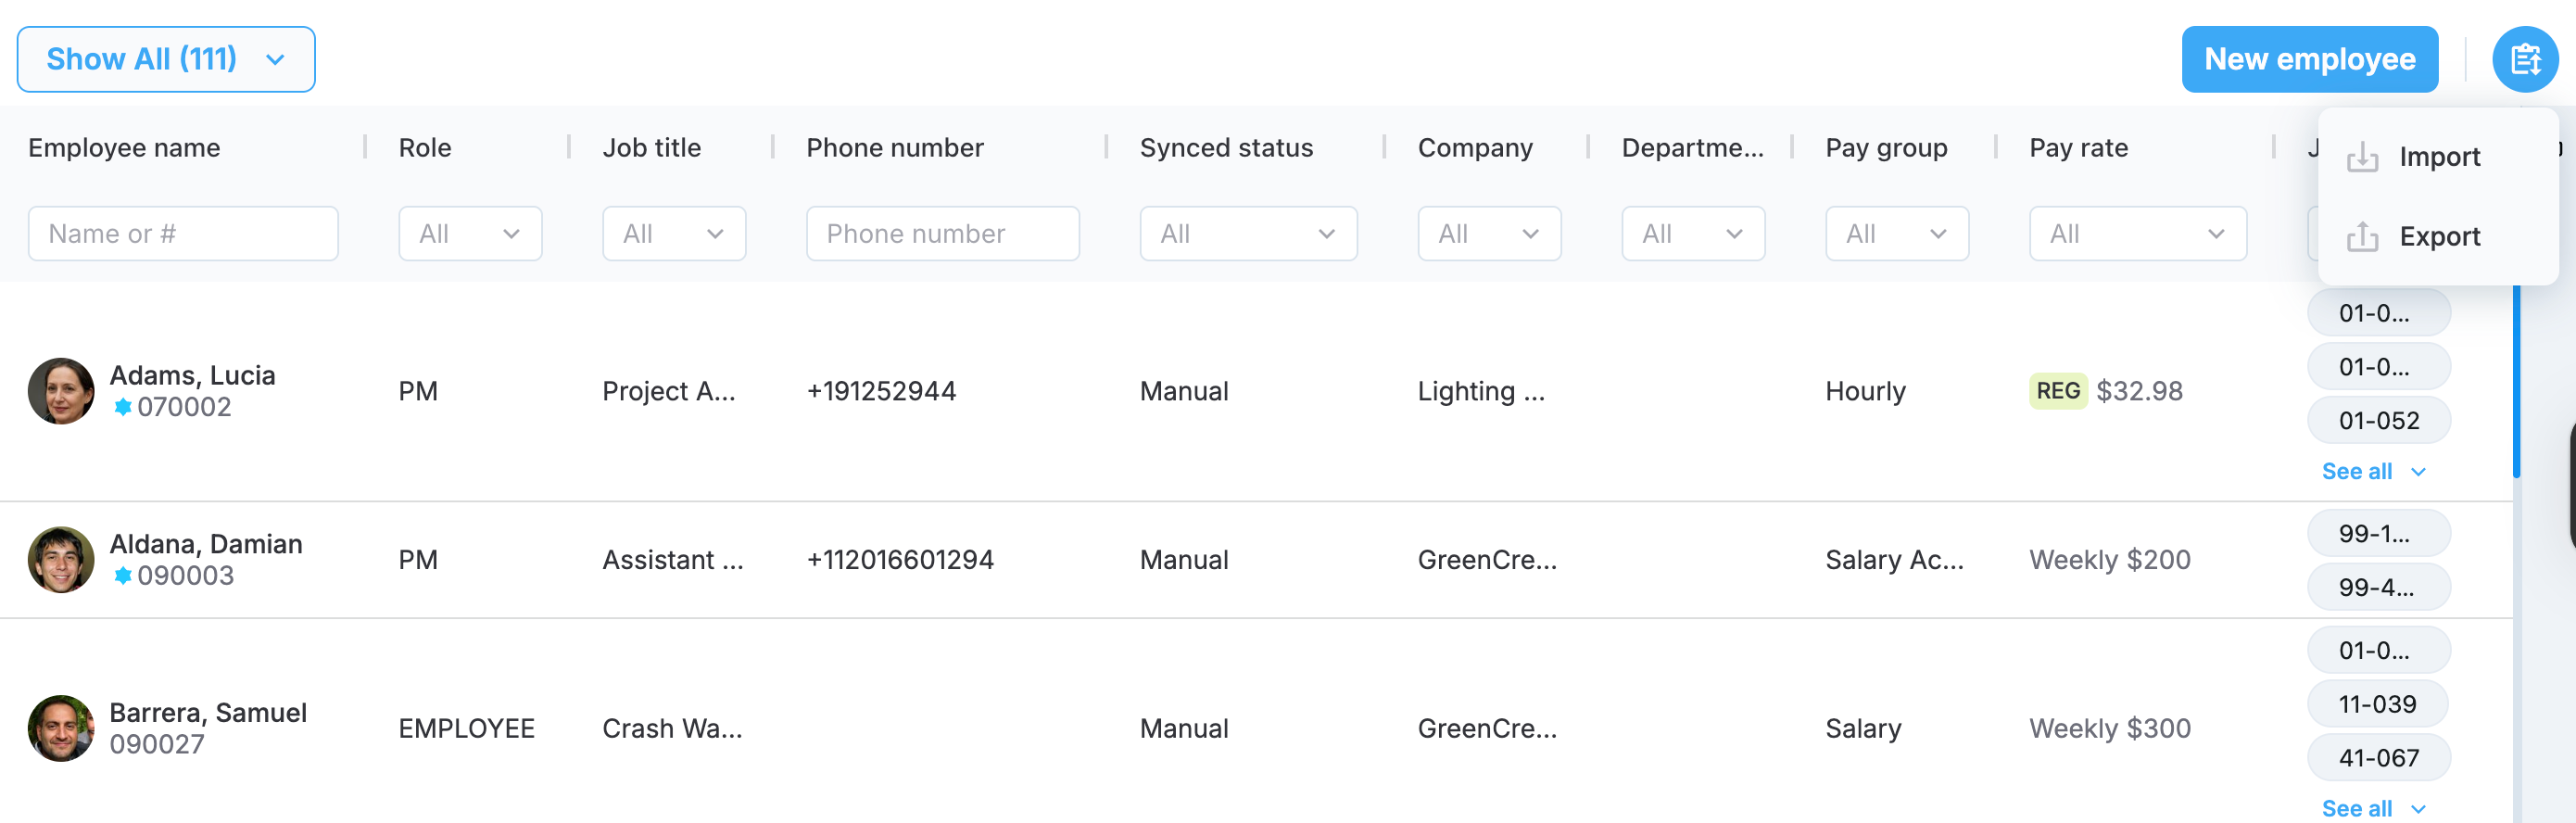
The employee list is a table with employee names and a number of employee properties. You can access the table by navigating to the Employees page from the left-hand navbar in your MobiClocks Web App.
Clicking on the employee entry takes you to the employee profile, where you can edit employee details. The table has the following fields:
- Employee name
- Role. The role of the employee within the organization.
- Phone number. Employee's phone number.
- Synced status. Indicates if the employee has been created manually or imported from a third-party integration, showing the name of the integration.
- Company. Employee's company.
- Pay Group. Employee's pay group.
- Pay rate. Employee's pay rates.
- Job Site. The job sites that the employee is assigned to. The employee's main job site is marked with a green checkmark. Read more in Job Site History.
- Status. The status of the employee profile.
- User Account. The status of the employee's user account.
Employee badge
You can also select the employee's profile picture to open the employee badge, which is a summary of the key employee details. The following screenshot shows an example of an employee badge.
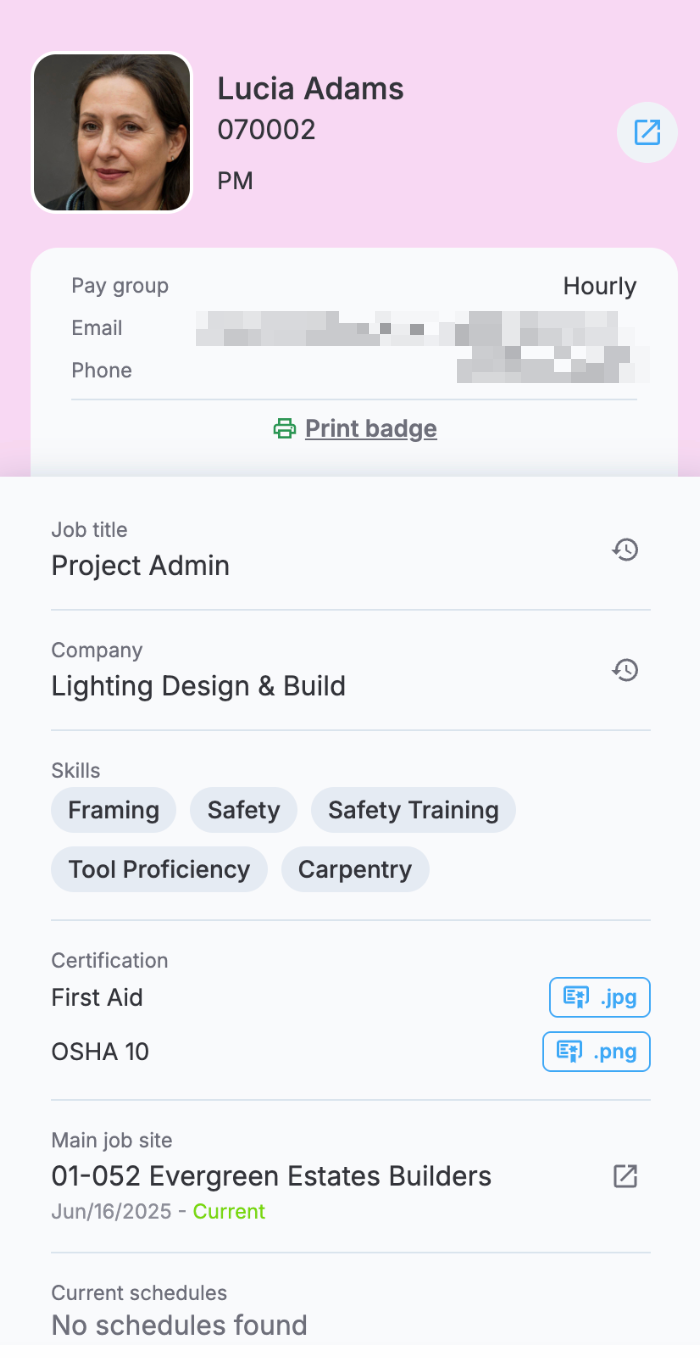
Employee badge
The card includes the following details:
- Profile picture
- Name
- Employee number. The employee number assigned to the employee.
- Pay group. Employee's pay group.
- Phone
- Job title. Employee's job title.
- Company. The company that the employee is assigned to. The history of past companies is available as well.
- Skills. The skill tagsadded in the employee profile.
- Certificaiton. Employee's certifications if any.
- Main job site. The main job site of the employee. The history of past main job sites is available as well.
- Current schedules. Employee's schedules.
Print the badge
Select Print badge to print the employee badge. This action opens the print dialog in your browser, where you can print it using any of your configured printers. The following screenshot shows the print dialog open in Chrome and set to save the badge as a PDF.

Badge printing
Note that the printable version of the badge is more concise and includes only a few key employee details.
Print multiple badges
You also have the option to print multiple employee badges at once. To do that, select more than one employees from the employee list and select the Print badge action at the top of the table. This will open a print dialog with multiple badges included, as shown in the following screenshot.
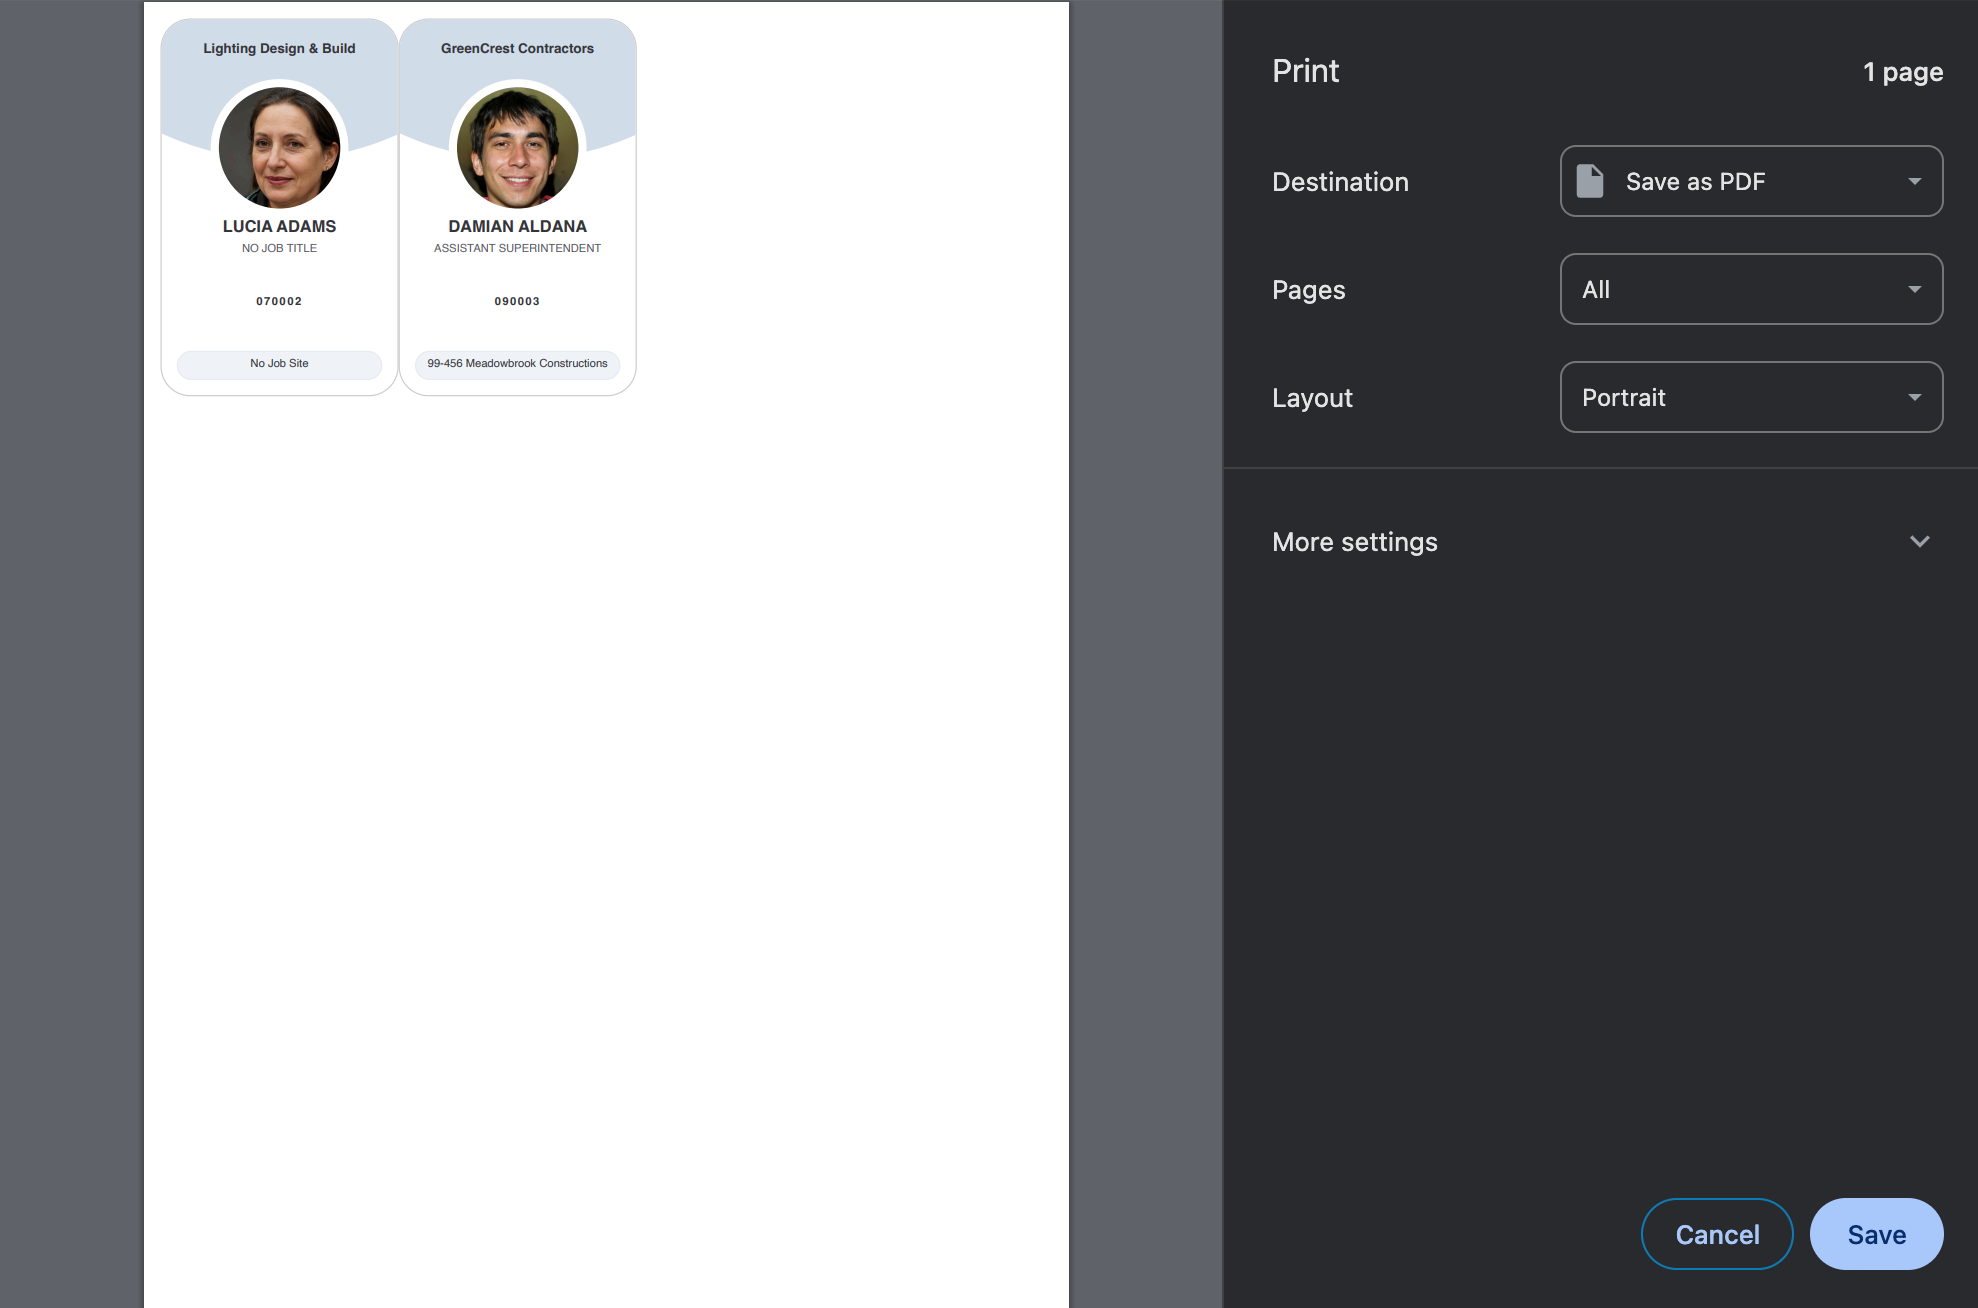
Bulk badge printing
Customizing and filtering the employee list
Each of the fields mentioned above has search or filtering options that you can use to locate employee profiles based on your chosen criteria. Additionally, the Columns menu in the top right corner lets you choose which columns to display. Some columns are mandatory, while others are optional. The folllowing screenshot shows the column visibility menu.
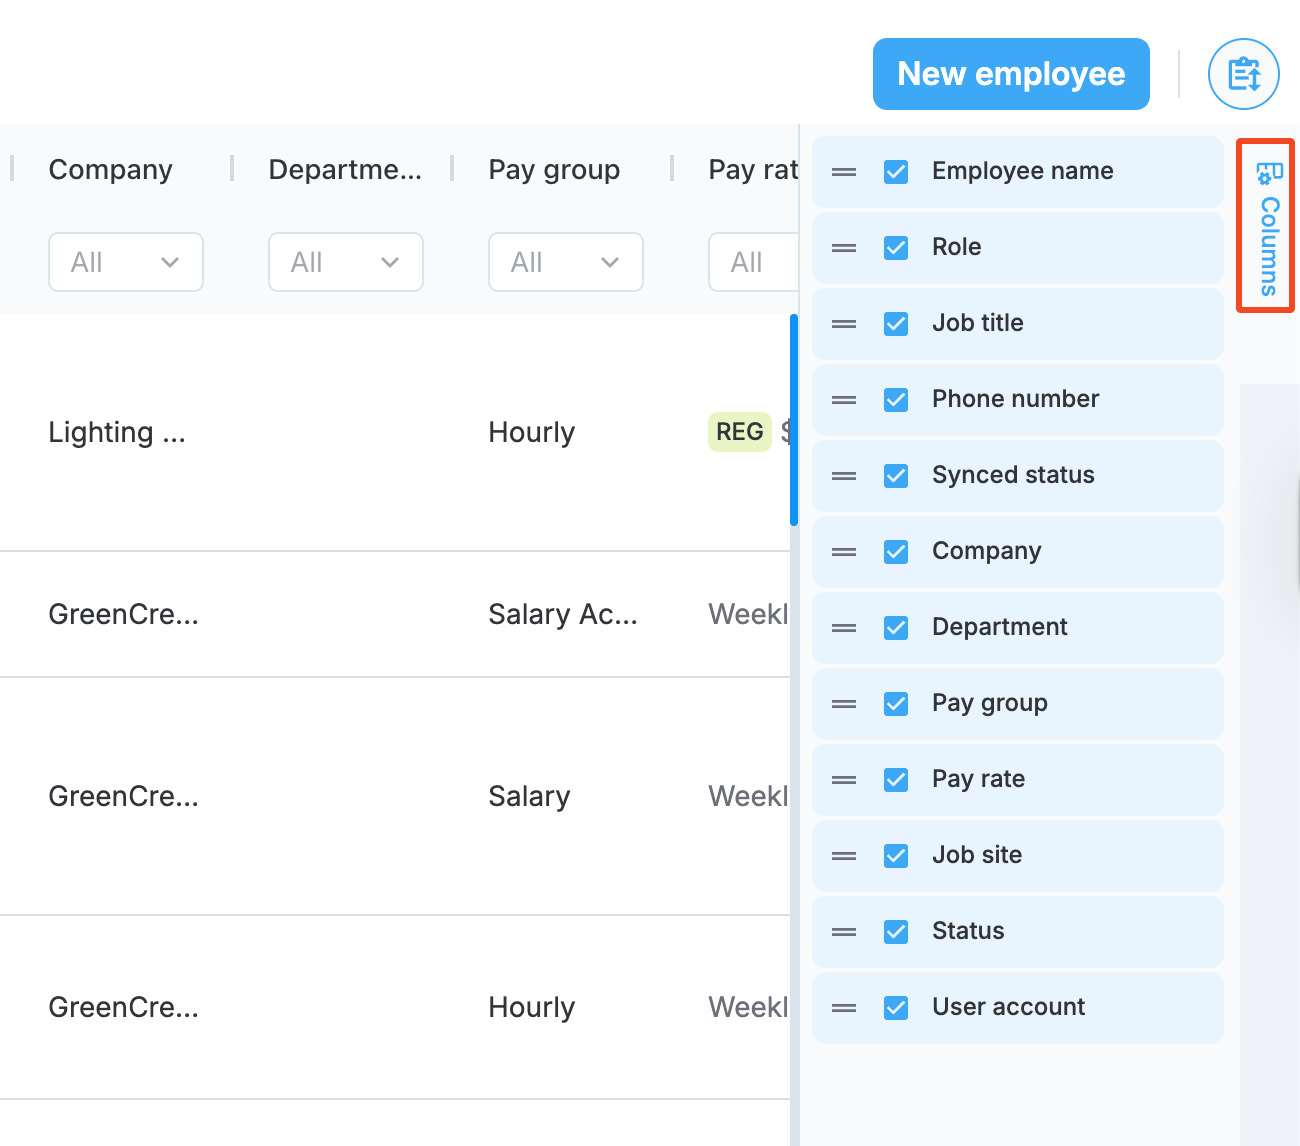
Column visibility option
Lastly, you have an option to filter out employee profiles based on when they have last been active in the system. Apart from the Show All option selected by default, you have Inactive for 3 weeks and Inactive for custom period, which you can select and enter a custom period of time. The following screenshot shows the filtering options.
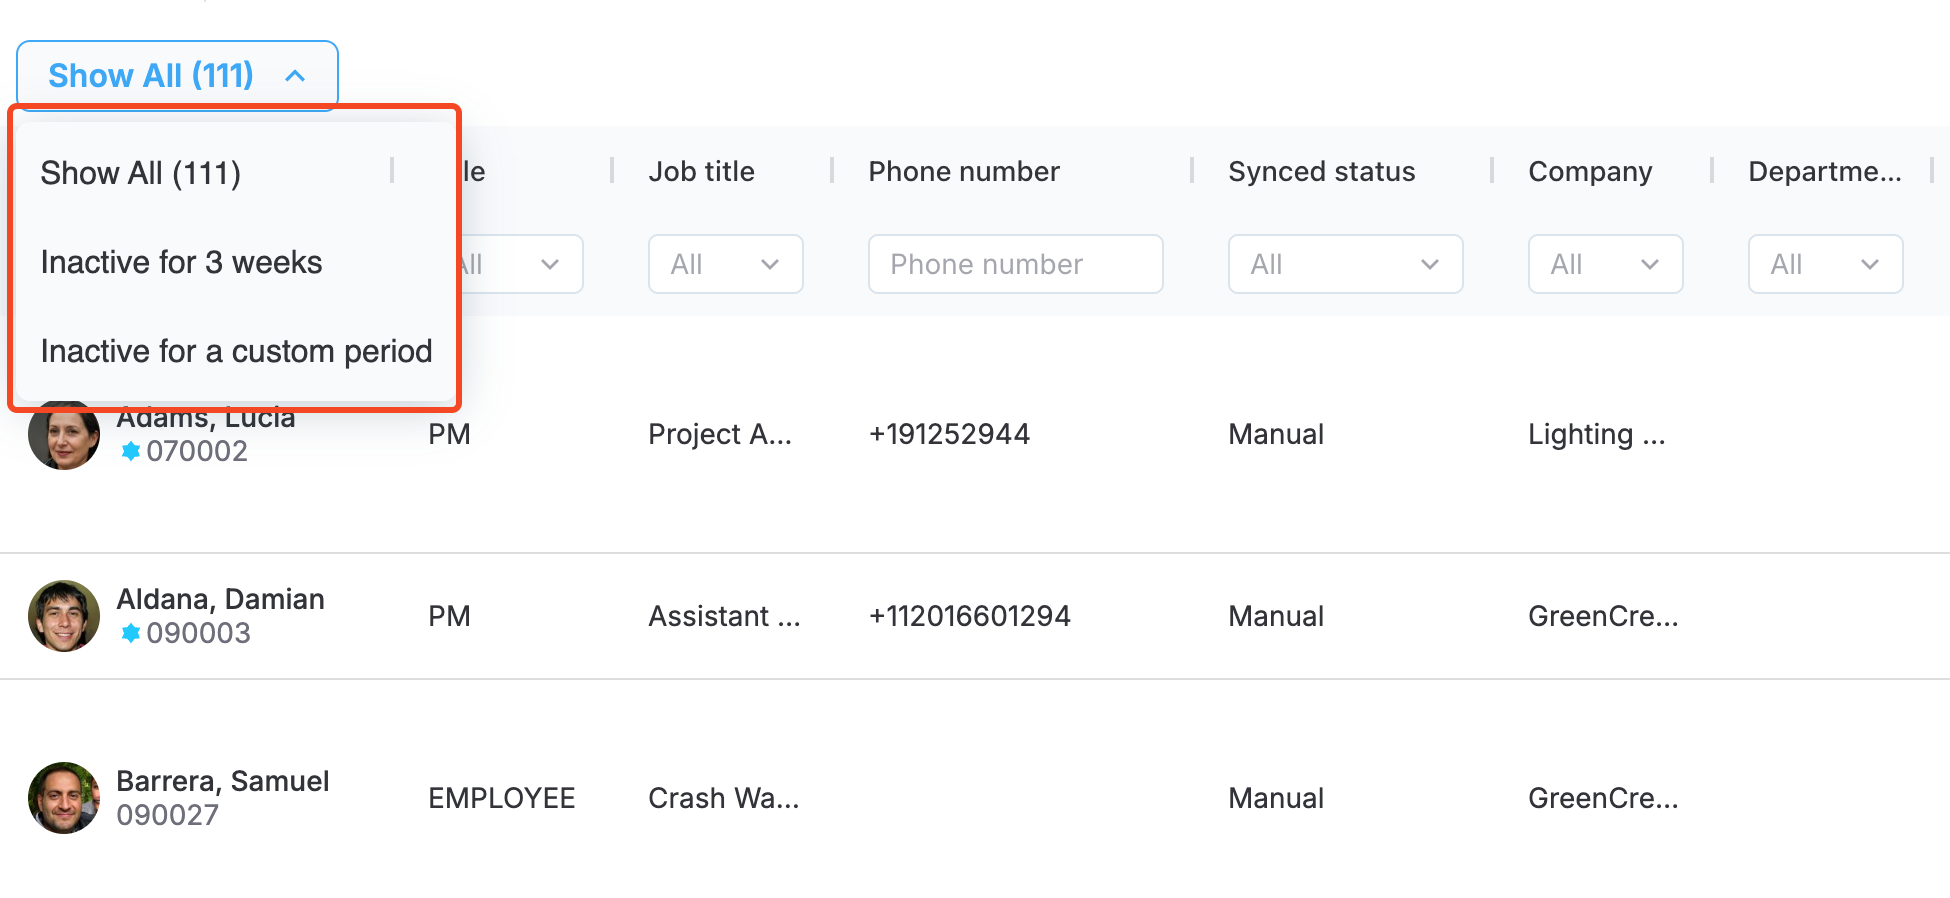
Employee filtering based on inactivity
Exporting the employee list
PERMISSIONSYour role needs to have the Export employees permission activated under Administration > Role Permissions > Employees to be able to export employees.
To export the list of employees, select the Import/Export button and choose the Export option, as highlighted in the following screenshot.
Import/Export menu
In the dialog that opens next, do the following:
- Select the fields that you want to export. Note that Employee Number, First Name, and Last Name may not be deselected and must always be included.
- Choose the format of the document you want to export the list to.
- Select Export to download the document.
The following is the list of all the available fields that you can include:
- Employee Number: The employee number.
- First Name: Employee's given name.
- Last Name: Employee's surname.
- Job Title: Employee's job title.
- Email: Employee contact email.
- Phone Number: Employee contact number.
- Street Address: Employee mailing address.
- City: Employee city.
- State: Employee state/province.
- Zip Code: Postal code.
- Last 4 SS#: Last four digits of Social Security Number.
- Company: Employee's company.
- Employee Status: Employee's status.
- Pay Group: Employee's pay group.
- Pay Class: Employee's pay class.
- Job Site (Main): Employee's main job site.
- Last Job Site Worked: Most recent work location.
- Last Date Worked: Most recent work date.
- Pay Policy Group: Employee's policy group.
- Pay Item Mapping: Employee's payroll mapping.
- Pay Rate Hourly REG: Regular hourly rate.
- Pay Rate Hourly OT: Overtime hourly rate.
- Pay Rate Hourly DT: Double-time hourly rate.
- Pay Rate Weekly: Weekly salary amount.
- Work Classification: Employee's work classification.
- Ignore Job Site Hours Policy Y/N:
Yif the employee's Ignore job site hours policy setting is activated.Nif the setting is not activated. - Role: The role of the employee.
- User Status: User account status:
CREATED,NO ACCOUNT, orPENDING. - Custom Role Permission:
Yif any settings under Employee Profile > User account> Role permission have been changed from the employee’s standard role permissions,Nif standard. - External id: Third-party system identifier for employees imported from integrations.
- Last Login Date: Most recent system access.
NOTEAny user-defined field that is added to the employee profile, will be included in the list of available fields as well.
Updated 4 months ago