
Employee profile editing
Overview of the employee profile settings.
This is a full overview of the employee profile details. The basic fields and settings are discussed in the Manually create an employee article, so here you'll get familiar with the additional settings that become available after creating the employee profile. Nevertheless, in the case of basic fields, there are some aspects that are different when creating an employee profile and when editing it.
PERMISSIONSYour role needs to have View employee profile and Edit employee profile permissions under Web App > Administration > Role Permissions > Employees to be able to view and edit the profile after creation.
Role change
There is a dedicated role permission for changing the employee role, which is applied when editing the employee role and not when creating it.
PERMISSIONSYour role needs to have a Change employee role permission under Administration > Role Permissions > Employees to be able to change the role.
Print a badge
Use this action to print the employee badge. See Employee badge to learn more about the employee badge and how printing works.
Organization unit
Update the main organization unit of the employee or assign additional organization units.
VISIBILITYYou may assign main and additional organization units only if your MobiClocks environment is converted to an enterprise structure.
The option to assign additional organization units is available if the Additional organization unit setting is enabled in Administration > Organization unit. The following screenshot shows the Organization unit and Additional organization unit(s) fields in the employee profile.

Organization unit and Additional organization unit(s) fields
Select Add organization unit to add one or more additional organization units.
See Additional organization units to learn about the access and visibility rules that guide collaboration across main and additional organization units.
Company change
If you attempt to change the employee's company, you’ll see a date picker to schedule the transfer date.
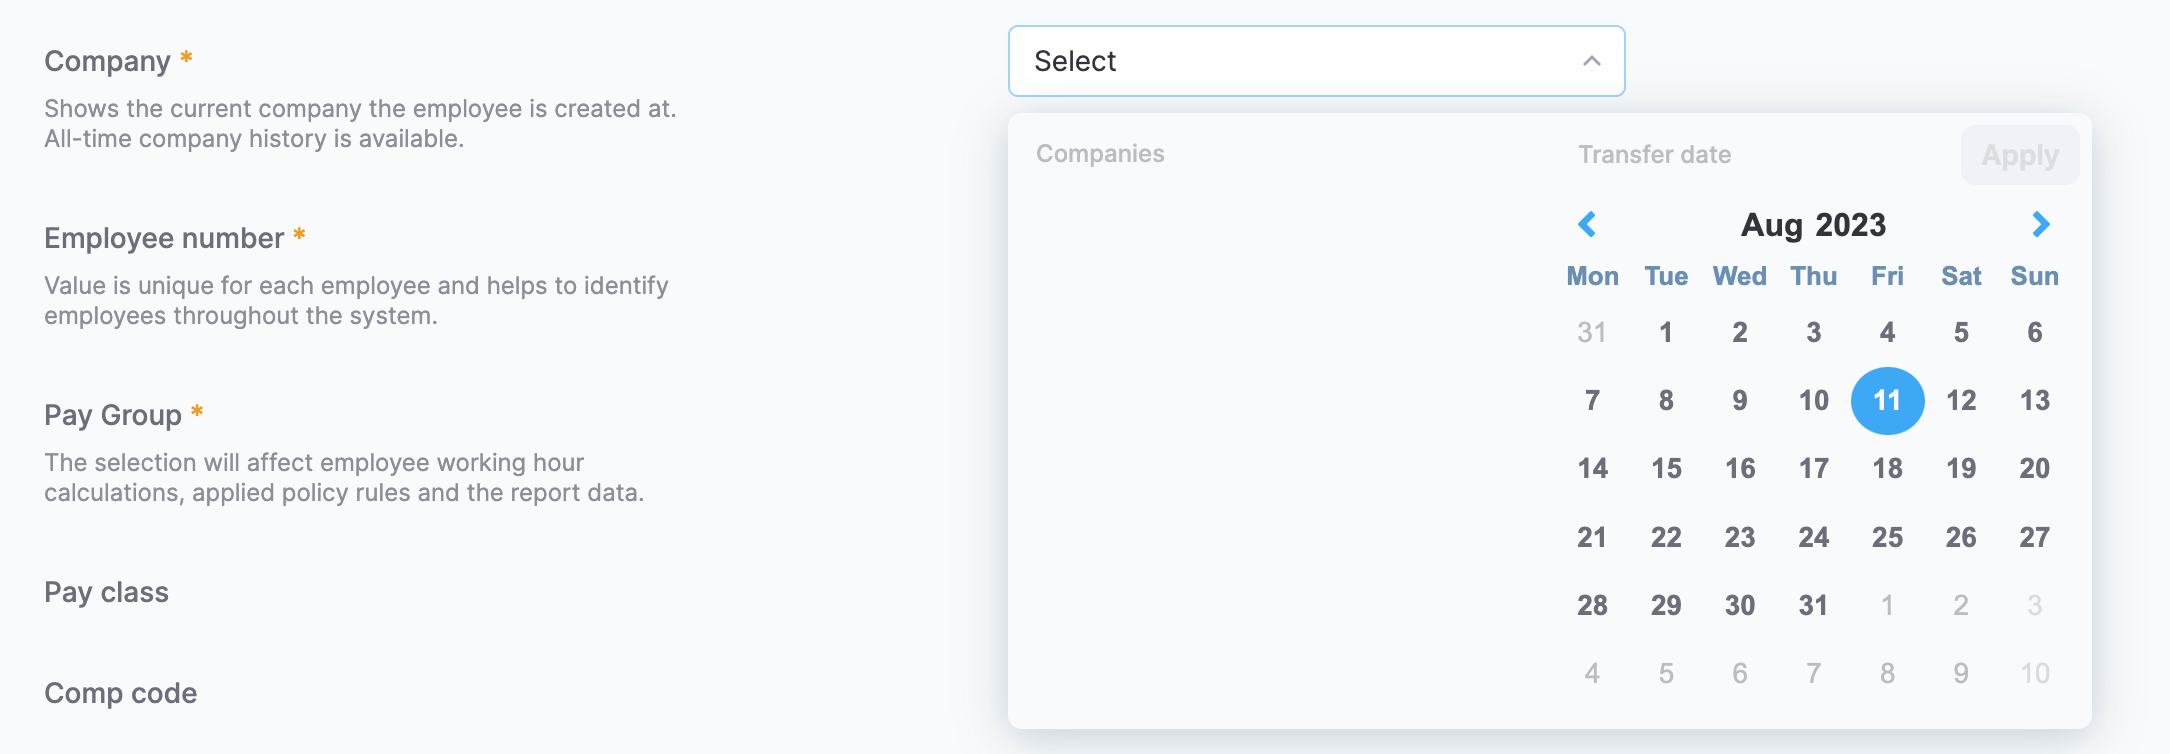
Scheduling company change
Depending on the scheduling settings (weekly or biweekly scheduling) configured for your MobiClocks environment, your past date selection range will be either 1 (in case of weekly scheduling) or 2 (in case of biweekly) weeks. This means that, in case of weekly scheduling, the earliest date that you are able to select for transfer is one week before your current date.
PERMISSIONSYour role needs to have an Employee company change permission under Administration > Role Permissions > Employees to be able to change the company after you’ve already set it.
Pay group change
If you attempt to change the employee's pay group, you’ll see a date picker to apply a transfer date.
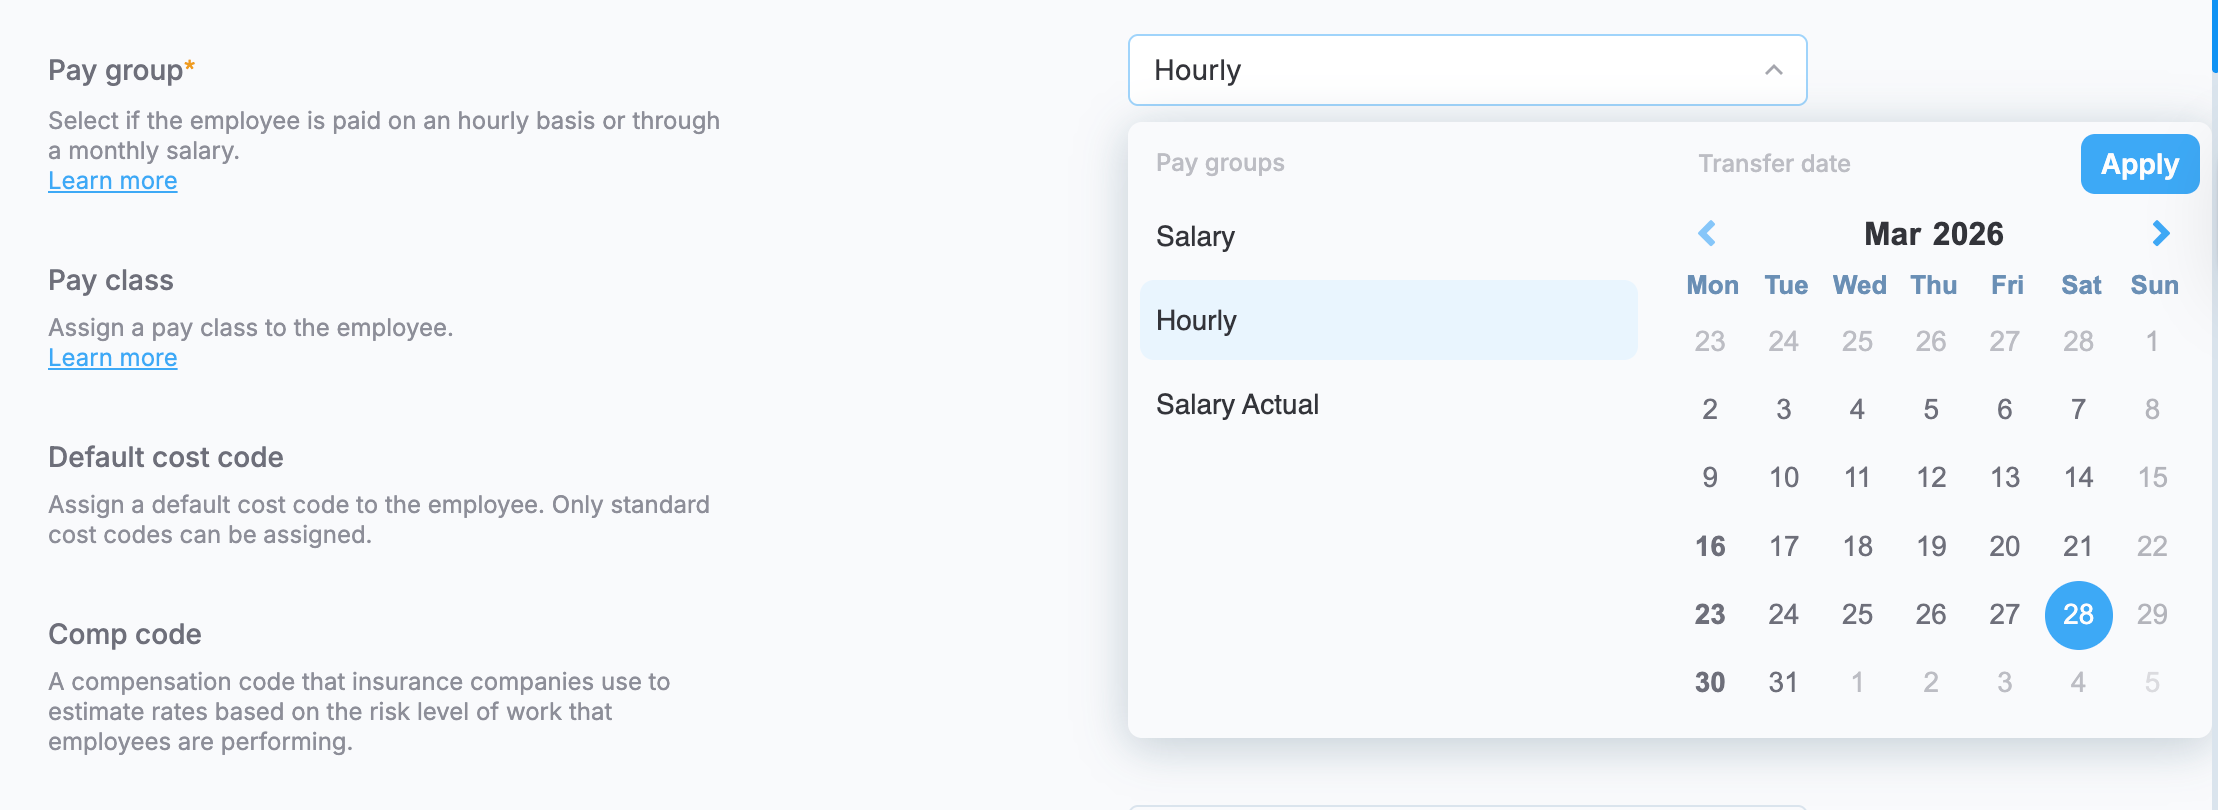
Changing employee pay group
You may only select the week start day (Monday, for example) for any week in the future and some past weeks. Depending on the scheduling settings (weekly or biweekly scheduling) configured for your MobiClocks environment, your past date selection range will be either 1 (in case of weekly scheduling) or 2 (in case of biweekly) weeks.
NOTEYou can't switch the employee's pay group to a past date if the payroll for that date has already been approved.
PERMISSIONSYour role needs to have an Employee pay group change permission under Administration > Role Permissions > Employees to be able to change the company after you’ve already set it.
Profile Information
This section discusses the rest of the settings under the Profile Info section of the employee profile, which are not discussed in Manually create an employee, as hey appear only after the employee profile is created. The following screenshot shows the fields that are discussed.
The following fields are included:
- SS number. The last four digits of the employee's social security number, which is required as part of federal or federally-assisted construction projects. This field appears if certified payroll is enabled for your MobiClocks environment.
- Email and Phone Number. Here you can specify employee's email and phone number, which are also used to activate the employee's user account.
- Address. Specify the employee's address.
NOTEYou will need to specify the Email to be able to create a User Account for the employee. Meanwhile, user account activation can be done either via email or phone (sms verification).
- Crews. View the employee's crew tags crew tags if any. Crew tags are assigned to employees from the job site's employees section.
Account and Access
User account
Creating a user account for an employee is optional, but it's needed to let employees perform actions, such as punching in to a job site from their personal devices or other MobiClocks apps.
PERMISSIONSYour role needs to have a Change user account settings permission under Administration > Role Permissions > Employees to be able to create and configure user accounts.
The user account needs to be created manually after creating the employee profile. To do that, in the Account & Access section of the employee profile, select Create account.
Select a sign-in method
After selecting Create account, choose the sign-in method the employee will use to access MobiClocks. Two methods are available:
- Email (password). The employee signs in using their email address and a password.
- Phone number (OTP). The employee signs in using their phone number and a one-time password (OTP), which is a temporary numeric code sent via SMS each time they sign in.
If the employee profile already has an email address or phone number, the corresponding method is prefilled automatically. If either is missing, you can add it directly in the dialog. The value will be saved to the employee profile automatically. The following screenshot shows the sign-in method selection dialog.
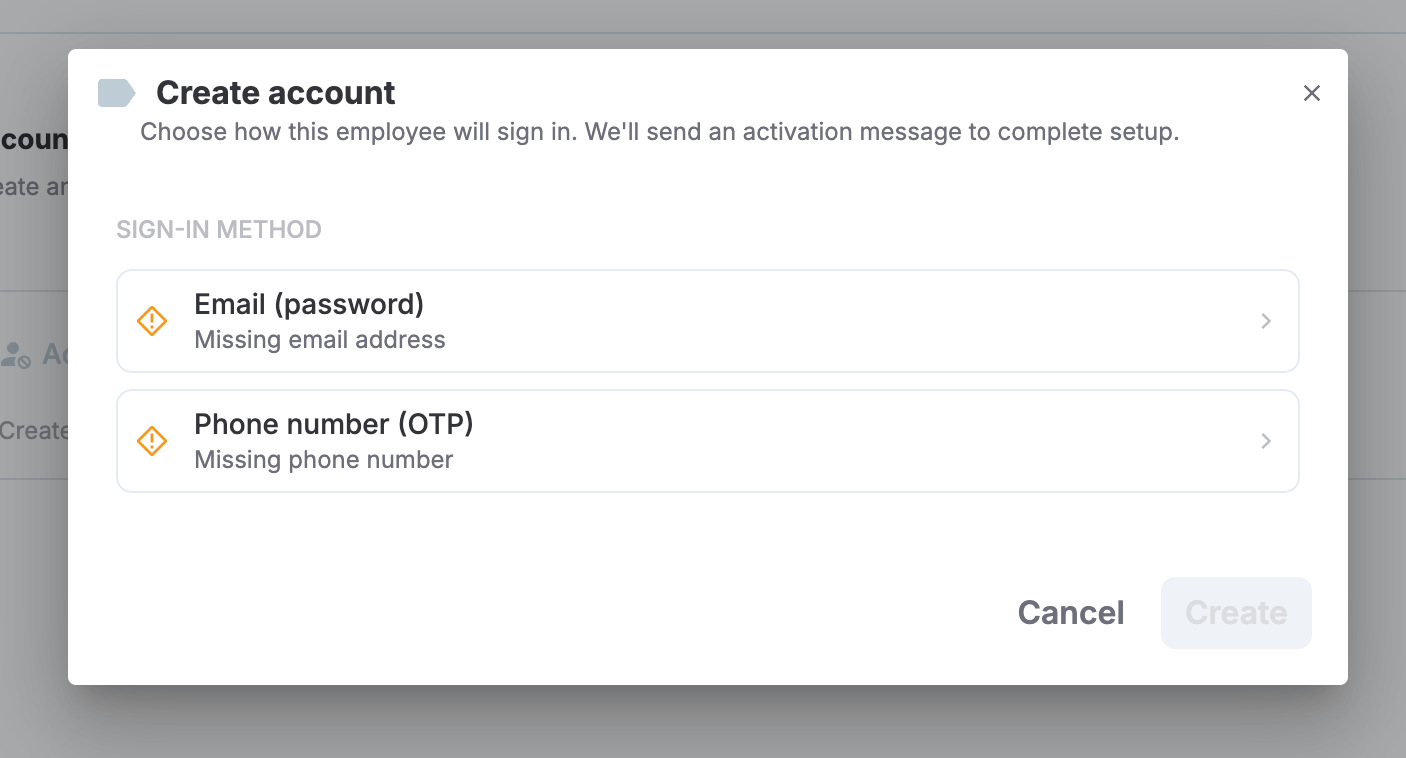
Selecting a sign-in method
After the account is created, an activation message is sent to the employee via email for the Email (password) method, or via SMS for the Phone number (OTP) method.
Account status and sign-in methods
After the account is created, the Account & Access section displays the account status and the configured sign-in methods. The account status reflects the overall state of the account:
- Pending activation. The account has been created and the activation message has been sent, but the employee hasn't completed the first sign-in yet.
- Active. At least one sign-in method has been activated by the employee.
- Disabled. All sign-in methods are disabled.
Each sign-in method is displayed as a separate card showing its current status:
- Not set. No activation has been sent for this method.
- Pending. The activation message has been sent, but the employee hasn't completed activation.
- Active. The employee has completed activation and can use this method to sign in.
- Disabled. The method has been disabled by an administrator.
To set up a method that hasn't been configured yet, select Set up & Enable on the corresponding card. To resend the activation message for a pending method, select Resend setup message.
The following screenshot shows an example where the Username & password sign-in method has been enabled for the employee, while the Phone number (OTP) method has not been set.
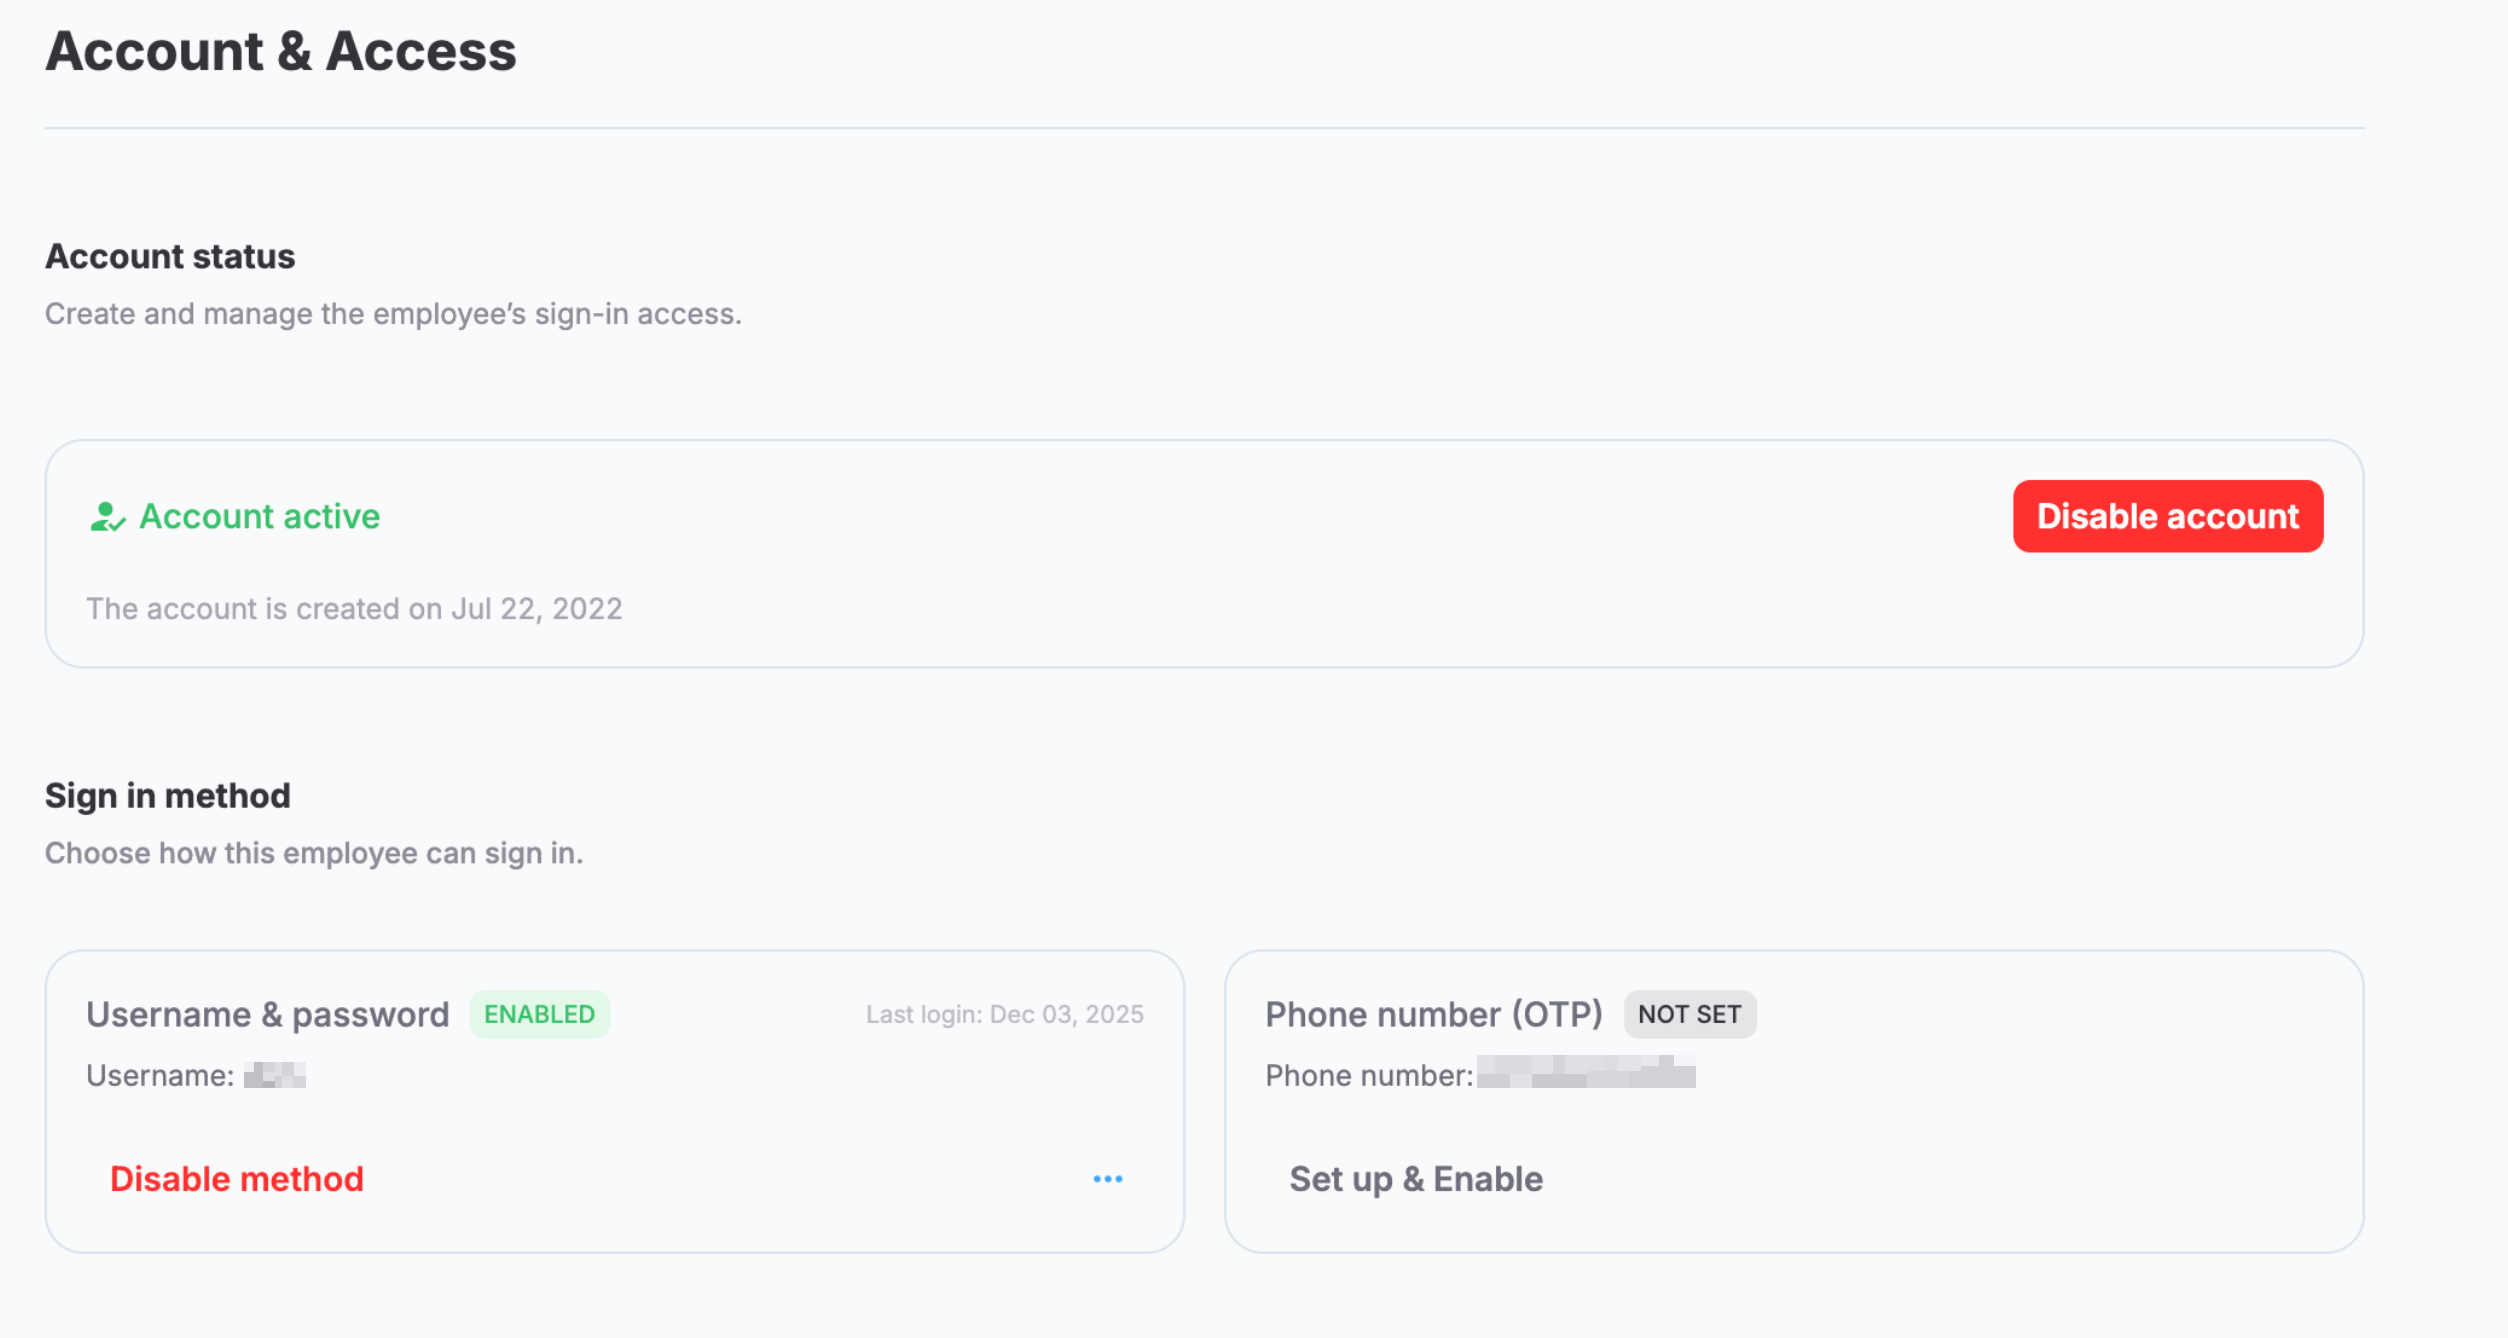
User account and sign-in method configuration example
Phone number update
In case the Phone number (OTP) method is Pending or Active, and the phone number has been updated in the employee profile, you'll get an alert about this with an Apply update action to update the phone number in the sign-in method. The following screenshot highlights the alert.
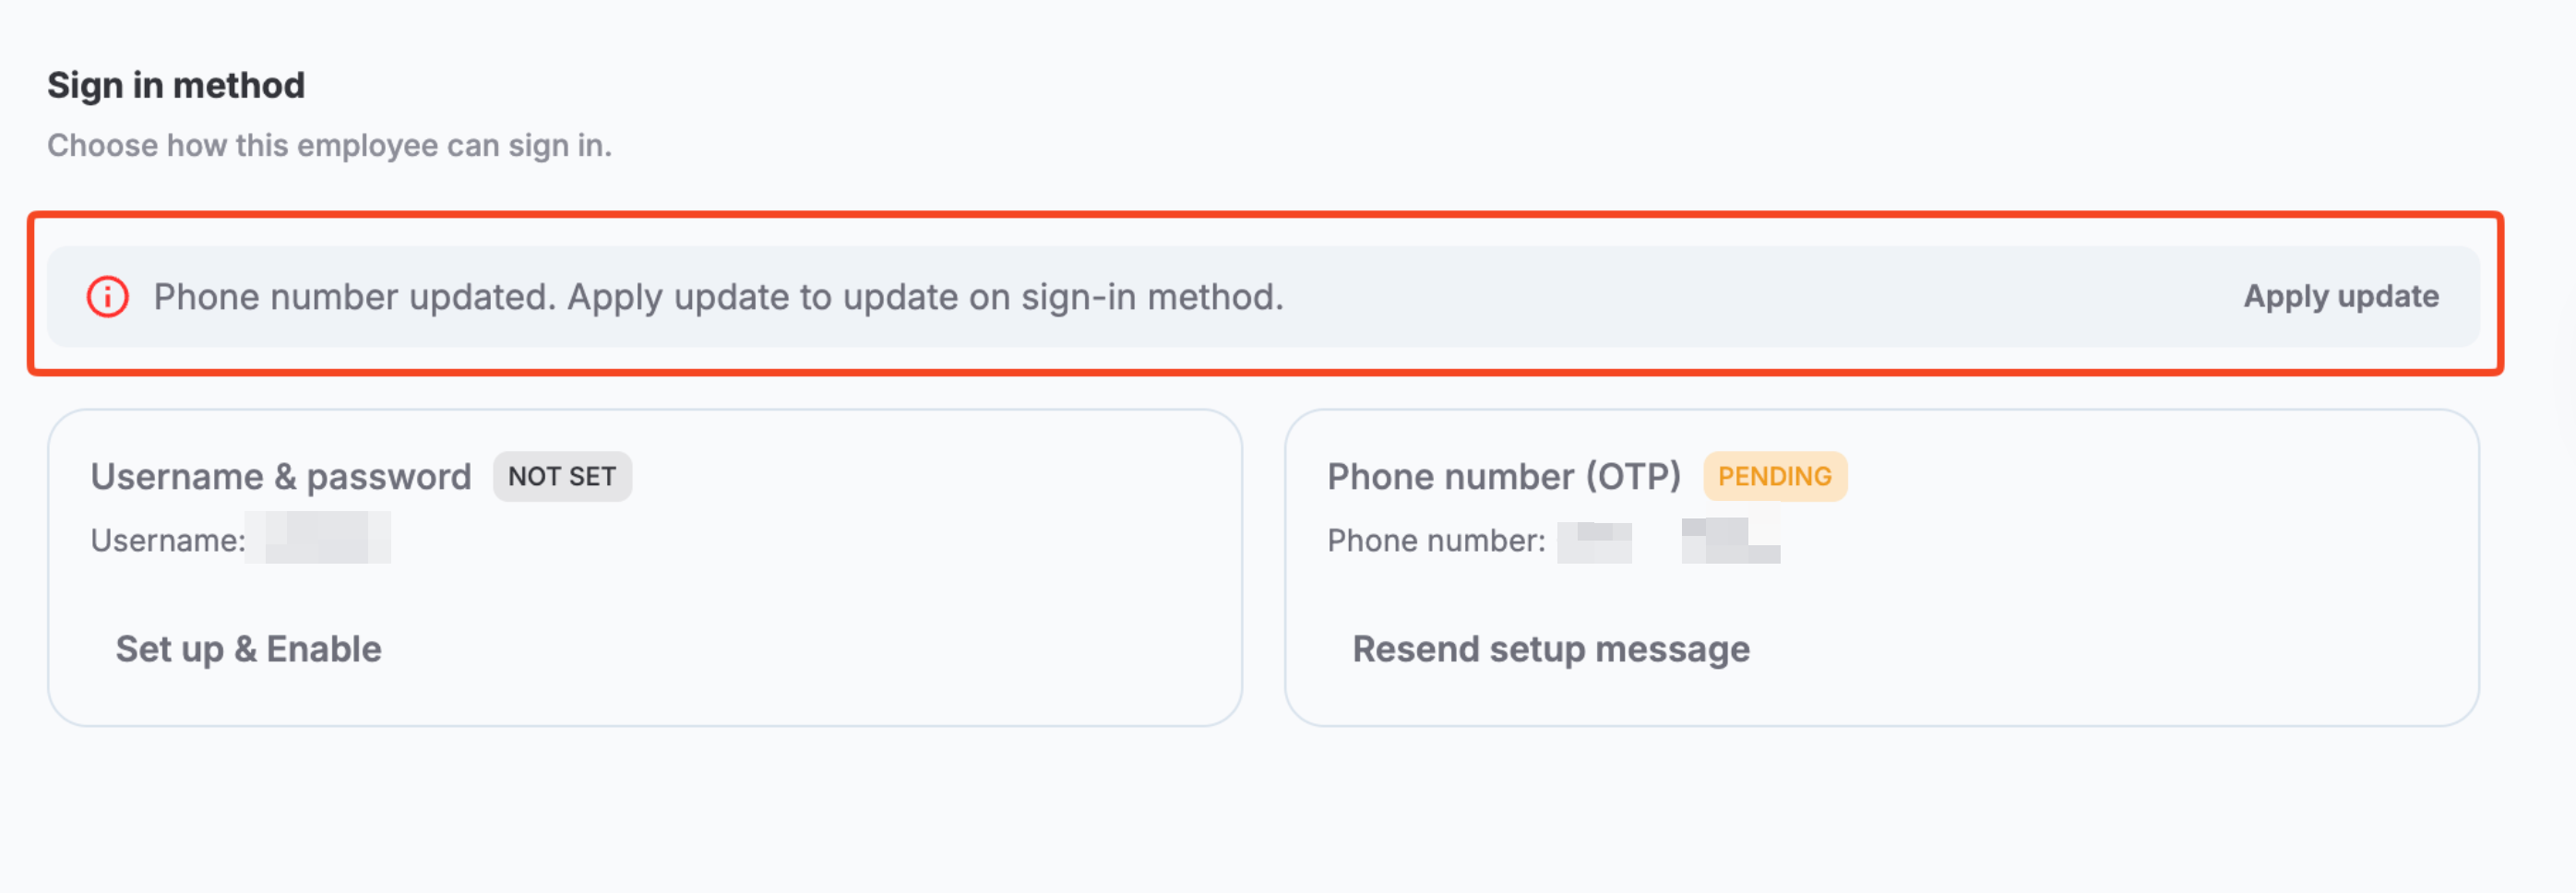
Alert about the phone number update
The following outcomes are possible:
-
If the status is
Pending, it will not change, and you can resend the setup message. -
If the status is
Active, it will switch toPendinguntil activated again. -
If the phone number was removed, the status will change to
Not setafter the apply update action.
Role permissions
The Role permission section lets you view and override the default permissions defined for the employee's role in Administration > Role permissions. Overrides apply only to this employee and don't affect other employees with the same role.
PERMISSIONSYour role needs to have the Employee permission override permission under Web App > Administration > Role Permissions > Employees to be able to override permissions in the employee profile.
Select View permission to open the Role permissions dialog.
When one or more permissions have been overridden for the employee, an override count (for example, 2 overrides) appears in red next to the View permission button, as shown in the following screenshot.

Override count
The Role permissions dialog lists all available permissions organized by category, such as Employees or Timelogs. Each permission has a checkbox that reflects whether it's enabled or disabled for the employee.
To locate a specific permission, use the Search bar at the top of the dialog.
Permissions that have been overridden from the role default are marked with a red dot next to their name. To view only overridden permissions, select the Show only overrides checkbox. The number in parentheses shows how many overrides are currently active. The following screenshot shows the dialog with the Show only overrides filter applies.
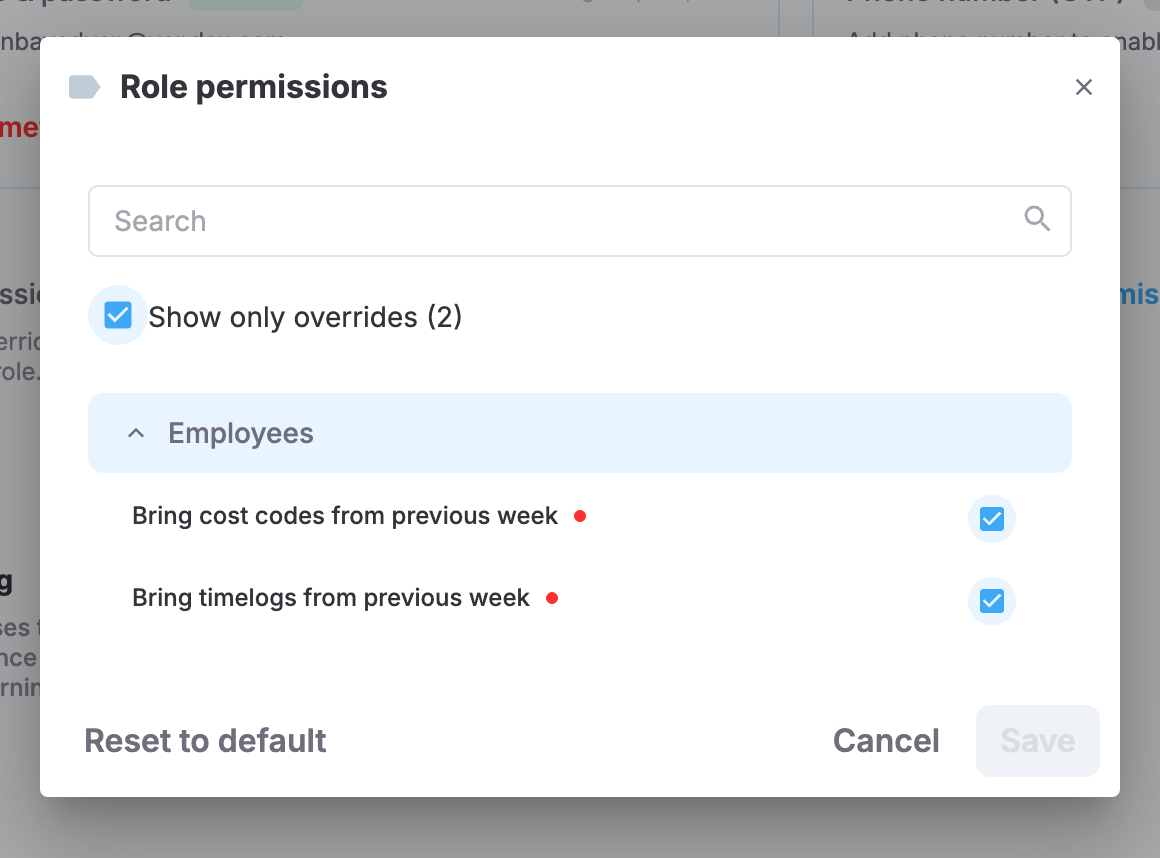
Show only overrides applied
After making your changes, select Save. To discard changes without saving, select Cancel.
To remove all overrides and restore the role's default permissions for this employee, select Reset to default.
Signed-in devices
Lastly, the User Account tab has a Signed-in devices list where all the signins along with Device model, OS, Signin date, and other parameters are logged.
General Settings
PERMISSIONSYour role needs to have an Edit general settings permission enabled under Administration > Role Permissions > Employees to be able to edit the General Settings section in employee profile..
Other
You have the following settings under Other:
- Policy group. Pay policy groups (include parameters such as work day duration, work week duration, and others) are set up in Administration > Pay Policy > Policy Groups, and here you can choose any of the available options or leave the default pay policy.
- Leave of absence. For each working day, an empty timelog is automatically generated and is then filled in by the employee. If this toggle is enabled, no timelog will be generated for the employee when on leave of absence.
Guaranteed hours
Override the general Guaranteed hours policy settings for the employee. See Guaranteed Hours Policy to learn more.
Meal Break Policy
VISIBILITYMeal Break Policy settings become available in the employee profile if Meal Break Policy is activated from Administration > Settings > Meal & Rest Break.
Additionally, Meal Break Policy settings don't appear if the employee's pay group is set to
Salary.
The meal break settings in the employee profile are only applicable if the job site's meal break policy is set to Fixed. The following settings are available:
- Auto-apply. Automatically apply the selected break duration to the employee's timelogs. If this setting is deactivated, you can apply a fixed meal break to a timelog from the timelogs list.
- Duration. The duration of the break. This overrides the value set in Fixed Meal Policy settings in job site settings.
PERMISSIONSYour role needs to have the Edit Meal/Rest Break Policy permission activated under Administration > Role Permissions > Employees to be able to edit Meal Break Policy settings.
Rest Break Policy
VISIBILITYRest Break Policy settings become available in the employee profile if Rest Break Policy is activated from Administration > Settings > Meal & Rest Break.
Additionally, Rest Break Policy settings don't appear if the employee's pay group is set to
Salary.
The following settings are available:
- Auto-apply. Automatically apply the selected break duration to the employee's timelogs. If this setting is deactivated, you can apply a fixed rest break to a timelog from the timelogs list.
- Duration. The duration of the break. This overrides the value set in Rest Break Policy settings in job site settings.
PERMISSIONSYour role needs to have the Edit Meal/Rest Break Policy permission activated under Administration > Role Permissions > Employees to be able to edit Rest Break Policy settings.
Assigned job sites change
The first job site you assign to the employee becomes the main job site. If you assign more sites to the employee, you can select another site to be the Main one from the three dots menu on the job site entry. In the same menu, you have the option of removing the job site, which will remain in the list, having its end date changed to the date of removal.
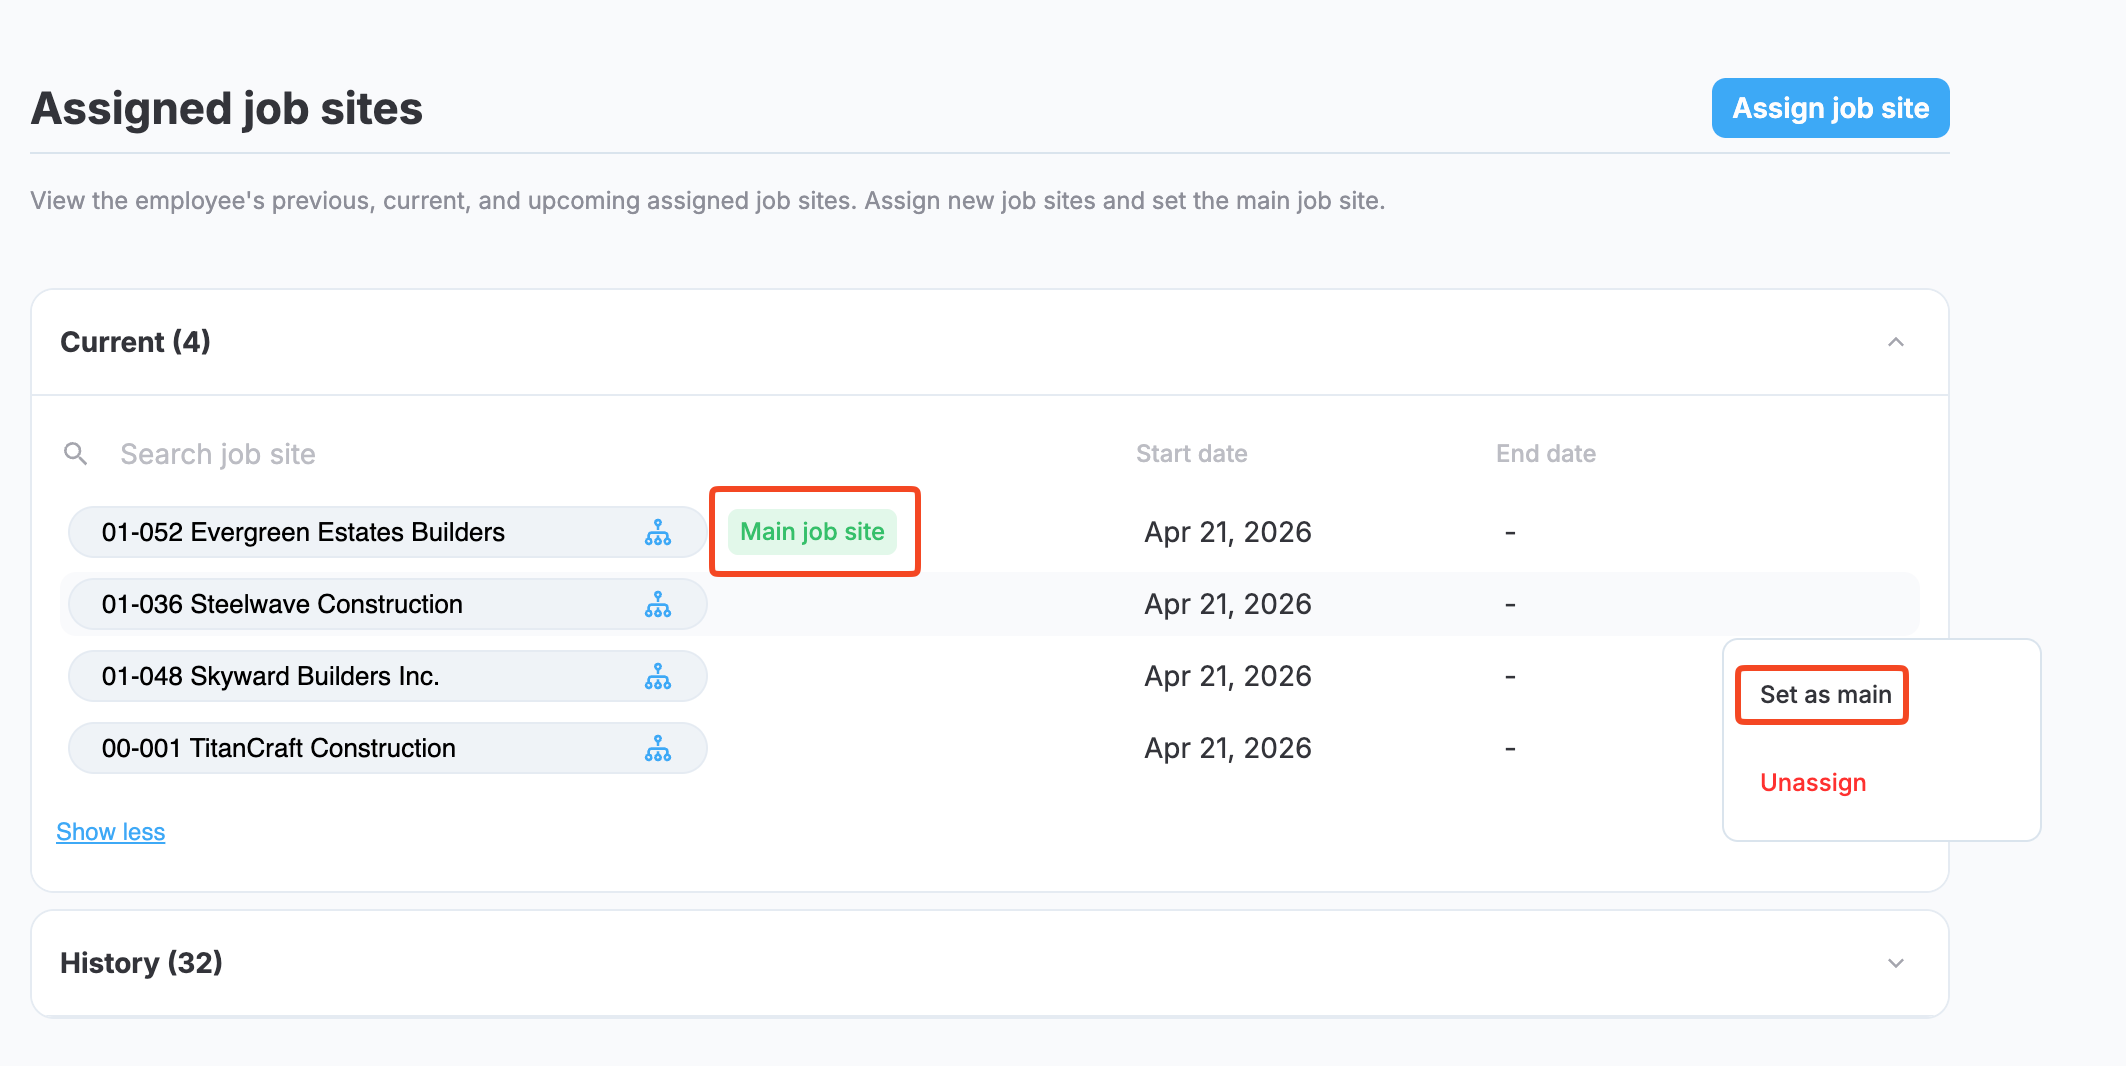
Setting a main job site
There is also a History section that shows all the job sites that had been assigned to the employee in the past.
Assign job sites from multiple org units
If your MobiClocks environment is converted to an enterprise structure, and the Additional organization unit(s) setting is enabled in Administration > Organization units, it is possible to assign job sites from multiple organization units.
In this case, when assigning a job site, the selected organization unit is displayed at the top and can be changed using the Change option, as highlighted in the following screenshot.
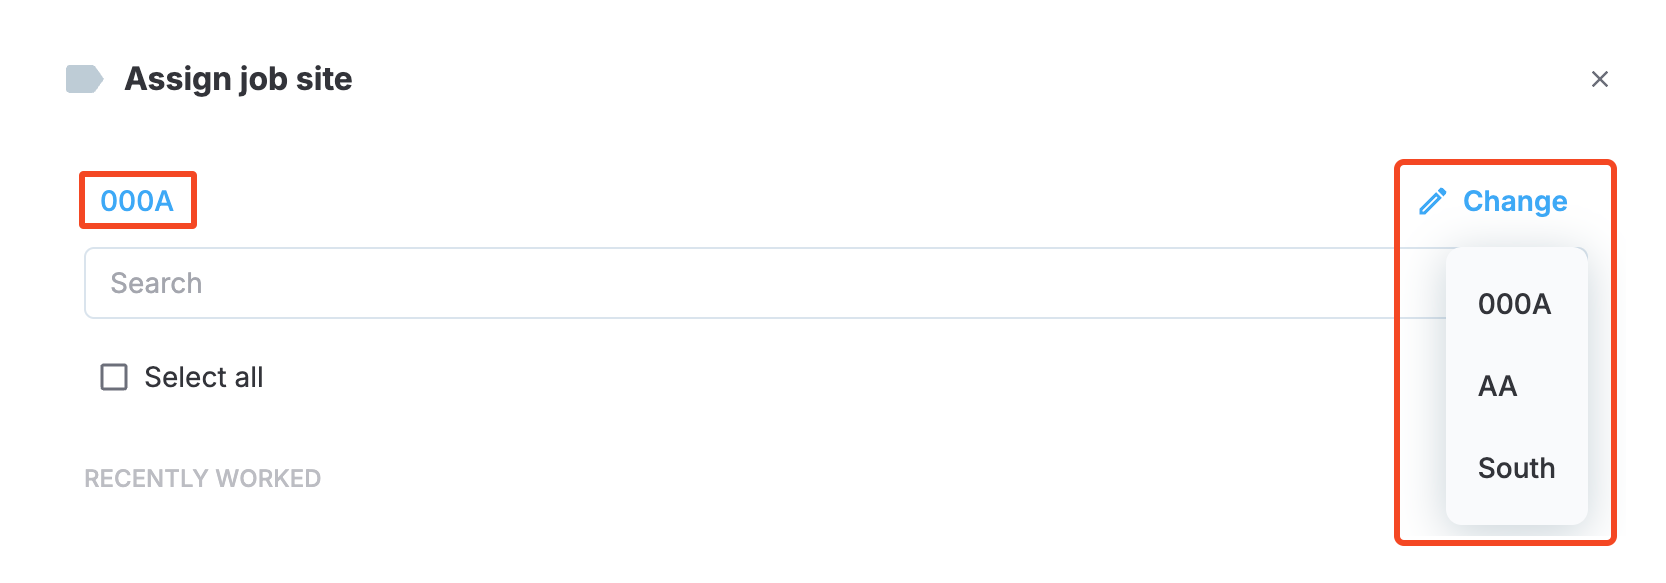
Selecting an organization unit
When assigning job sites, the system limits available job sites based on the intersection of your organization units and the employee's organization units. You can only assign job sites from organization units that both you and the employee have access to. For example, if you have access to organization Units A, B, and C, while the employee has organization unit A as their main unit and only organization unit B as an additional one, you can only assign that employee to job sites in organization units A and B.
After the organization unit is selected, job sites within the organizaiton unit will appear in the list and can be assigned to the employee. See Additional organization units to learn more.
Pay rates
In this section, you see the pay rates of the selected employee and can set new rates.
PERMISSIONSFor each employee pay group, you must have the corresponding permission activated in Administration > Role Permissions > Employees to be able to see their pay rates. The following are the permissions for each pay group:
- View hourly employee rate
- View salary actual employee rate
- View salary employee rate
On the highest level, pay rates are set up in company details where you can specify Company default rates as well as separate rates for each Job Title.
So, if the employee profile has a Job Title that has pay rates set up for it in the employee’s company details, those pay rates are applied for the employee by default. Otherwise, company default rates are applied. The following screenshot shows an example where company default rates are applied.
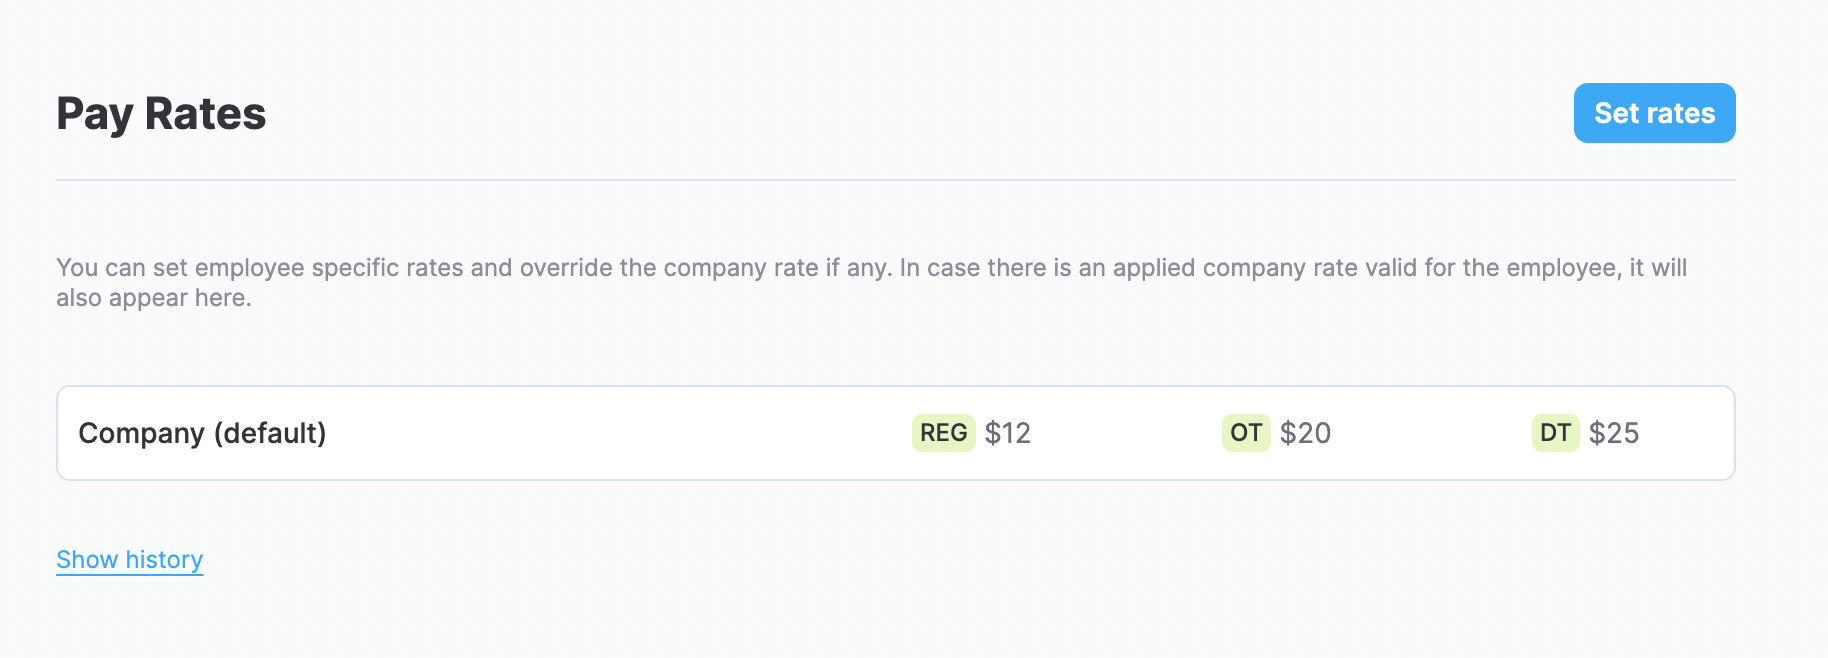
Company default rates applied
NOTEThere can be cases when there is no Company default rate or Job Title rate set up. If neither of those is specified, you’ll need to set rates for each employee profile separately, which is discussed next.
Lastly, you can select the Set rates button and define rates specific to the employee.
PERMISSIONSYour role needs to have an Edit pay rates permission activated under Administration > Role Permissions > Employees to be able to set new rates for the employee.
In the dialog that opens next, you can set Hourly or Weekly rates.
Hourly rates
You can set hourly rates for the following pay IDs:
- Regular
- Double-Time
- Overtime
See Pay ID for more details on pay IDs.
Weekly rates
You can also set a weekly pay rate for the employee. Note that the weekly rate is not inherited from company details and is set on an individual employee level only. In addition, you can set either an hourly or a weekly rate for a specific employee.
Finally, as shown in the following screenshot, you have a Show History button to view the history of all the previously applied rates.
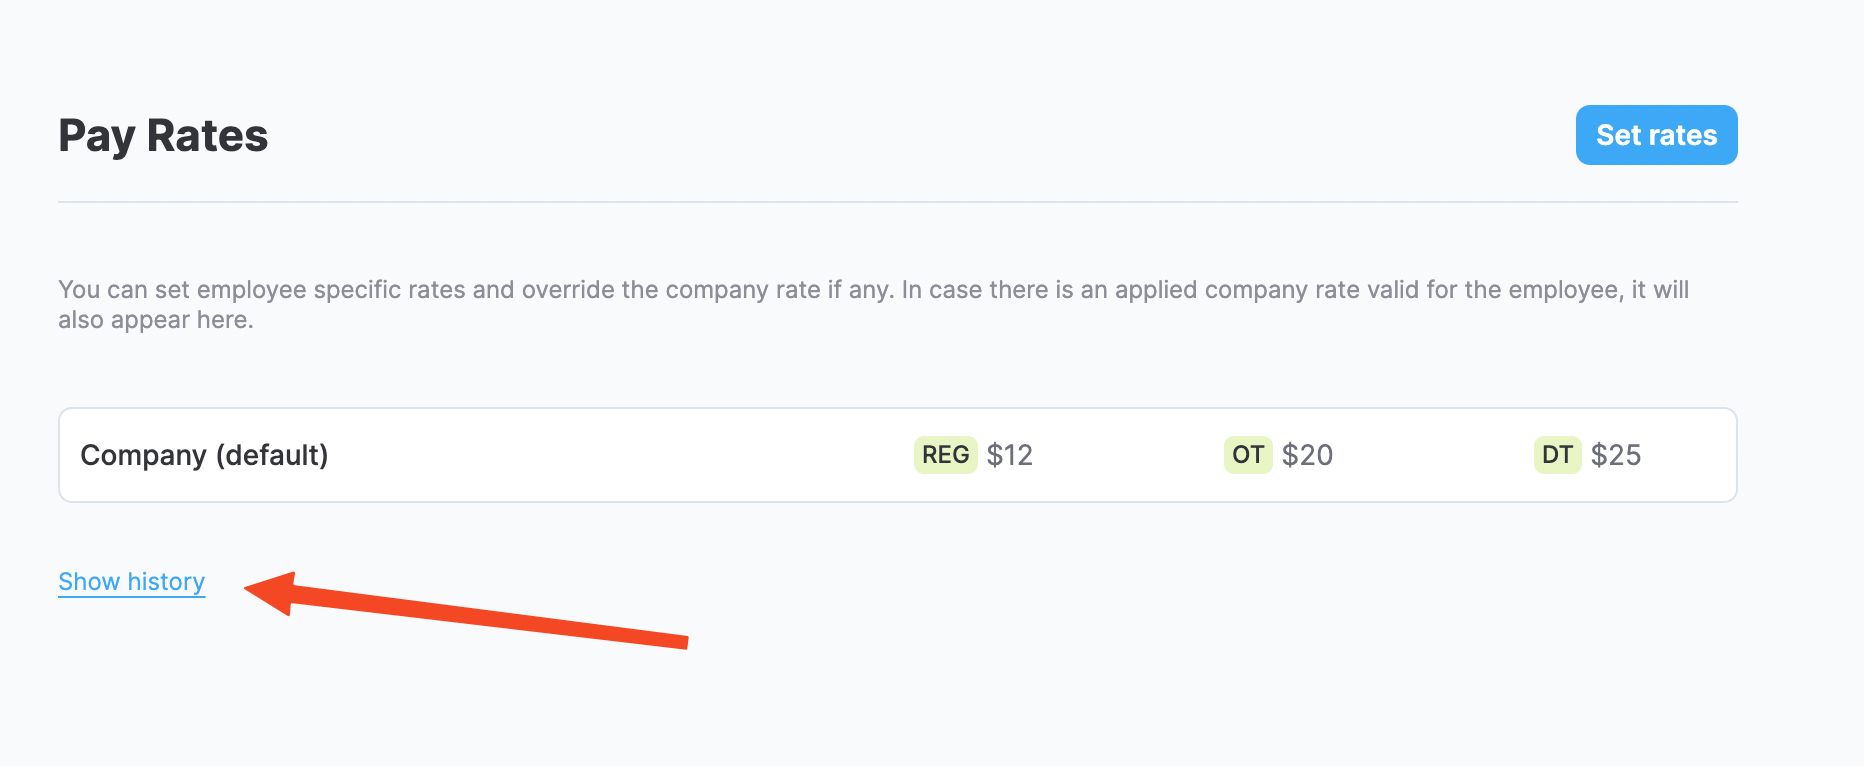
Show history
Payroll Item Mapping
Payroll items mapping group is a set of mappings that indicates which MobiClocks pay IDs corresponds to which payroll items. Payroll items are entities from MobiClocks integrations that are equivalent to pay IDs in MobiClocks. However, you need to explicitly establish a connection between each pay ID and payroll item to be able to export payroll reports correctly to integrated platforms (accounting systems, for example).
In this section of the employee profile, you can select payroll mapping groups for the employee. By default, the mapping groups specified for the employee's company are selected, but you can select from any other available mapping groups.
See Map pay IDs for exporting for more details on creating payroll mapping groups.
PERMISSIONSYour role needs to have the Set payroll item permission activated under Administration > Role Permissions > Employees to be able to select a payroll mapping.
Similar employees
Here, you have the list of all the other employee profiles that have been qualified by the system as similar to the given employee. The profile card of a similar employee includes a profile picture, status, name, and employee number. The following screenshot shows an example of a similar employee card.
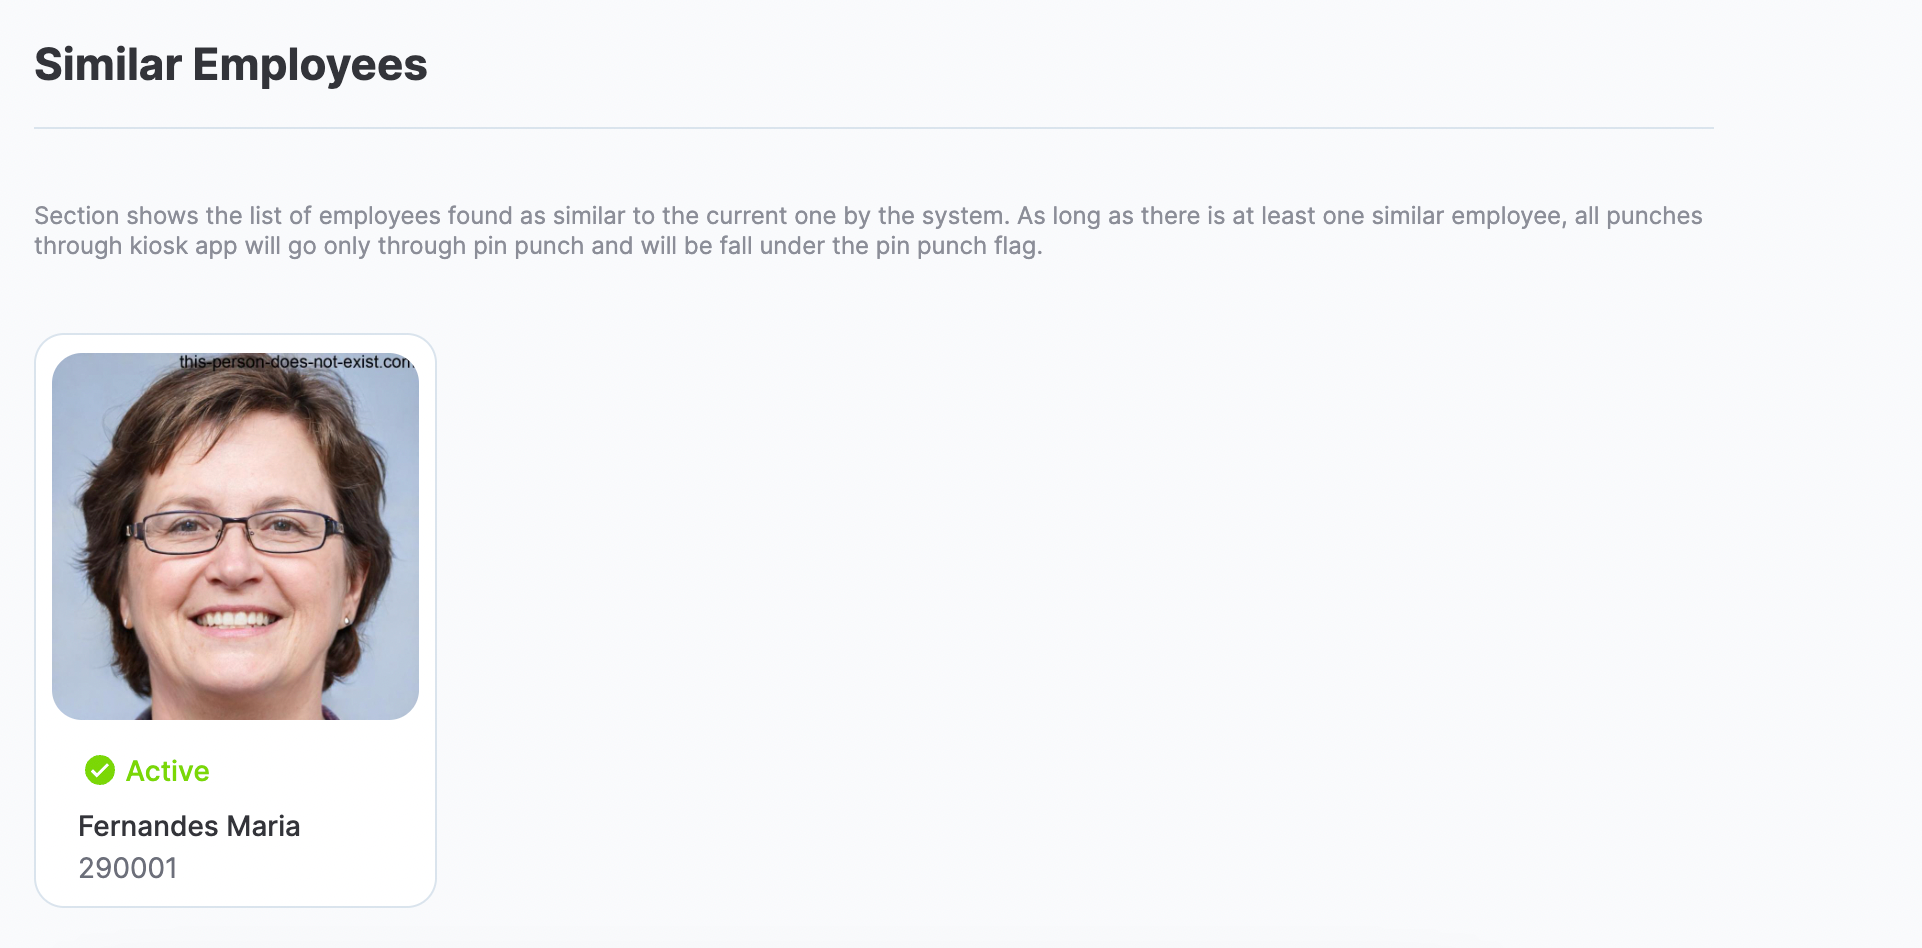
Similar Employees
NOTELocating similar employees can help you identify duplicate profiles (for instance, if the employee already had a profile but created a new one) and manage them.
Face library
This is a collection of all the photos that were taken for punch-in but were not recognized by the system.
For a photo to appear here, it first needs to be added to Face Library from the employee’s timelog that contains the unrecognized punch-in photo.
Once the photo is in Face Library, you can remove it or add it as a profile photo. This can be useful if, for instance, the appearance of the employee has changed, and the profile photo needs to be updated to reflect the current appearance.
Accepted Terms
In this section, you see the history of all the documents, such as an affidavit, accepted by the employee. The following screenshot shows an example of a list of accepted documents.
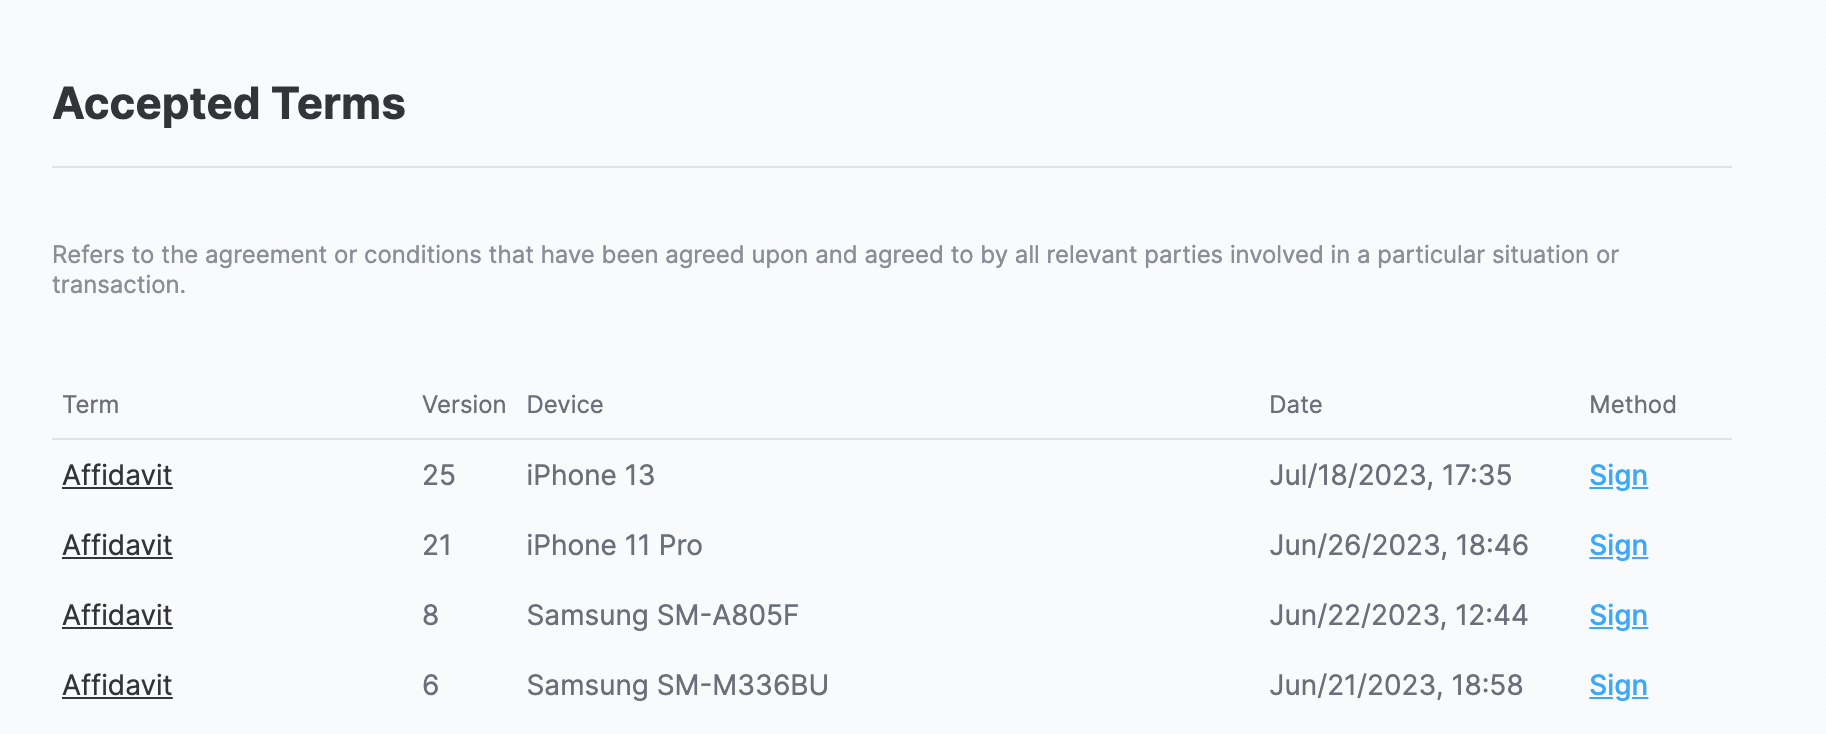
List of accepted documents
View-only profile mode
There can be cases when you may view the employee profile in view-only mode without the ability to make any edits. This is the case, when you have a PM or a derived role and want to view employee profiles outside of your job site. See Assign employees to learn more.
The view-only mode is also activated when your organization is converted to an enterprise structure and you view employees from additional org units. See Additional organization units to learn more.
Updated about 1 month ago