
Plan manpower
How to plan manpower.
In this topic, you'll get familiar with the process of planning manpower within the Workforce module. The topics covers the process of planning manpower, viewing existing planning, and downloading planning reports.
Workforce planning is activated in Administration () > Settings > Workforce.
PERMISSIONSYou may access, create, edit, and share the planning if you have the Manage plannings permission enabled for your role in Administration () > Role Permissions > Workforce.
Plan manpower
Perform the following steps to plan employee work.
Step 1: Select and configure a job site
Navigate to the Workforce page from the left-hand navbar of your Web App and select the Planning tab.
Select a job site from the left-hand navbar, as shown in the following screenshot.
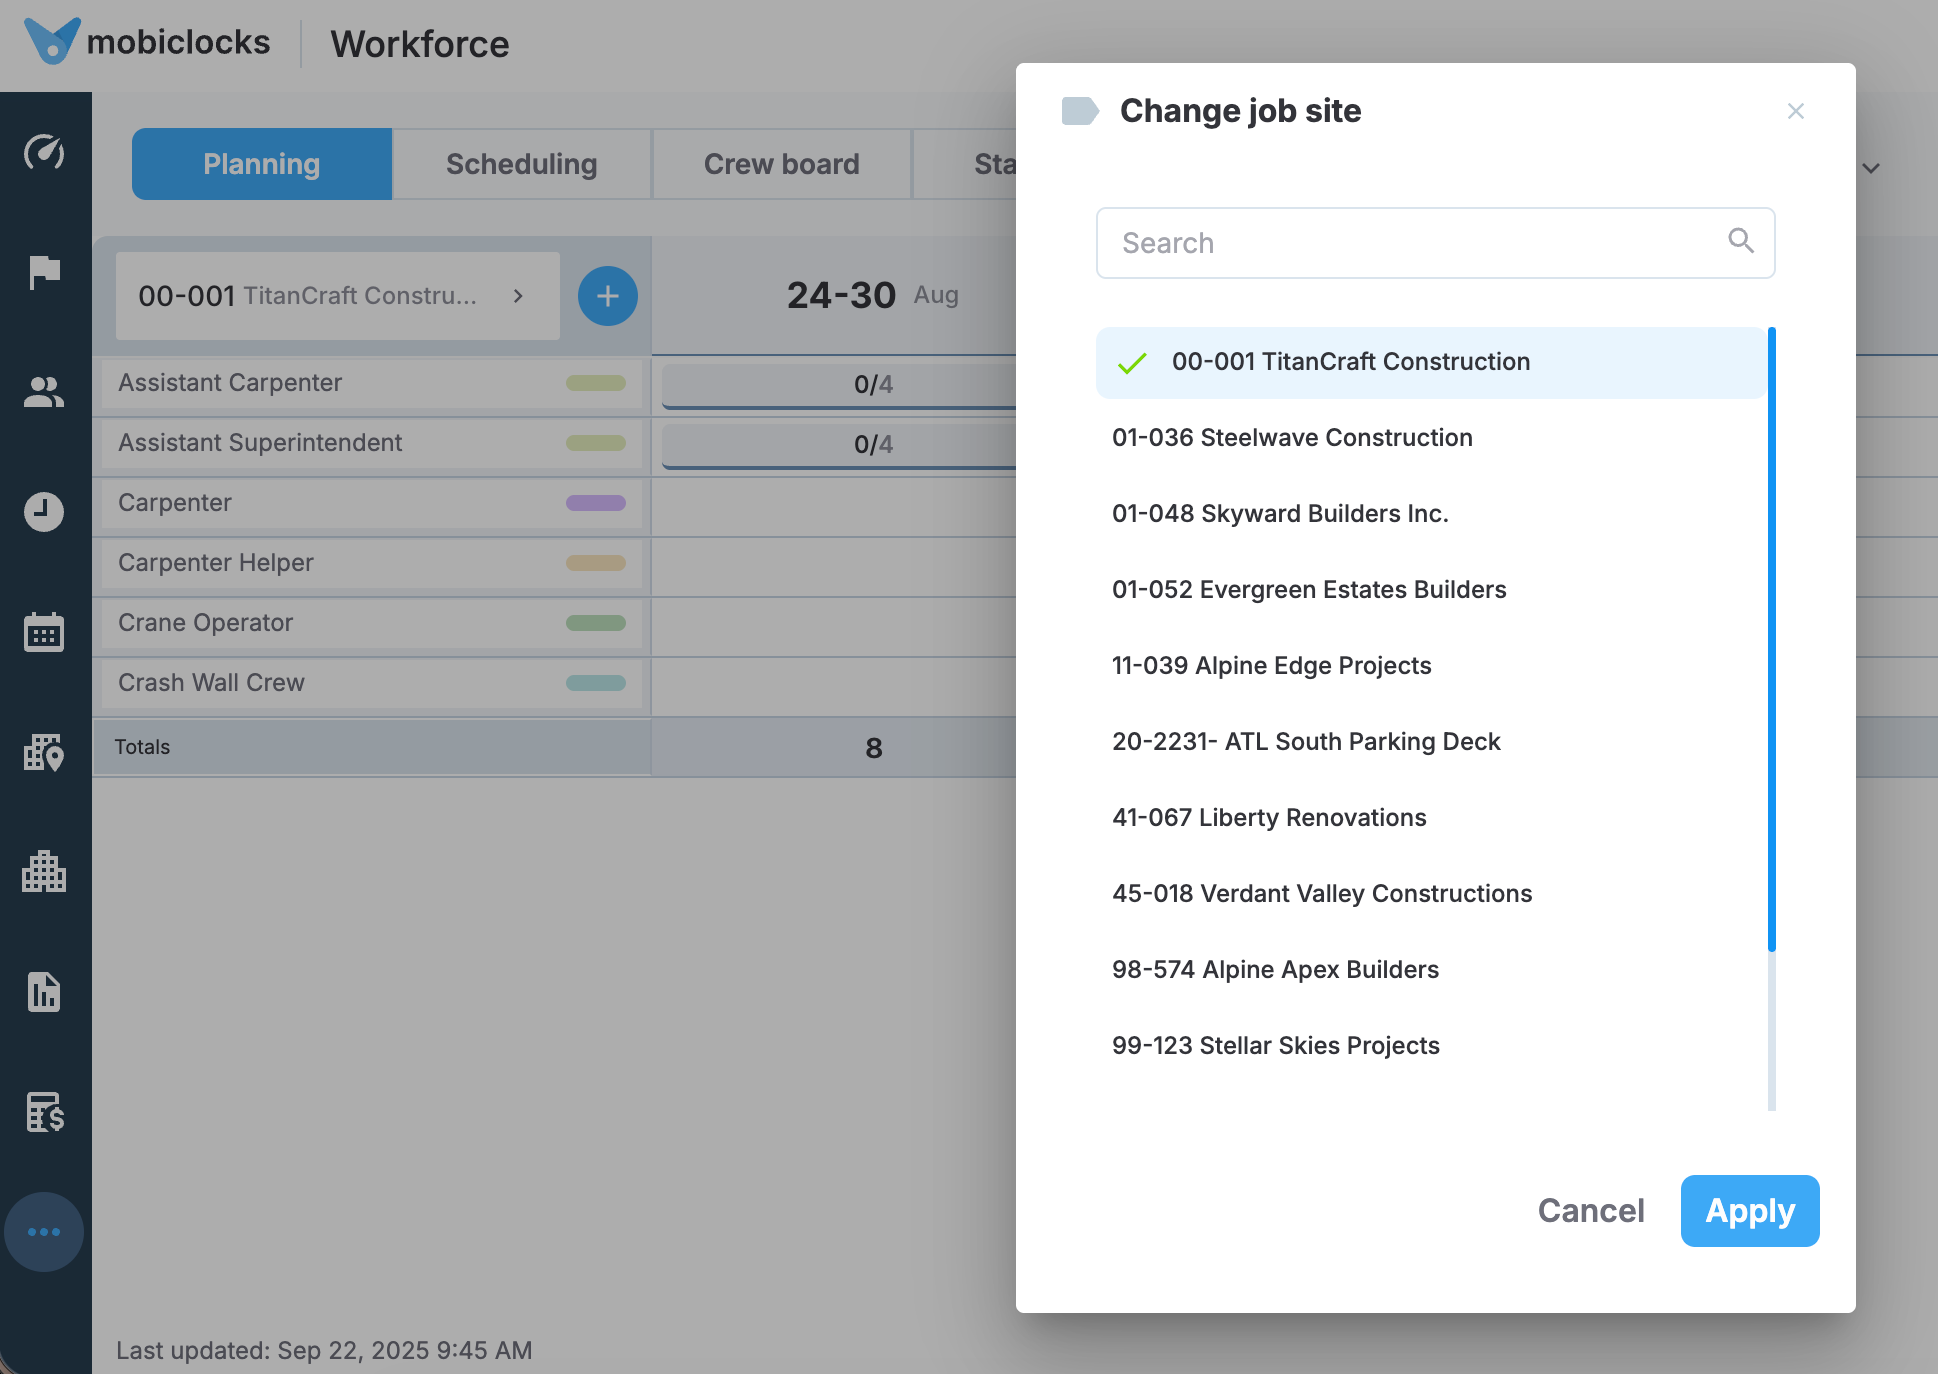
Selecting a job site
Step 2: Add manpower
Select the plus (+) icon next to the job site name to choose the job titles you want to do planning for. Select one or more job titles and select Apply to add them under the job site. The following screenshot shows the job title selection dialog.
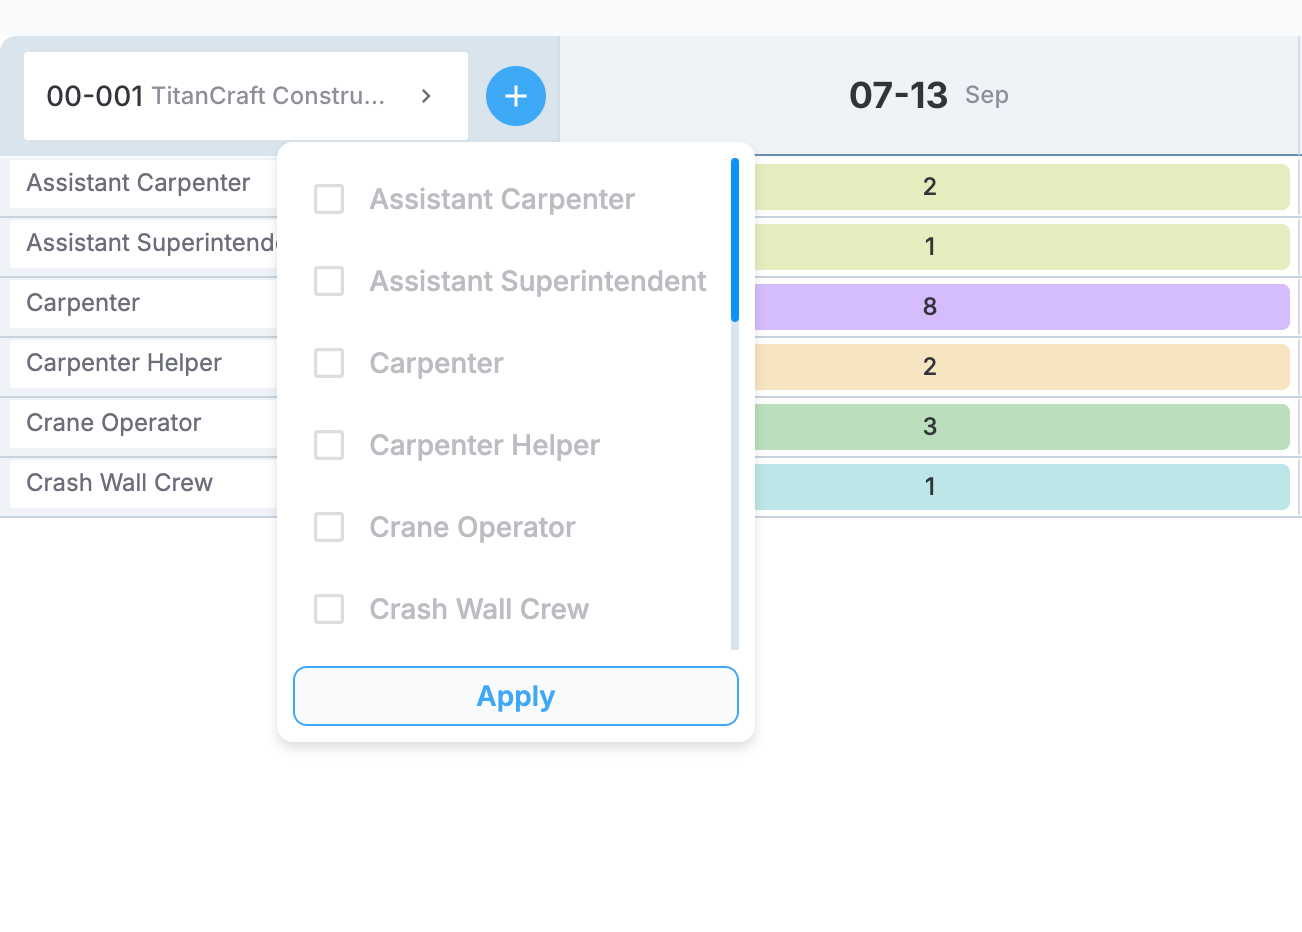
Selecting job titles
Any of the added job titles can also be removed by selecting the remove () icon next to the job title, which becomes available on hover.
NOTEIf you remove a job title from your manpower, all the associated planning is deleted.
Step 3: Plan manpower
Now that you have configured your job site and selected the required manpower, you can start doing manpower planning.
Select a date range
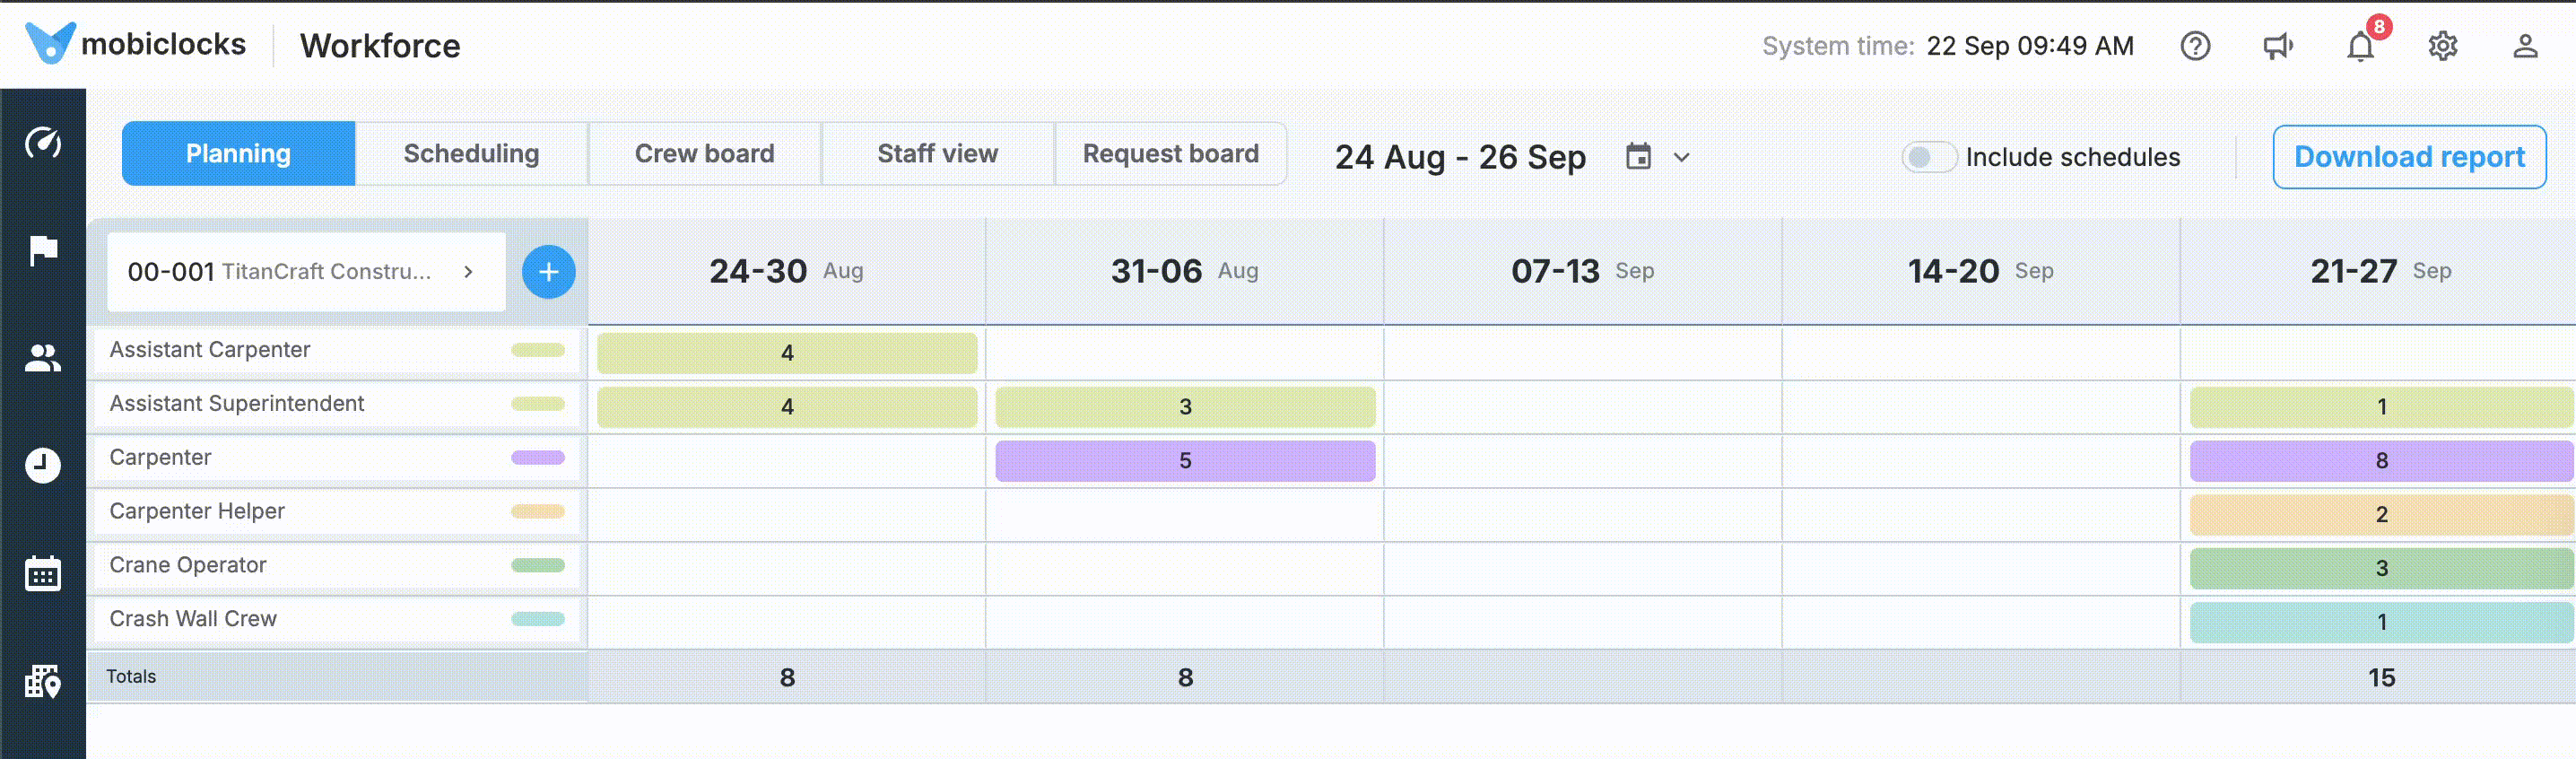
From the date picker at the top of the page, select the date range of your planning calendar. Input is done on a weekly basis, where each calendar cell represents one week and displays the sum of all man-days planned for that entire week period. Here are the three available date range options:
- Custom date range: Allows you to manually select specific start and end dates for your planning view, giving you complete flexibility to focus on any time period you need.
- This month: Displays the planning calendar for the current month, providing a monthly overview of your manpower planning.
- Next 6 weeks: Shows planning data for the upcoming six-week period, which is useful for medium-term workforce planning and scheduling.
Input man-days
Select a cell in the calendar and enter a value in the cell. For example, if you enter 5 in a cell next to the Assistant Carpenter job title, you thus plan5 Assistant Carpenter man-days or a particular week.
NOTEYou can enter a
0to explicitly indicate when no employees are needed for a specific job title on a given day or week.
Adding man-days
Navigate between cells by selecting a cell or using arrow keys on your keyboard.
At the bottom of the Planning calendar, you also have the total number of man-hours for each week as well as the date and time of the last update, as shown in the following screenshot.

Total man-hours and last updated timestamp
Include schedules
If enabled, the Include schedules option displays the relationship between the scheduled workforce and planned manpower in each planning cell. When enabled, it shows a ratio format in each cell instead of just the planned numbers. The first number represents the currently scheduled workers for that job title and time period. The second number represents the planned manpower for the same. This provides immediate visibility into staffing gaps or overages.
The cell coloring provides visual indicators based on the scheduling ratio:
- Blue cells: Indicate understaffing situations where scheduled workers are below planned requirements (such as
0/2,1/8,1/3). - Green cells: Show complete matches where scheduled workers equal planned requirements (such as
2/2). - Red cells: Highlight overstaffing situations where scheduled workers exceed planned requirements (such as
3/1).
The following screenshot shows the Planning tab with the Include schedules option enabled.

Include schedules enabled
Collaborative sharing
You may share any of the job site planning with other users in your environment to collaborate.
Perform the following steps to share planning:
-
Select Share in the upper right corner of the page.
-
Locate users using the search bar and select Share to add them to the list of collaborating users.
-
Users who have access to the shared planning will appear under the Users with access, where you can configure their permissions:
-
Can view: can only view the shared planning
-
Can edit: can edit the shared planning.
-
Remove: remove access for the user.
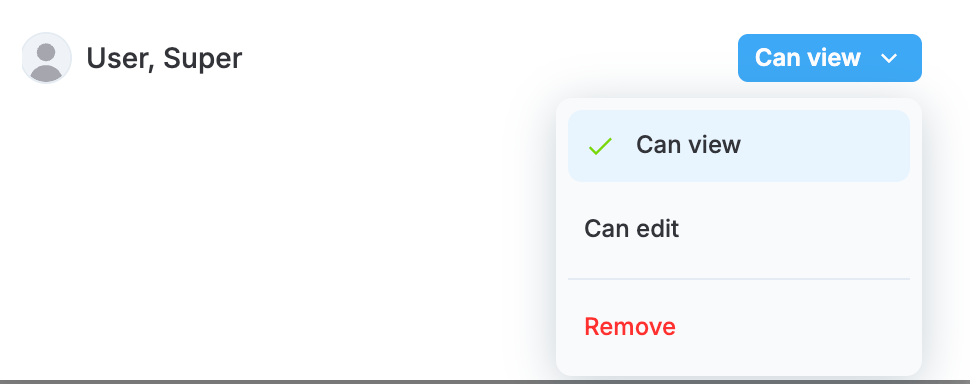
Configuring user access
-
In the sharing dialog, you also have a Users with manage permission list that includes other users who have the Manage planning permission.
Download a report
You can download a manpower report for each job site by selecting Download report in the upper-right corner of the Planning page. The report includes the same data you see in the planning calendar for the selected date range.
Updated 4 months ago