
Schedule a report
Automating the report generation and sharing.
Report scheduling is the process of automating reportgeneration and sharing. Using the Report Scheduler tool available in the Administration () section of your Web App, you can choose a report type and set up an automation flow that generates and sends the report to the selected group of recipients according to the specified schedule.
PERMISSIONSYou may view the Report Scheduler page if you have the View "Report Scheduler" tab permission enabled for your role in Administration () > Role Permissions > Administration.
The following steps describe the process of setting up a report schedule and editing existing schedules
Create a new schedule
To create a new schedule, select the Schedule a Report button in Report Scheduler. Select the report type you want to schedule. After selecting the report type, you see the formats that the report sharing is available in, as shown in the following screenshot.
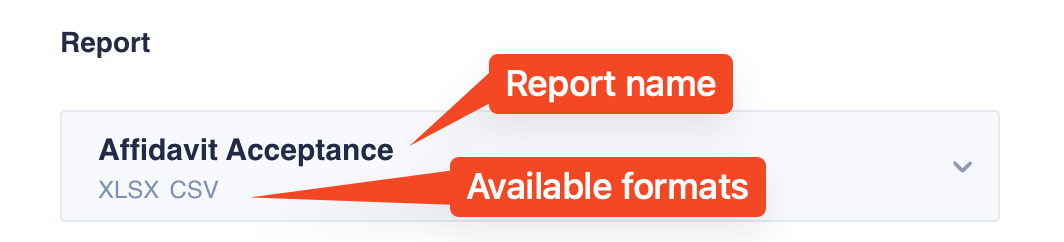
Selecting a report type
Configure generation options
In the Generation options section, you first choose the format that the report is generated in. Different report types have different available formats, so the list of options can differ.
Next, there is the Type selection where you choose how the report is distributed. There are three options:
- Single file. All the data is compiled into one single file.
- Multiple per Company. The data is grouped by the Company field, and separate files are generated for each company.
- Multiple per Job Site. The report data is grouped by the Job Site field, and separate files are generated for each job site.
NOTEIn case of certain report types, not all generation options may be available due to the nature of the report. For example, the Employee Roster report has the Multiple per Company option only, as its purpose is to provide a list of employees for each individual company.
Configure filtering
In the Filter section, you can specify the timeframe that the report encompasses. For example, if you select Last day, the report will only include data for the previous day of its generation. Further on, you have the Last week and Last month options as well as a Custom option to specify any custom range.
If in the previous Generation options settings, you have selected Single file or Multiple per Company, you will also have the Company filter to choose which companies to include in the report. If your organization is converted to an Organization Unit, you will also see the list of organization units to filter the list of companies accordingly.
The following GIF shows the process of selecting the time period and companies.
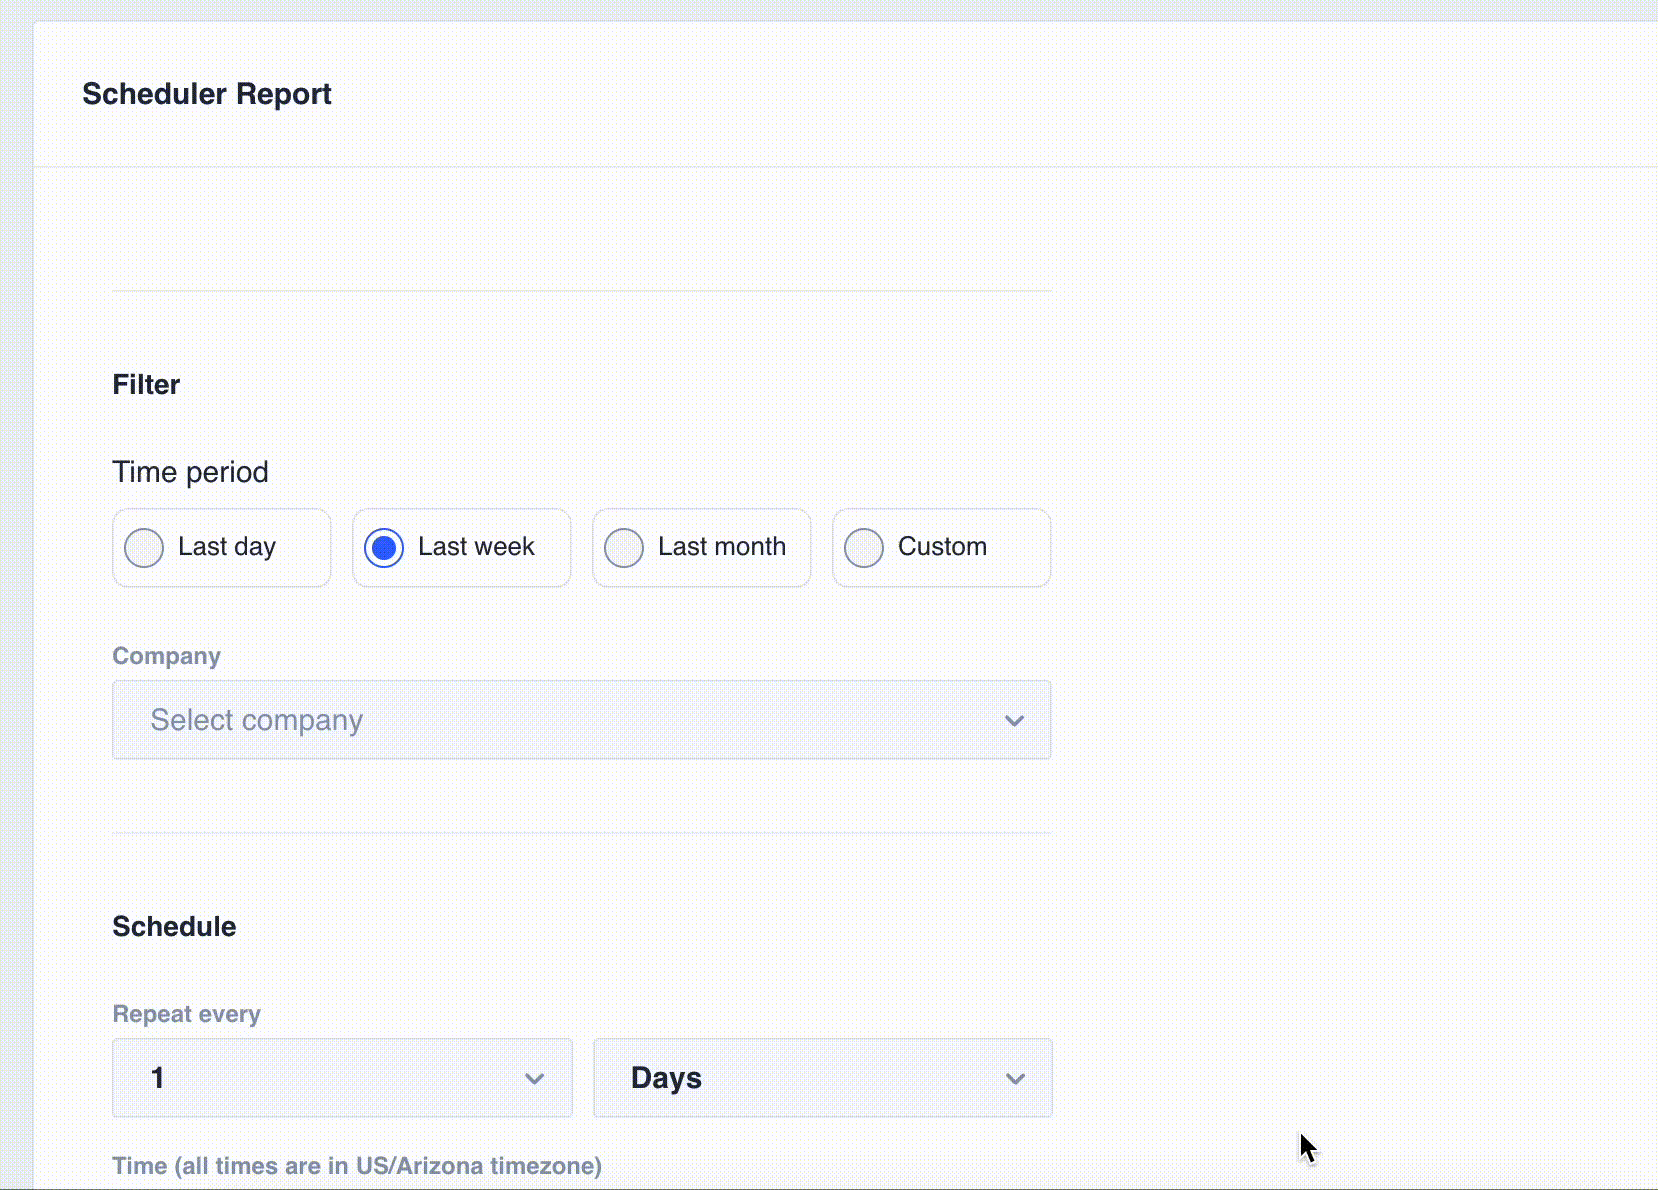
Selecting a time period and the list of companies
Set up the schedule
In the Schedule section, you choose how frequently the report is sent (repeat every 2 weeks, for example). You can also select an exact time when the report is sent out (the timezone is set in Administration () => Settings => General).
The following screenshot shows an example of a schedule configuration.
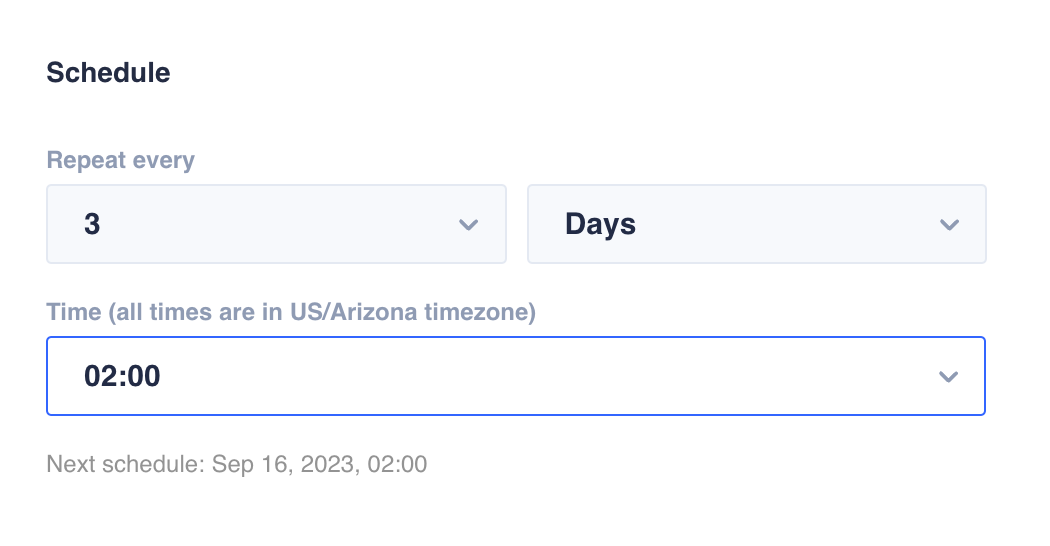
Schedule configuration example
Select recipients
Lastly, choose the recipients of the report in the Recipients section. Recipient options differ depending your setup in Generation options. The following is a breakdown of each case possible case.
"Single file" selected in Generation options
In this case, the following recipient options are available:
- Send to role. Admin and Super Admin roles and the roles created from their templates are included. Each role sees only the data that they have access to based on their permissions. See Role permissions for more information on roles and their templates.
- Send to custom emails. Custom email recipients get all the data, and there are no any permission-related restrictions.
- Send to SFTP folder. See SFTP setup to learn more.
"Multiple per Company" selected in Generation options
In this case, the following recipient options are available:
- Company owners. If checked, company owners (the contact person set in Company Details) receive a report with data on their company only.
- Send to role. Admin and Super Admin roles and the roles created from their templates are included. Different roles see only the data that they have access to based on their permissions. See Role permissions for more information on roles and their templates.
- Send to custom emails. Custom email recipients get all the data, and there are no any permission-related restrictions.
- Send to SFTP folder. See Set up SFTP to learn more.
"Multiple per Job Site" selected
In this case, the following recipient options are available:
- Send to role. Admin, Super Admin, and PM roles and the roles created from their templates are included. Each role sees only the data that they have access to based on their permissions. See Role permissions for more information on roles and their templates.
- Send to custom emails. Custom email recipients get all the data, and there are no any permission-related restrictions.
- Send to SFTP folder. See Set up SFTP to learn more.
When you're done setting up your schedule, select Save Schedule to save all the changes and create the new schedule.
Set up SFTP
This option lets you receive reports to a secure FTP (SFTP) folder on your device (learn more about SFTP in https://www.techtarget.com/searchcontentmanagement/definition/Secure-File-Transfer-Protocol-SSH-File-Transfer-Protocol). To be able to configure SFTP in the Report Scheduler, you first need to configure an SFTP server on your device. The configuration process may be different for different operating systems, so the following guides will help you do the setup if you're using Windows or Mac OS. If you're using a different operating system, try a search engine query such as "SFTP server setup on [OS name]", where [OS name] is replaced with the name of your operating system.
- Learn how to configure an SFTP server on a Windows device in https://www.serv-u.com/ftp-server-windows/server-setup.
- Learn how to configure an SFTP server on a Mac OS device in https://www.maciverse.com/how-to-turn-on-your-macs-sftp.html.
After you set up an SFTP server, you need to fill in your details in MobiClocks to establish the connection. You have the following fields under SFTP setup:
- Host. Your host name in the following format: www.example.com. Don't include "http://" or "https://".
- Port. The default port is set to "22" but you can use any other port depending on the SFTP setup on your device.
- Username
- Password
- Folder. The folder name needs to start with an opposite slash as in
\foldername.
After entering all the details, select Test Connection to make sure the connection is established. Don't forget to select Save Schedule to save all your changes.
View schedule history
When you have one or more schedules that run regularly, you can monitor Schedule history to make sure the reports are being sent successfully or learn about the issues if any.
The Report Scheduler page has a table with all the existing reports and each report has a Go to history button that takes you to the history page of the schedule.
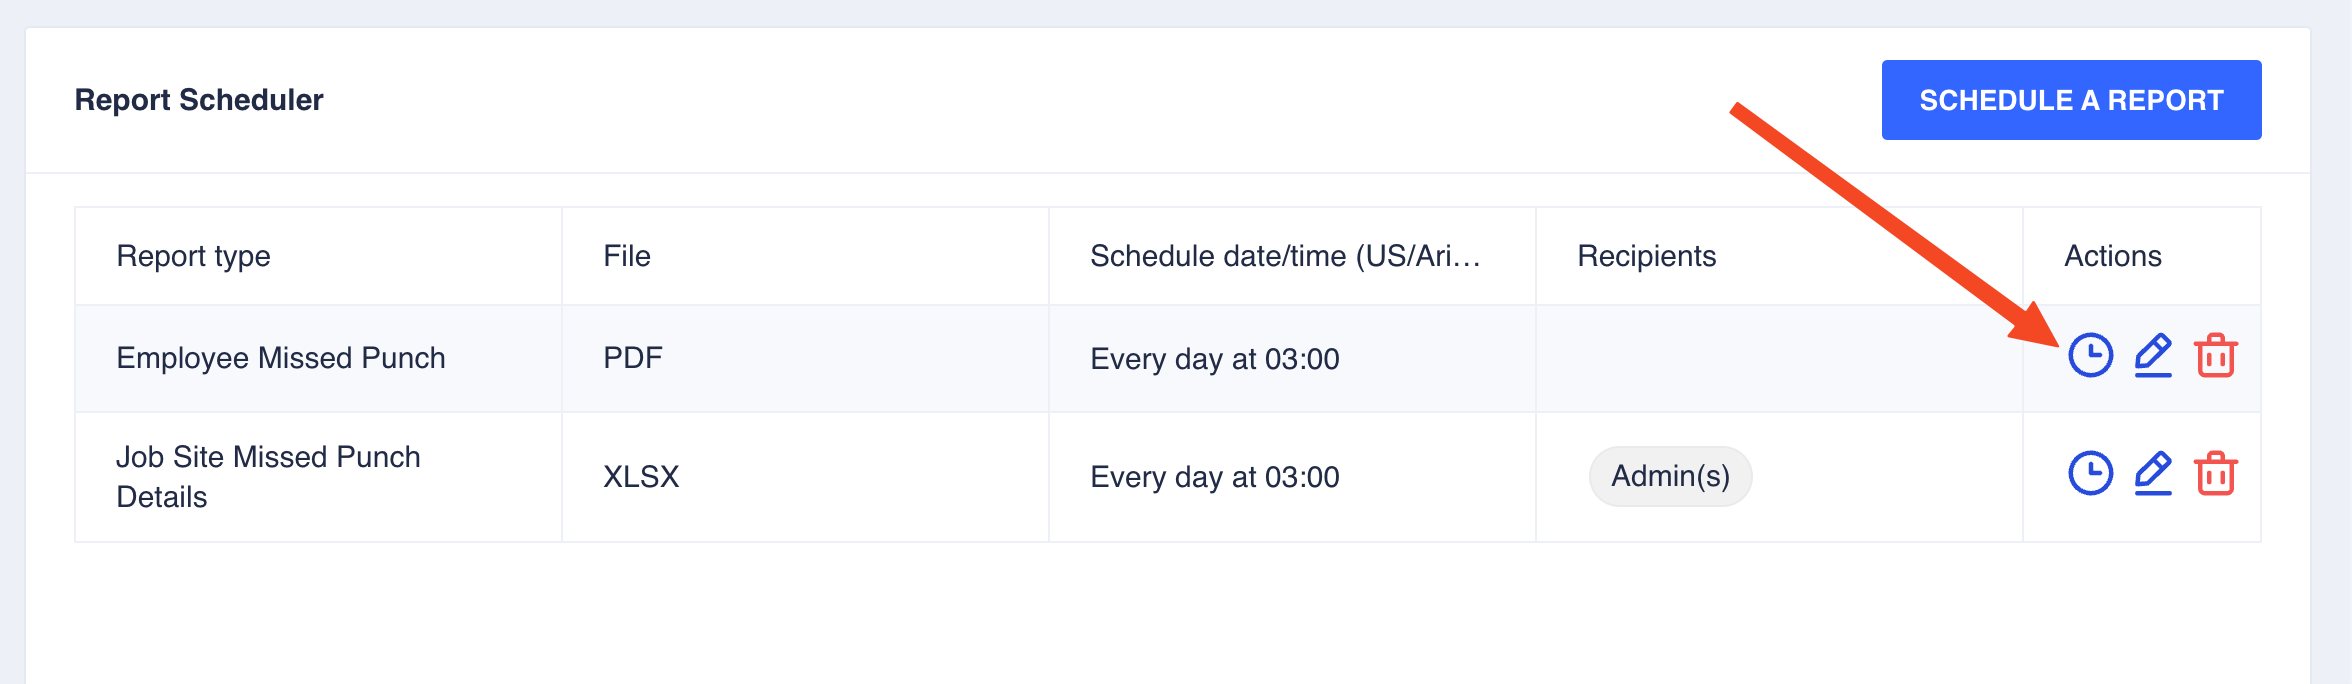
Navigating to schedule history
The history page consists of a table where each row provides details on a specific schedule run. The table has the following fields:
- Run date/time. When the schedule ran.
- File. One or more report files that were sent as part of the schedule are attached and can be downloaded
- SFTP. Indicates whether the SFTP option is enabled or not.
- Recipients. The list of the report recipients.
- Status. The field provides information on the delivery of the files. If one or more recipients failed to receive the report, the reasons for failure are indicated.
Edit a schedule
In the Report Schedule page, where you have the list of existing schedules, each schedule has an Edit and Delete options. Selecting the Edit button takes you to the schedule details page, which is similar to the new schedule creation screen.
Updated over 1 year ago