
Publish to Procore
How to set up data publishing to Procore.
Using the Procore integration, you can publish aggregated data, such as manpower, timecard, and production quantity, to Procore. In the following sections of this topic, you'll learn how to set up Procore publishing and get familiar with the process of publishing each of the entities mentioned earlier.
Setup
First, you need to choose what data you want to publish to Procore. To do that, navigate to Administration > Integrations > Procore > Setup > Select Procore Modules and activate the options that you are going to publish. Under each option, you have the list of corresponding MobiClocks modules that need to be mapped, which is discussed next under Data mapping. After finalizing the setup, a Procore icon starts appearing in the left-hand navbar of your MobiClocks Web App, as shown in the following screenshot.
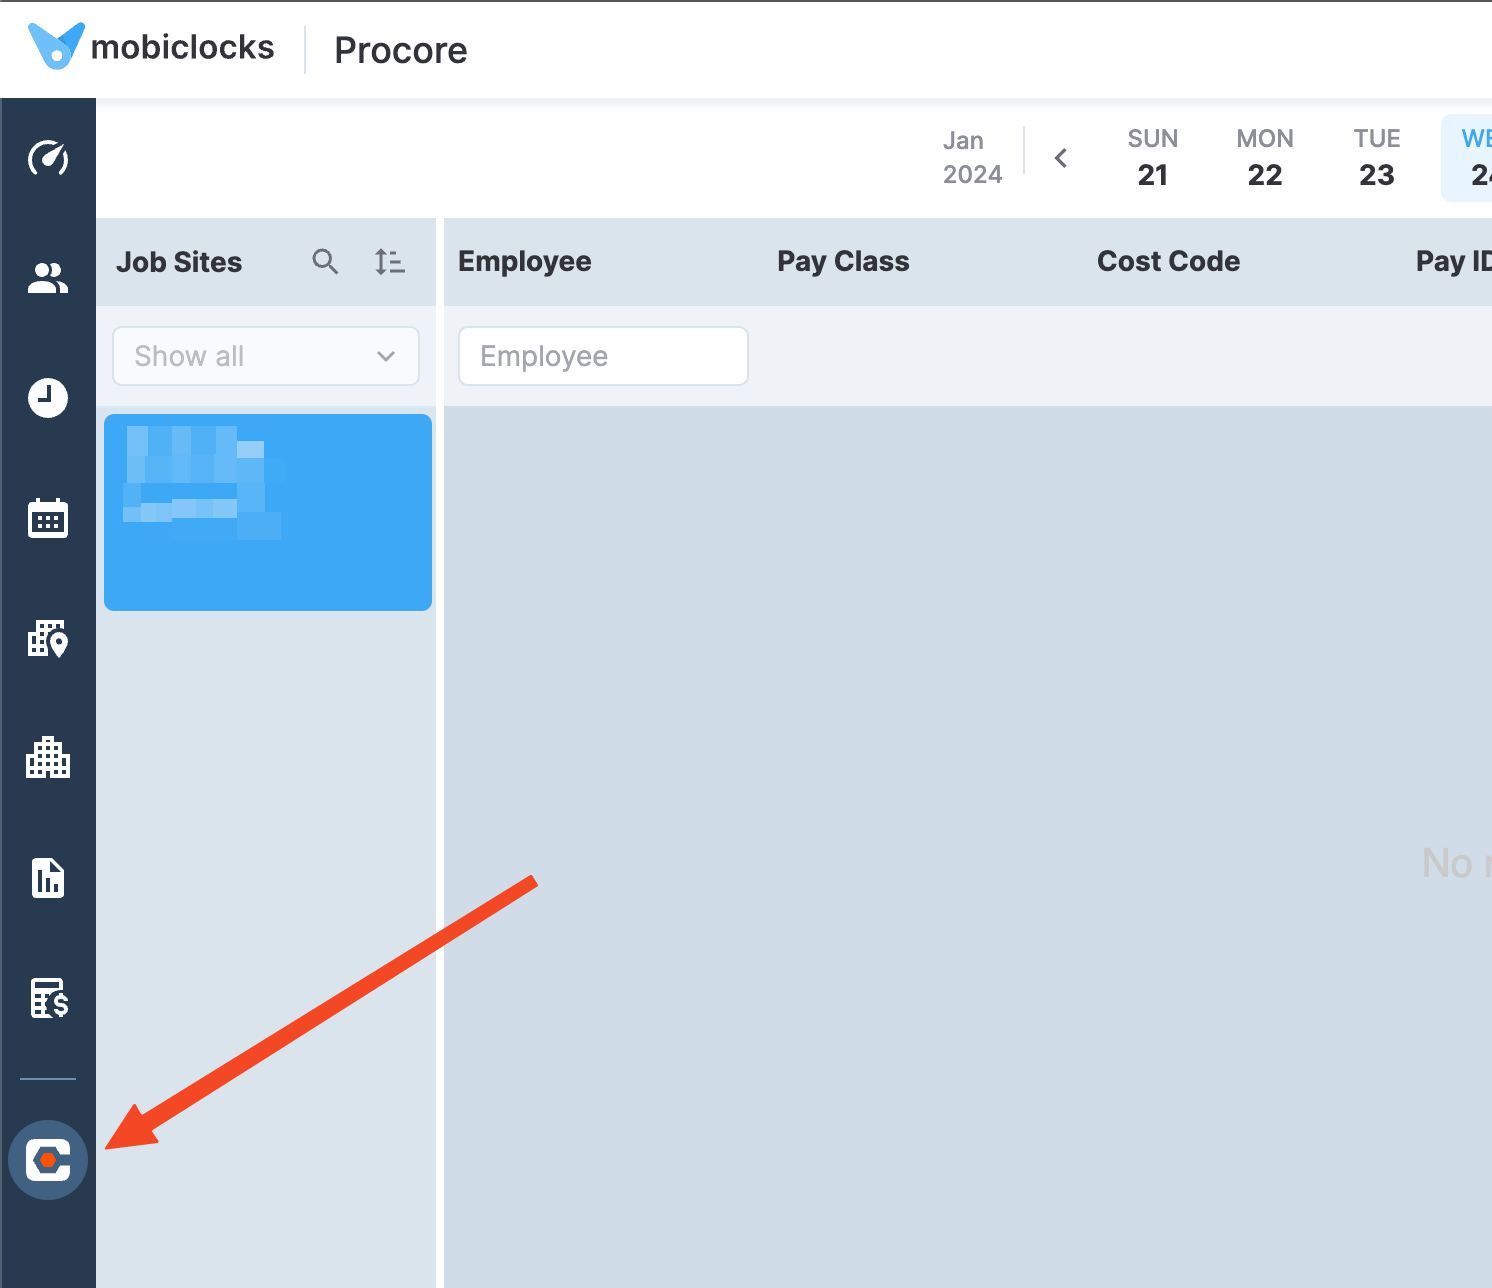
Accessing Procore publishing
Data mapping
Select the Procore icon in the left-hand navbar of your Web App and choose Data Mapping.
NOTEIf you have selected the Two-way integraiton option in Procore setup, you don't need to do data mapping for publishing, as it's done automatically. Therefore, in this case, you don't have the Data mapping option.
In the Data Mapping section, you map your MobiClocks modules to corresponding entities in Procore to indicate where the data is going to be published in Procore.
PERMISSIONSYou may do data mapping if you have the Procore Connect data mapping permission enabled for your role in Administration () > Role Permissions > Procore.
The Data mapping page is divided into tabs that represent Procore entities that can be mapped. Which entities are available depends on your selection in setup. The following is the list of supported Procore entities and the MobiClocks modules they correspond to:
- Vendors. Corresponds to companies.
- Projects. Corresponds to job sites.
- Employees. Corresponds to employees.
- Classifications. Corresponds to pay classes.
- Cost codes. Corresponds to cost codes.
- Payroll types. Corresponds to pay IDs.
NOTESince cost codes and classifications are dependent on projects, you need to have at least one project mapped to start seeing cost code data for the mapped projects.
Sync data
To get started with data mapping, you first need to sync the list of names for the selected entity. For example, to start mapping projects, navigate to the Projects tab and select the Sync button. As a result, the page will be populated with the list of projects you have in the connected Procore company. Next, you have two options for mapping:
- Auto-map. This option is only available if the module has a Number field. Auto-map matches entities that have the same number in MobiClocks and Procore and maps them.
- Manual mapping. In this case, you need to manually map each row. For example, if you're mapping projects with job sites, for each project, you need to select a corresponding job site from the Job Site column, as shown in the following screenshot.
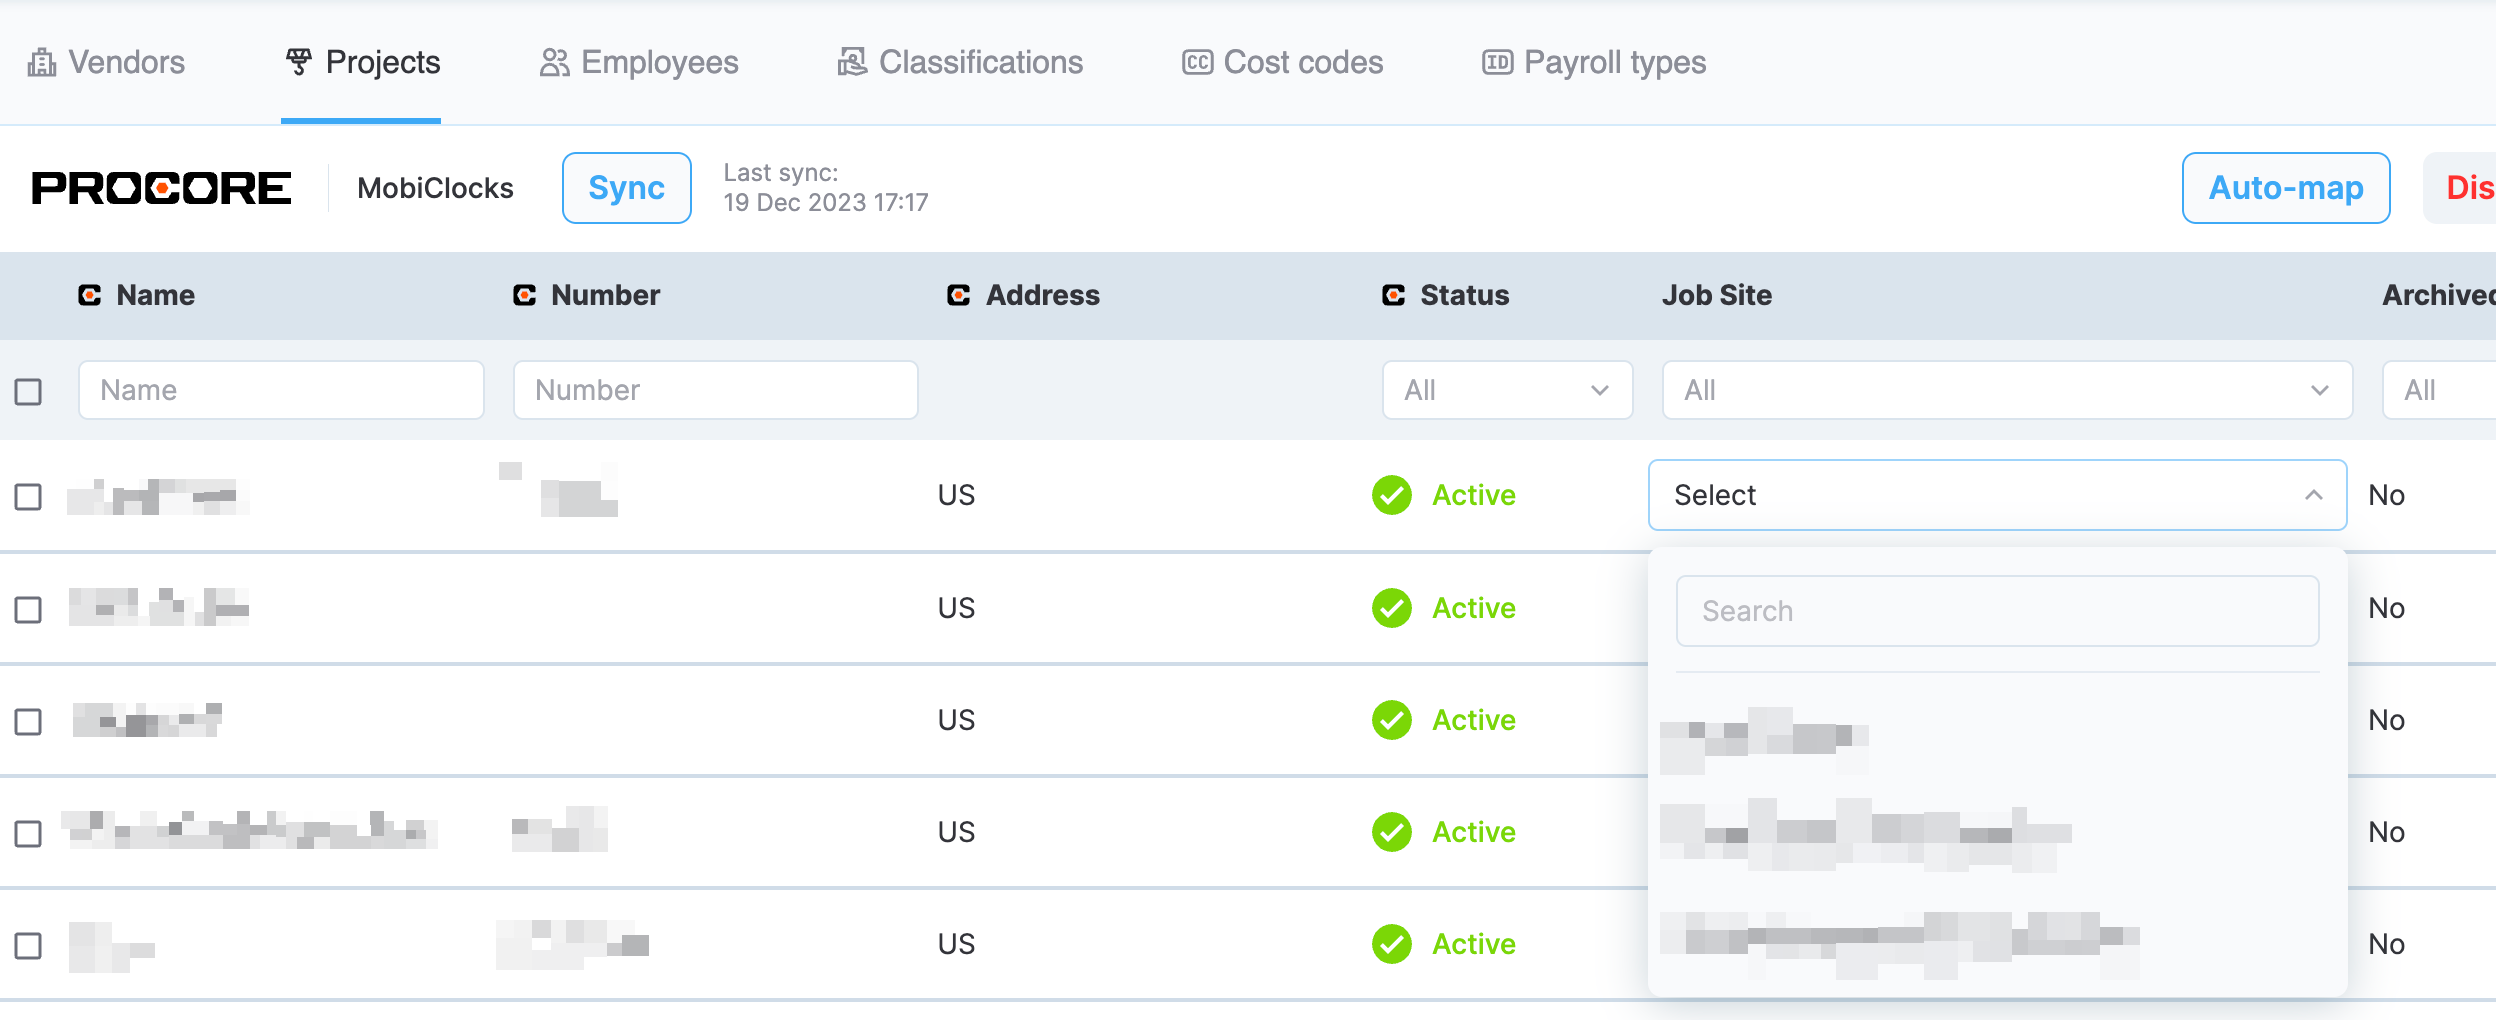
Mapping projects
After completing the mapping, you can proceed to data publishing.
Manpower publishing
In the left-hand navbar of your MobiClocks Web App, select the Procore icon and choose Manpower. Manpower represents the number of crew members within a company and the total time that each crew has worked on a particular day. Manpower data is organized into a dashboard where you have the list of job sites on the left and a calendar view on the right. This way, you see each job site's manpower data for each day of the week.
At the top of the dashboard, you have a date picker and a status filter to filter manpower by its published status. See Manpower details to learn more about each status. The following screenshot shows the manpower dashboard.
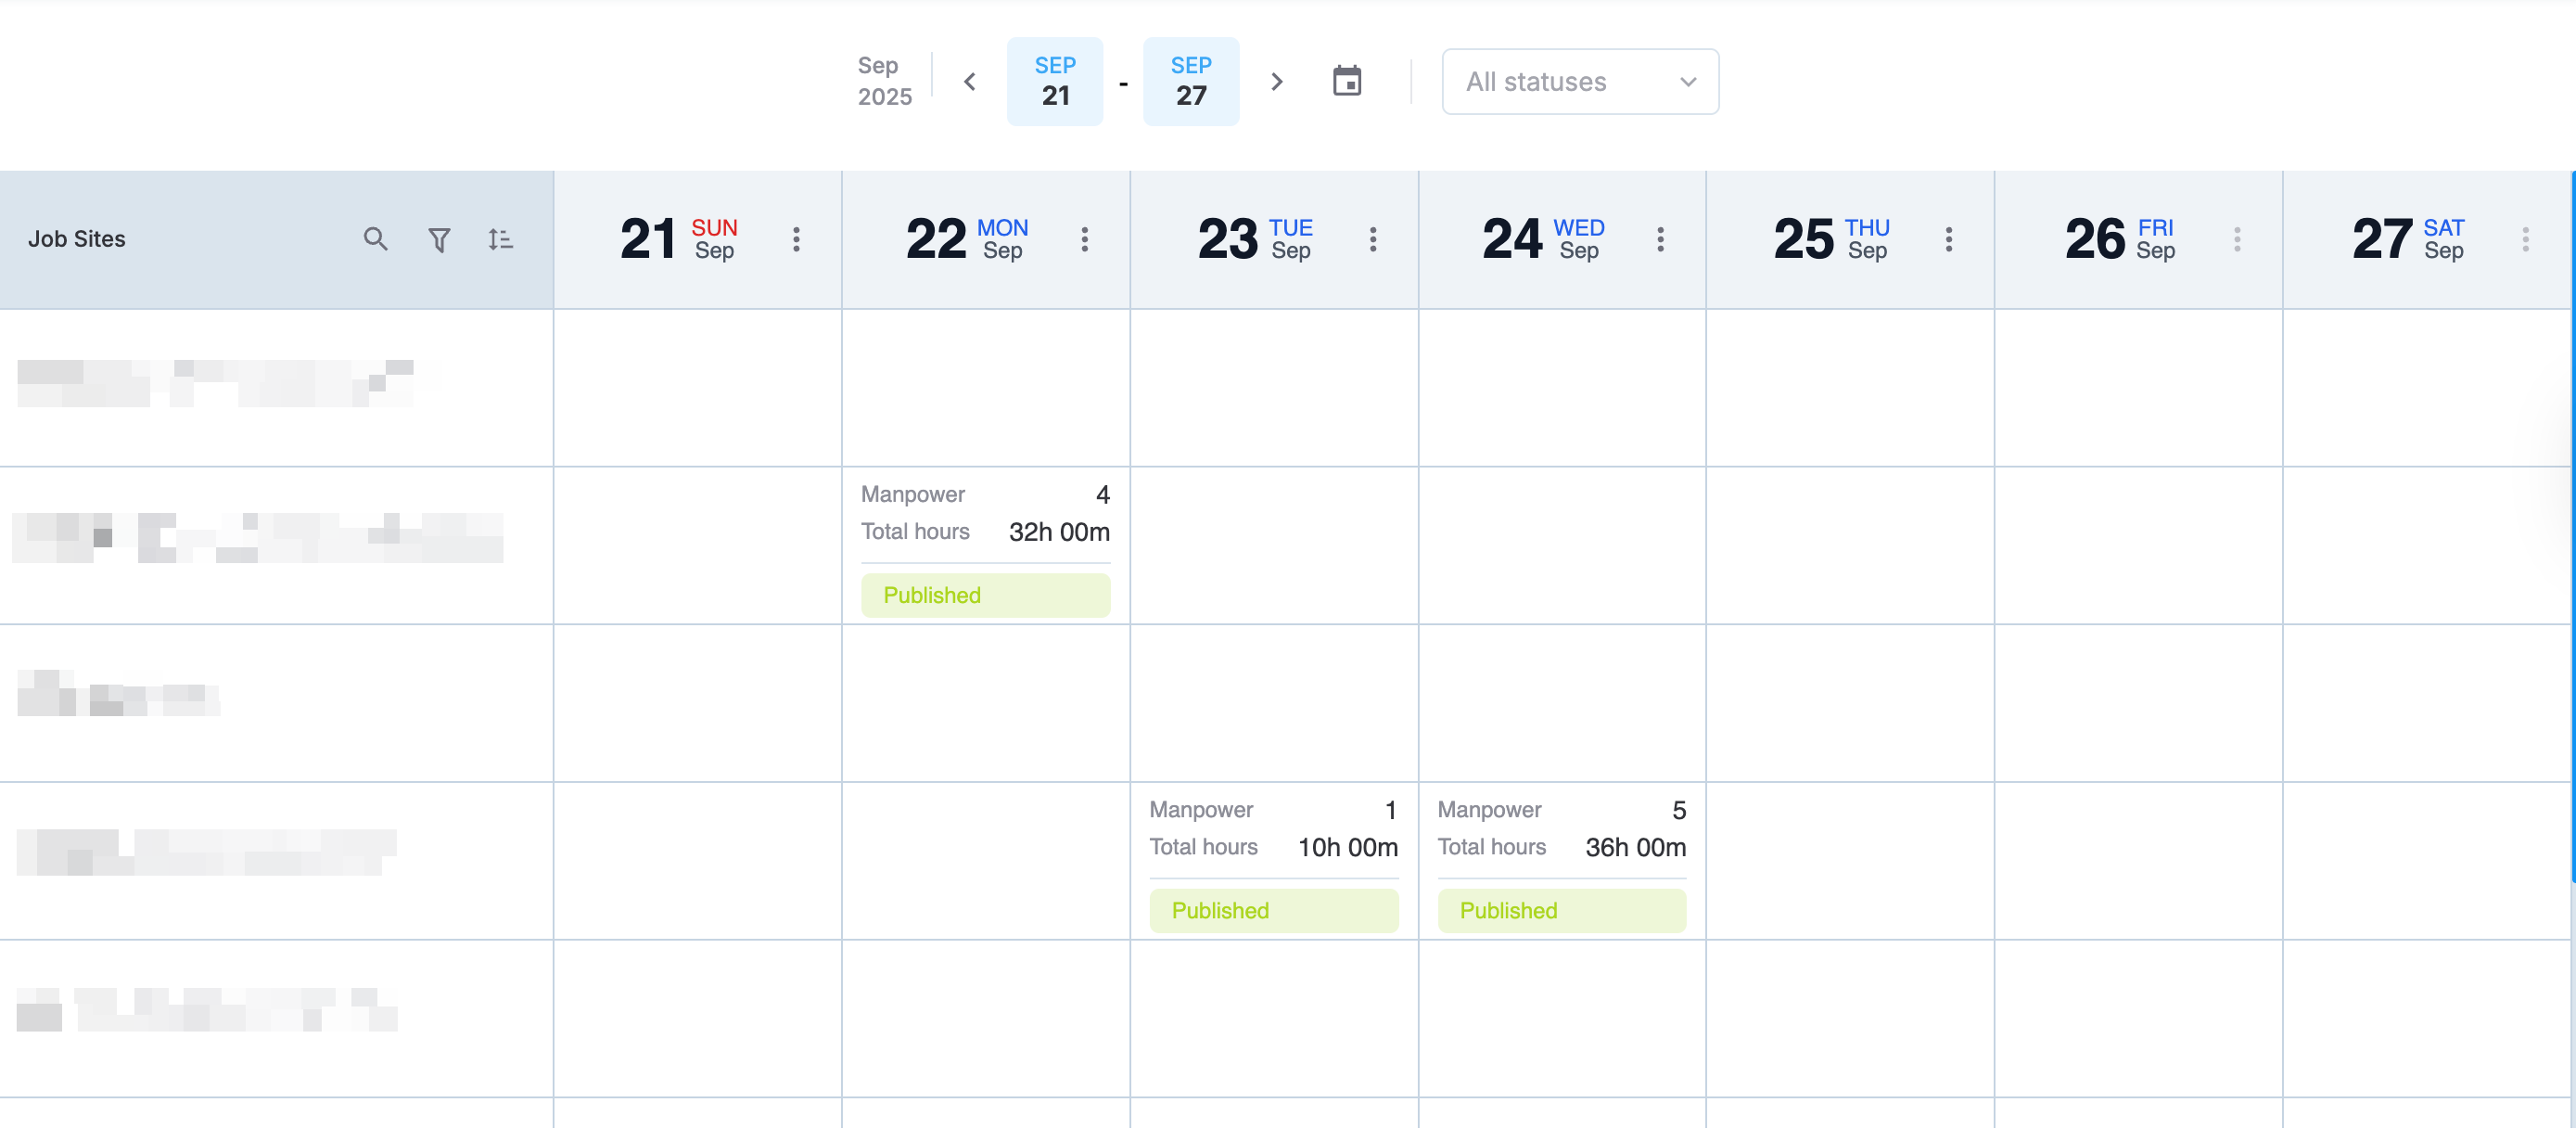
Manpower dashboard
As you can see, each calendar cell with data includes the manpower number, the total hours worked, and the published status. You can hover over the status to perform actions such as Publish, Republish, or Force publish depending on the status. See Manpower details to learn more about each action.
Manpower details
Select a calendar cell from the dashboard to access manpower details for that particular job site and date. The following screenshot shows the manpower table, where each row represents the numbers for a specific crew within a company.
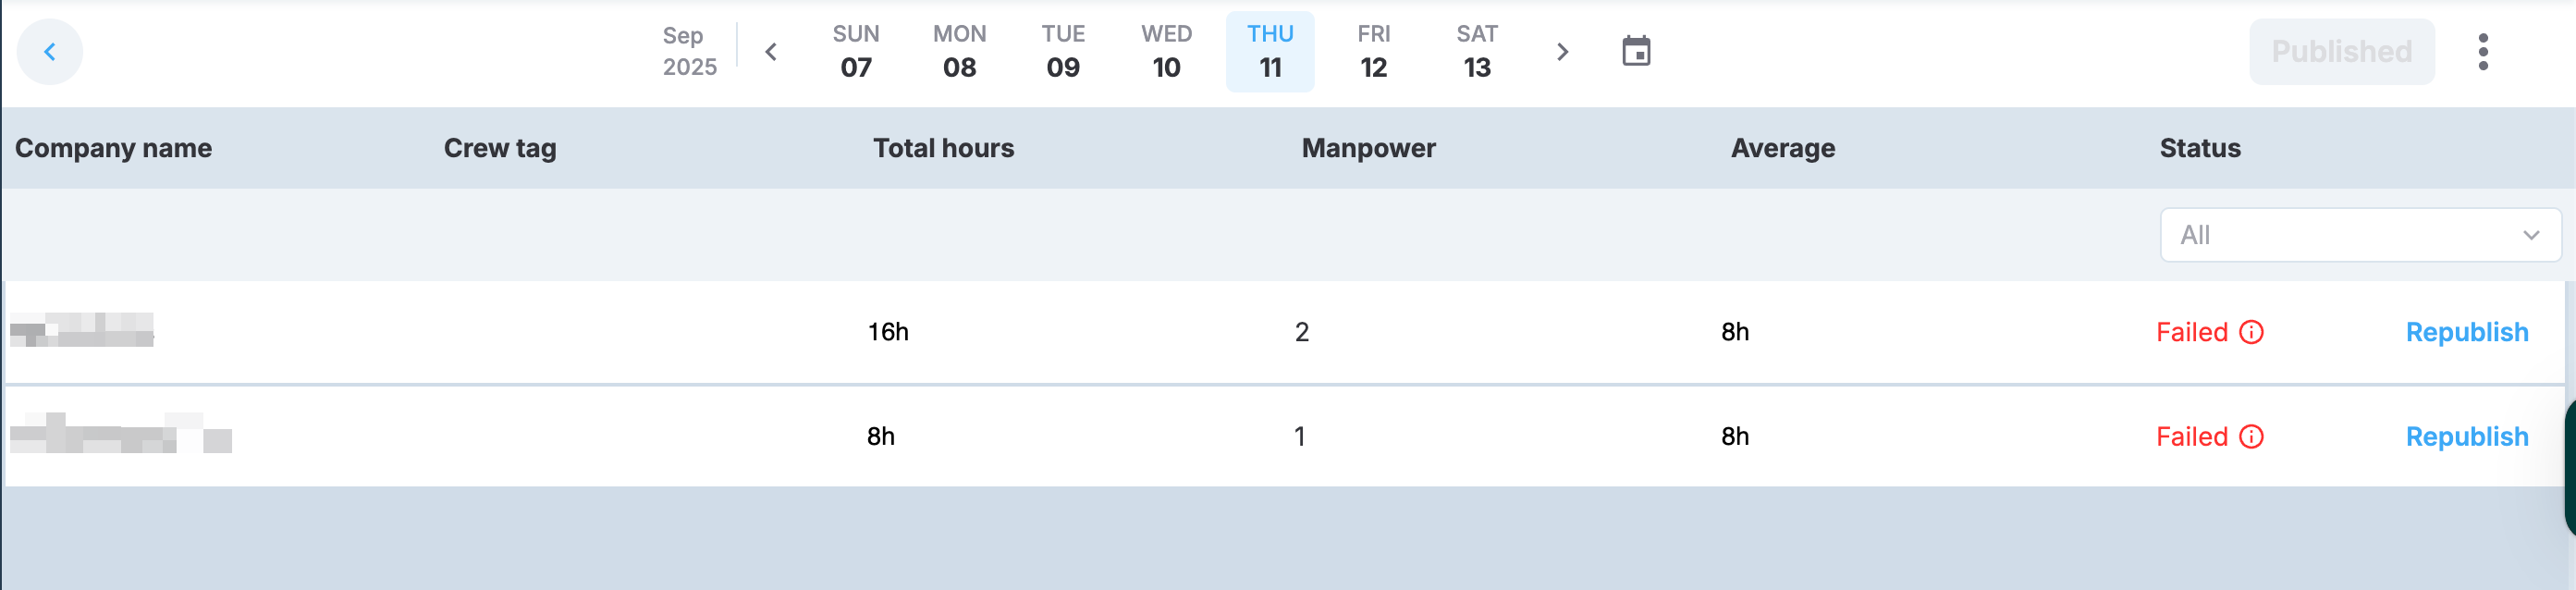
Manpower table
The table includes the following fields:
- Company name
- Crew tag. The name of the crew.
- Total hours. How many hours the crew members have worked in total.
- Manpower. How many people the crew includes.
- Average. The average number of hours worked by the crew.
- Status. This field shows the status of the entry. The following values are possible:
- To do. The entry still needs to be published.
- Publishing. The publishing is in process.
- Published. The entry has been published.
- Updated. The entry has been published to Procore but has then been modified in MobiClocks.
- Failed. The entry could not be published
- Deleted. One or more timelogs that are part of the entry have been deleted after the entry was published to Procore. Publishing the entry will delete the corresponding data in Procore as well.
Select Publish to publish the data to Procore. In the more ( ) menu next to the Publish button there is a Force publish all option. If an entry that has already been published to Procore, bears a change in Procore, publishing this entry again won't overwrite the entry in Procore. However, the Force publish all option overwrites all the data on Procore with data from MobiClocks, regardless of the changes made in Procore.
If there are Failed or Deleted entries in the manpower table, there is a Republish option for each entry.
Timecard publishing
In the left-hand navbar of your MobiClocks Web App, select the Procore Connect icon and choose Timecard. The Timecard section represents the work accomplished by each individual employee. Timecard data is organized into a dashboard where you have the list of job sites on the left and a calendar view on the right. This way, you see each job site's timecard data for each day of the week.
At the top of the dashboard, you have a date picker and a status filter to filter timecards by their published status. See Timecard details to learn more about each status. The following screenshot shows the timecard dashboard.
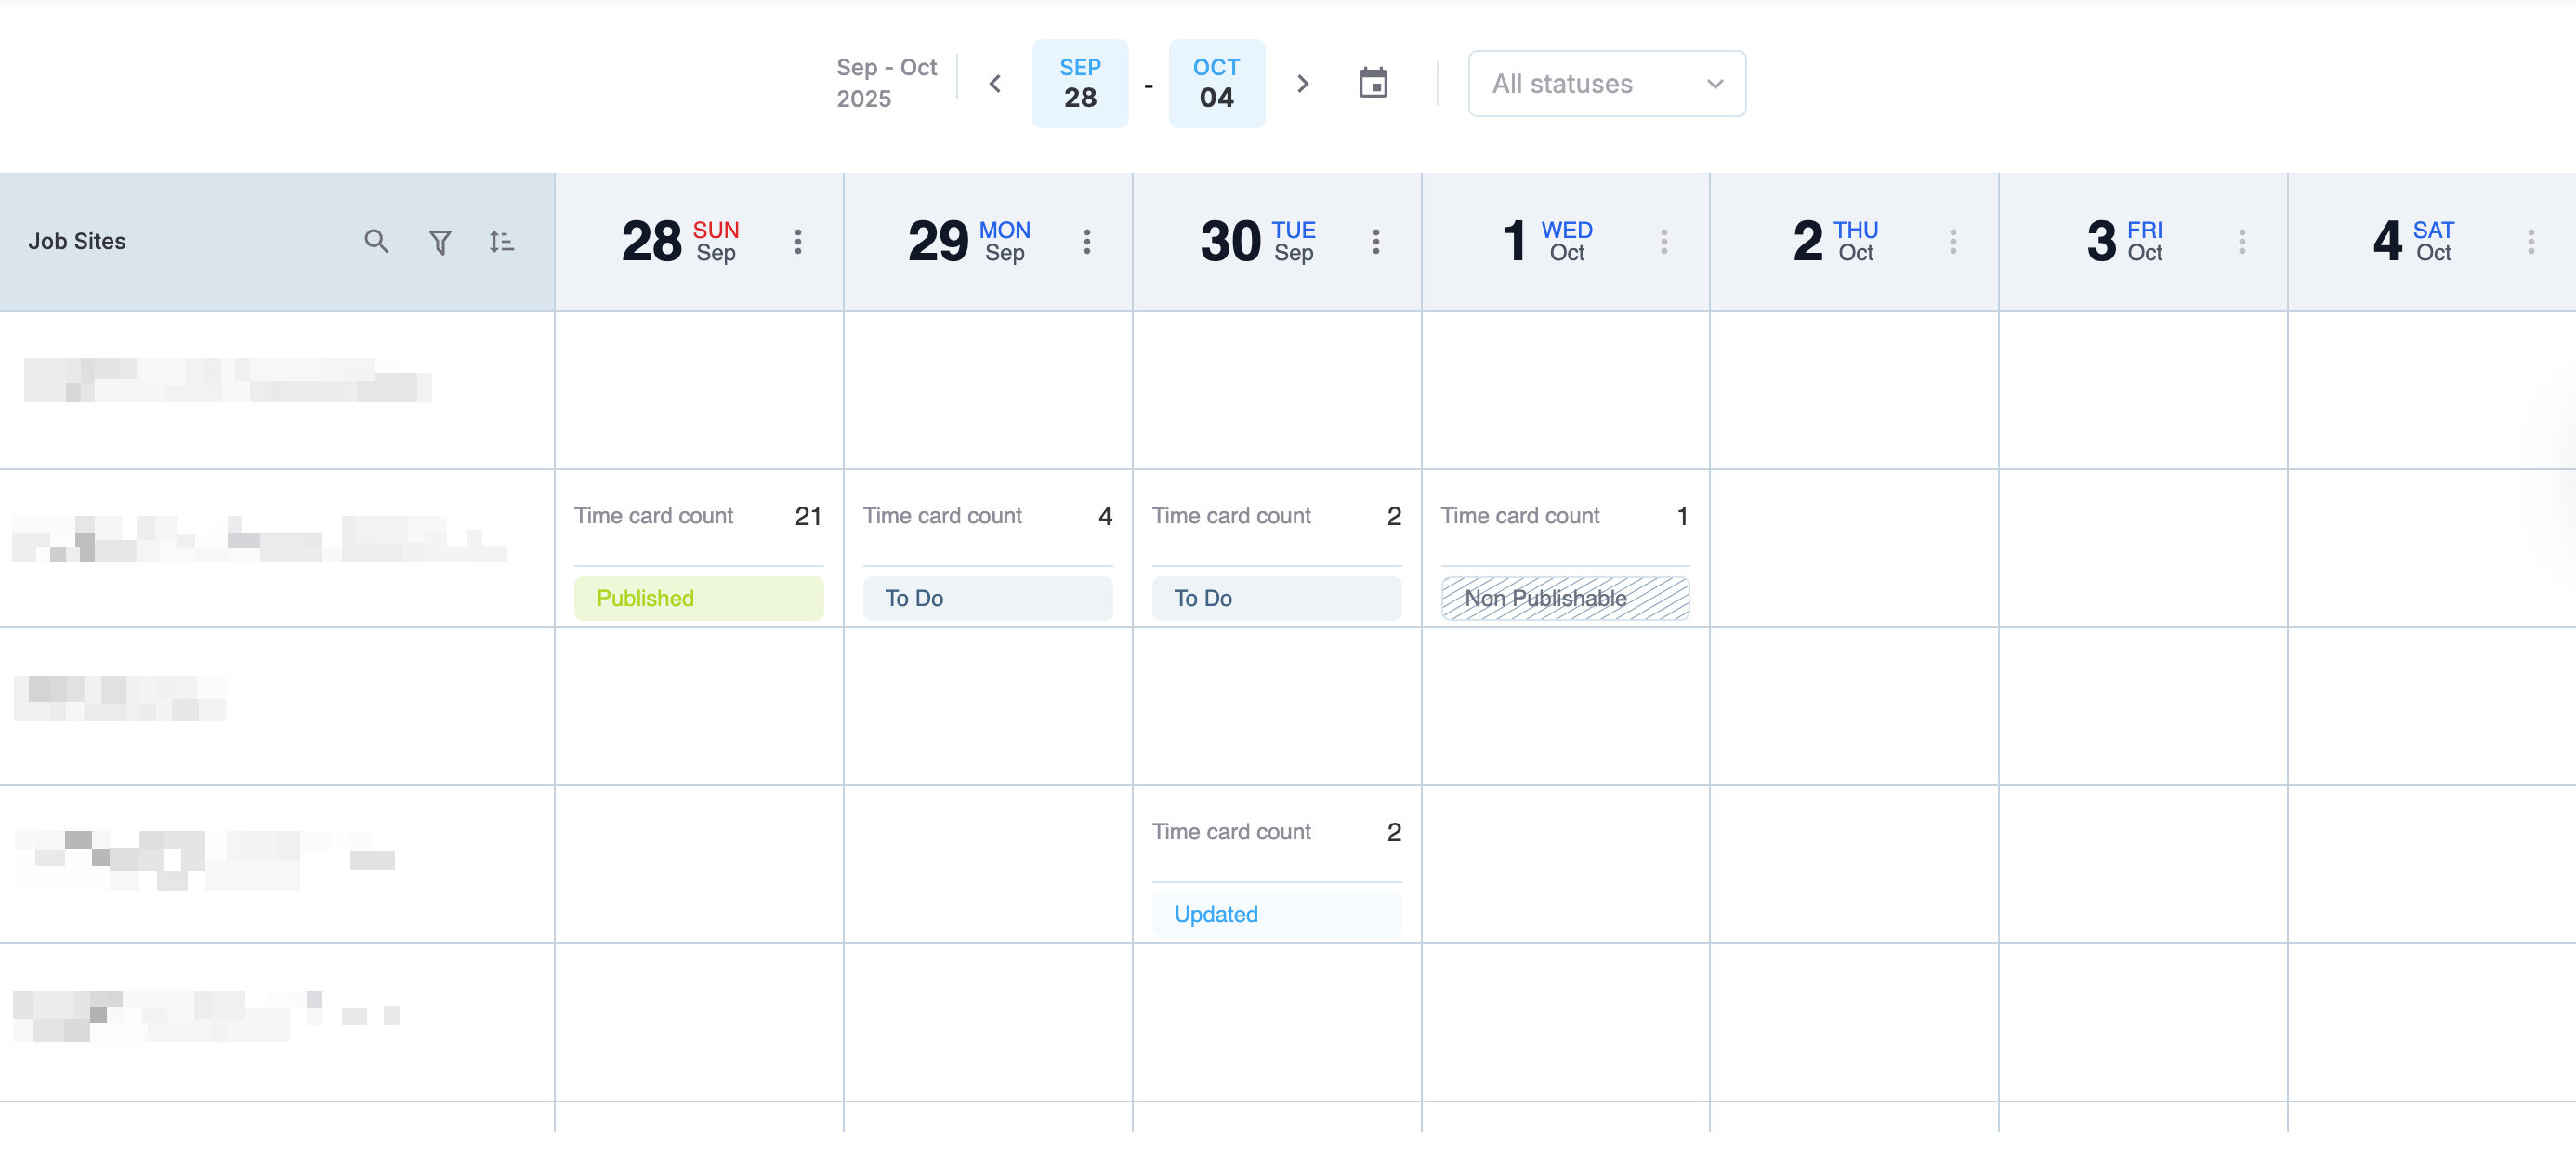
Timecard dashboard
As you can see, each calendar cell with data includes the number of timecards and the published status. You can hover over the status to perform actions such as Publish, Republish, or Force publish depending on the status. See Timecard details to learn more about each action.
Timecard details
Select a calendar cell from the dashboard to access timecard details for that particular job site and date. Each entry in the timecard table represents the work accomplished on a particular day by a single employee under a specific pay ID and cost code. The following screenshot shows an example, where, on the same day, the same employee has four separate entries for each pay ID and cost code combination.
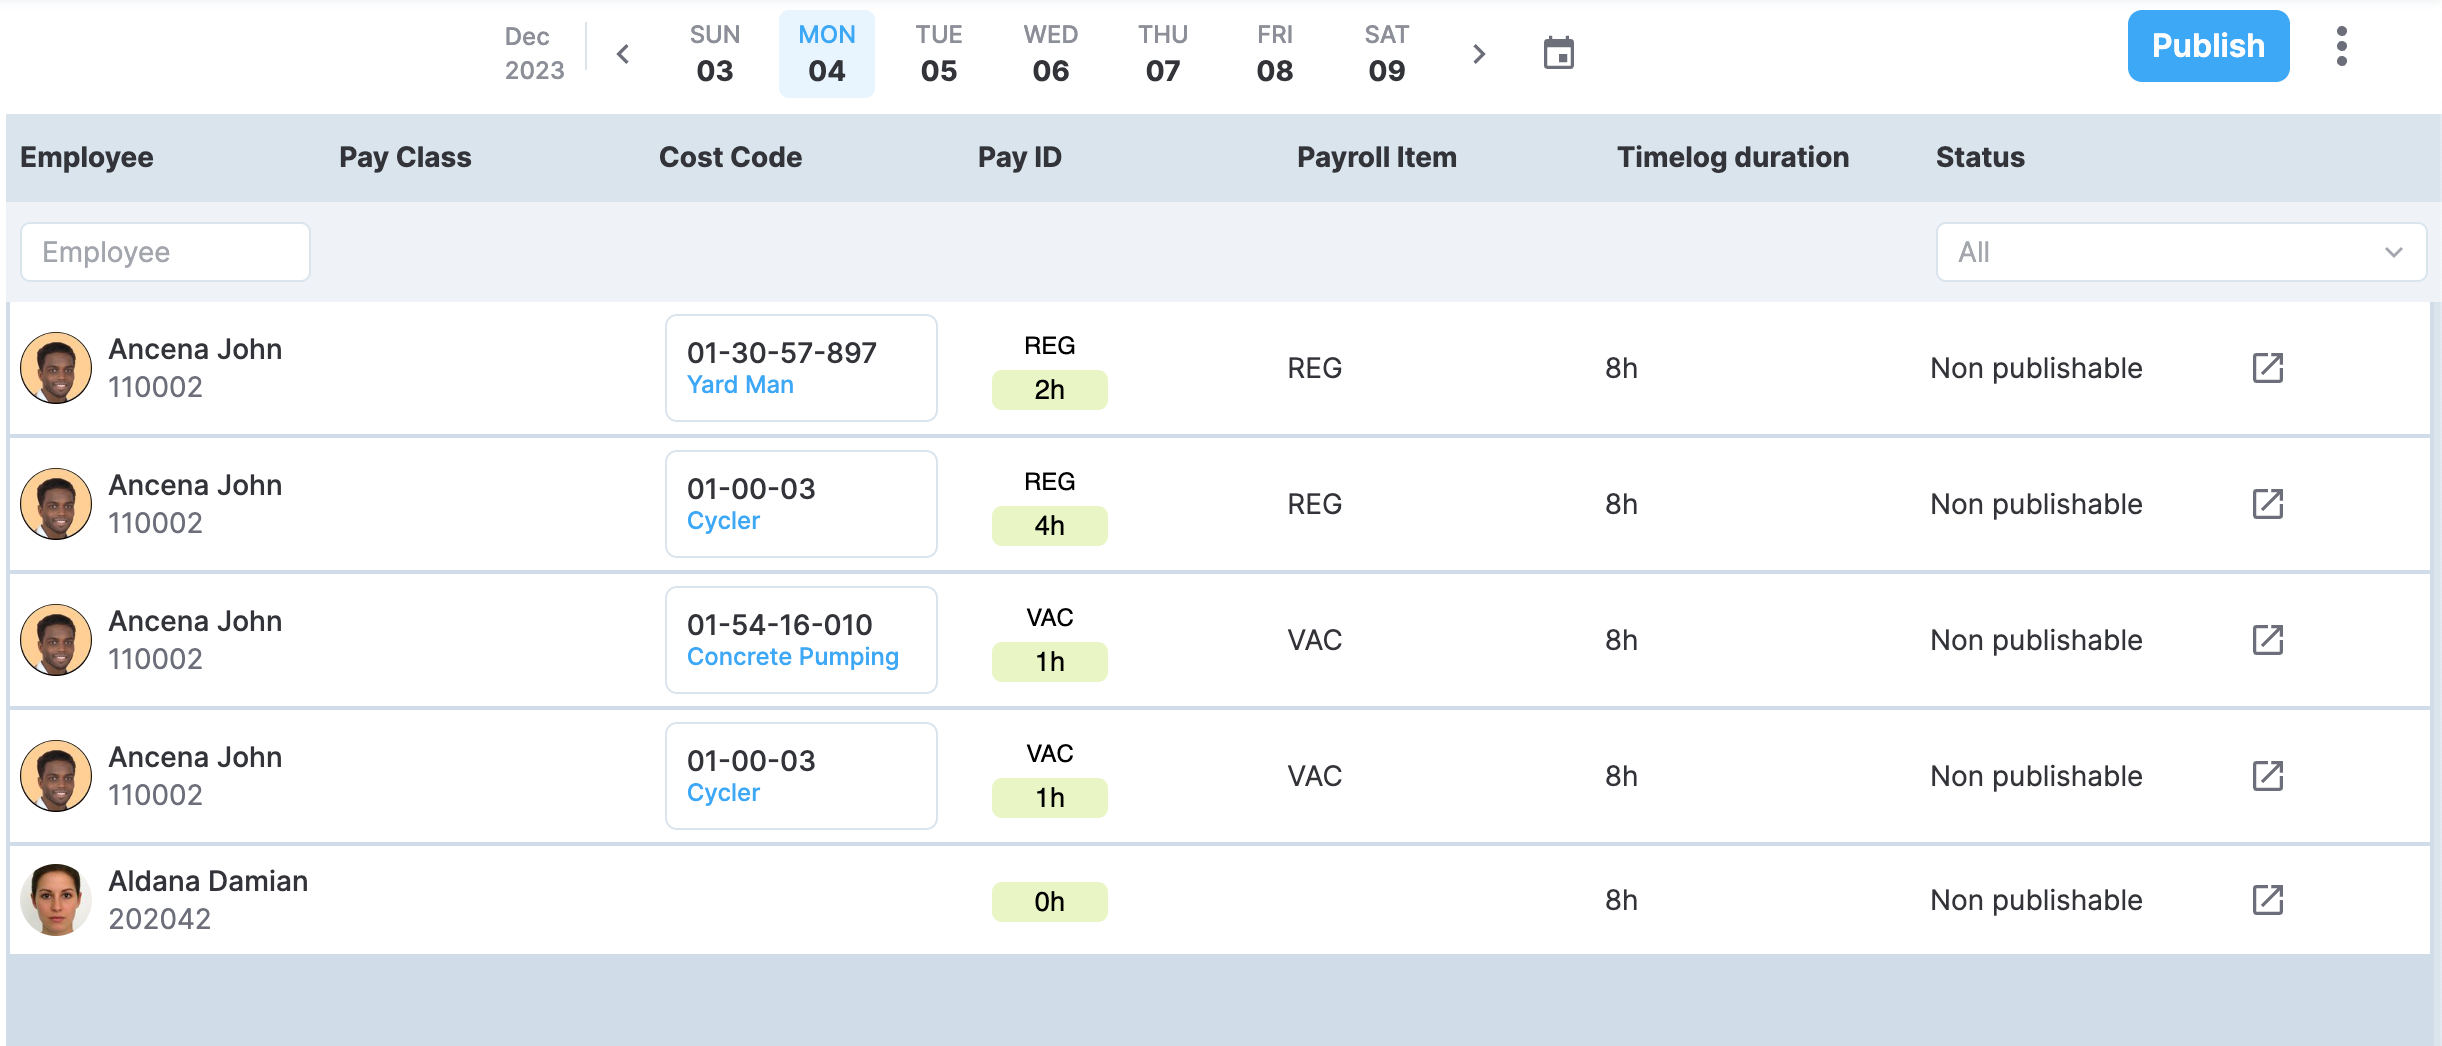
Example of a timecard table
The timecard table includes the following fields:
- Employee. The name of the employee.
- Pay class. Pay classif any.
- Cost code
- Pay ID
- Payroll item. The pay ID in Procore that corresponds to the MobiClocks pay ID. See Map pay IDs for exporting for mroe information.
- Timelog duration. The duration of the timelogs.
- Status. This field shows the status of the entry. The following values are possible:
- To do. The entry still needs to be published.
- Publishing. The publishing is in process.
- Published. The entry has been published.
- Updated. The entry has been published to Procore but has then been modified in MobiClocks.
- Failed. The entry could not be published
- Deleted. One or more timelogs that are part of the entry have been deleted after the entry was published to Procore. Publishing the entry, will delete the corresponding data in Procore as well.
The status of an entry can also be Non Publishable if there are missing cost codes or payroll item mapping. In this case, you'll see an Errors notification on that page, which you can expand to see more details on the error. The following screenshot shows the errors dialog with details on the issues that prevent the timecard from being published.
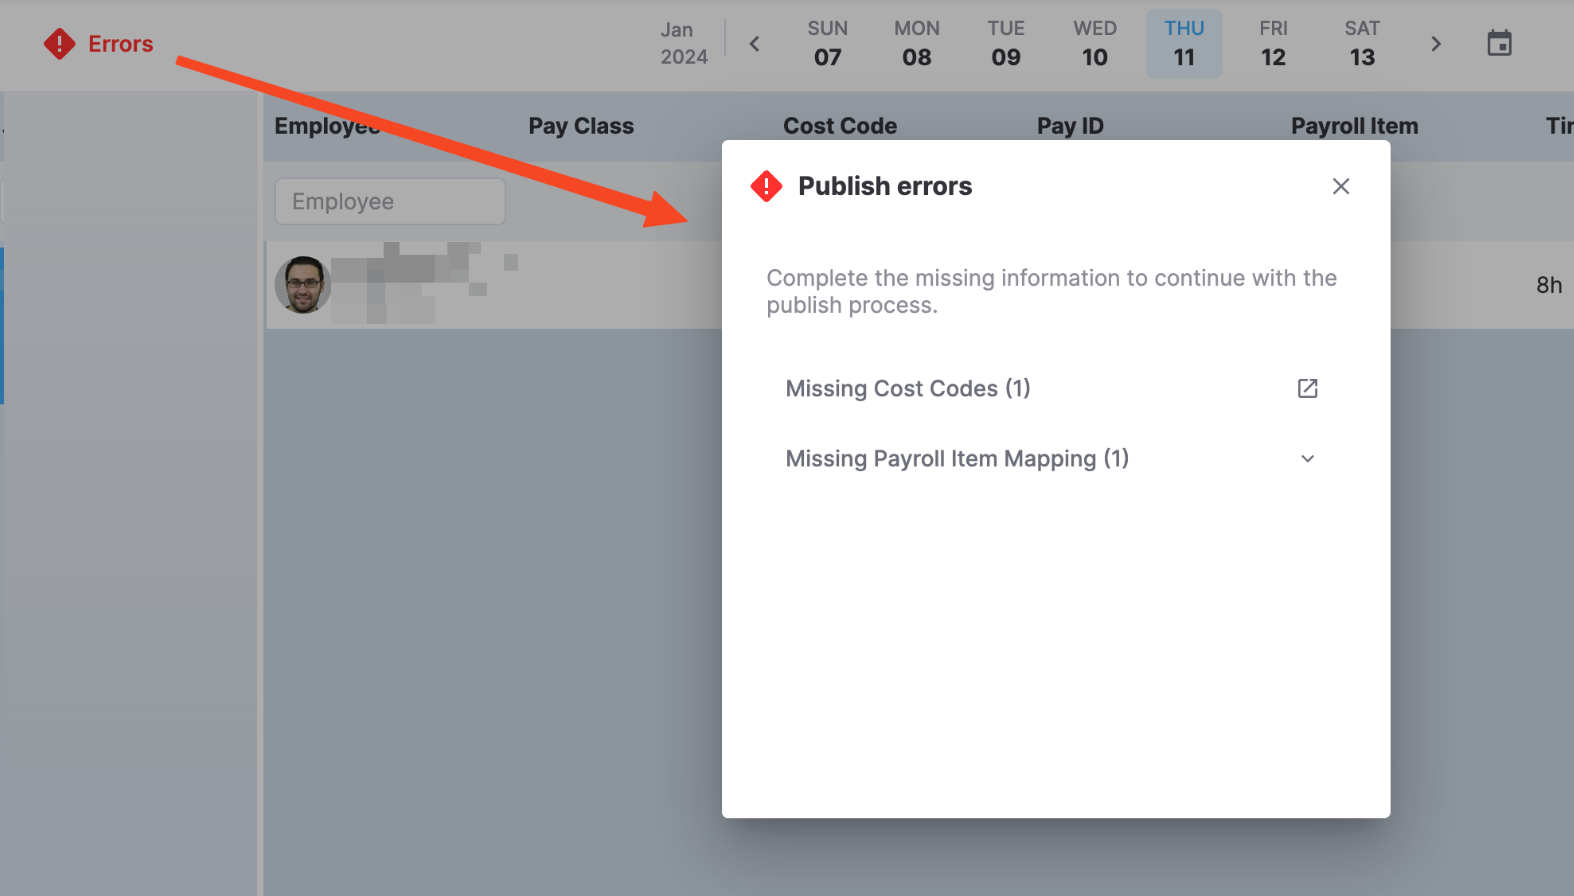
Publish errors
Select Publish to publish the data to Procore. In the more ( ) menu next to the Publish button there is a Force publish all option. If an entry that has already been published to Procore, bears a change in Procore, publishing this entry again won't overwrite the entry in Procore. However, the Force publish all option overwrites all the data on Procore with data from MobiClocks regardless of the changes made in Procore.
If there are Failed or Deleted entries in the manpower table, there is a Republish option for each entry.
Production quantity publishing
In the left-hand navbar of your MobiClocks Web App, select the Procore Connect icon and choose Production quantity. The Production quantity section represents the production quantity accomplished for each cost code on a specific date and job site. Production quantity data is organized into a dashboard where you have the list of job sites on the left and a calendar view on the right. This way, you see each job site's production quantity data for each day of the week.
At the top of the dashboard, you have a date picker and a status filter to filter production quantity by its published status. See Production quantity details to learn more about each status. The following screenshot shows the production quantity dashboard.
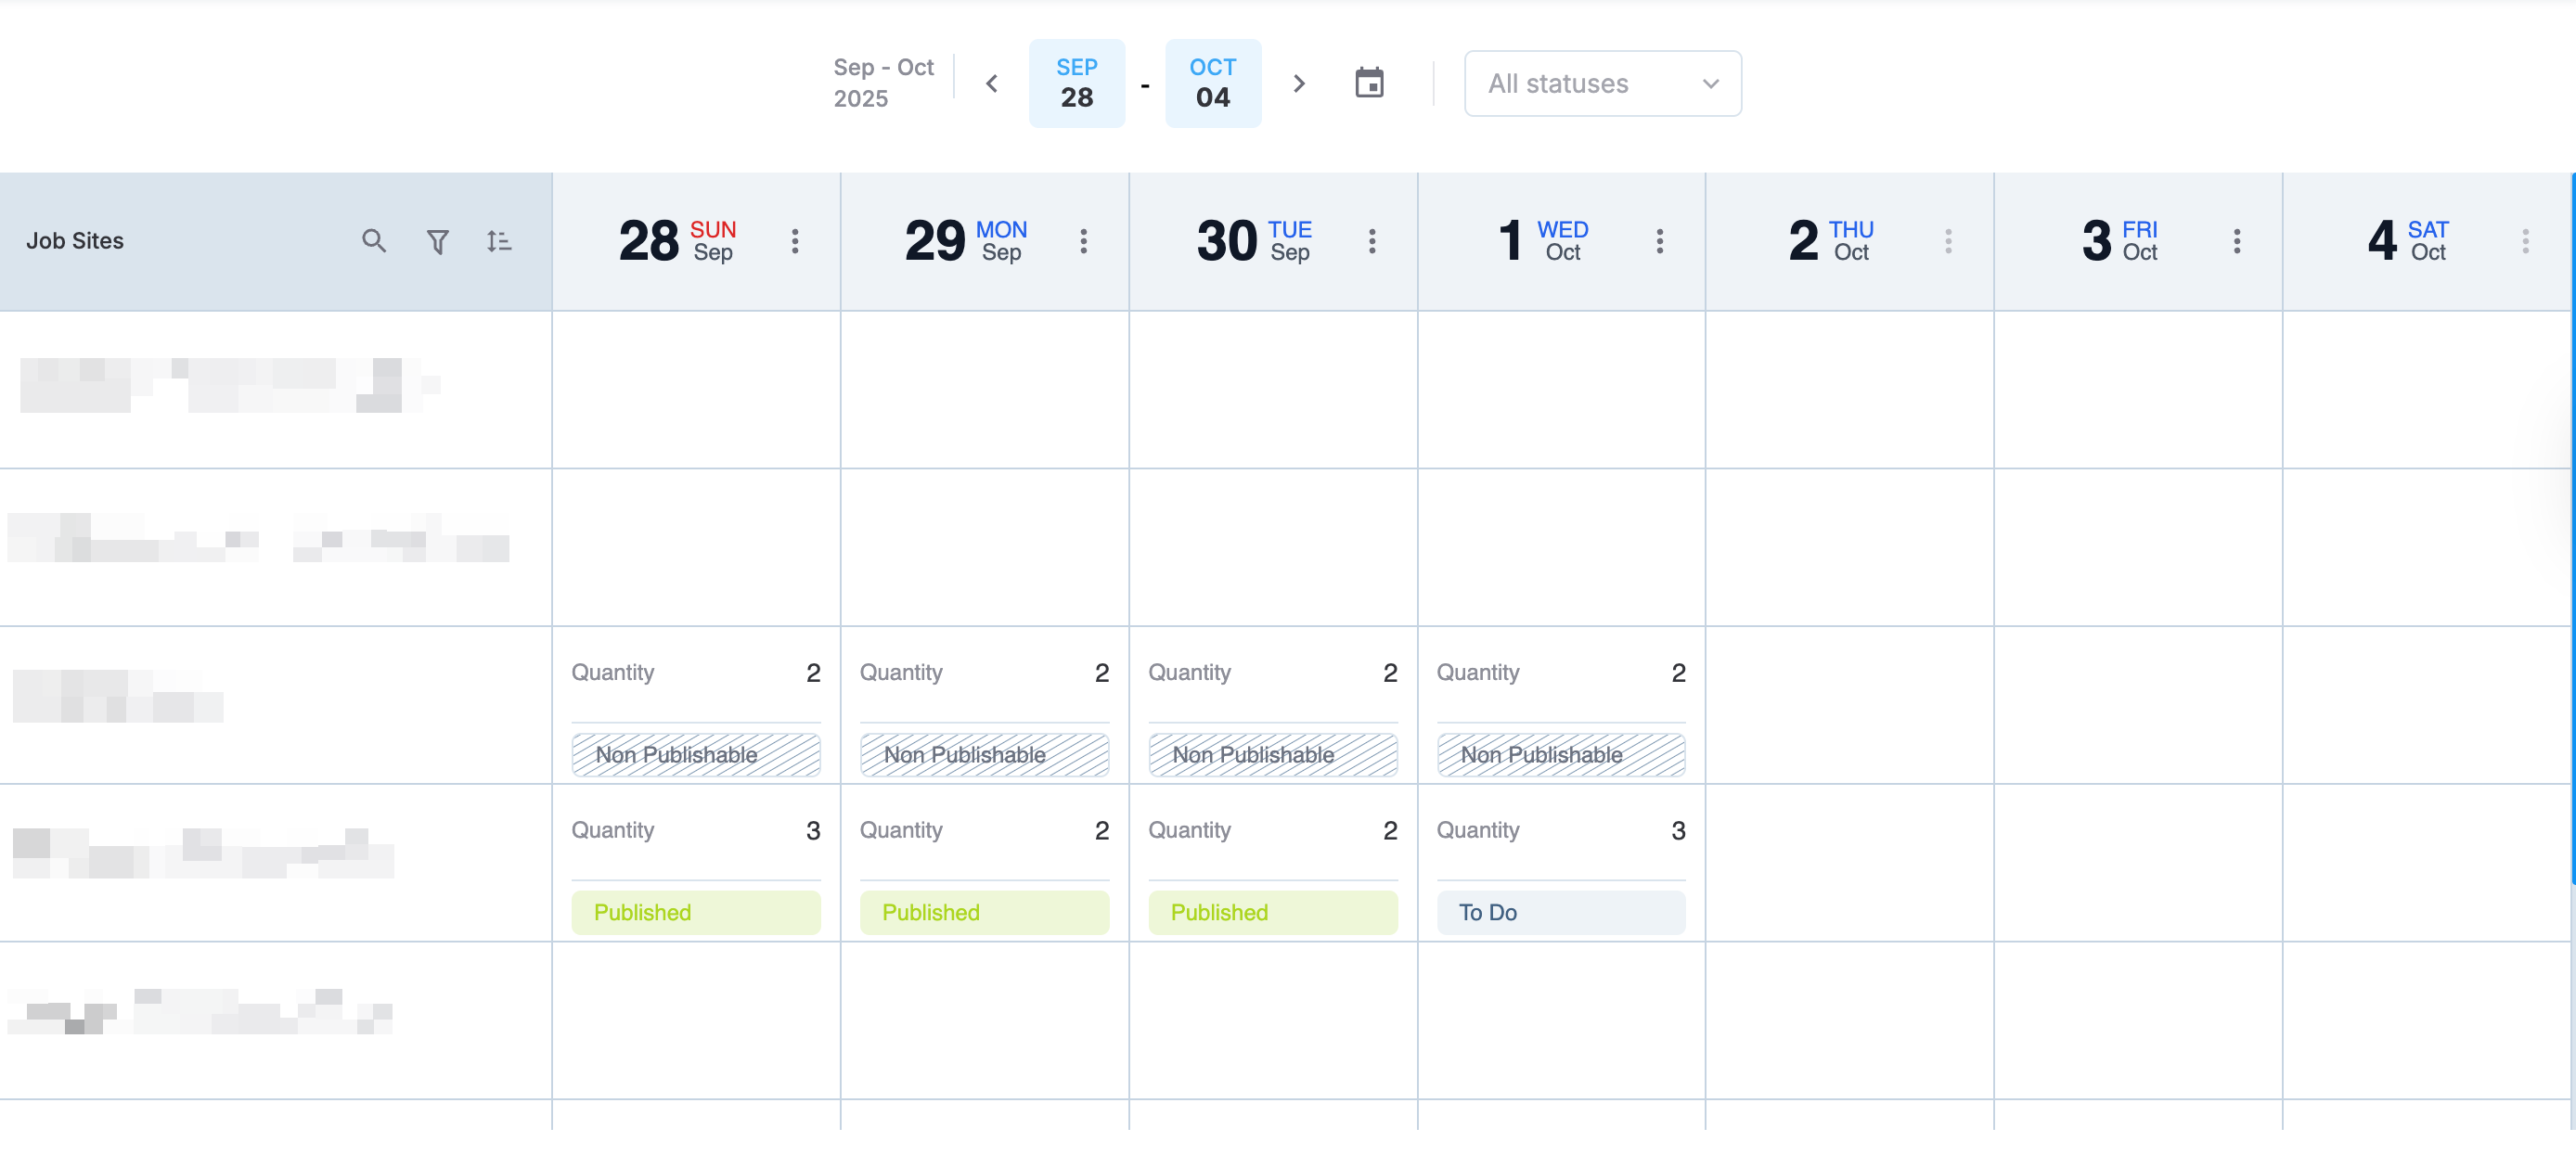
Production quantity dashboard
As you can see, each calendar cell with data includes the quantity of the tracked cost codes and the published status. You can hover over the status to perform actions such as Publish, Republish, or Force publish depending on the status. See Production quantity details to learn more about each action.
Production quantity details
Select a calendar cell from the dashboard to access production quantity details for that particular job site and date. The production quantity table includes all the cost codes and associated production quantity accomplished on the selected day at a particular job site. The following screenshot shows an example of a production quantity table.
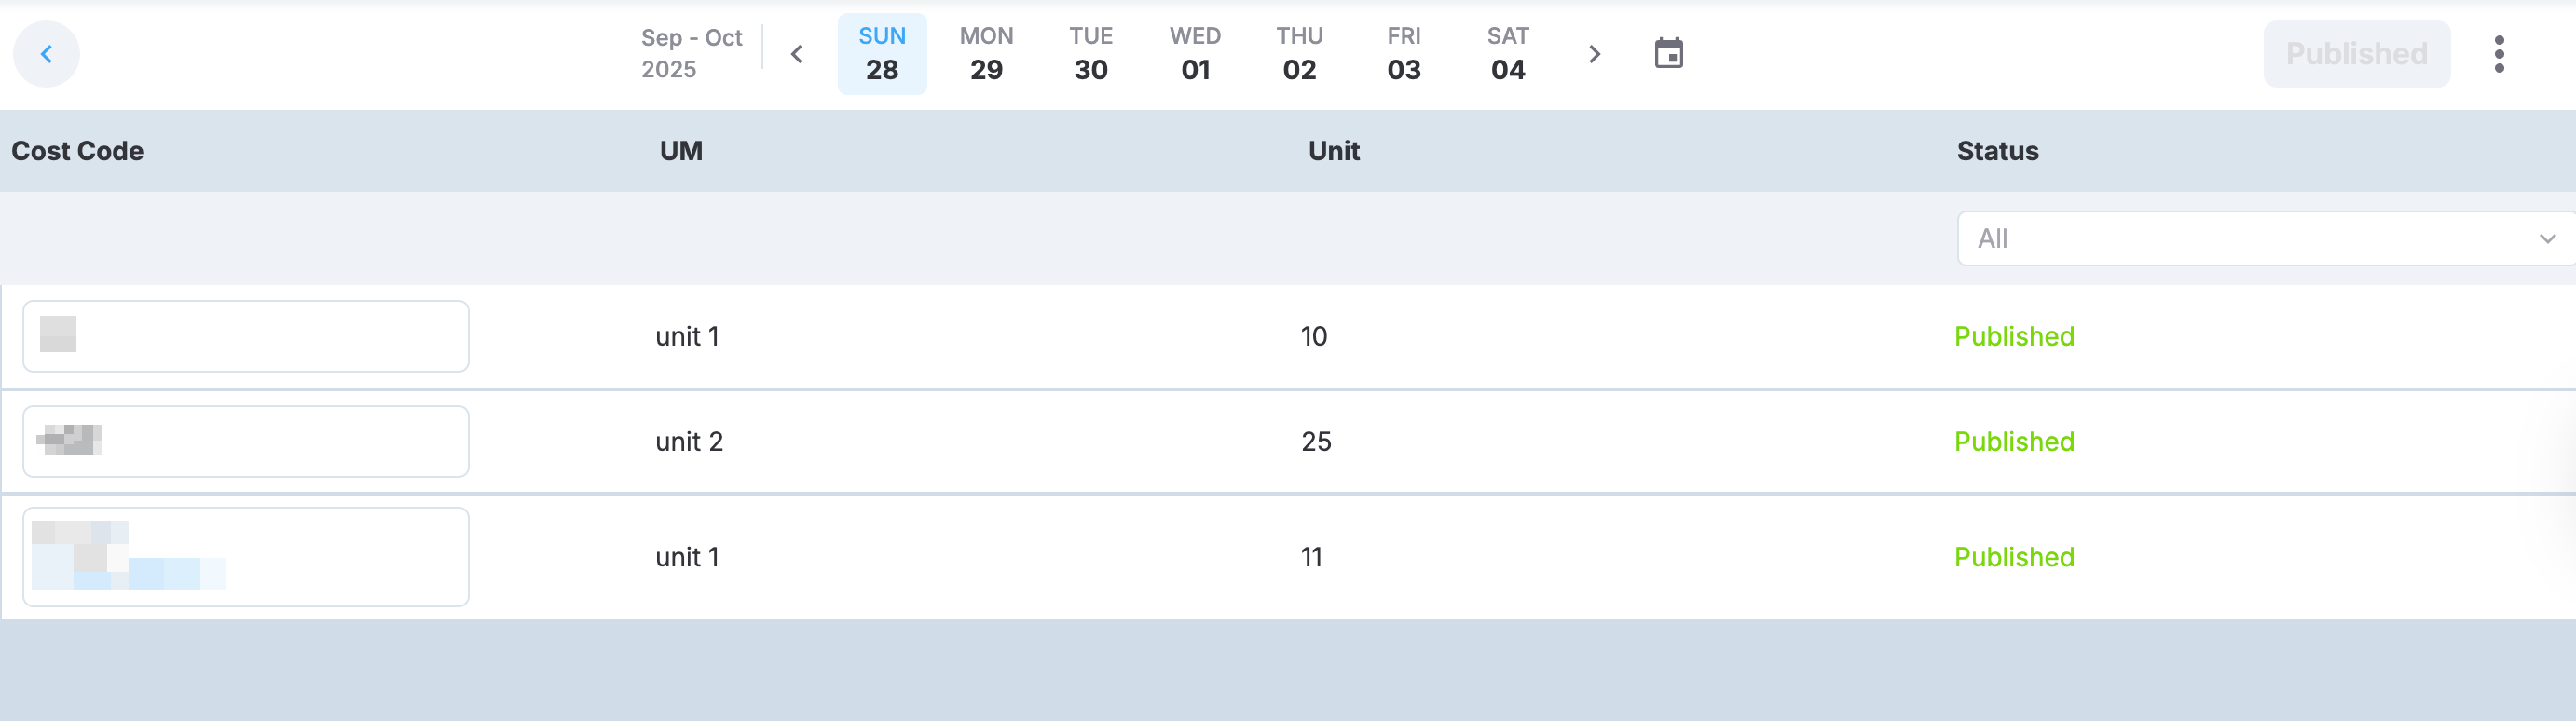
Production quantity table
The production quantity table includes the following fields:
- Cost Code
- UM. The measurement unit.
- Unit. The number of completed units.
- Status. This field shows the status of the entry. The following values are possible:
- To do. The entry still needs to be published.
- Publishing. The publishing is in process.
- Published. The entry has been published.
- Updated. The entry has been published to Procore but has then been modified in MobiClocks.
- Failed. The entry could not be published
- Deleted. One or more timelogs that are part of the entry have been deleted after the entry was published to Procore. Publishing the entry, will delete the corresponding data in Procore as well.
Select Publish to publish the data to Procore. In the more ( ) menu next to the Publish button there is a Force publish all option. If an entry that has already been published to Procore, bears a change in Procore, publishing this entry again won't overwrite the entry in Procore. However, the Force publish all option overwrites all the data on Procore with data from MobiClocks regardless of the changes made in Procore.
If there are Failed or Deleted entries in the production quantity table, there is a Republish option for each entry.
Updated 9 months ago