
Cost coding
How to cost code your team's timelogs.
In the Cost Codes section of the Personal App, you can cost code timelogs. See Cost coding for more information on cost coding and how it works in MobiClocks. This section is for cost coding crew timelogs, and you can access all the timelogs from the job sites you're assigned to and cost code them.
VISIBILITYThe Cost coding section is visible if your role is PM or derived from a PM,
The following steps describe the process of applying a cost code to a timelog.
Step 1: Select a timelog
To cost code a timelog, select a job site, select the name of the employee, and choose a timelog you want to cost code.
The timelog entry contains the name and number of the job site, the date it was generated on, the timelog duration, and the pay ID. Also, a cost code is indicated if the timelog has already been cost-coded, or it says Not cost- coded. Tap on Not cost-coded to add a cost code (if a cost code already exists, you can tap on it to edit). The following screenshot shows a timelog that has not been cost-coded yet.
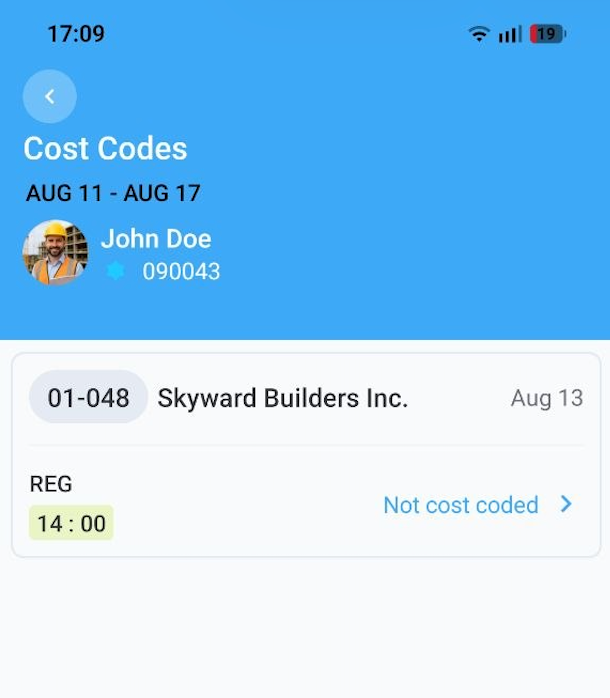
Employee timelog entry
Step 2: Apply cost codes
After entering the cost coding screen, you see the list of the available cost codes and a plus (+) icon next to each one. Cost codes are set up in the MobiClocks Web App for each job site. Learn more in Define cost codes.
NOTEYou can apply cost codes only to timelogs with an entry.
Tap on the plus (+) icon to apply the cost code to the timelog. You can apply multiple cost codes to a single timelog, distributing the timelog duration between the cost codes. If the selected job site is certified, you can also apply pay classes together with cost codes. See Pay classes for more information on pay classes and when they are used.
The following screenshot shows an example of applying two cost codes along with pay classes to a timelog.
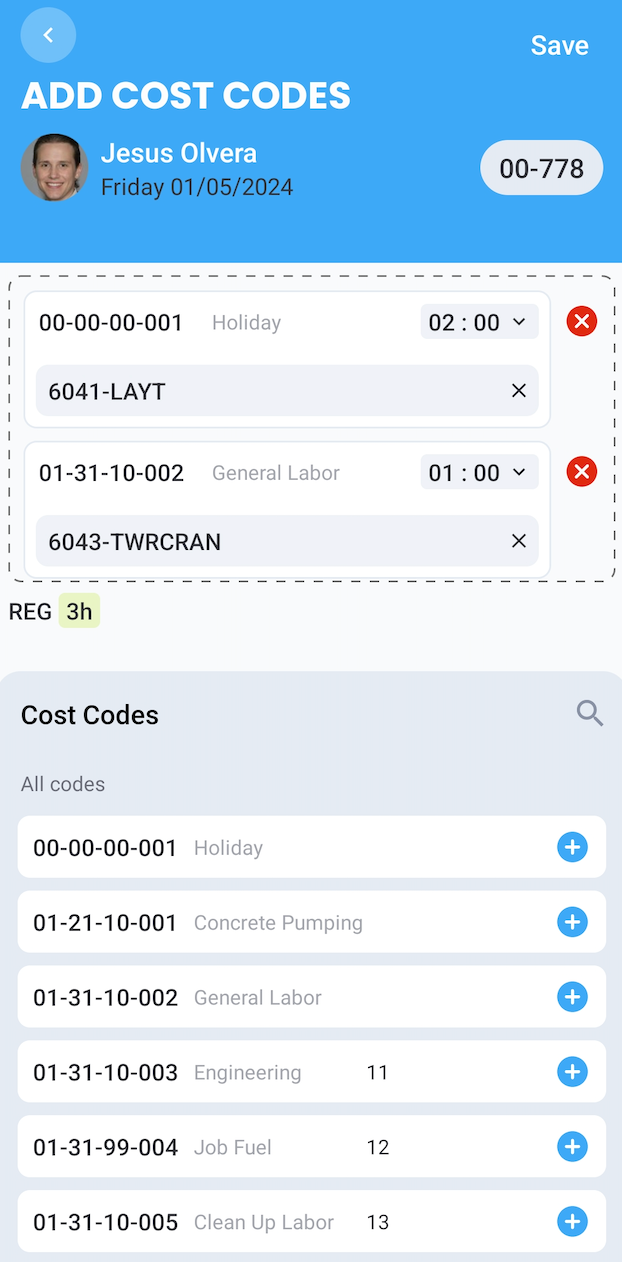
As you can see, the duration of the timelog is 3h, which has been distributed across the two cost codes, resulting in a 2h duration for the first cost code and 1h for the second one.
Step 3: Save changes
Lastly, when you're done applying cost codes, select the Save button to save your changes.
Updated about 2 months ago