
Manually create an employee
Creating an individual employee profile manually.
This guide provides step-by-step instructions for manually creating an employee profile.
Step 1: Create a new employee profile
In your MobiClocks Admin App, navigate to the Employees tab of the left-hand navbar and select the Add new employee button.
PERMISSIONSYour role needs to have a Create new employee permission under Web App > Administration > Role Permissions > Employees to be able to create an employee.
NOTEIf Employee Manual Creation is not activated for your MobiClocks environment in Web App > Administration > Settings > General, the Add new employee button will not be available.
Step 2: Select a role
Select the employee's role from the list of available roles. What roles are available depends on your setup in Web App > Administration > Settings > Role Permissions.
Step 3 (visible based on configuration): Select an organization unit
Next comes the Organization Unit field where you select the organization unit that the employee is assigned to.
VISIBILITYYou’ll see the Organization Unit field only if your MobiClocks environment is converted to an enterprise structure.
PERMISSIONSYour role needs to have an Assign to organization unit permission under Web App > Administration > Role Permissions > Employees to be able to assign employees to organization units.
Step 4: Add an employee name
Next, fill in the First name and Last name fields.
Step 5: Select a company
Assign the employee to a company using the list of available companies.
NOTEIf your environment is converted to an enterprise structure, the list of companies is filtered based on the selection of an organization unit done in Step 3 of this guide.
Step 6: Add an employee number
Further on, you have the employee number, which is a unique identification number assigned to each employee. There are two methods for specifying employee numbers:
- Generated automatically
- Entered manually
Which method is applicable for a given employee, depends on the Employee Number Policy setting of the employee's company configured in company details.
Step 7: Select a pay group
Here, you choose the pay group of the employee. The following options are available:
- Hourly. For employees compensated based on the actual number of hours worked, with pay calculated at an hourly rate.
- Salary. For employees receiving a fixed annual compensation divided into regular pay periods, regardless of exact hours worked.
- Salary Actual. For salaried employees whose compensation is precisely calculated based on the specific hours they have completed in each pay period.
Step 8 (optional): Add a profile picture
There’s also the profile picture field, which is optional. So, you can create an employee without adding a profile pic, but you won’t be able to activate the employee profile without a profile pic.
NOTEThe profile picture also serves as a base for face recognition. Therefore, if you're using face recognition as part of your employee identification process, make sure employee profile picture are clean photos with clear backgrounds and don't contain sunglasses.
If the profile picture contains sunglasses, the system will not let you upload the photo.
Step 9: Finalize the setup
When you’re done, select the Create Employee button at the top to create the employee entry. As soon as the employee is created, you’ll be taken to the employee’s newly created profile, where you’ll see some additional details under Profile Info.
Employee activation
By default, the employee profile has a Draft status. You’ll be able to activate it as soon as you fill in all the required fields and add a profile picture. If the requried fields and profile picture are set prior to selecting the Create Employee button, the status will change to Active automatically upon creating the profile.
Draft employee profiles can be deleted using the Delete employee option.
PERMISSIONSYour may delete a draft employee profile if you have the Send employee activation link permission enabled under Administration > Role Permissions > Employees.
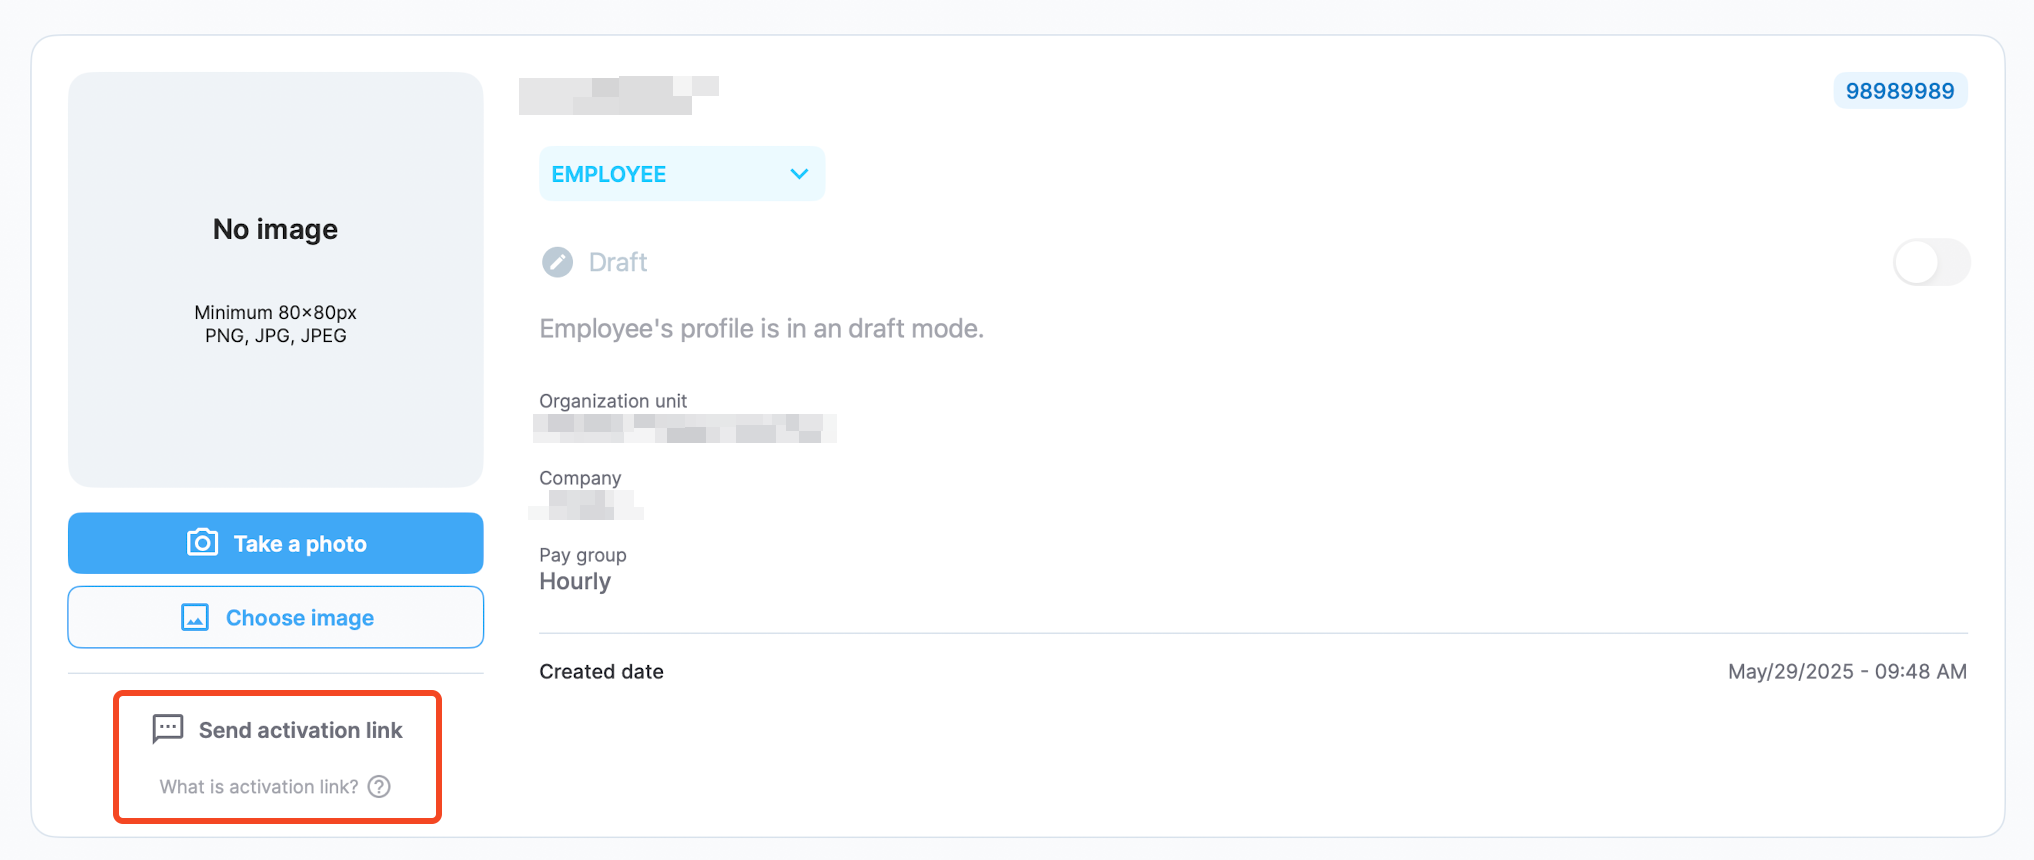
If the employee profile has a Draft status and doesn't have a profile picture, you can send an activation link to the employee and request to upload a profile picture. See Add a profile picture to learn more.
PERMISSIONSYour may send activation links if your role has the Send employee activation link permission enabled under Administration > Role Permissions > Employees.
The option is available under the profile picture area, as shown in the following screenshot.
Employee activation link
Updated about 1 year ago