
Track production quantity
How to activate and track production quantity.
In this topic, you'll learn how to activate the production quantity feature for a job site, add planned production quantity, and then track actual production quantity.
Step 1: Enable production quantity
Production quantity can be enabled for each job site separately. To do that, navigate to the Production quantity section in job site settings. Turn on the Track production quantity toggle and choose one of the tracking methods:
- Daily. Track production quantity on a daily basis.
- Weekly. Track production quantity on a weekly basis.
Each method is discussed in detail under the Track production quantity section of this guide.
PERMISSIONSYou may configure production quantity tracking if you have the Edit production quantity tracking permission enabled for your role in Administration () > Role Permissions > Job Sites.
Step 2: Specify planned production quantity
When you enable production quantity for a job site, a new Planned PQ field appears in job site's Cost codes section, where you can specify the production quantity that is planned to be accomplished for a particular cost code. To specify Planned PQ for a cost code, you need to select the corresponding cell on the cost code entry and add a value and a measurement unit. Select the check mark to save your changes.
The following GIF shows the process of adding a Planned PQ to a cost code.
Adding Planned PQ to a cost code
Each cost code also has Budget and Planned hours fields that can also be filled in as part of cost code planning but aren't included in production quantity calculations.
Step 3. Track production quantity
Now that you have specified the planned production quantity for a cost code, you can revisit the cost code regularly to fill in the actually completed production quantity and compare it against the planned quantity and the hours that have been tracked for the cost code. To do that, you need to follow these steps:
-
Navigate to the Cost Coding tab of your Web App from the left-hand sidebar and select the Production quantity tab.
-
Select a job site from the Job Sites navbar. Apart from job site selection, the navbar has some additional functionality which is discussed in the Job Sites navbar section in Timelogs list, as the same navbar is used there as well.
-
Use the date picker to select a week.
-
Apply filters (optional). You have the following filtering options:
- Hide cost codes with no weekly hours. Hides the cost codes that don't have any hours tracked during the selected week.
- Hide cost codes with no weekly units. Hides the cost codes that don't have any production quantity units added during the selected week. This is discussed in greater detail further in this guide.
Now that you have selected the cost codes that you want to track production quantity for, you are ready to fill in production quantity data. The process differs depending on the method you selected in Step 1 of this guide. Therefore, each case is discussed separately in the following sections.
PERMISSIONSYou may add or edit production quantity data if you have the Add/edit production quantity permission enabled for your role in Administration () > Role Permissions > Cost coding.
Step 3.1 Tracking production quantity weekly
In the cost codes table, you need to fill in the Weekly units field to indicate how many production quantity units have been completed for the selected cost code on the selected week.
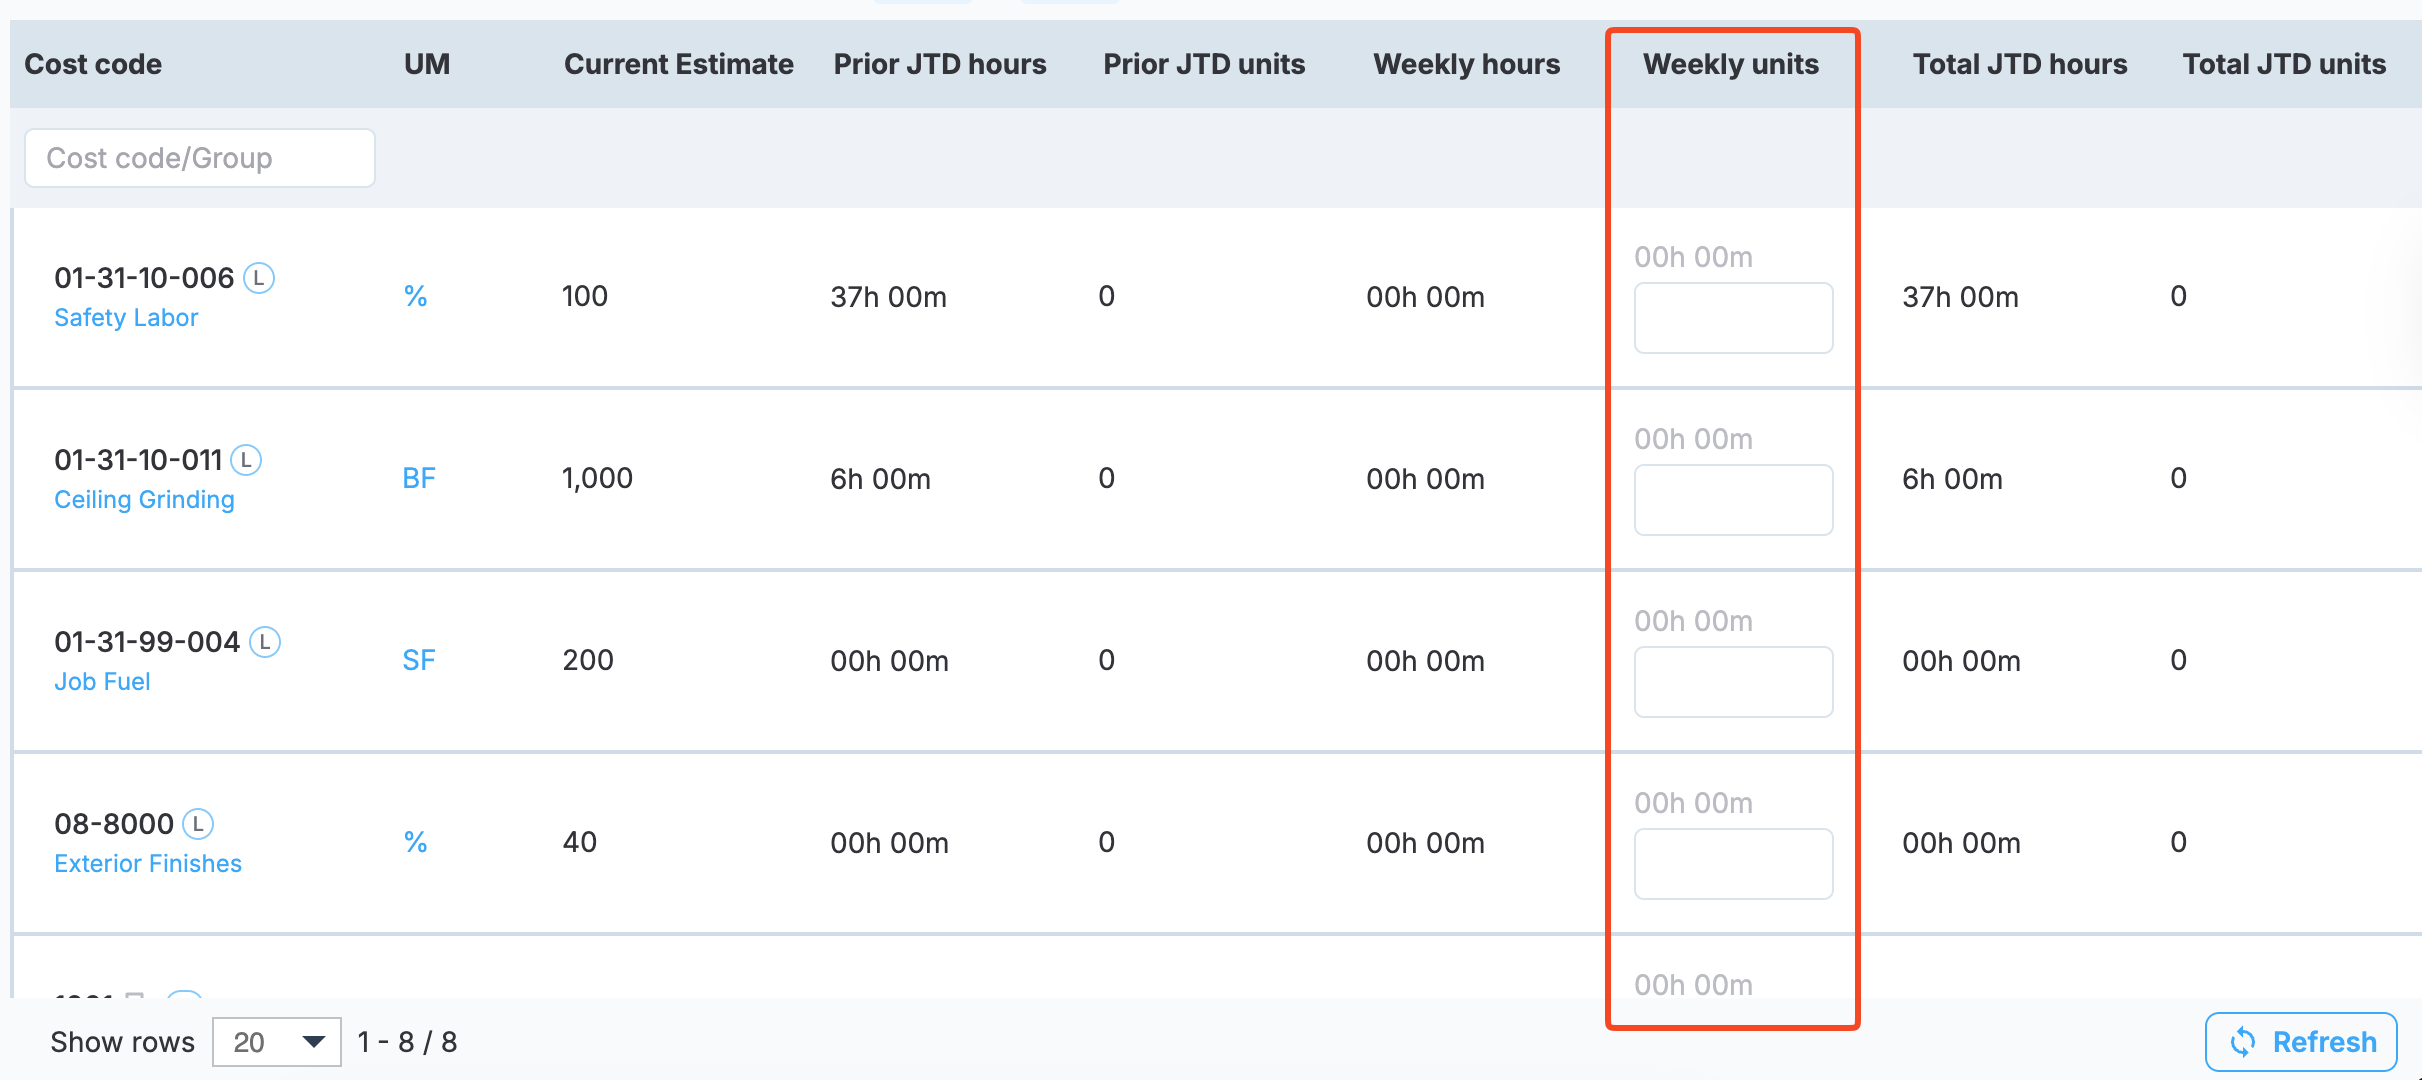
The Weekly units field for tracking weekly production quantity
The first column of the cost code table contains the cost code name and its cost type as an abbreviation. Apart from that, the table contains several other fields that provide additional information for tracking:
- UM. The measurement unit selected for the cost code.
- Current Estimate. What is the estimated production quantity specified under Planned PQ. See Step 2: Specify planned production quantity.
- Priot JTD hours. JTD stands for Job to Date and indicates the number of hours tracked for a given cost code to this date.
- Priot JTD units. Indicates the number of production quantity units tracked for a given cost code to this date.
- Weekly hours. How many hours have been tracked on the selected week.
- Total JTD hours. The sum of Priot JTD hours and Weekly hours.
- Total JTD units. The sum of Priot JTD units and Weekly units.
After entering the weekly units, select Save to apply the numbers. If the entered value exceeds Current Estimate, you will see a warning sign next to the cost code name (hover over the sign to learn the details) immediately and will receive an alert dialog when trying to save the changes, as highlighted in the following screenshot.
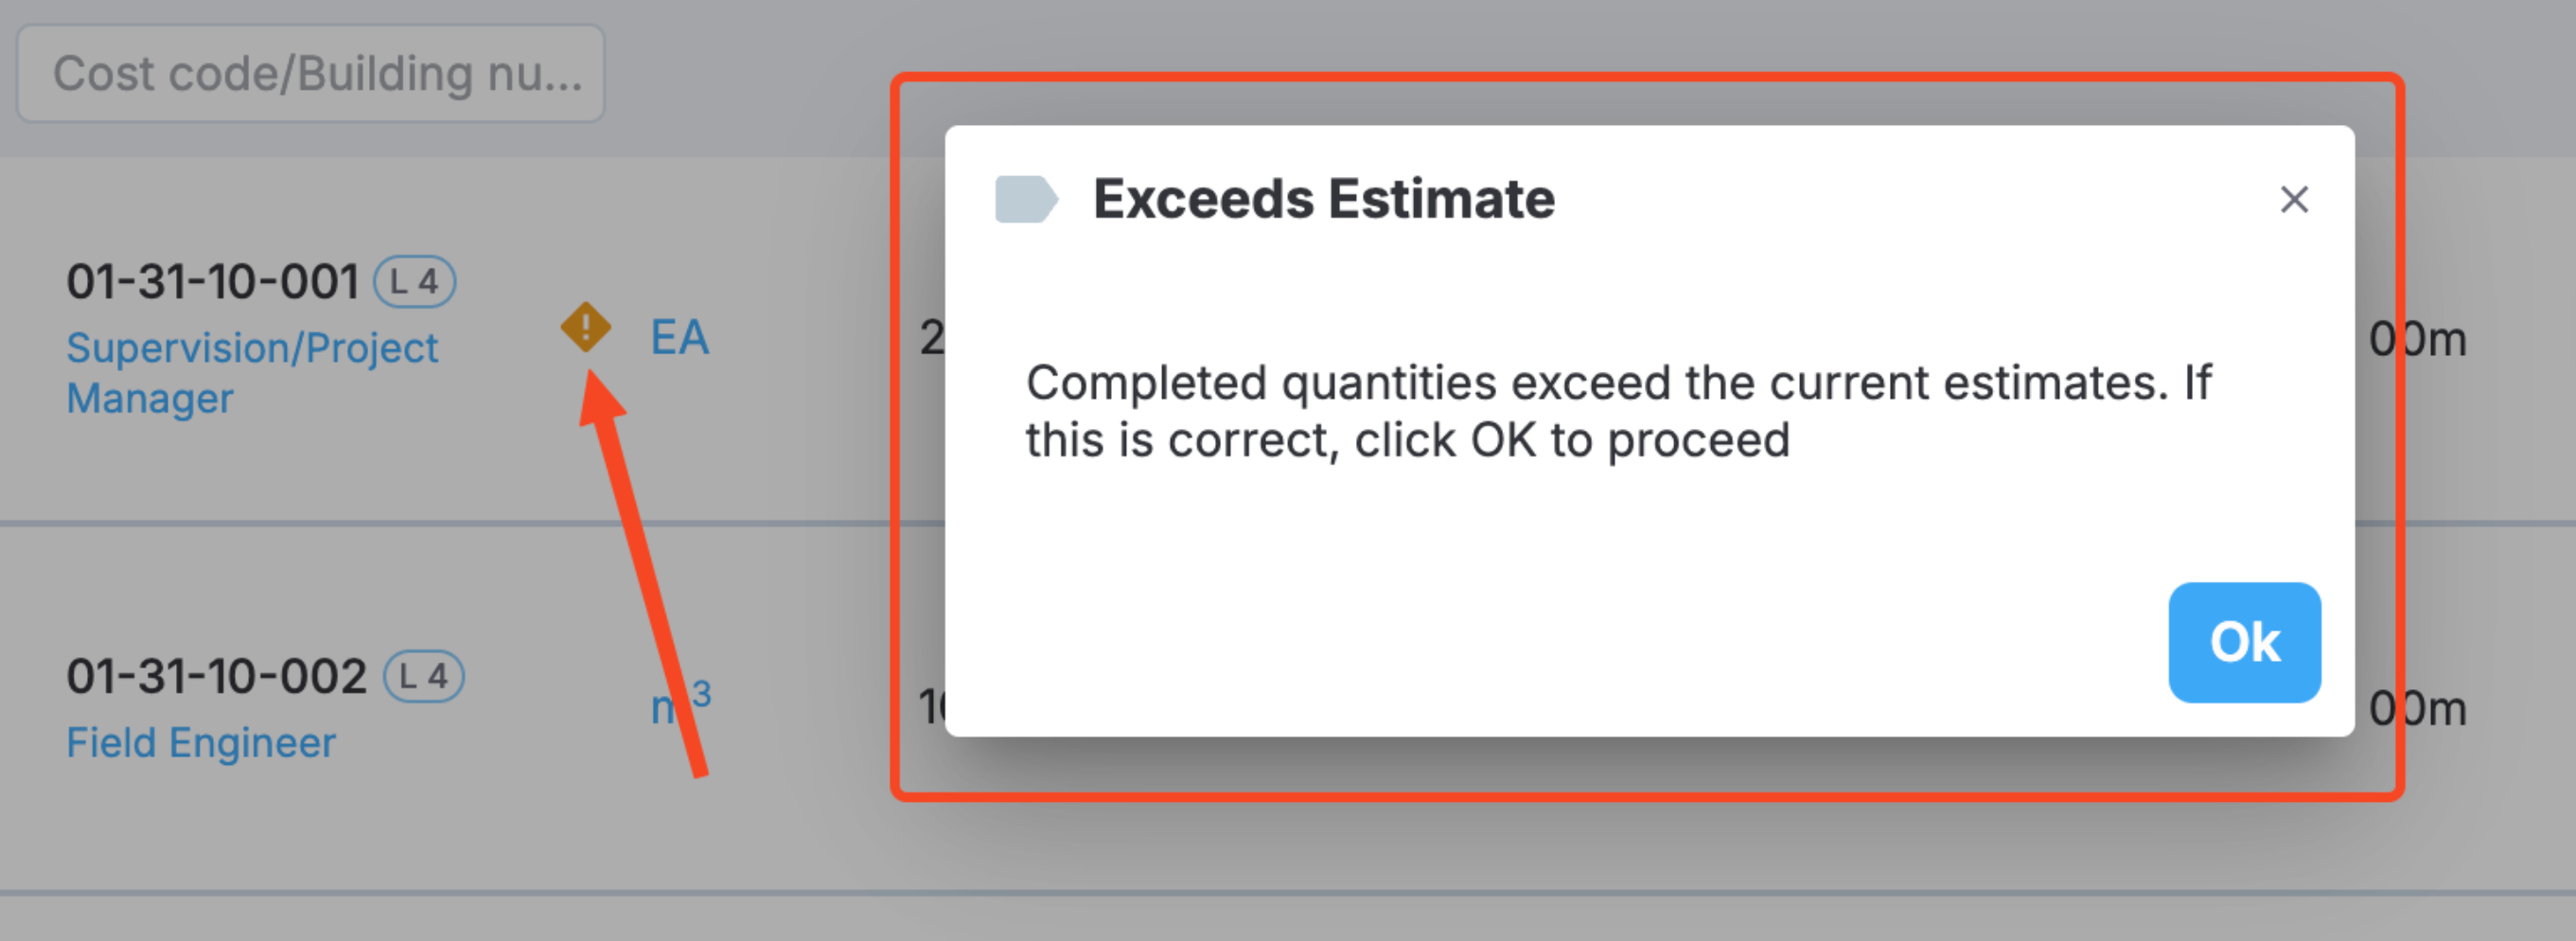
Estimate exceeding warning
The alert dialog is shown only once for a particular cost code, and you may select Ok to proceed and apply your changes.
Tracking by crew
If By Crew tracking is enabled in job site settings, the production quantity table is grouped into crews instead of individual cost codes. Under each crew, select Add cost code to add a cost code and fill in production quantity data for that cost code. Next to the Add cost code button you also have a Bring cost codes from previous week option to copy the cost codes added for the previous week instead of manually adding them again. The following screenshot highlights the Add cost code and Bring cost codes from previous week options.
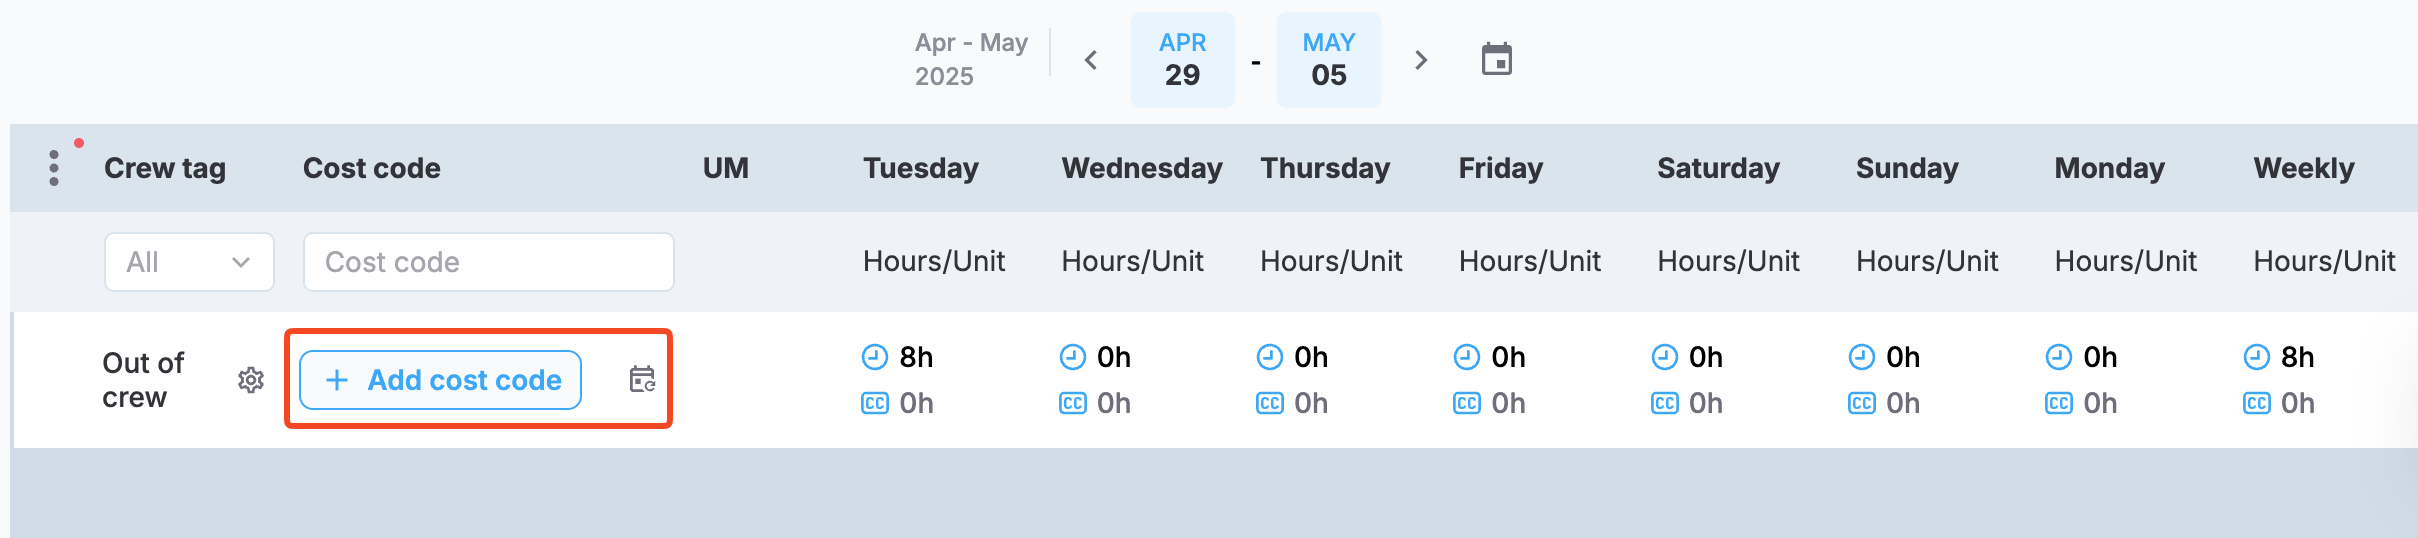
Add cost code and Bring cost codes from previous week
Percentage-based tracking
If Percentage-based production tracking is enabled in job site settings, you can select the gear () icon and choose if you want to input production quantity in Percentage or Unit, as highlighted in the following screenshot.
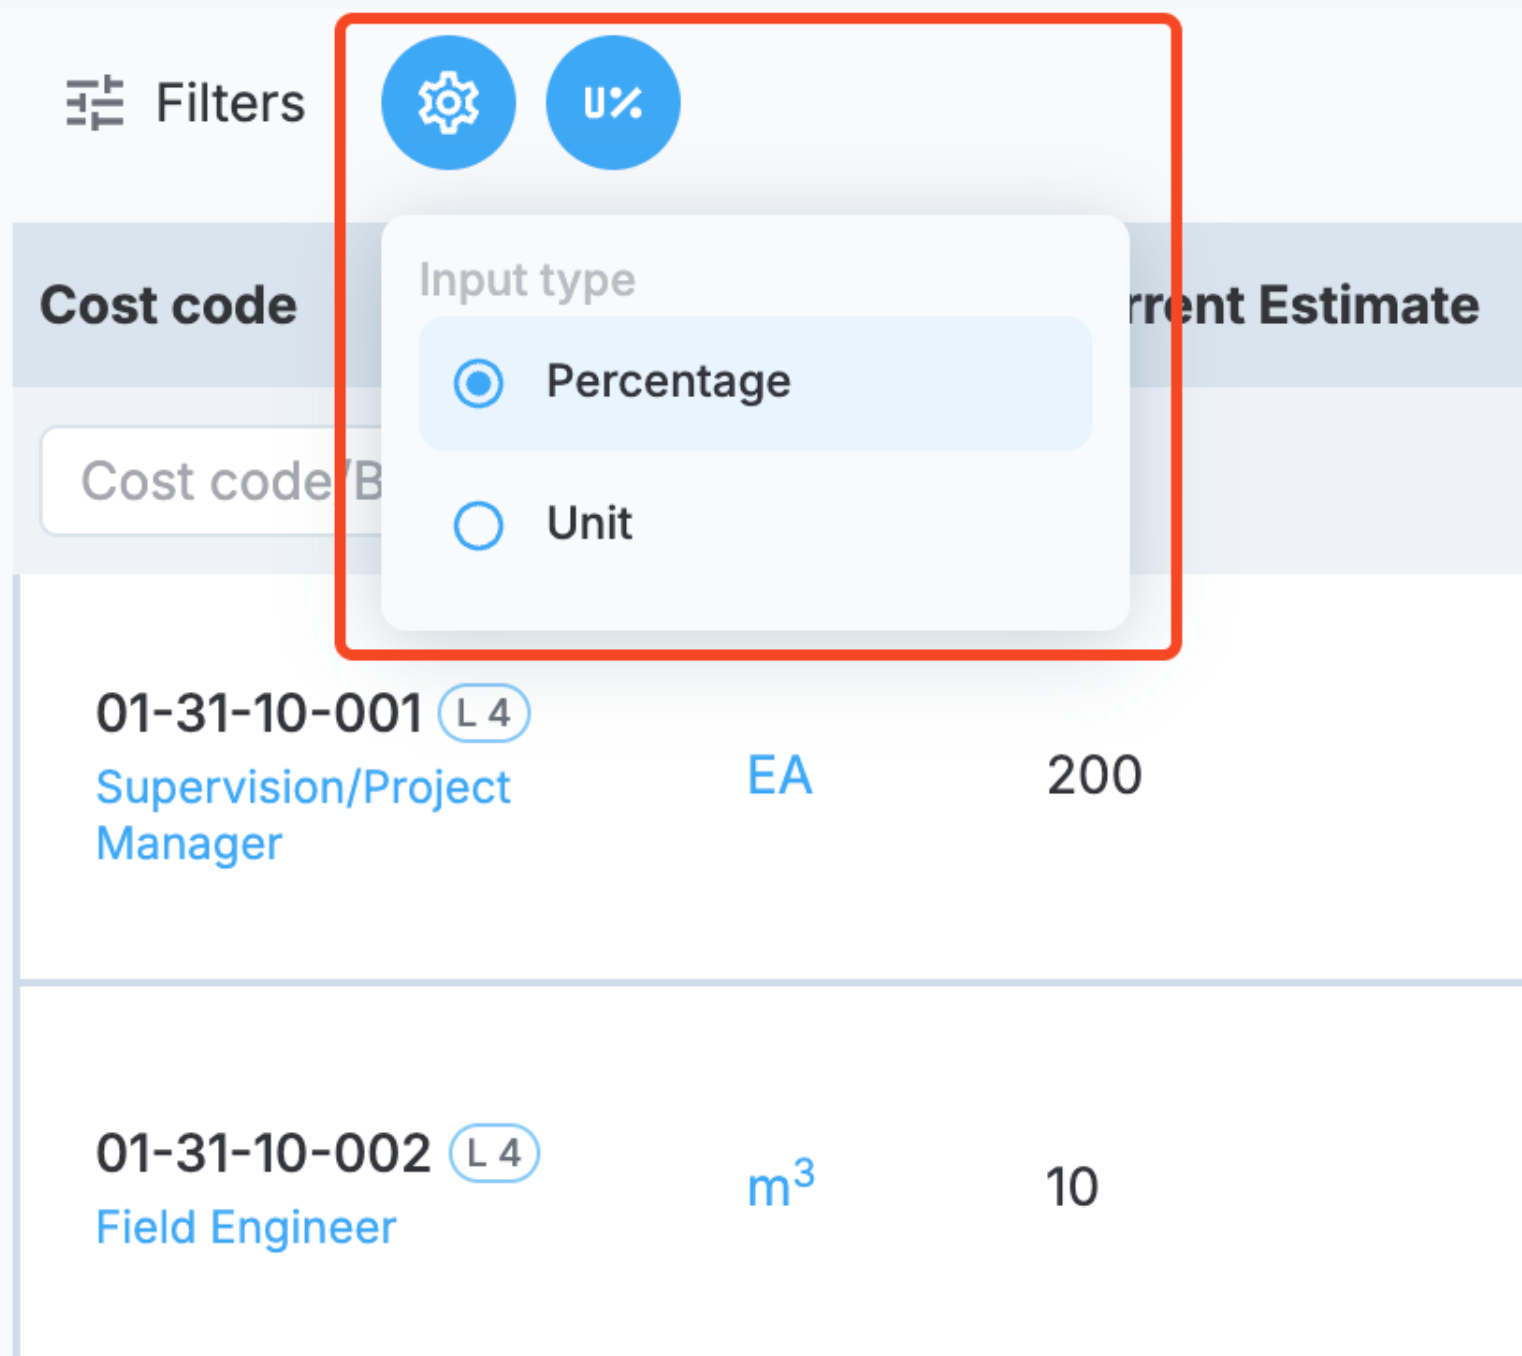
Production quantity input type selection
When inputting production quantity in percentage, you are expected to indicate the percentage of the overall estimate that has been achieved in the current week. This value includes the JTD plus what has been completed in the current week.
In addition, next to the gear icon, you have another option that displays the values for both types when activated. For example, if the Percentage input type is selected and you enter a percentage value, the equivalent value in units is displayed below.
For example, in the following screenshot, the Percentage input type is selected, and the option for displaying both the unit and percentage values is enabled. A 90% value is entered under Weekly units, while Current Estimate is 10 units and Prior JTD is 7 units. This means that to complete 90% of the estimate, 2 units must be completed in the selected week, which is displayed below the input field.

Percentage-based input example
Note that you may not enter percentage-based values if planned production quantity is not specified for the cost code. If that is the case, you will get a warning sign with details available on hover, as highlighted in the following screenshot.
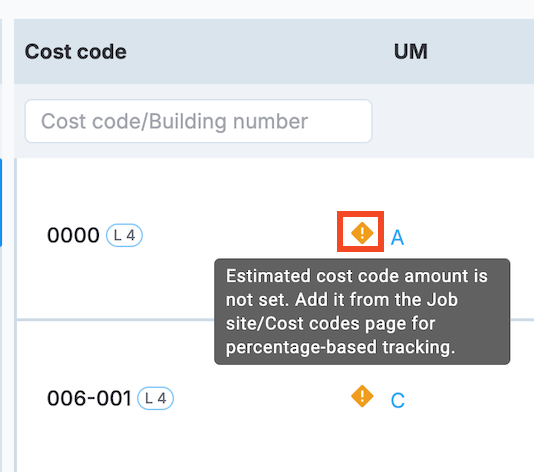
Warning about the planned production quantity not being specified
Step 3.2 Tracking production quantity daily
Here you have two views: Daily view and Overview.
Daily view is where you fill in daily production quantity data for a cost code. Here, the cost codes table shows tracked hours for each day of the week and you can add corresponding production quantity units for each day. The Weekly column shows a sum of all the units completed on the selected week.
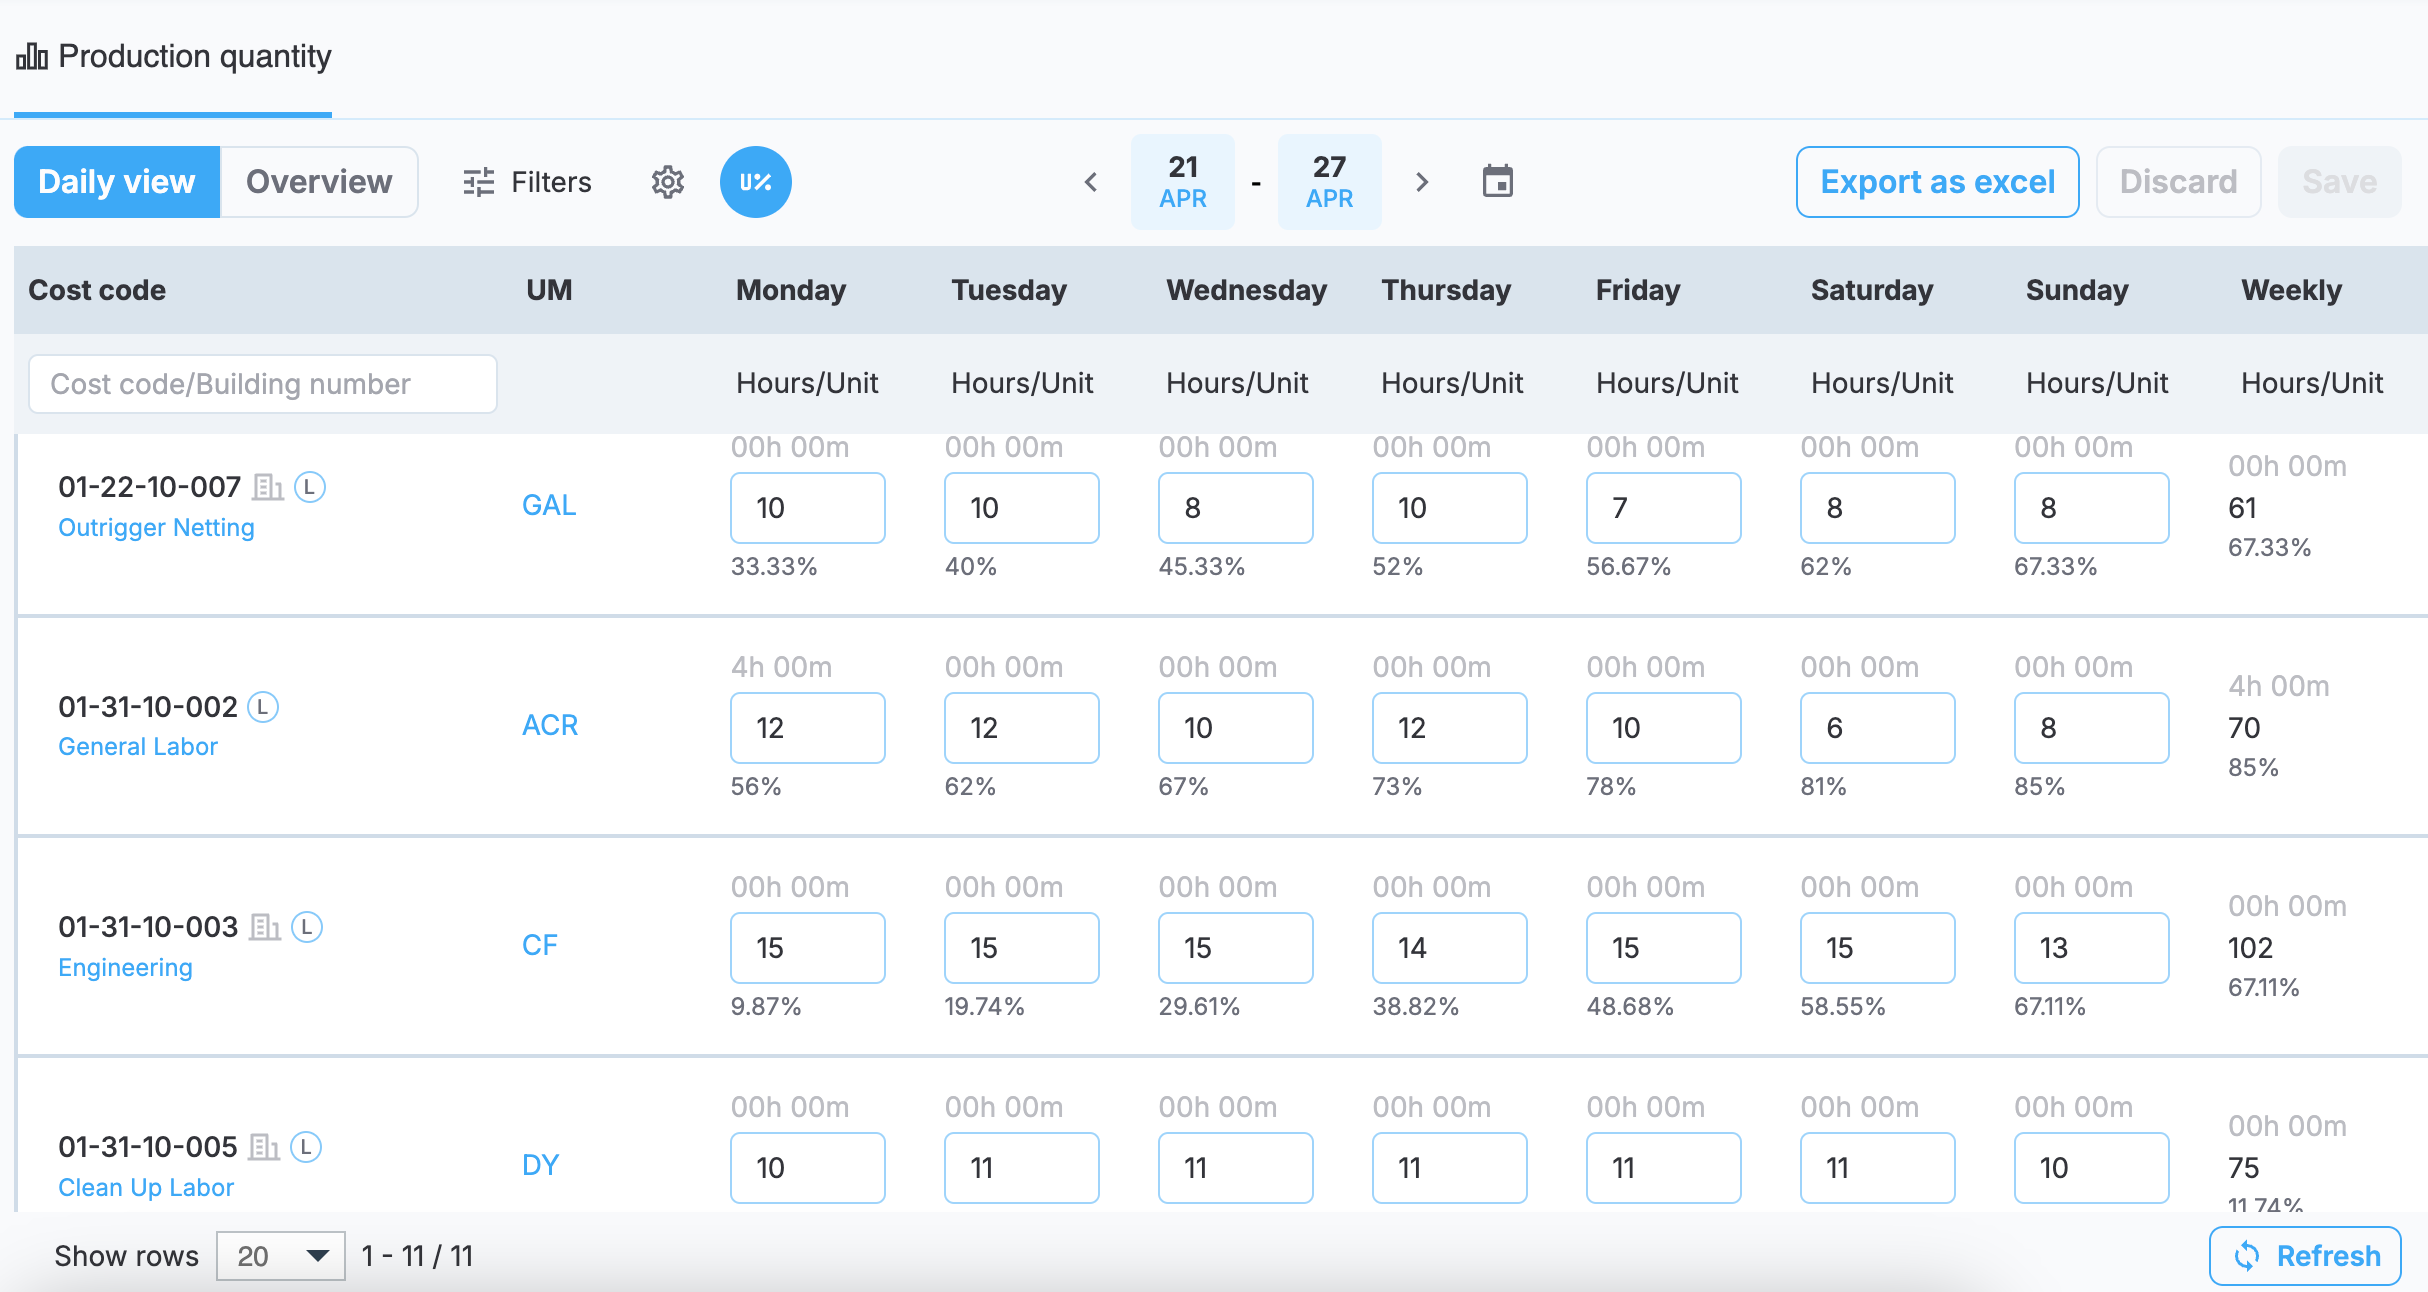
Daily view
Overview, in turn, provides a weekly summary of the tracked hours and units. Here, the cost codes table is similar to that in weekly tracking.
To apply your tracking numbers, select Save. You will receive warnings if the entered production value exceeds the Current Estimate. See Tracking production quantity weekly for more details.
Similar to weekly tracking, percentage-based tracking is applied if it is enabled for the job site.
Also, similar to weekly tracking, tracking by crew is applied if it is enabled for the job site. The only difference is that it is possible to select weekly tracking inside of a crew and fill in production quantity for the whole week at once, as shown in the following screenshot.
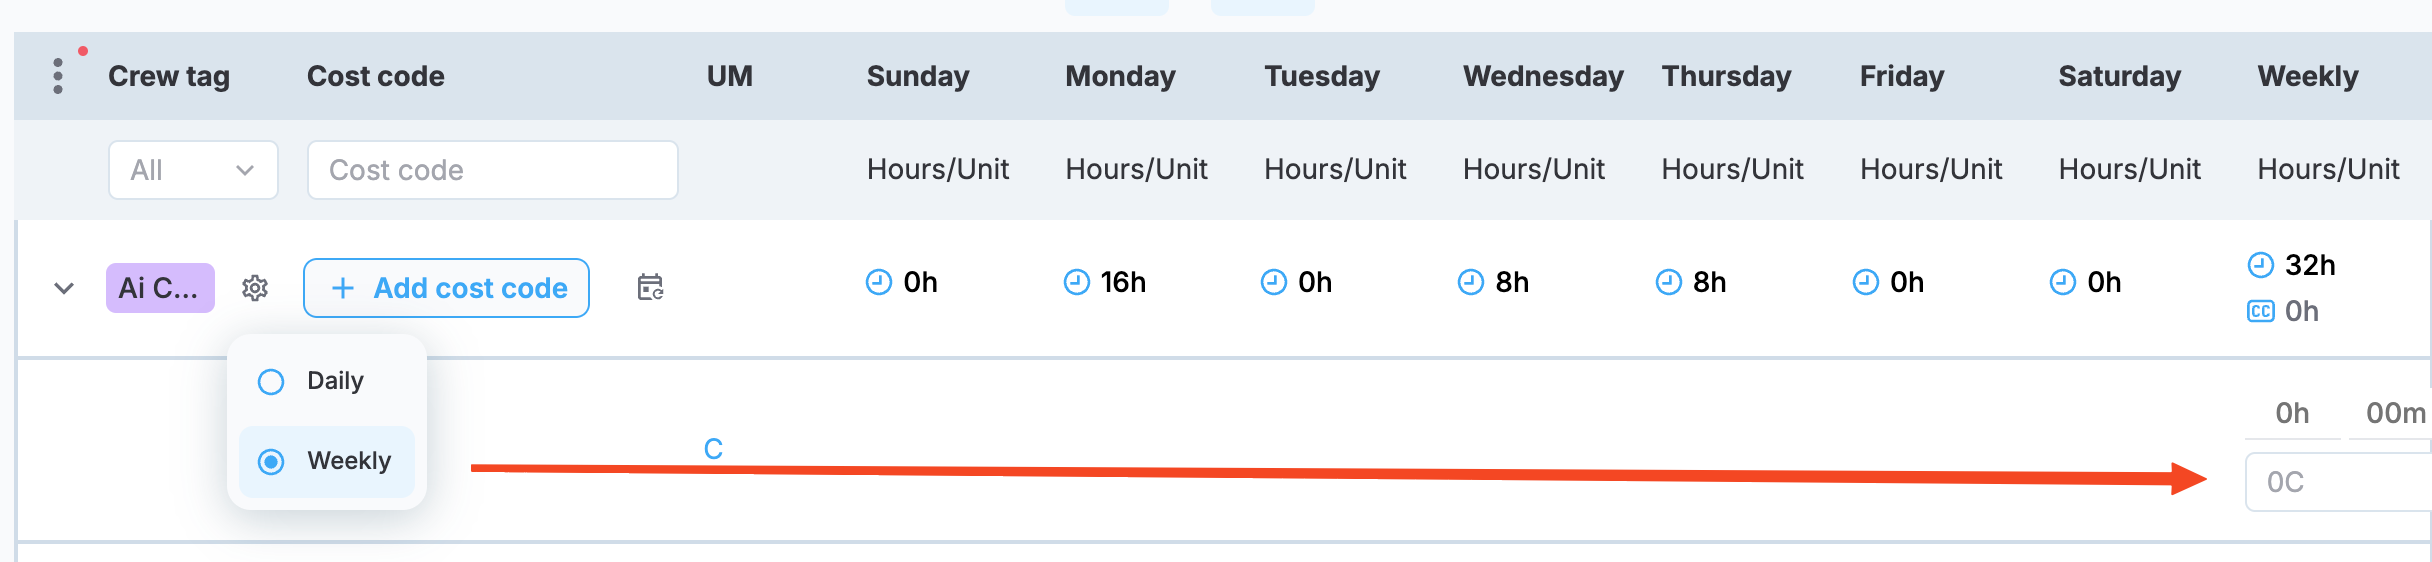
Weekly tracking inside a crew
Export production quantity data
Use the Export as excel option to export an XLSX file with all your production quantity data.
Updated 4 months ago