
Set up per diem
A step-by-step guide to configuring per diem in your environment.
Per diem is a daily allowance paid to employees to cover travel expenses. In MobiClocks, you can configure per diem on a job site level, specifying a per diem rate for each job title. However, it's also possible to set rates for each individual employee and see their per diem calculations in the employee profile.
In this guide, you'll learn how to configure per diem settings, specify rates on a job site and employee level, view per diem calculations, and download reports.
Step 1: Configure per diem settings
To get started, you need to configure per diem calculation rules for your environment.
PERMISSIONSYou may configure per diem calculation rules if you have the Edit per diem settings permission enabled for your role in Administration () > Role Permissions > Job Sites.
Per diem settings are located in Administration () > Settings > Per Diem. Here, you have two settings:
- Daily minimum. Specify the minimum time an employee needs to work during the day to be eligible for the per diem allowance.
- Weekly minimum. Specify the minimum number of days an employee needs to work during the week to be eligible for the weekly (7-day) per diem allowance.
NOTEIf employees have worked on multiple job sites during the day, they receive per diem from the job site where they have worked the most. Similarly, per diem allowance for the weekends and other non-working days is also provided by the job site where the employee has worked the most during the week.
Note that a job site is included in the employee's per diem calculations only if per diem is activated on a job site and employee employeelevel.
Step 2: Activate and configure per diem for a job site
To activate per diem for a job site, navigate to the Per Diem section in job site settings and perform the following steps:
- Use the toggle next to the section name to activate the feature.
- Select Set per diem.
- In the dialog that opens next, select a job title and specify a per diem rate for the job title.
- Repeat the steps for other job titles if needed.
PERMISSIONSYou may set and view job site's per diem rates if you have the View job site/employee per diem rates permission enabled for your role in Administration () > Role Permissions > Job Sites.
The following screenshot shows the per diem setup dialog in job site settings.
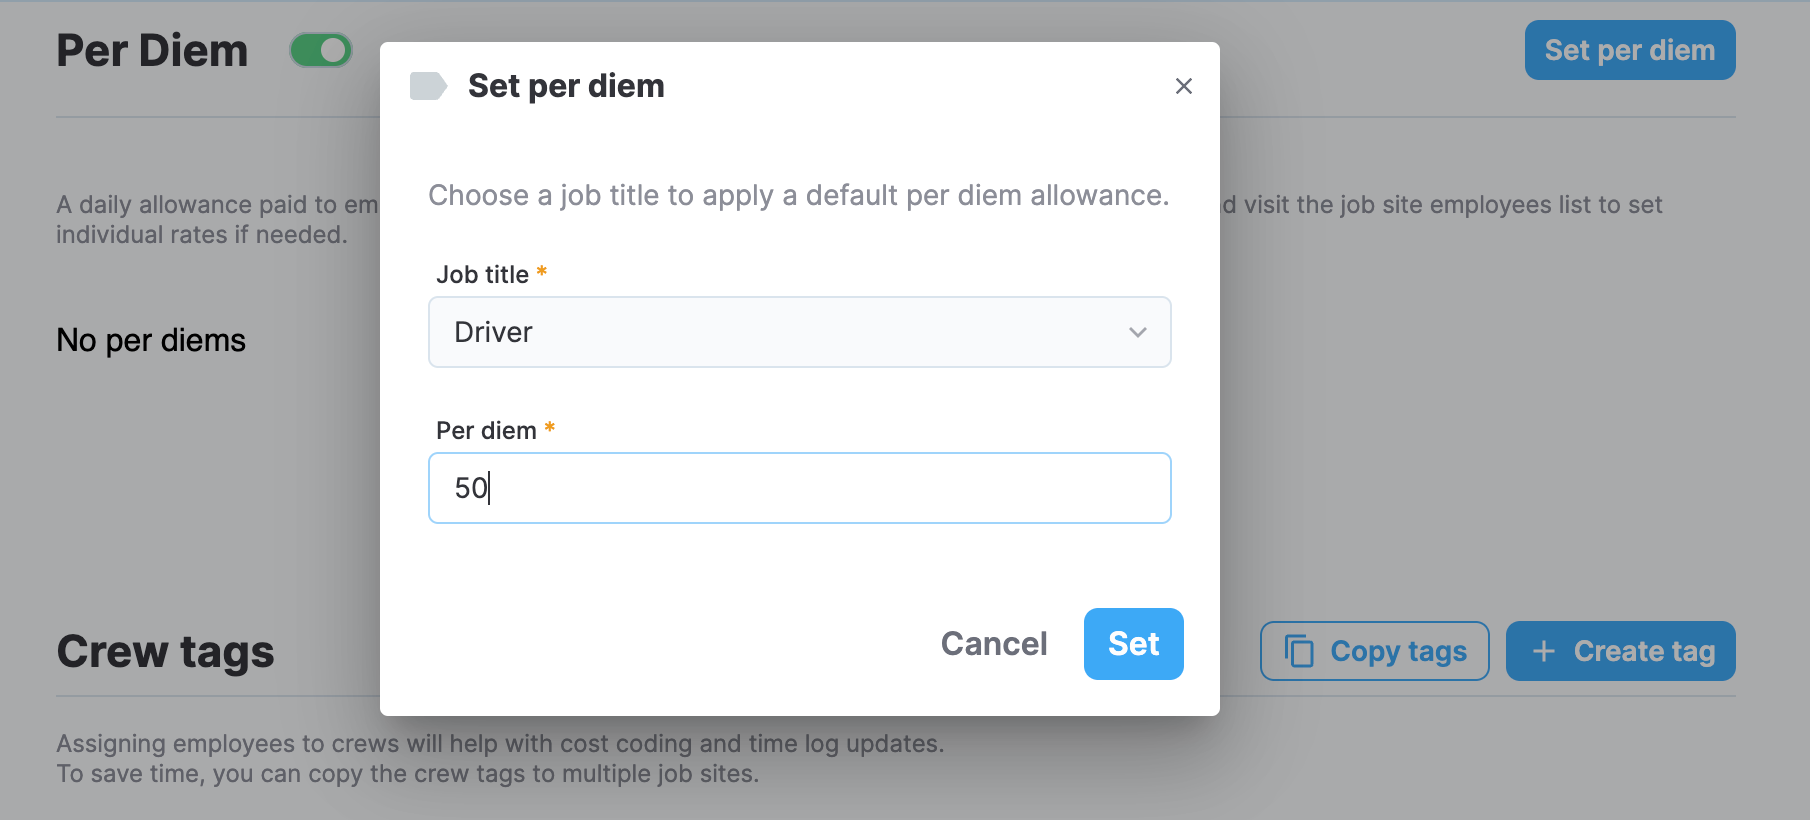
Setting up per diem for a job site
At this point, although per diem rates are specified for one or multiple job titles, they are not applied to employees yet. The next step describes how to activate per diem for employees.
Step 3: Apply per diem to an employee and override default rates
Navigate to the Employees section of the job site. There, you have Per diem and Per diem rate fields, which are highlighted in the following screenshot.
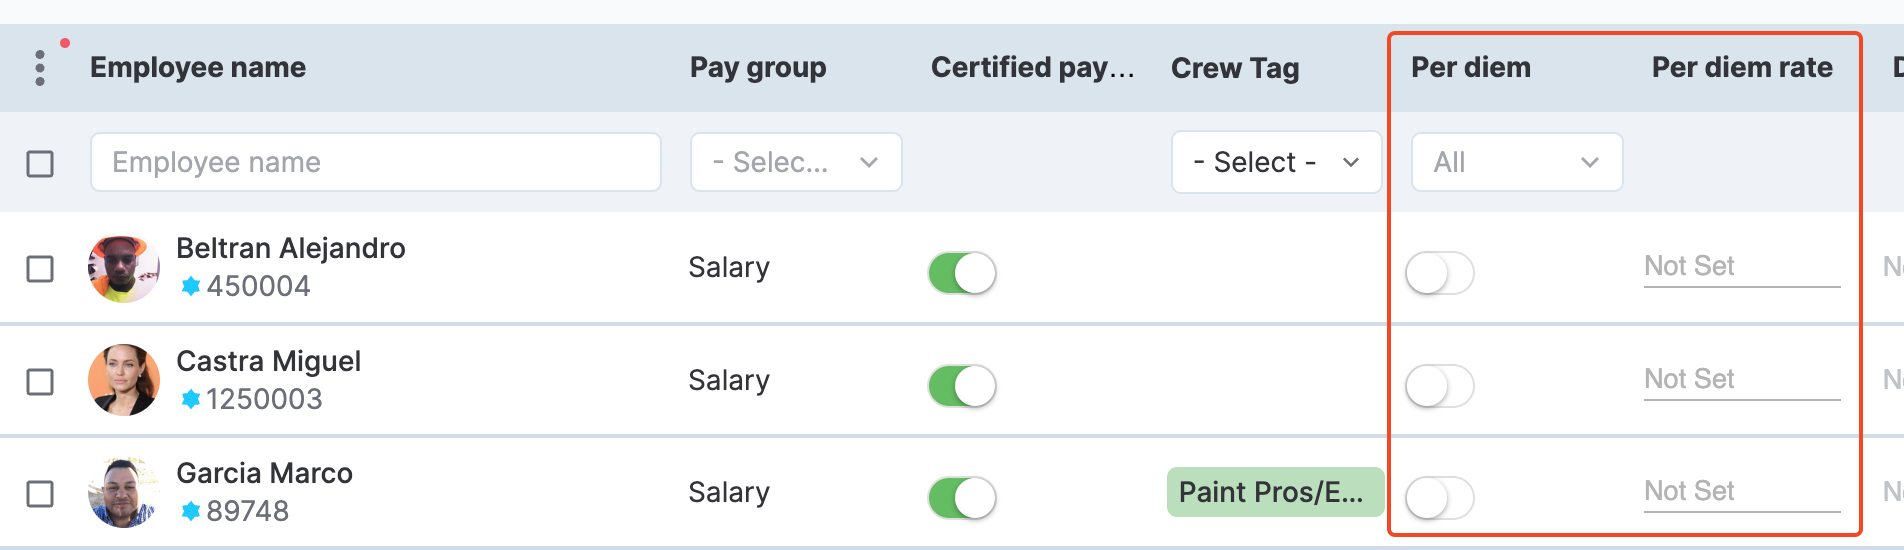
Employee's per diem fields
To apply per diem to an employee, switch on their Per diem toggle.
PERMISSIONSYou may modify an employee's per diem settings if you have the Edit employee per diem permission enabled for your role in Administration () > Role Permissions > Job Sites.
If an employee doesn't have a per diem rate specified for their job title, you can add a rate for them under Per diem rate. If a per diem rate is already specified for the employee's job title, adding a new value under Per diem rate overrides the job title rate.
PERMISSIONSYou may set and view employee per diem rates if you have the View job site/employee per diem rates permission enabled for your role in Administration () > Role Permissions > Job Sites.
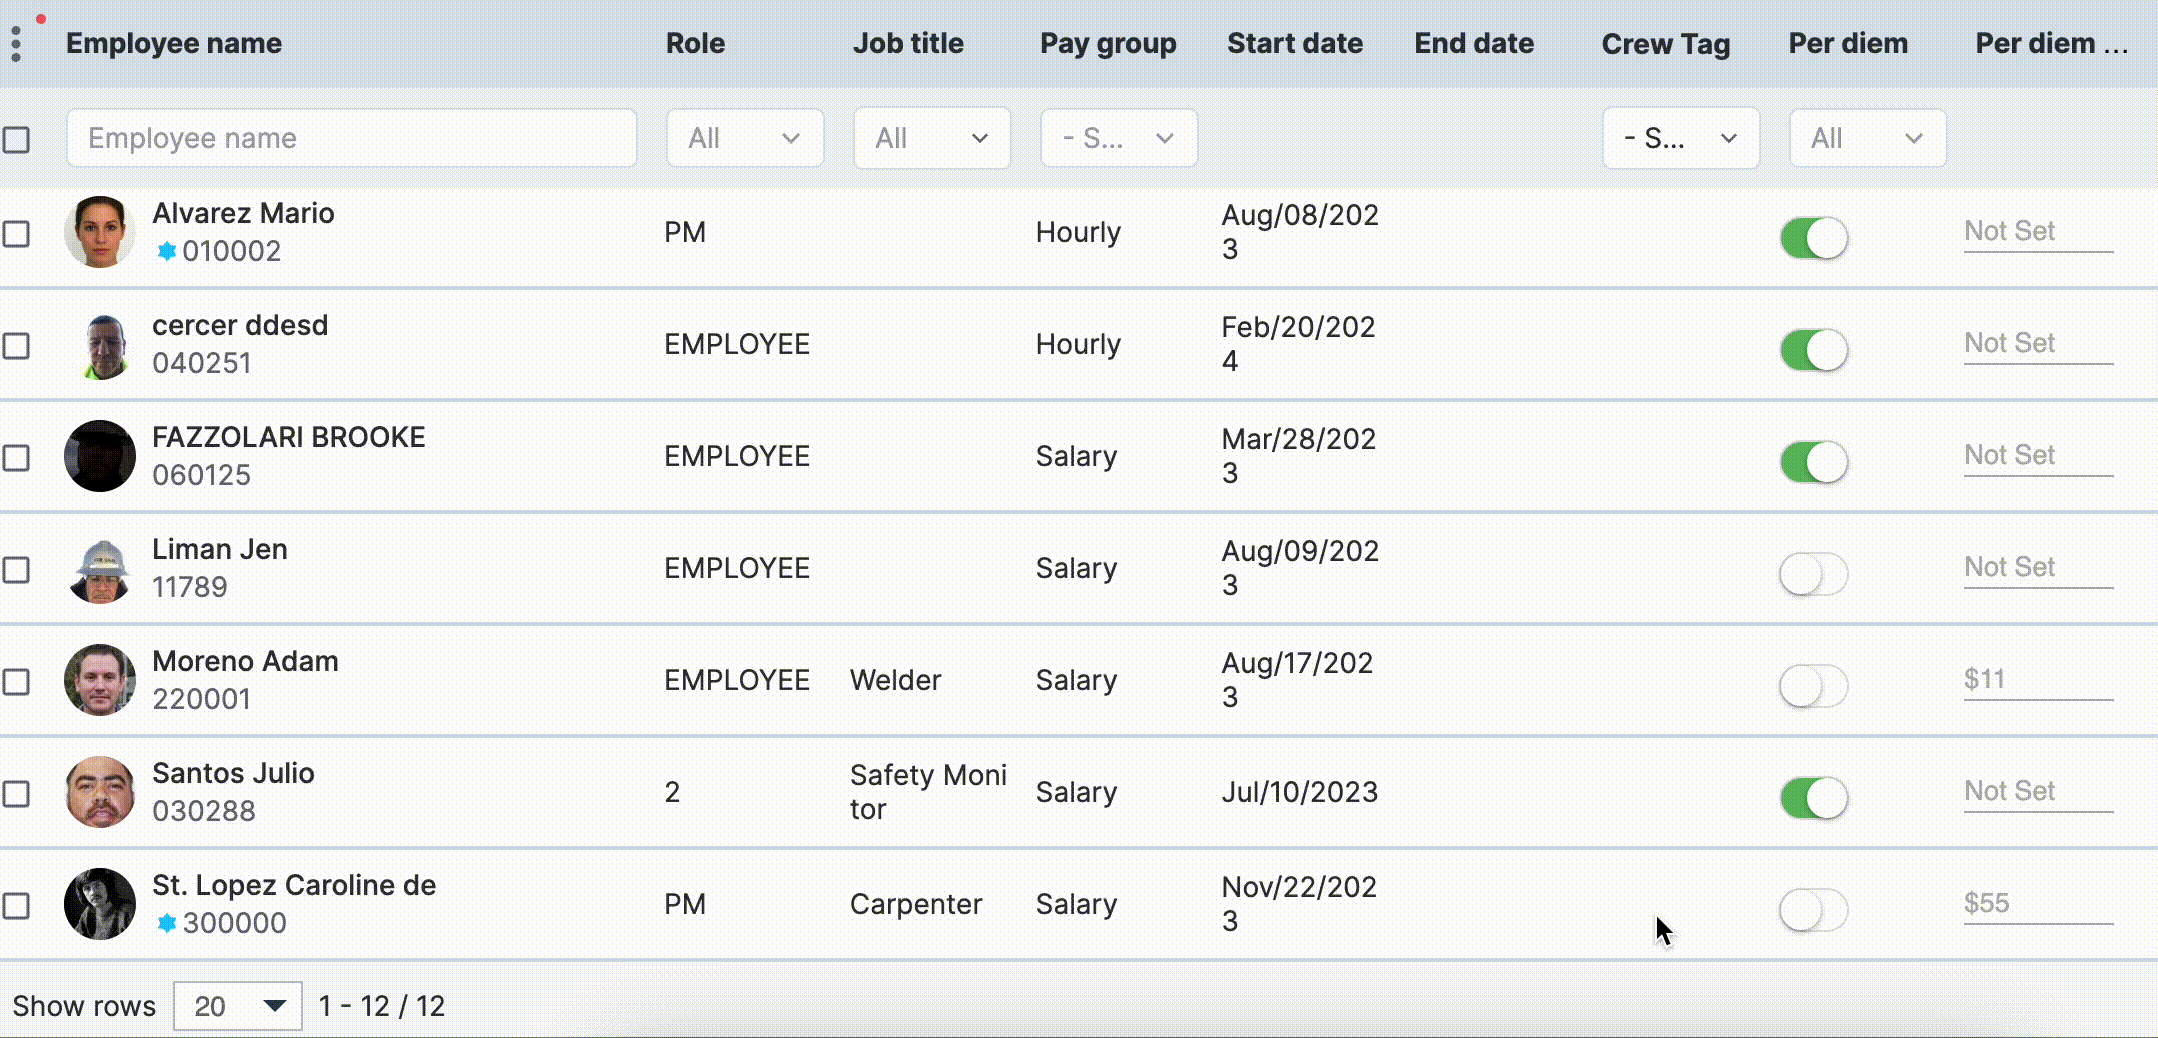
In the GIF below, the user activates the per diem option for an employee and modifies the default job title rate. Default rates are represented in black, while overridden rates are displayed in blue, aiding in easy differentiation between the two.
After you're done with the setup, per diem allowances will be calculated and allocated for the selected employees. In the next step, you'll learn how to view per diem allocations.
Step 4: View per diem calculations for an employee
You can view weekly per diem calculations for each employee in the Timelogs section of the employee profile. The per diem data is located below the timelog table as highlighted in the following screenshot.
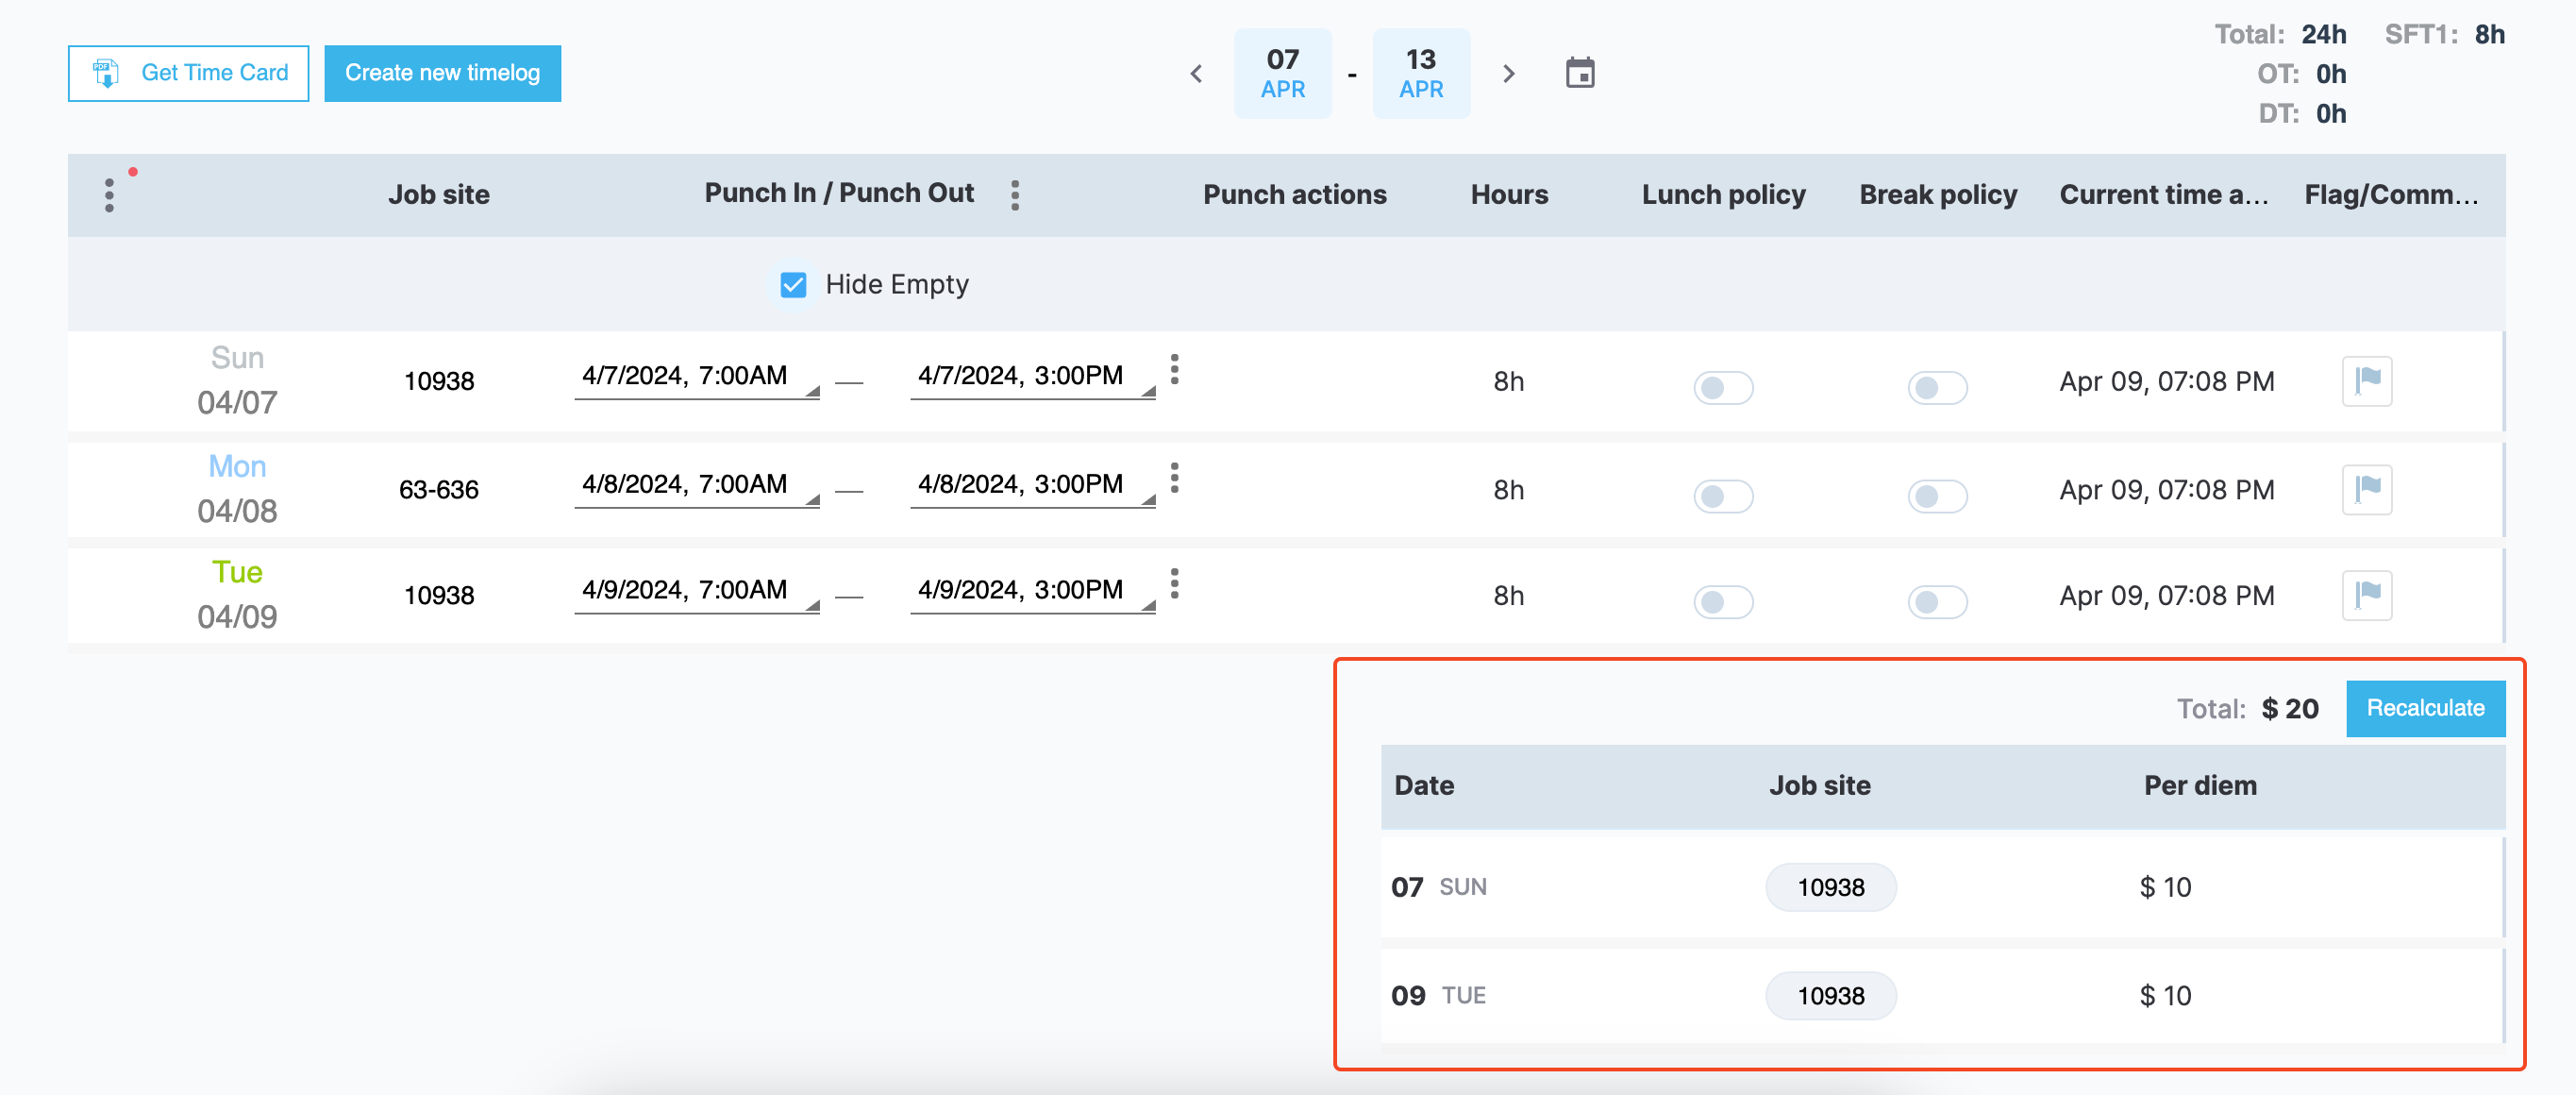
Employee's per diem calculations
The per diem table shows the Date when the per diem was allocated, the Job site it was allocated from, and the per diem amount under Per diem.
In the example represented by the screenshot above, the employee has worked for three days so far but has been provided per diem for two days only. The reason is that one day was spent on a different job site, where per diem is not enabled.
Employee's per diem calculations are updated every hour for the current payroll week only. You can also manually update the most recent data by selecting Recalculate at the top of the per diem table.
Step 5: Download per diem data in a report
Per diem data is included in the Employee Time Card report, where you have each employee's daily and weekly per diem calculations for the selected week.
Updated over 1 year ago