
Apply cost codes
As soon as you have defined cost codes, you can start applying them to timelogs. Cost codes can be applied in three ways:
- Manual
- Automatic
- Employees can cost code their own timelogs.
The following sections discuss each method in detail.
Apply cost codes manually
The following is a step-by-step guide to manually applying cost codes.
Step 1: Select a date
In your MobiClocks Web App, navigate to the Cost Coding section from the left-hand navbar. Use the date picker to select the week for which you want to do cost coding, then select a specific day within that week.
PERMISSIONSYou may access the Cost Coding section if you have the View "Cost Coding" tab permission enabled for your role in Administration > Role Permissions > Cost coding.
Step 2: Select a job site
Now, you need to select a job site, which is done from the Job Sites navbar on the left side. Apart from job site selection, the navbar has some additional functionality which is discussed in the Job Sites navbar section in Timelogs list, as the same navbar is used there as well.
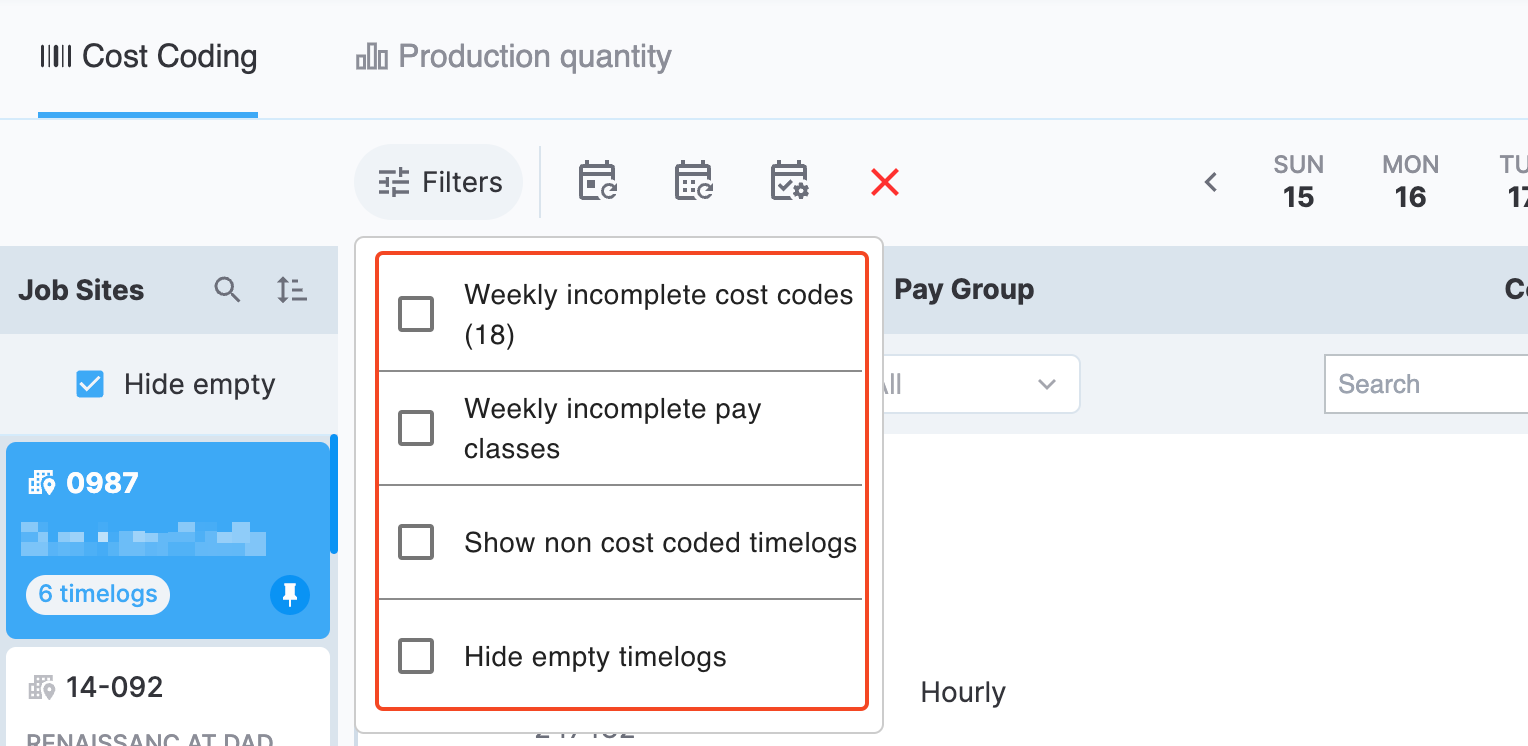
Step 3: Apply filters (optional)
You can apply filters to filter out timelogs based on the selected criteria. The following options are available:
- Weekly incomplete cost codes. The option filters out timelogs throughout the week that have an entry but don't have a cost code applied.
- Weekly incomplete pay classes. The option is visible for certified job sites only and filters out timelogs throughout the selected week that are cost-coded but don't have pay classes specified. See Pay classes for more information on pay classes and their purpose.
- Show non cost coded timelogs. This option is similar to the Weekly incomplete cost codes one but shows incomplete timelogs for the selected day instead of the whole week.
- Hide empty timelogs. The option hides all the empty timelogs.
The following screenshot shows the list of the cost code filters.
Filtering options
Step 4: Apply cost codes
At this point, you should have the list of timelogs that need to be cost-coded and can start applying cost codes.
NOTEYou can apply cost codes only to timelogs with an entry.
You have the list of all the cost codes for the selected job site in the right-hand menu named Cost Codes. If a cost code is used frequently enough, which is configured from Cost Code Favorites in Administration > Settings > Cost Codes, it is added to a Favorites section above All codes. If no cost code has been used frequently enough, the Favorites section is not shown. You can also filter the cost codes by Building name, which is the same as Building number specified when adding a cost code.
On each cost code, you also have an abbreviation that indicates the cost type. The following screenshot highlights the cost type abbreviation on a cost code.
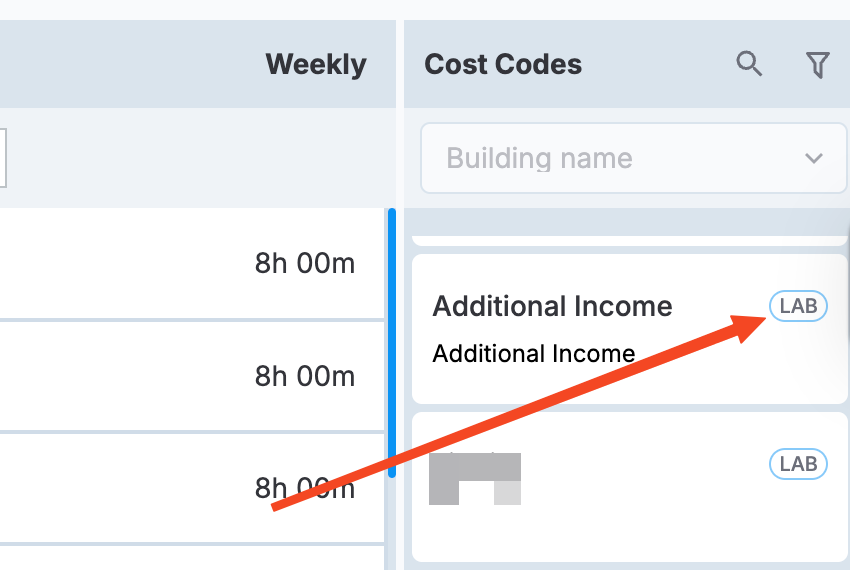
Cost type abbreviation on a cost code
PERMISSIONSYou may apply cost codes if you have the Cost code all timelogs permission enabled for your role in Administration > Role Permissions > Cost coding.
To apply a cost code, you need to drag it from the Cost Codes menu and drop it on a timelog. You can apply multiple cost codes to a single timelog, distributing the timelog duration between the cost codes. If the selected job site is certified, you can also apply pay classes together with cost codes. See Pay classes for more information on pay classes and when they are used.
When you're done applying cost codes, select the Save button to save your changes.
The following GIF illustrates the process of applying cost codes and pay classes to a timelog.
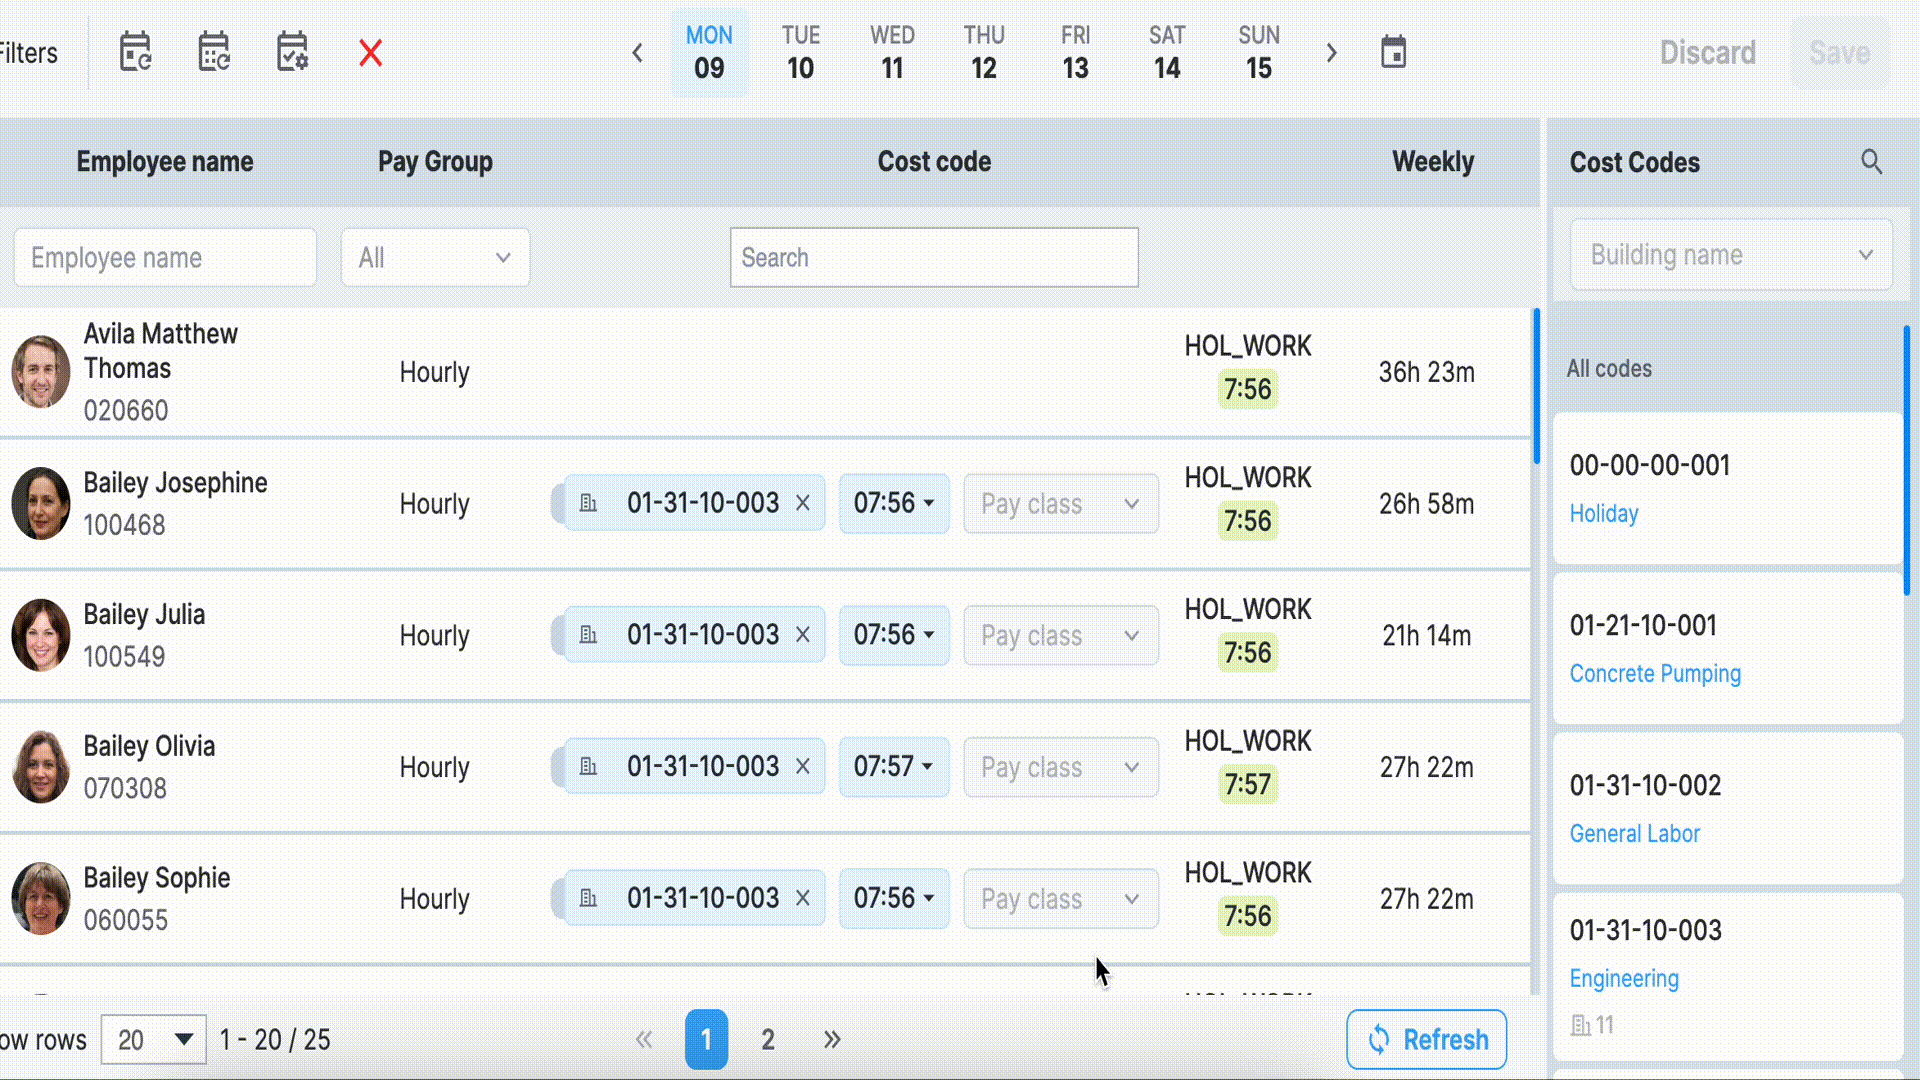
Applying cost codes and pay classes
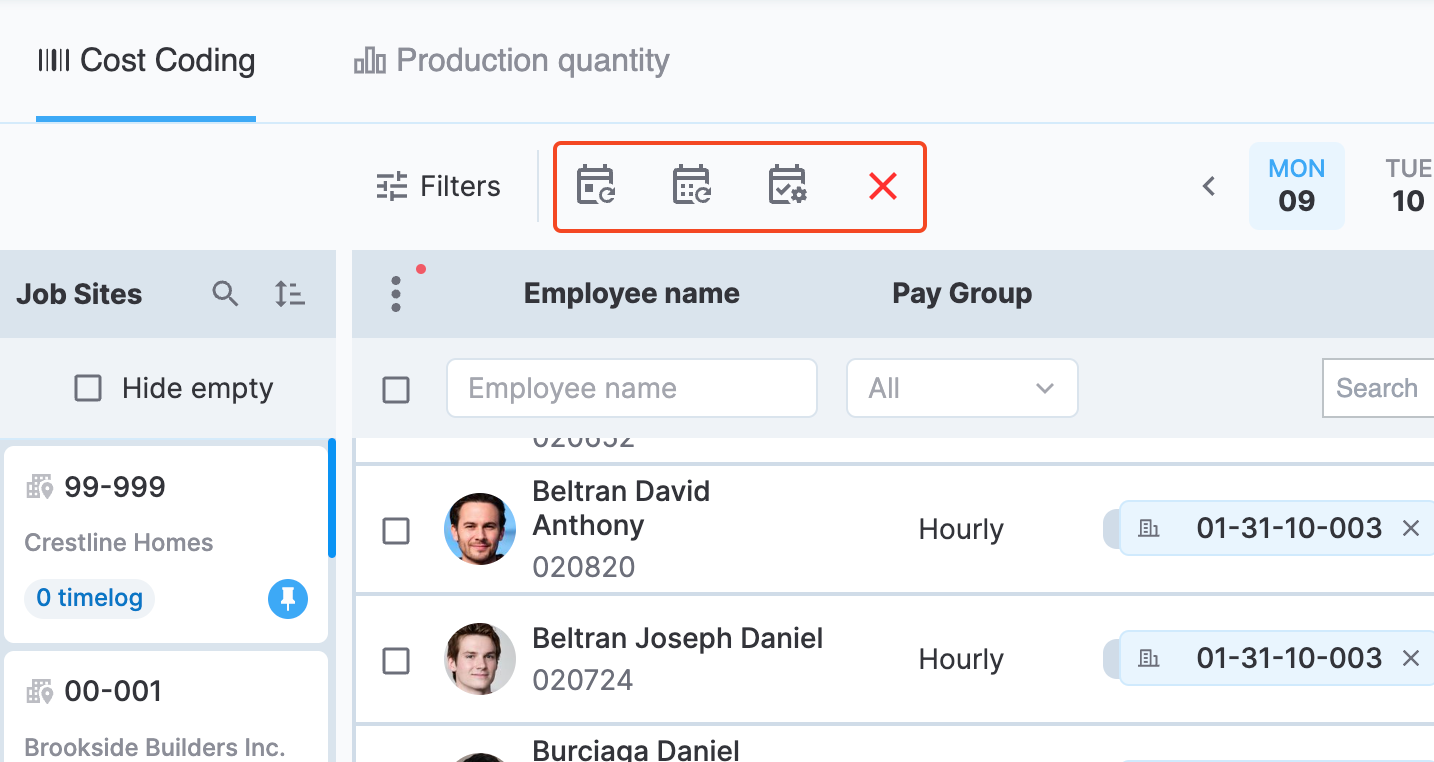
Step 5: Actions (optional)
Using the cost code actions, you can apply or remove cost codes to or from multiple timelogs at once.
The following actions are available:
Bring From Previous Day
If an employee's timelog has a cost code applied to it on the day before the selected day of the week, the same cost code is applied to this employee's current timelog if there is any on the selected day.
Error handling:
- Blocking conditions apply similar to regular cost coding.
Bring From Custom Day
This action works similar to the Bring From Previous Day action, but you can select any day of the week instead of the previous day.
Error handling:
- Blocking conditions apply similar to regular cost coding.
Apply Default Cost Codes
Each employee can have a default cost code specified in the Employees section of a job site. Using this action, you can apply default employee cost codes to all the selected timelogs.
Error handling:
- Only applies to timelogs without existing cost codes.
- Skips timelogs with blocking conditions.
Clear Cost Codes
Removes all the cost codes from the selected timelogs.
Error handling:
- Cannot clear cost codes from reviewed job sites.
- Cannot clear cost codes from approved payroll.
After applying an action, select the Save button to save the changes.
Cost code actions
Apply cost codes automatically
You can set a default cost code for each employee to be applied automatically on the timelogs generated by that employee. The setup involves the following steps:
- Navigate to Administration > Settings > Cost Codes to enable the Auto-apply cost codes setting and set a time when the auto-apply needs to run.
- Proceed to the job site list of your Web App and select a job site.
- Navigate to the Employees tab.
- For one or more employees, select a Default Cost Code from the list of cost codes defined for the selected job site.
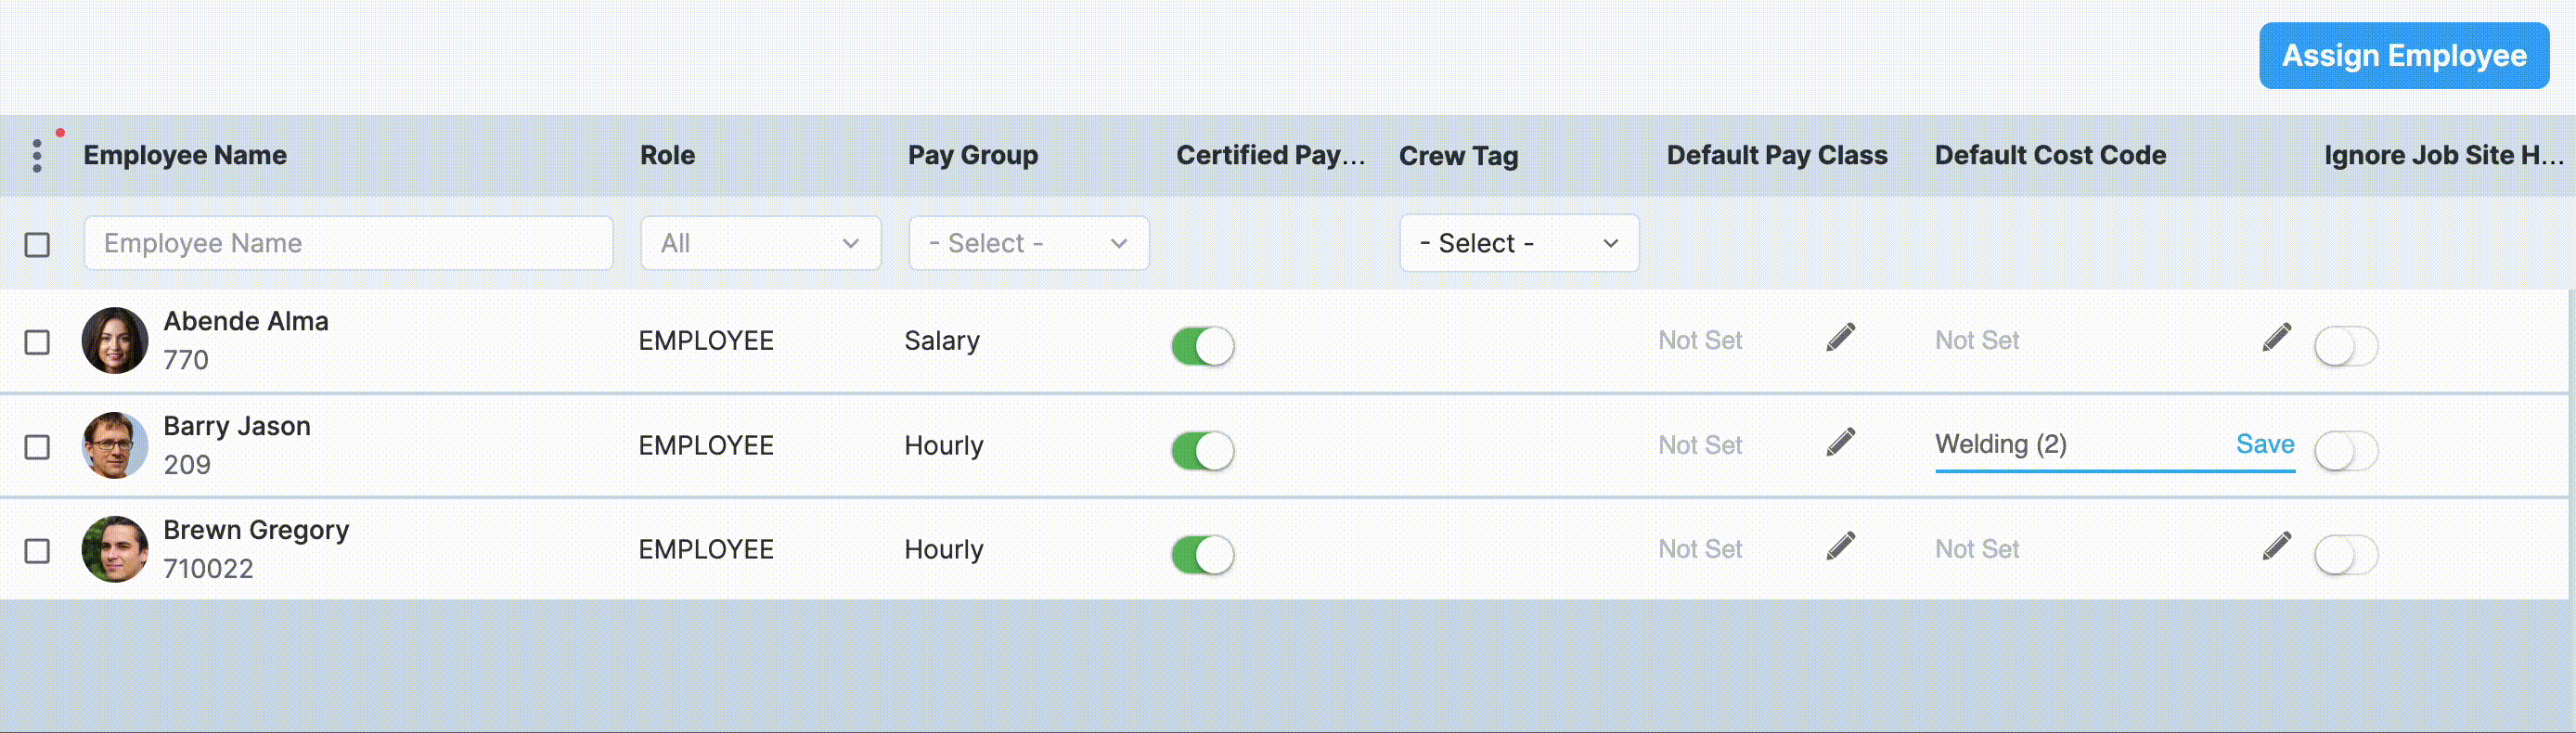
Adding default cost codes to employees
The cost code auto-apply task runs every day at the time selected in the first step above and applies default cost codes to all the timelogs that meet the following criteria:
- The timelog employee has a default cost code specified.
- The timelog doesn’t have any cost codes applied yet (for example, a cost code has not been applied manually prior to running the auto-apply task).
Apply pay classes
If a job site is certified, you can apply pay classes along with cost codes. In this case, the employee entry in the Employees section also has a Default Pay Class field. Thus, if an employee has a default pay class specified, it will be applied together with the default cost code. See Pay classes for more information on pay classes and their purpose.
Allow self cost coding
You can let employees cost code their own timelogs through the Personal App by enabling the Self cost coding permission for them under Administration > Role permissions > Cost coding. Additionally, you can require them to cost code their timelogs on each punch-out by performing the following steps:
- Activate the Cost Code on Punch Out setting in Administration > Settings > Cost Codes.
- Enable self cost coding for individual employees in their profile settings.
Blocking conditions and error indicators
When working with cost codes, various conditions can prevent or restrict cost coding. The system displays specific visual indicators and error messages to help you identify and resolve these issues.
Pay class errors
When pay class cost coding is mandatory (Certified payroll is enabled in job site settings):
- Missing pay class fields are marked in red to indicate they must be filled.
- The system automatically displays errors connected to pay classes when you navigate to the Cost coding page.
- You cannot save cost codes without completing the required pay class fields.
System-defined critical flags
Only system-defined default critical flags can prevent timelog cost coding. These critical flags must be resolved before cost coding can proceed.
Visual indicators:
- Red icon on affected timelogs
- Hover message displays the specific error details.
- Timelogs with unresolved critical flags cannot be cost-coded until the flags are resolved.
Job site review status
When a job site has been approved, a lock icon appears on the employee row, preventing you from applying cost codes. The icon is highlighted in the following screenshot:
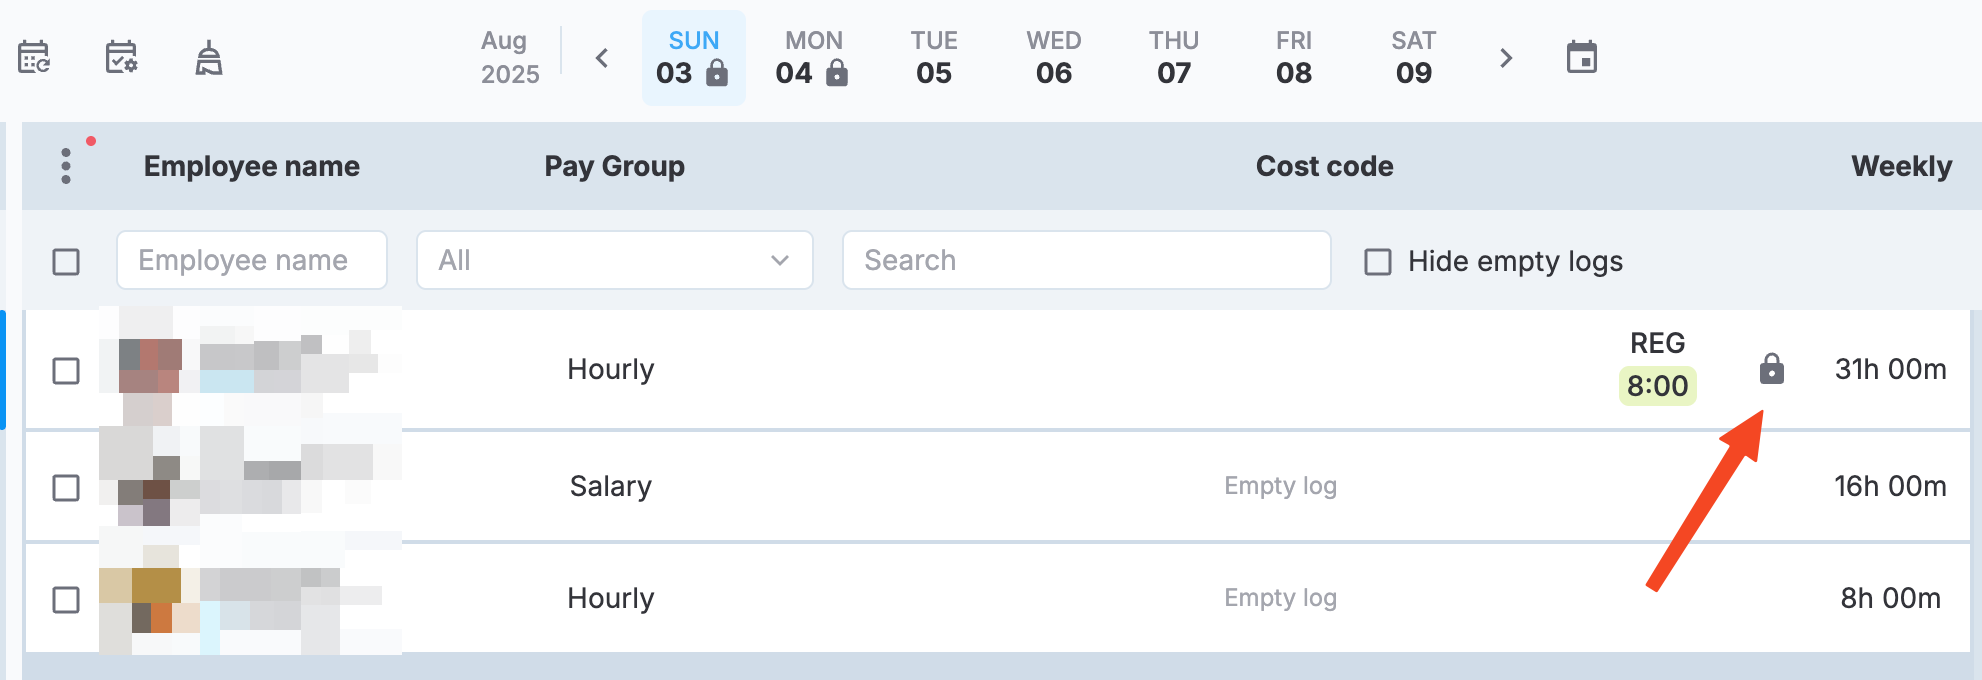
Job site approval indicator
Empty timelogs
Timelogs without any entries:
- Grey text indicator shows "Empty" status on the timelog
- Empty timelogs cannot have cost codes applied
The following screenshot highlights Empty log indicators on two timelog rows.
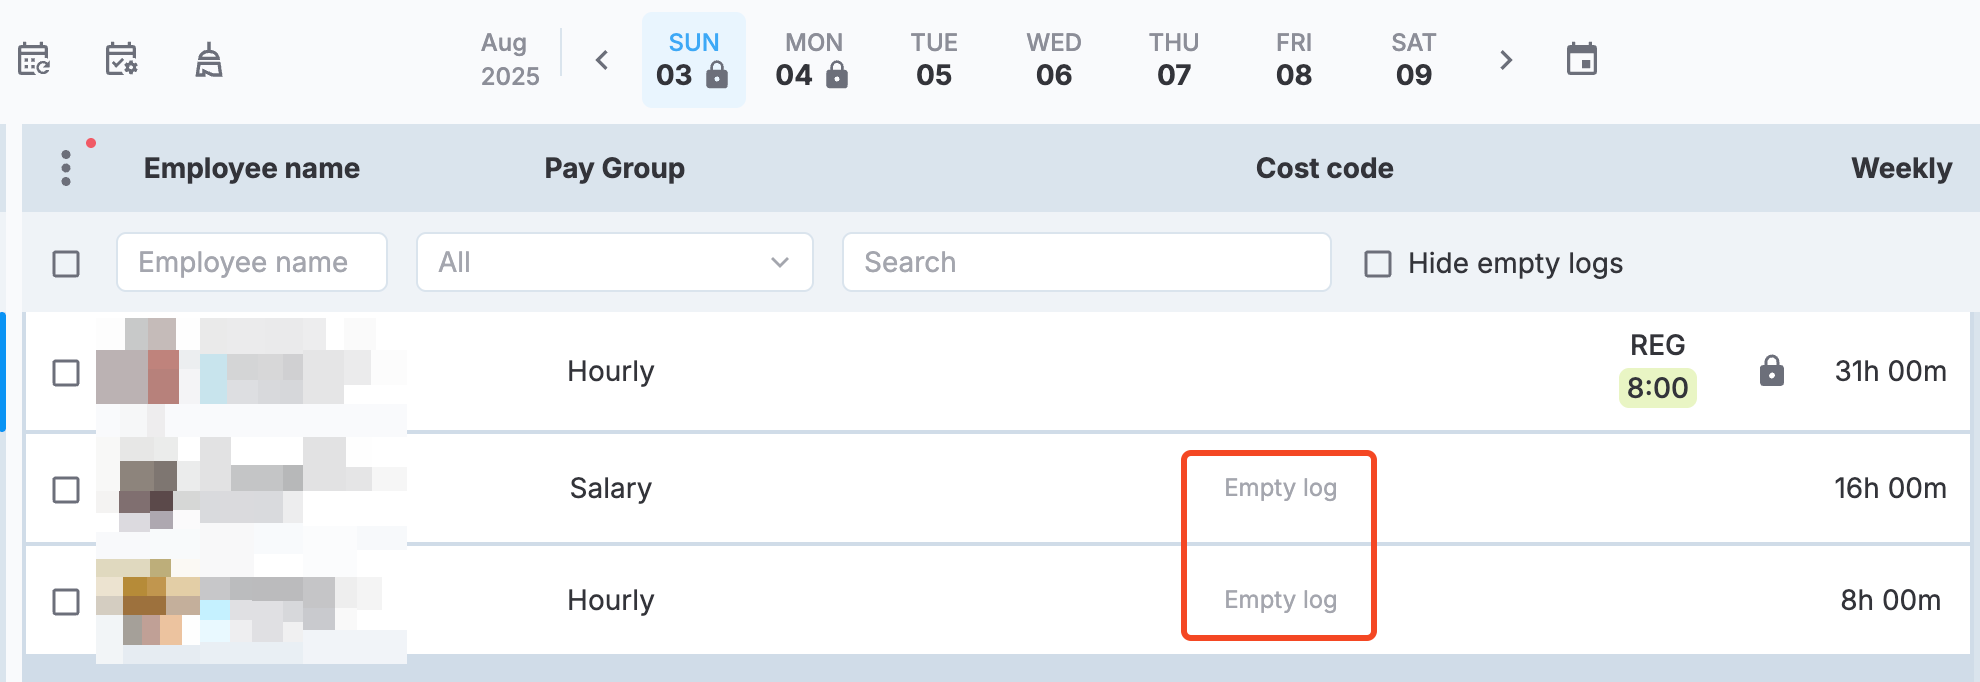
Empty logs
Incomplete timelogs
Timelogs with missing punches or incomplete entries:
- Red icon appears on the timelog.
- Hover message shows "Incomplete timelog" or specific error details.
- Must be completed before cost coding can be applied.
A timelog is considered incomplete if it misses a punch-in or a punch-out. The difference with the Missed punch flag is that, in the case of no punch-out, the timelog is flagged as a Missed punch only after the specified period of time set in Administration () > Settings > Punch and Timelogs > Punch Interval.
Approved payroll status
When the company's payroll has been approved:
- A corresponding indicator appears on affected timelogs.
- Approved payroll timelogs cannot be modified.
- Cost codes cannot be changed after payroll approval.
The following screenshot highlights an approved payroll icon on a timelog row.
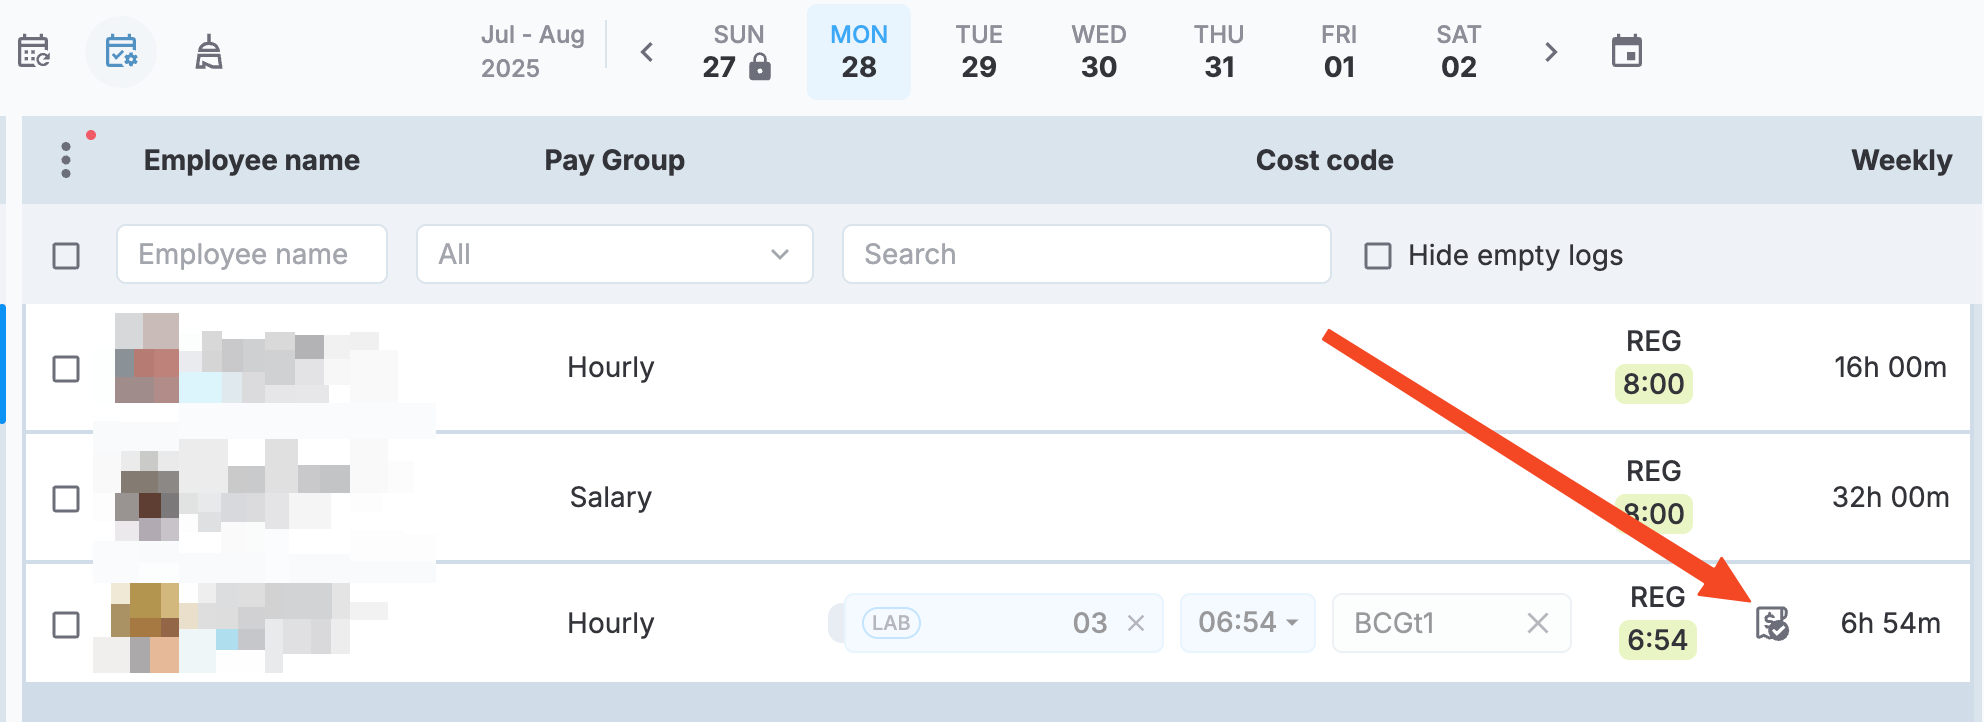
Approved payroll indicator
Updated 9 months ago