
Timelog details
Overview of the timelog details section.
Expand a timelog to see additional details as well as view and resolve flags. The following sections discuss such timelog details as Comments, Action logs, Map, and others.
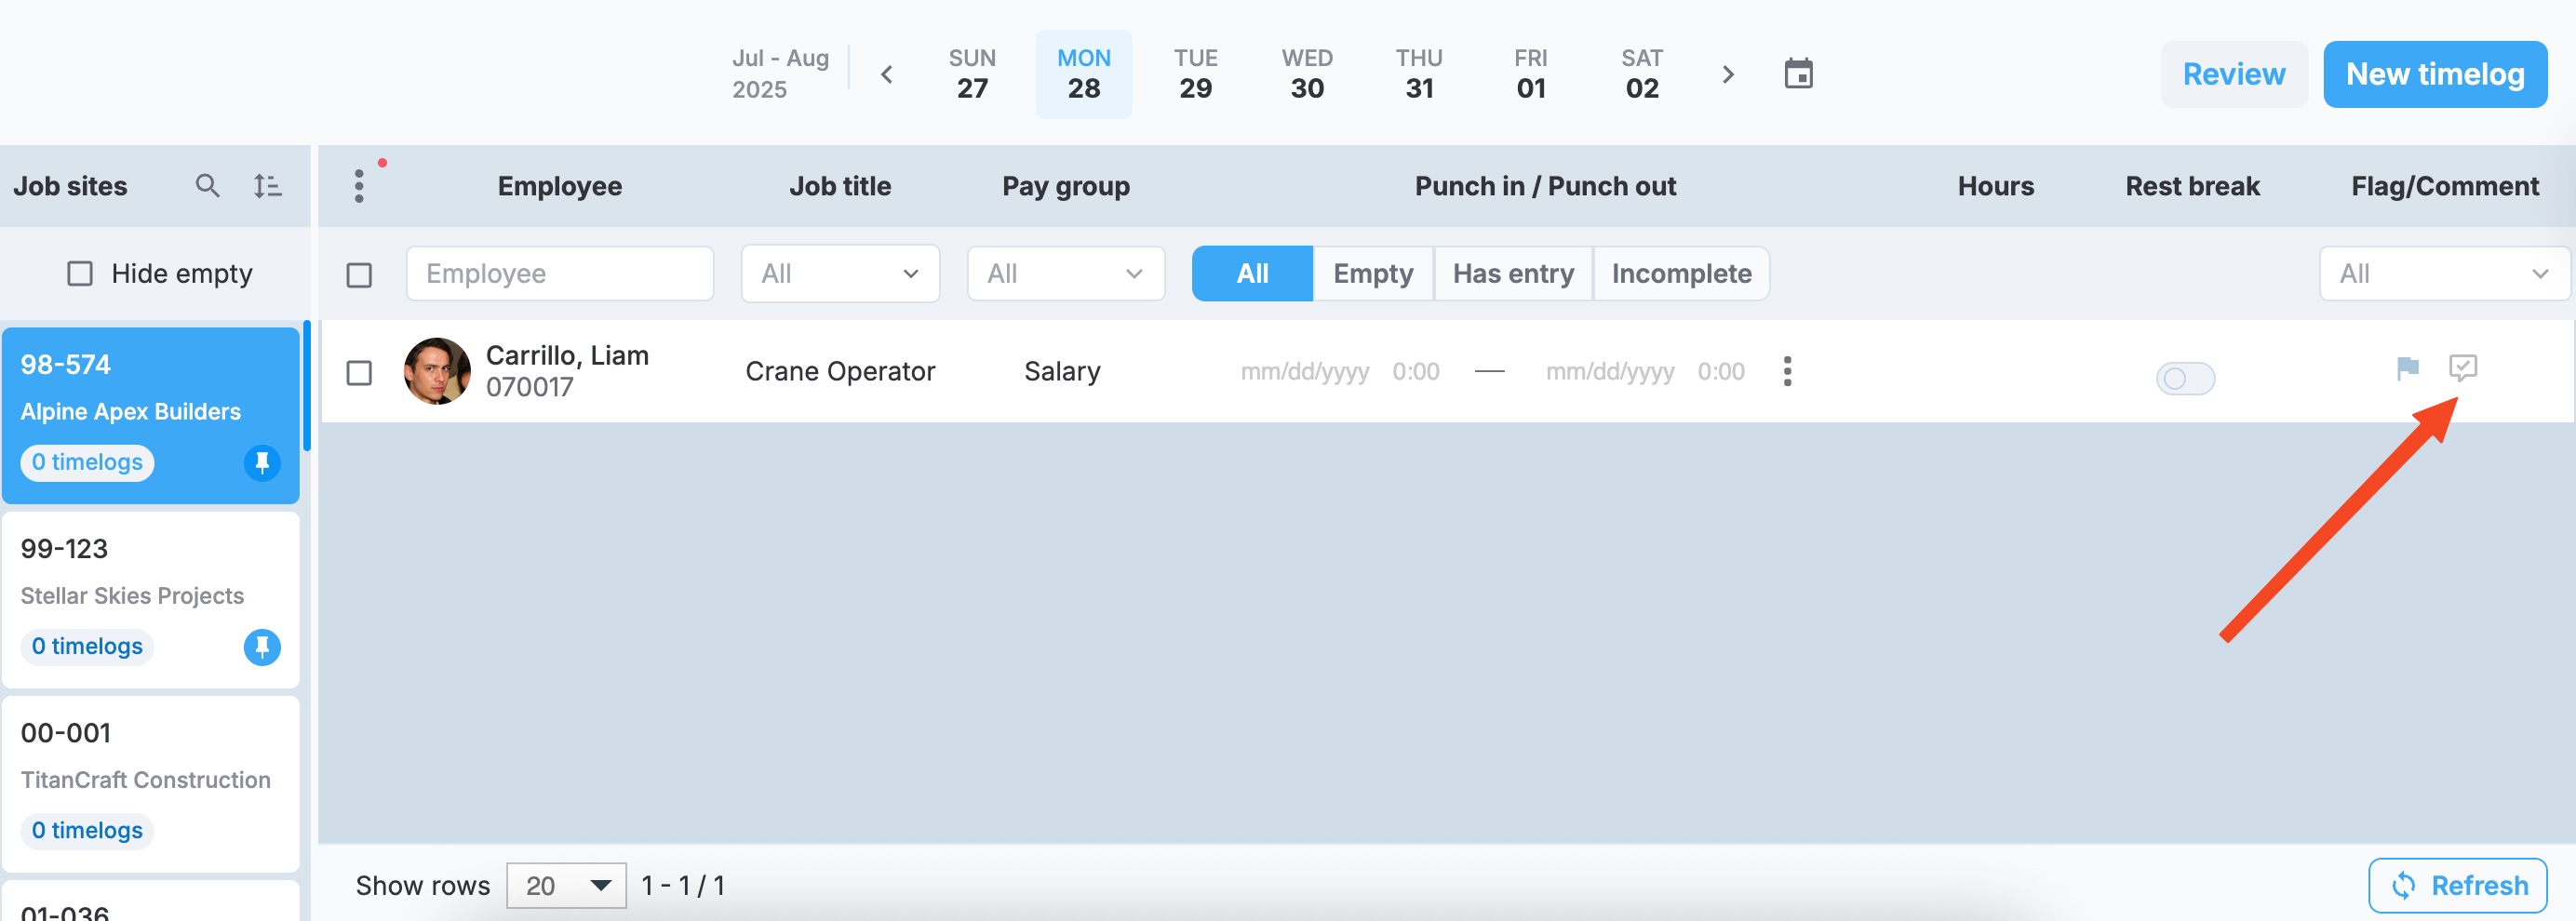
To access timelog details, select the flag icon on the timelog row in the timelogs list, as highlighted in the following screenshot.
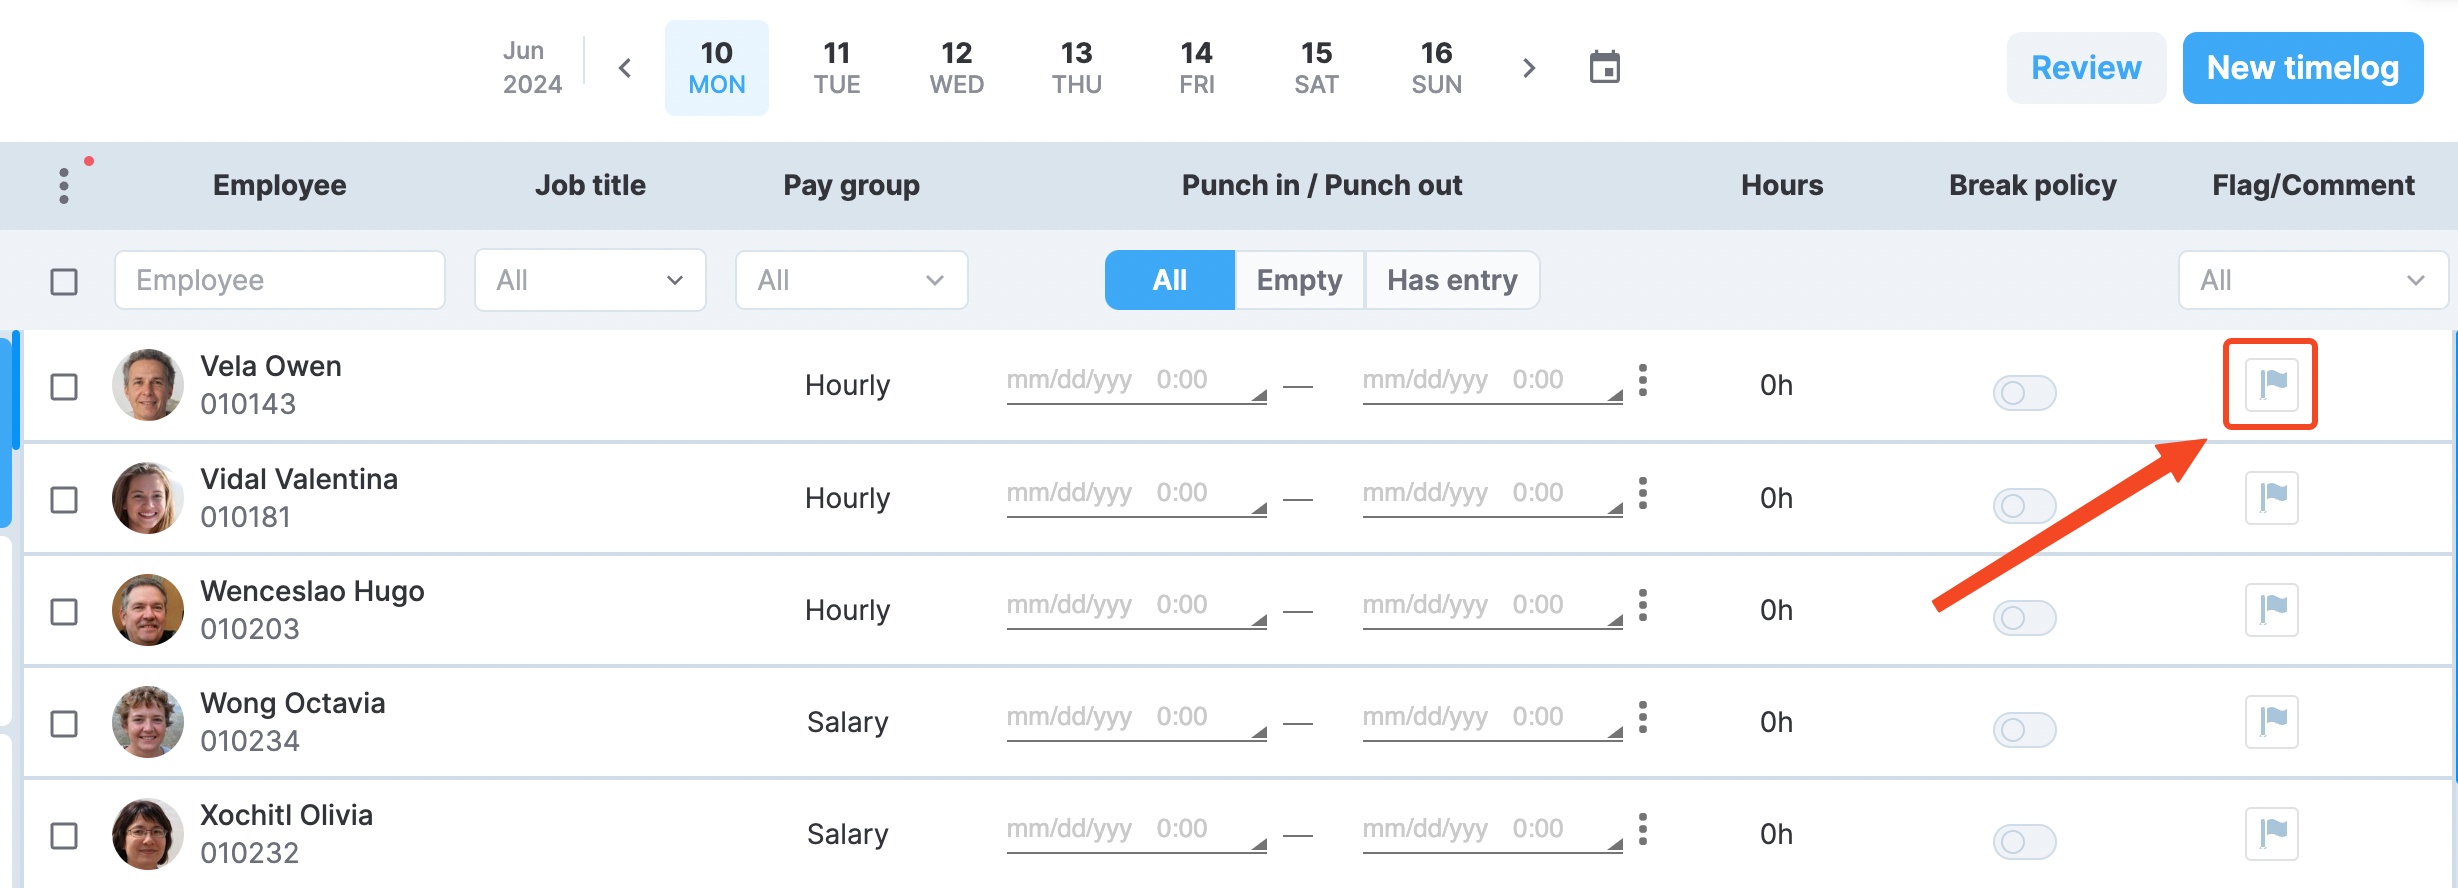
Accessing timelog details
Summary
At the top of the timelog details, you have a summary section that includes the profile picture of the employees along with some employee and job site details.
Lastly, you have a summary of the timelog hours that includes:
- Punched hours. How many hours the employee has worked.
- Meal taken. Displays the total time an employee spent on meal breaks. To track meal durations, enable the Meal break policy for the job site.
- Rest taken. Displays the total time an employee spent on rest breaks. To track rest break durations, enable the Rest break policy for the job site. The field is not displayed for salaried employees.
- Leave hours. Leave requests taken if any.
- Total time. The total time the employee has worked after subtracting all the break durations and leave hours. For salaried employees, this is always
8h.
Timelog details
The Timelog details tab contains details on all the timelog entries such as a punch entry, a meal break entry, and a leave request. The following sections discuss these entry types in greater detail.
Punches
The following screenshot highlights the key components of a punch entry. Note that the details section displays both the rounded time (top) and the actual recorded time (bottom) for each punch, allowing you to see both the time used for calculations and the precise moment when the punch occurred.
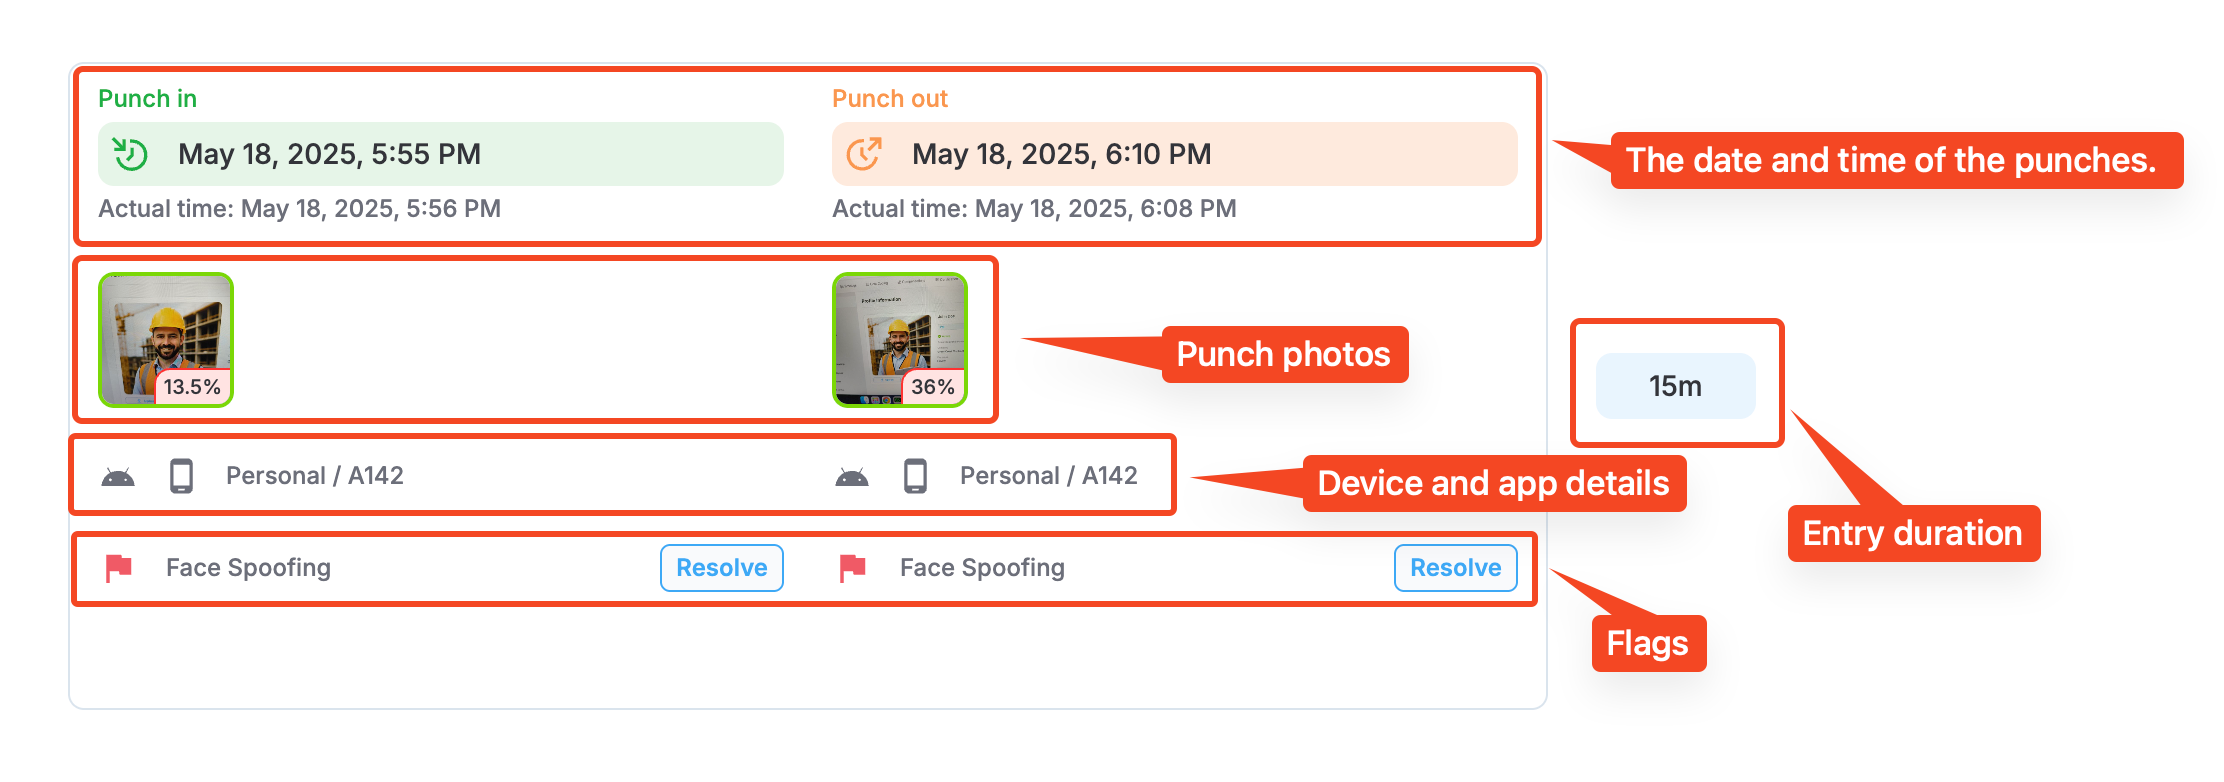
Punch entry components
The following sections discuss each component in detail.
Date and time
The date and time of the punch-in and punch-out.
Punch photos
If face recognition is activated in job site settings, the entry includes employee punch photos. Also, if face liveness is enabled in Administration () > Settings > Punch and Timelogs, the face liveness percentage is indicated on the photo.
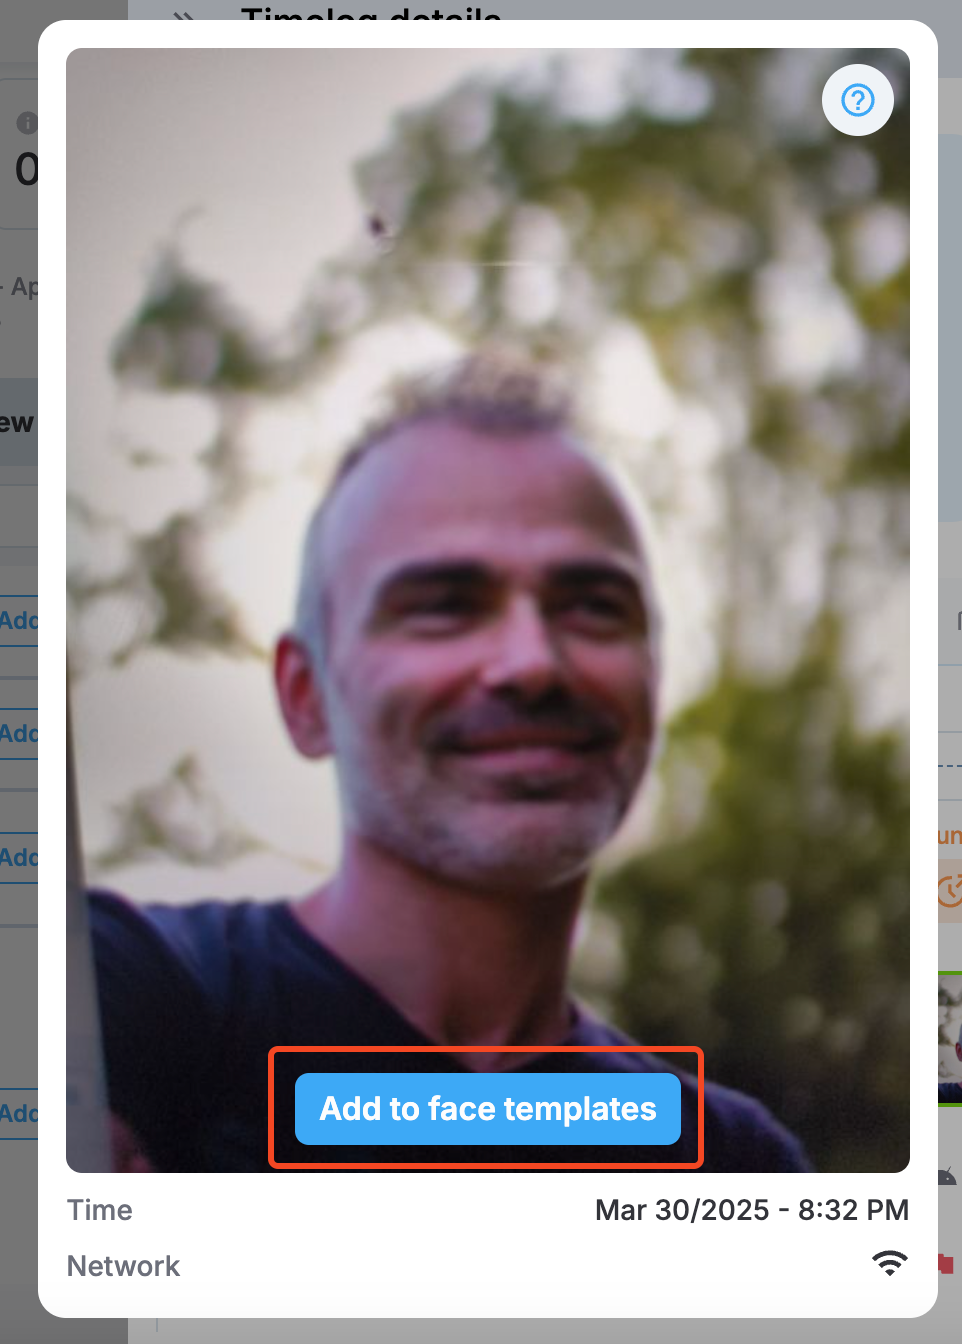
Select the punch photo to expand it and access the Add to face templates option, which adds the photo to the employee's photo library to be used for face recognition later on. From there, the photo can also be added as a profile picture. This can be useful if, for example, the appearance of the employee has changed, and the profile photo needs to be updated to reflect the current appearance.
PERMISSIONSYou may add a photo to face templates if you have the Add face template permission enabled for your role in Administration () > Role Permissions > Employees.
The following screenshot highlights the Add to face templates option on the punch photo.
Device and app details
Here, you have details on the device the punch has been made from. Learn the device model, operating system, and whether the punch has been made from Personal App or Kiosk App.
Flags
Here, you see all the flags, if any, that have been applied to the timelog with the option to resolve them.
Show punch forms
Select the Show punch forms option to view all the punch forms that are applicable to the timelog.
Entry duration
The duration of the entry that is the interval between the punch-in and punch-out.
NOTEIf a punch entry has been created manually, it only includes the punch date and time.
Meal breaks
Meal breaks are recorded by employees if trackable meal policy is enabled for the job site. For more information, see Kiosk App and Personal App docs on manually tracking meal breaks.
Similar to punch entries, a meal break entry includes the date and time of the meal start and end as well as device and app details.
If face recognition is activated in job site settings for meal start or end, the entry also includes employee photos. The Add to face templates option is available too.
Action Logs
Next to General Details, you have the Action Logs tab containing detailed logs on all the actions taken on the selected timelog entry. The following screenshot shows an example of the logs with information on punch times, manual updates, and so on.
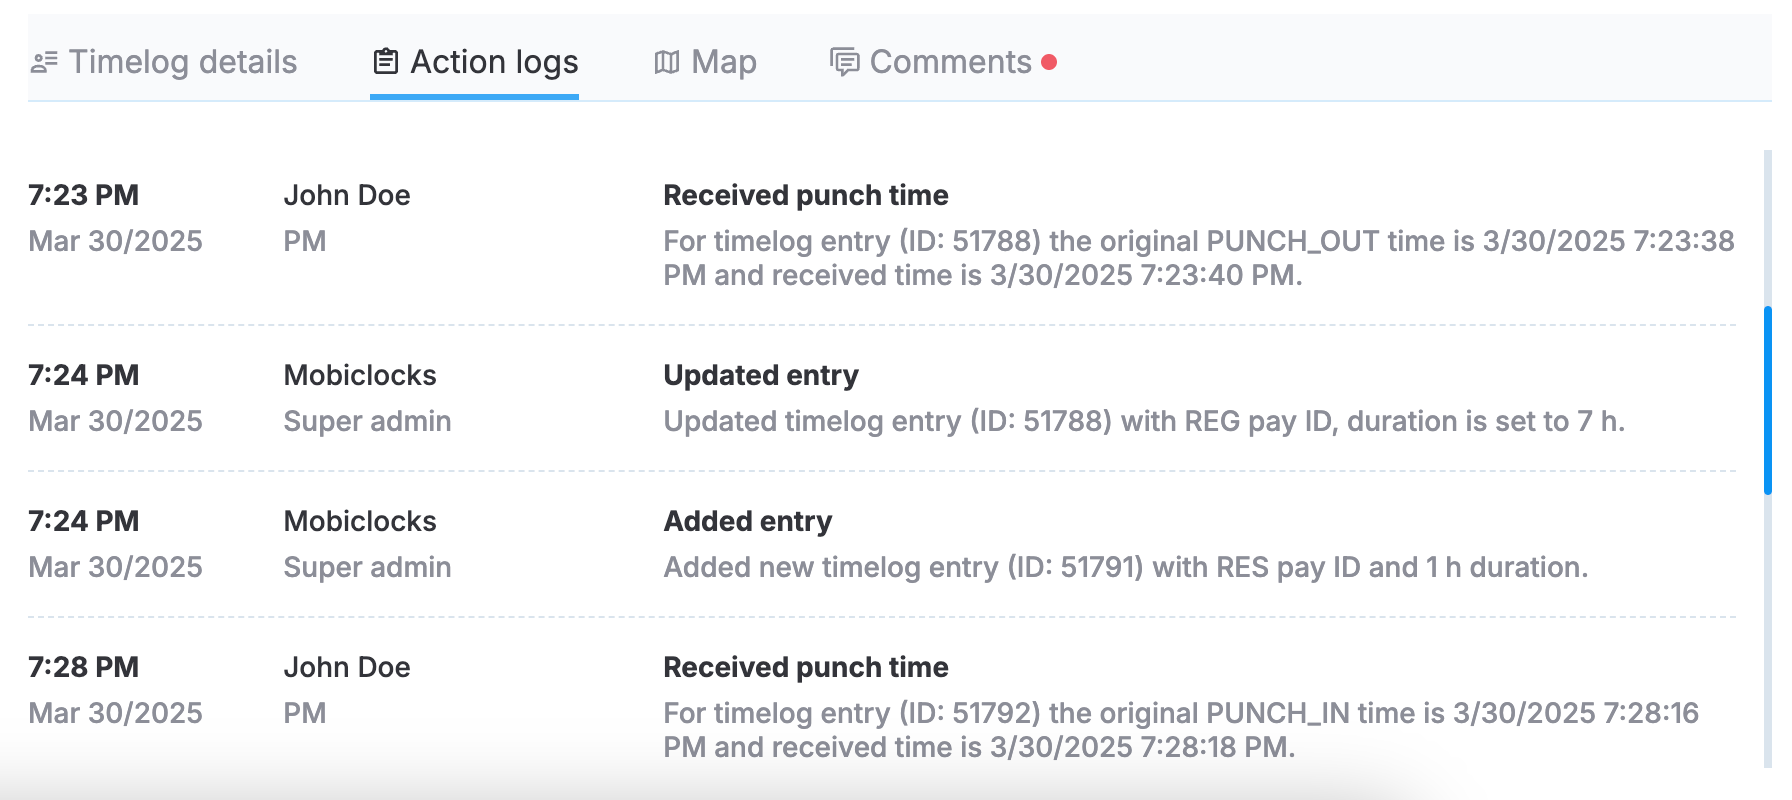
An example of action logs
Map
The Map tab displays all the punch locations through pins on a map. Hover over a pin to learn more about the punch. The following screenshot shows an example of a Map section.
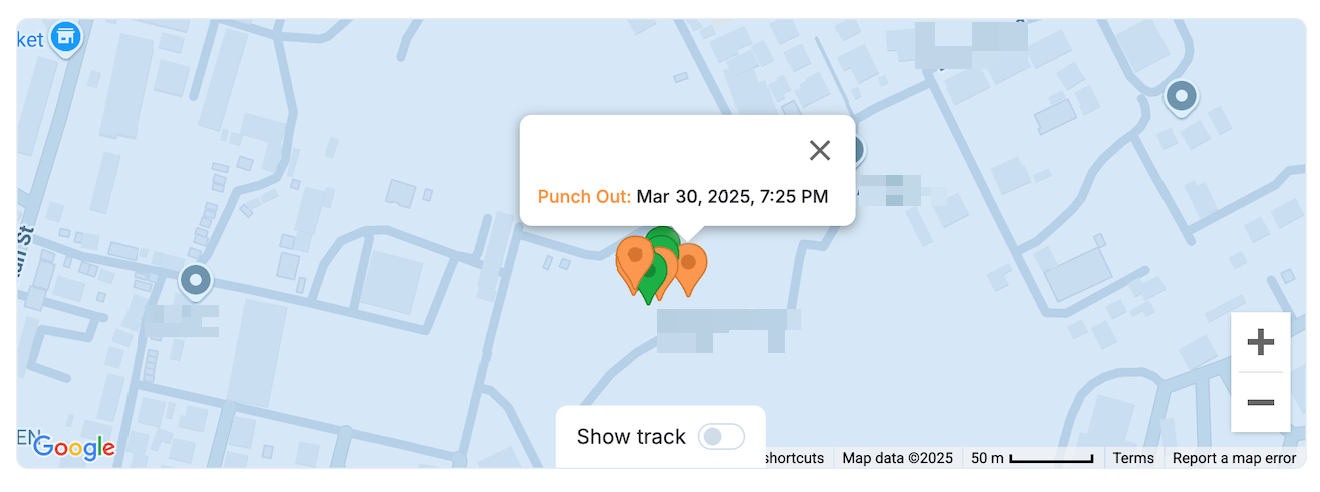
The Map section of the timelog details
Show track
Select Show track to view the movement path between an employee's punch-in and punch-out locations for each punch entry.
Comments
The Comments section can be useful if you or your colleagues need to provide some additional information on the timelog. The section is divided into two tabs:
- Public. Comments are visible to all roles.
- Internal. Internal comments visible only to Admins and PMs.
Use the Resolve all button to resolve all the comments at once.
PERMISSIONSYou may add comments to a timelog if you have the Add Comments permission enabled for your role in Administration () > Role Permissions > Timelogs. In addition, you may resolve comments if you have the Resolve/Unresolve flags and comments permission enabled under the same setting.
The comment icon on the timelog row in Timelogs list indicates if the comments have been seen or resolved. The following four options are available:
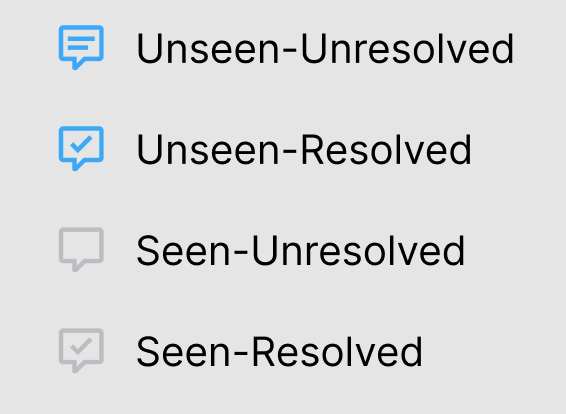
Comment icon variations
The following screenshot shows an example of a timelog where the comments have been seen and resolved.
Comments seen and resolved
Daily log
This section includes the daily log recorded by the employee in the punch form. See Daily log to learn more. The log can also be added directly from Web App.
Updated 3 months ago