
Review and export payroll
How to review payroll data and export it to third parties.
In this topic, you'll learn how to review payroll data and export payroll reports to third-party software. In order to export payroll reports to other platforms, such as accounting software, for processing, you first need to map pay IDs to establish a connection between the pay IDs in your MobiClocks environment and those in the third-party software. Pay ID mapping can be done from the Web App only. To learn more, see Map pay IDs for exporting.
The payroll review and approval process takes place in the payroll dashboard, which is accessed through the Payroll tab in the left-hand navbar of your MobiClocks Admin App.
PERMISSIONSYou may access the Payroll tab if you have the View "Payroll" tab permission enabled for your role in Web App > Administration () > Role Permissions > Payroll.
The payroll dashboard is a Kanban board where each item or card represents weekly payroll data generated for a particular job site. Job site payroll cards are generated automatically by the end of each week and appear under the To do column to be reviewed. Continue to the next section to get started with the review process.
Step 1: Specify date and company
To start the review process, you first need to specify two parameters in the payroll dashboard:
- Company. Choose a company to see corresponding payroll data. An
Alloption is available as well to see data for all the companies at once. - Date. Select a payroll week.
The following screenshot highlights these two filters on the dashboard page.
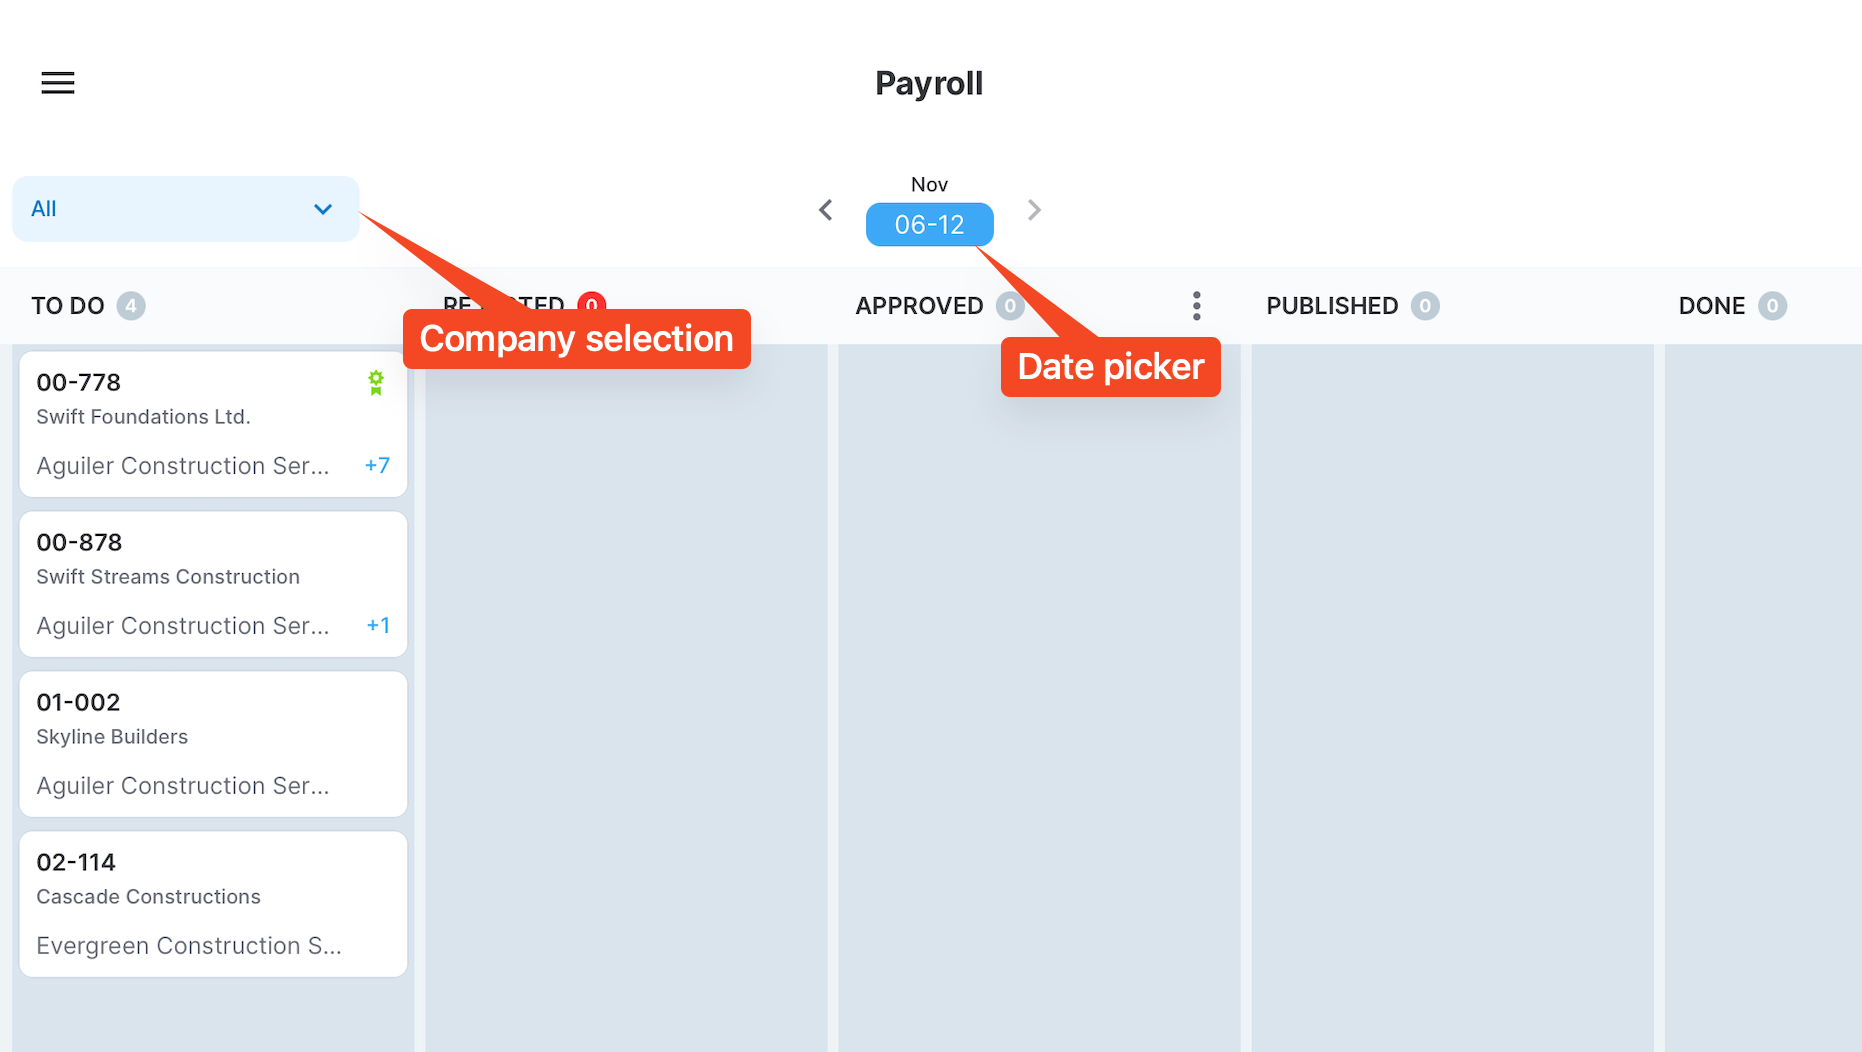
Company and date filters
So, as soon as you select which company and week you want to manage payroll for, you see the available items under the To do column and can start reviewing them.
Step 2: Review payroll
To review a particular job site payroll card, you need to select it to navigate to the details page. The details page includes all the relevant timelogs that have been generated under the selected job site. The list of timelogs consists of the following columns:
- Employee Name. Name of the employee.
- Company. Employee's company.
- Cost code. The cost code assigned to the timelog.
- Pay ID. The pay ID of the timelog.
- Payroll Item. The name of the payroll item in the third-party software that corresponds to the timelog's pay ID. See Map pay IDs for exporting.
- Pay Class. The pay class of the timelog if any.
- Timelog. The duration of the timelog.
The following screenshot shows an example of a job site payroll card details page.
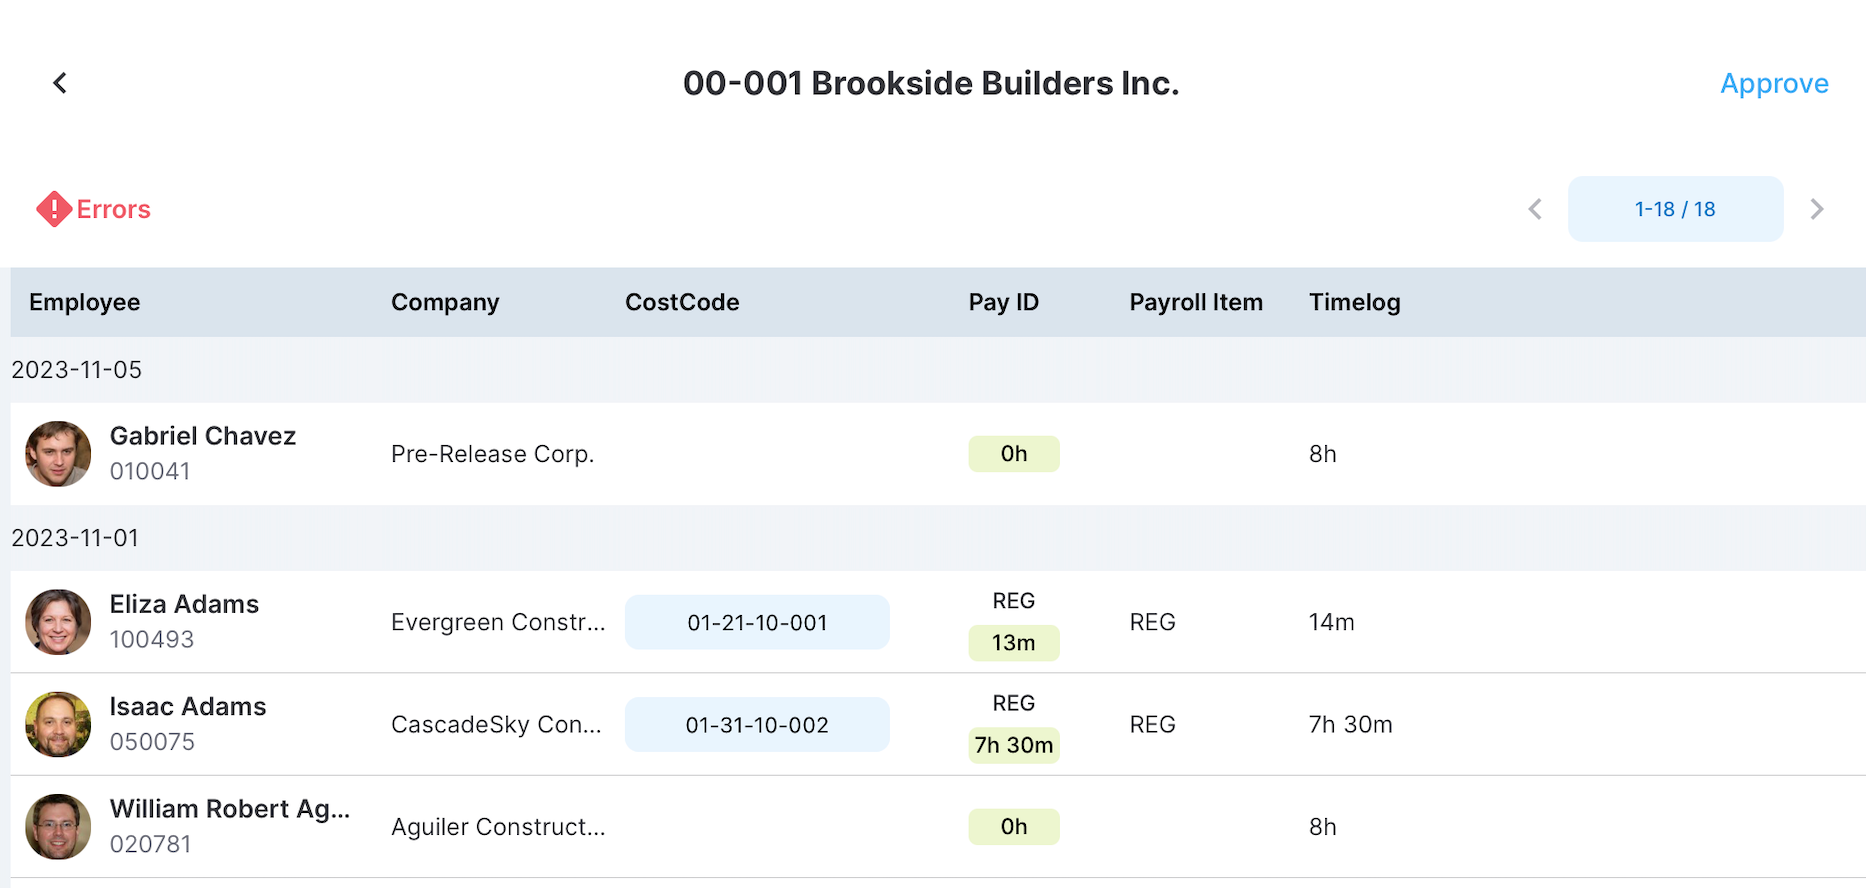
Payroll item details
Step 3: Approve payroll
After reviewing the job site card, you can proceed with approving it. There are two methods you can use for approval:
- Select the Approve payroll button from the job site payroll card's details page.
- Drag and drop the card to the Approved column in the Payroll dashboard.
PERMISSIONSYou may approve payroll if you have the Approve payroll permission enabled for your role in Web App > Administration () > Role Permissions > Payroll.
If there are any issues and payroll cannot be approved, you are notified about it through a dialog box that has details on the issues. The following issues are possible:
- Missing cost codes. One or more timelogs are not cost-coded.
- Missing payroll item mapping. One or more payroll items are not mapped.
- Missing punches. There are timelogs with missed punches.
The following screenshot shows an example of an error dialog box that appears when a job site card has issues and cannot be approved.
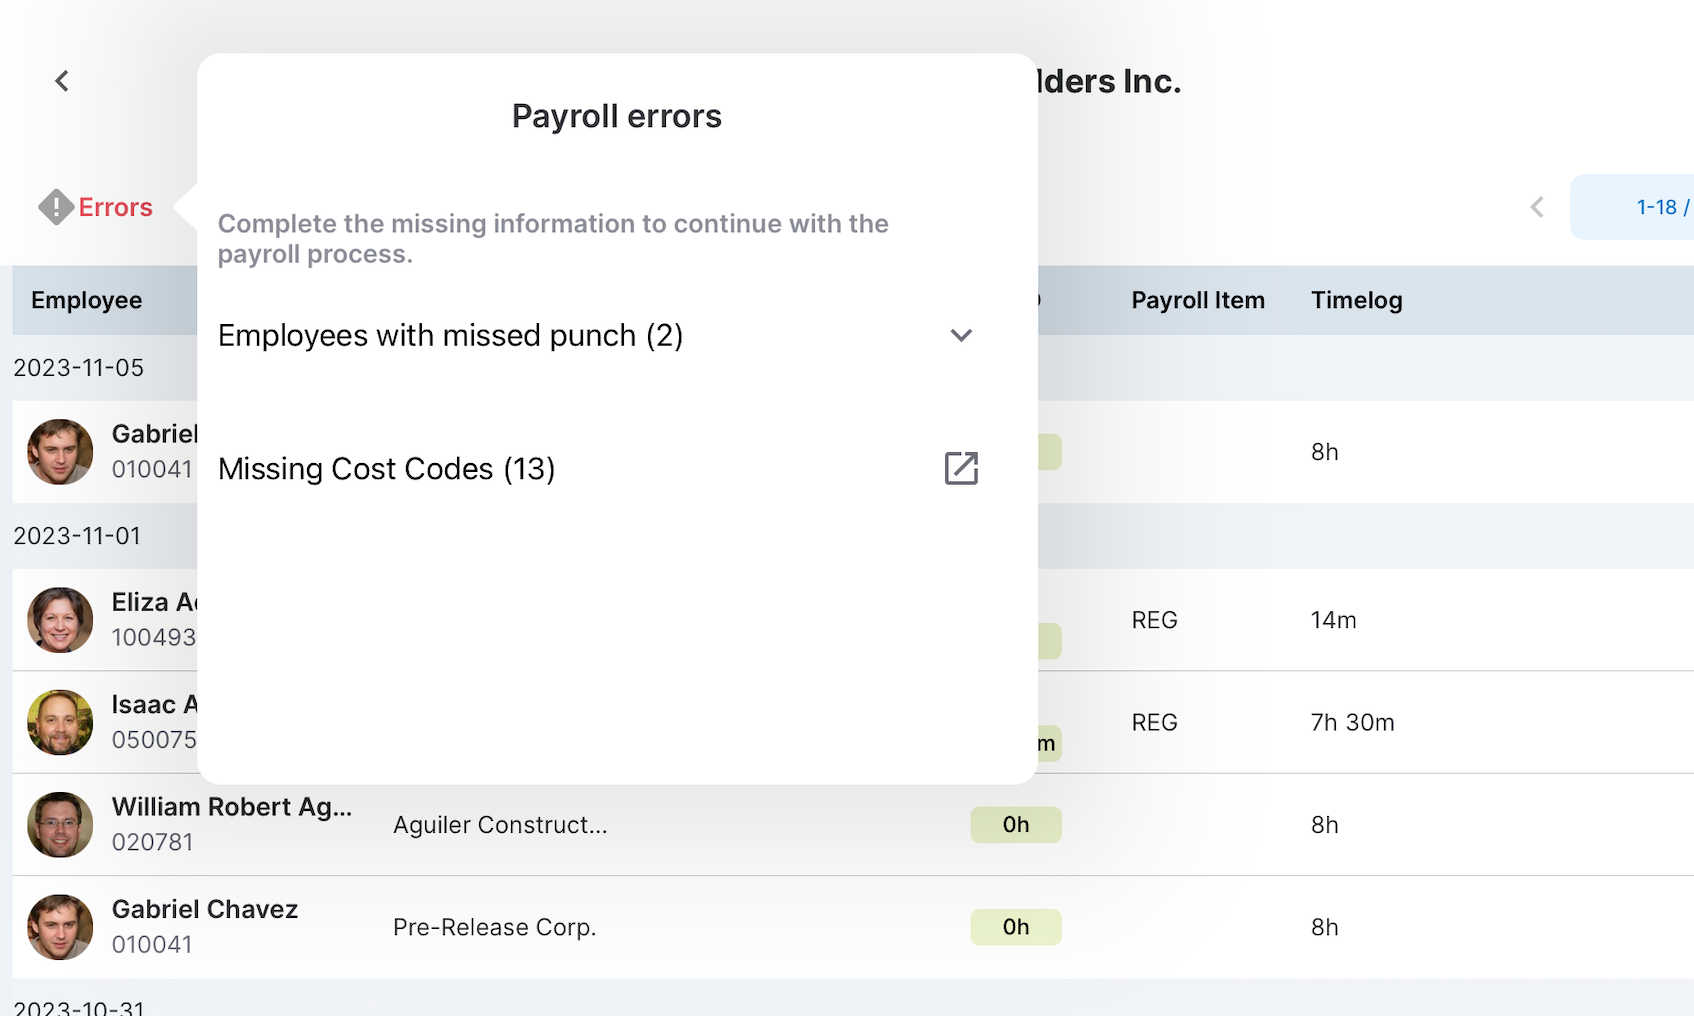
Payroll error details
If there are no issues, and the payroll is eligible for approval, you see a dialog box to confirm the approval or cancel it, as shown in the following screenshot.
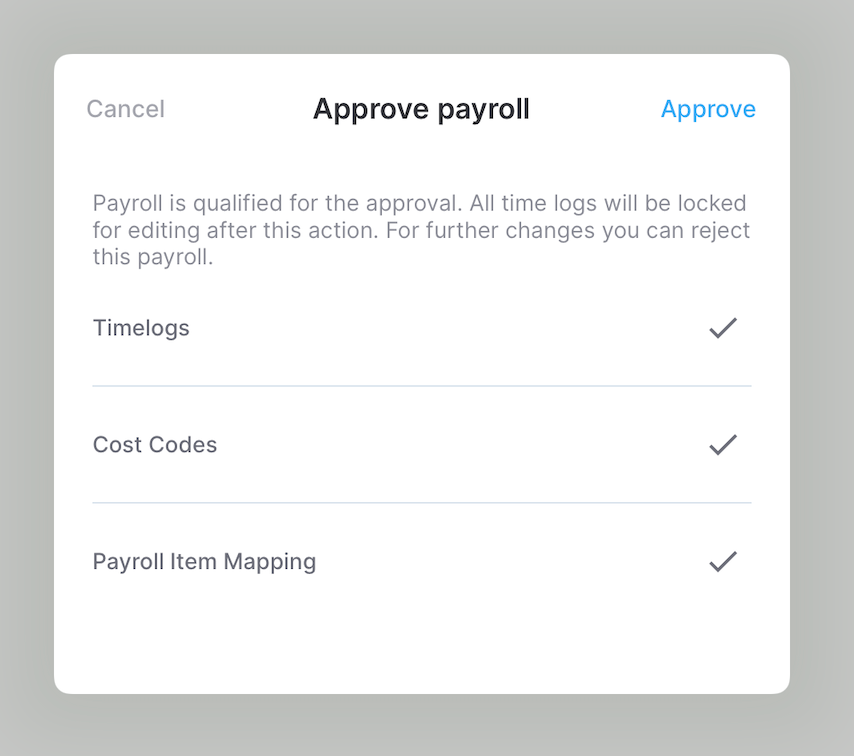
Approve payroll dialog box
NOTEIf a payroll is approved, all the related timelogs become locked and cannot be edited.
Lastly, if for some reason, the approval needs to be reverted, you can move the card to the Rejected column.
PERMISSIONSYou may reject payroll if you have the Reject payroll permission enabled for your role in Web App > Administration () > Role Permissions > Payroll.
There is also an option to Lock payrolls in the Approved column, to prevent them from being rejected.
PERMISSIONSYou may lock payroll if you have the Lock payroll permission enabled for your role in Web App > Administration () > Role Permissions > Payroll.
The Lock payrolls action is accessed from the more icon ( ) in the Approved column, as shown in the following screenshot.
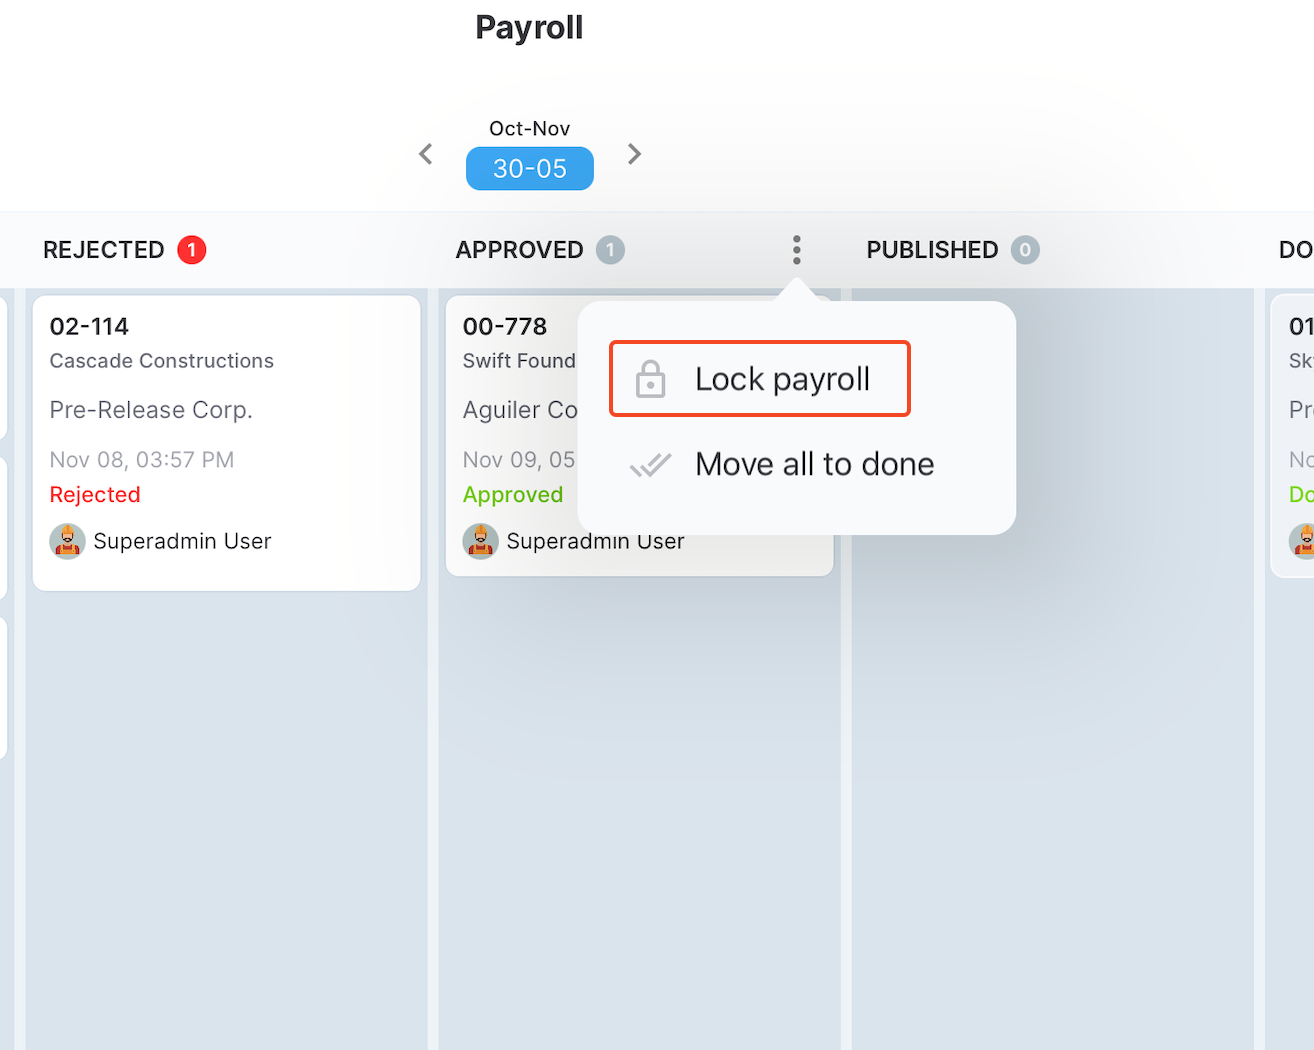
Lock payroll action
Step 4: Publish payroll
Finally, you can move a payroll card to the Published column if you want to send it to a connected software to be processed. See Payroll publishing for more details.
PERMISSIONSYou may publish payroll tab if you have the Publish payroll permission enabled for your role in Web App > Administration () > Role Permissions > Payroll.
After moving the item to the Published column, you can monitor its status. You are notified if the item has been published successfully or if there have been any issues. The following screenshot shows an example of a failed attempt.
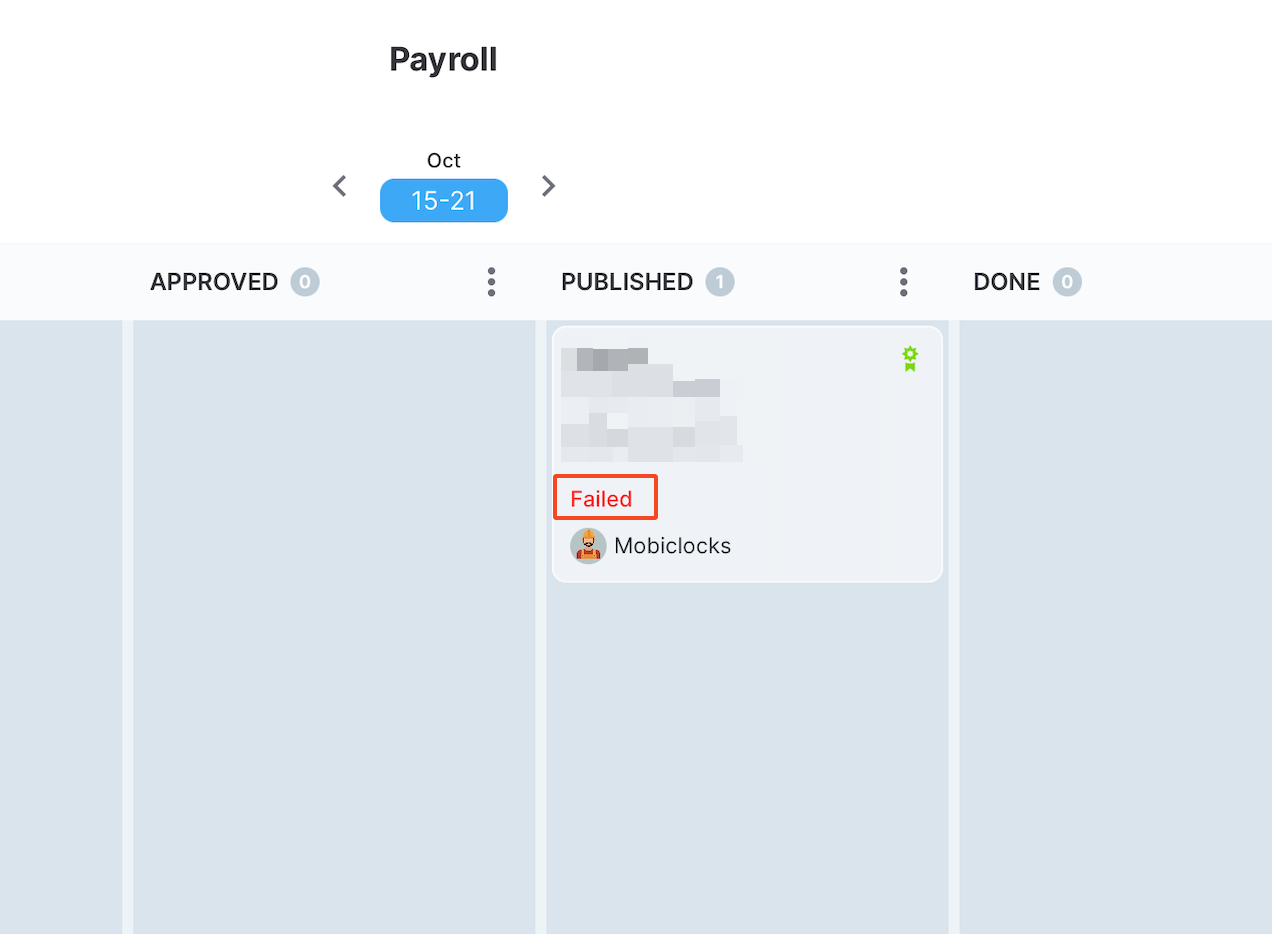
Failed publishing attempt
In such cases, you can enter the payroll card details page and learn more about the reasons for failure in Payroll history.
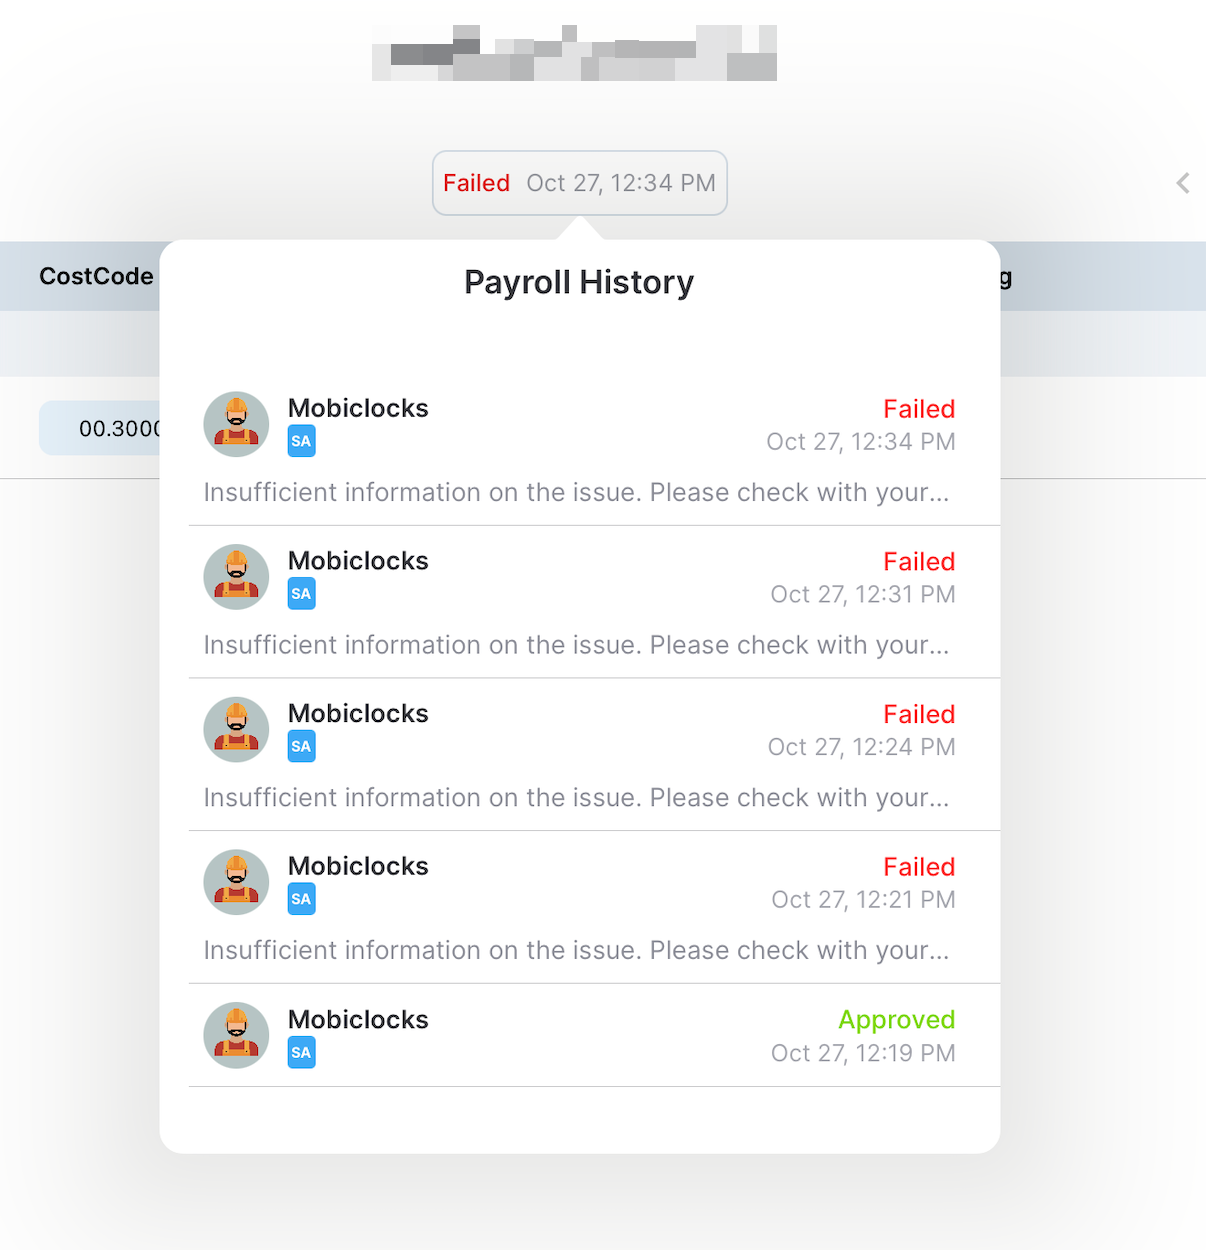
Payroll History
After addressing the issues, you can select the Retry button in the payroll dashboard to try publishing the payroll item again.
Updated over 1 year ago