
Define cost codes
Different methods for adding cost codes.
To start applying cost codes, you first need to define them in your MobiClocks environment. Cost codes are defined for each individual job site and can be accessed from the Cost codes tab in job site details.
PERMISSIONSTo access the Cost code section, you must have the View "Cost Codes" tab permission enabled for your role in Administration > Role Permissions > Job sites.
There are four methods for adding cost codes to a job site:
- Manual creation
- Manual importing
- Importing from MobiClocks integrations
- Copying from another job site
The following sections discuss each method in detail.
Create cost codes manually
To be able to create cost code manually, you need to have the Cost Code Creation Policy activated in Administration > Settings > Cost Codes.
PERMISSIONSTo create a cost code, you must have the Create cost code permission enabled for your role in Administration > Role Permissions > Job sites.
Follow these steps to manually create a cost code:
- Open the Job Sites tab from the left-hand navbar of your MobiClocks Web App.
- Navigate to the job site you want to add a cost code to and open the Cost codes tab in the job site details.
- Open the Actions menu and select Create cost code.
- Fill in the following fields in the dialog box:
- Type. The cost type.
- Cost code. Add a name for the cost. A cost code name usually includes a numeric identifier and account name (the unique name assigned to an account in an accounting system), but you can use any format depending on your cost code structure. For more information on cost code naming, see Cost coding overview.
- Description. Add any additional information to the cost code.
- Group. Use this field to organize and categorize cost codes by specific designations such as buildings, areas, phases, or other groupings.
- Hourly Rate. Specify an hourly pay rate for the cost code.
- Unit of measure. The unit of measure for the cost code. Visible if you have production quantity enabled.
- Make Standard. If you mark a cost code as standard, it is applied to all job sites in your environment.
- Is Billable. Specify if the cost code is billable or not.
- User-defined fields. Additionally, you may have one or more custom fields if you have any user-defined fields specified.
- Select Save to create the cost code.
When you save a newly created cost code, it starts appearing in the list of cost codes of the selected job site. Further on, you can edit the cost code and add more details to it. See Editing cost codes and adding more details.
Import cost codes manually
With manual import, you can import an Excel file with one or more cost codes.
PERMISSIONSTo import cost codes, you must have the Import cost codes permission enabled for your role in Administration > Role Permissions > Job sites.
Follow these steps to manually import a cost code:
- Navigate to the job site you want to add cost codes to and open the Cost codes tab in job site details.
- Open the Actions menu and select Cost Code Excel Import.
- In the dialog box that opens next, select Excel template to download the file. The Excel file contains the template sheet that you need to fill in and an example sheet with placeholder data for reference. In the template sheet, you have the following fields:
- COST CODE. This field is equivalent to the Name field in Create cost codes manually.
- COST CODE DESCRIPTION. Same as Description in Create cost codes manually.
- SUB-JOB / GROUP. Same as Group in Create cost codes manually.
- COST CODE TYPE. The cost type.
- STANDARD. Same as Is Standard in Create cost codes manually. If the cost code is standard, you need to enter
TRUEas the cell value. Otherwise, leave the cell empty. - BUDGET, PLANNED HOURS, PRODUCTION QUANTITY and UNIT OF MEASURE. Used if you have production quantity enabled.
- After completing the Excel file with all the cost codes that you need to import, return to the dialog box in the Web App that the template was downloaded from.
- Select Attach and upload the completed template.
- Select Upload to upload the data.
Now, the uploaded cost codes will appear in the list of cost codes of the selected job site. Further on, you can edit the cost codes and add more details. See Editing cost codes and adding more details.
Import cost codes from integrations
You can use MobiClocks integrations as your data source, and, in some cases, the data includes cost codes as well. To see if a given integration supports cost code or standard cost code importing, visit the integration page under Integrations.
To get familiar with the process of syncing and importing data from integrations, see How integrations work.
NOTEWhen importing cost codes from integrations, standard cost codes are imported to all job sites at once. In turn, regular cost codes are grouped by job site, and you can sync and import each job site's cost codes separately.
Copy cost codes from another job site
Use the Copy from option to copy the cost codes from one or more job sites in your environment. Select the job sites from the dialog and select Save, as shown in the following screenshot.
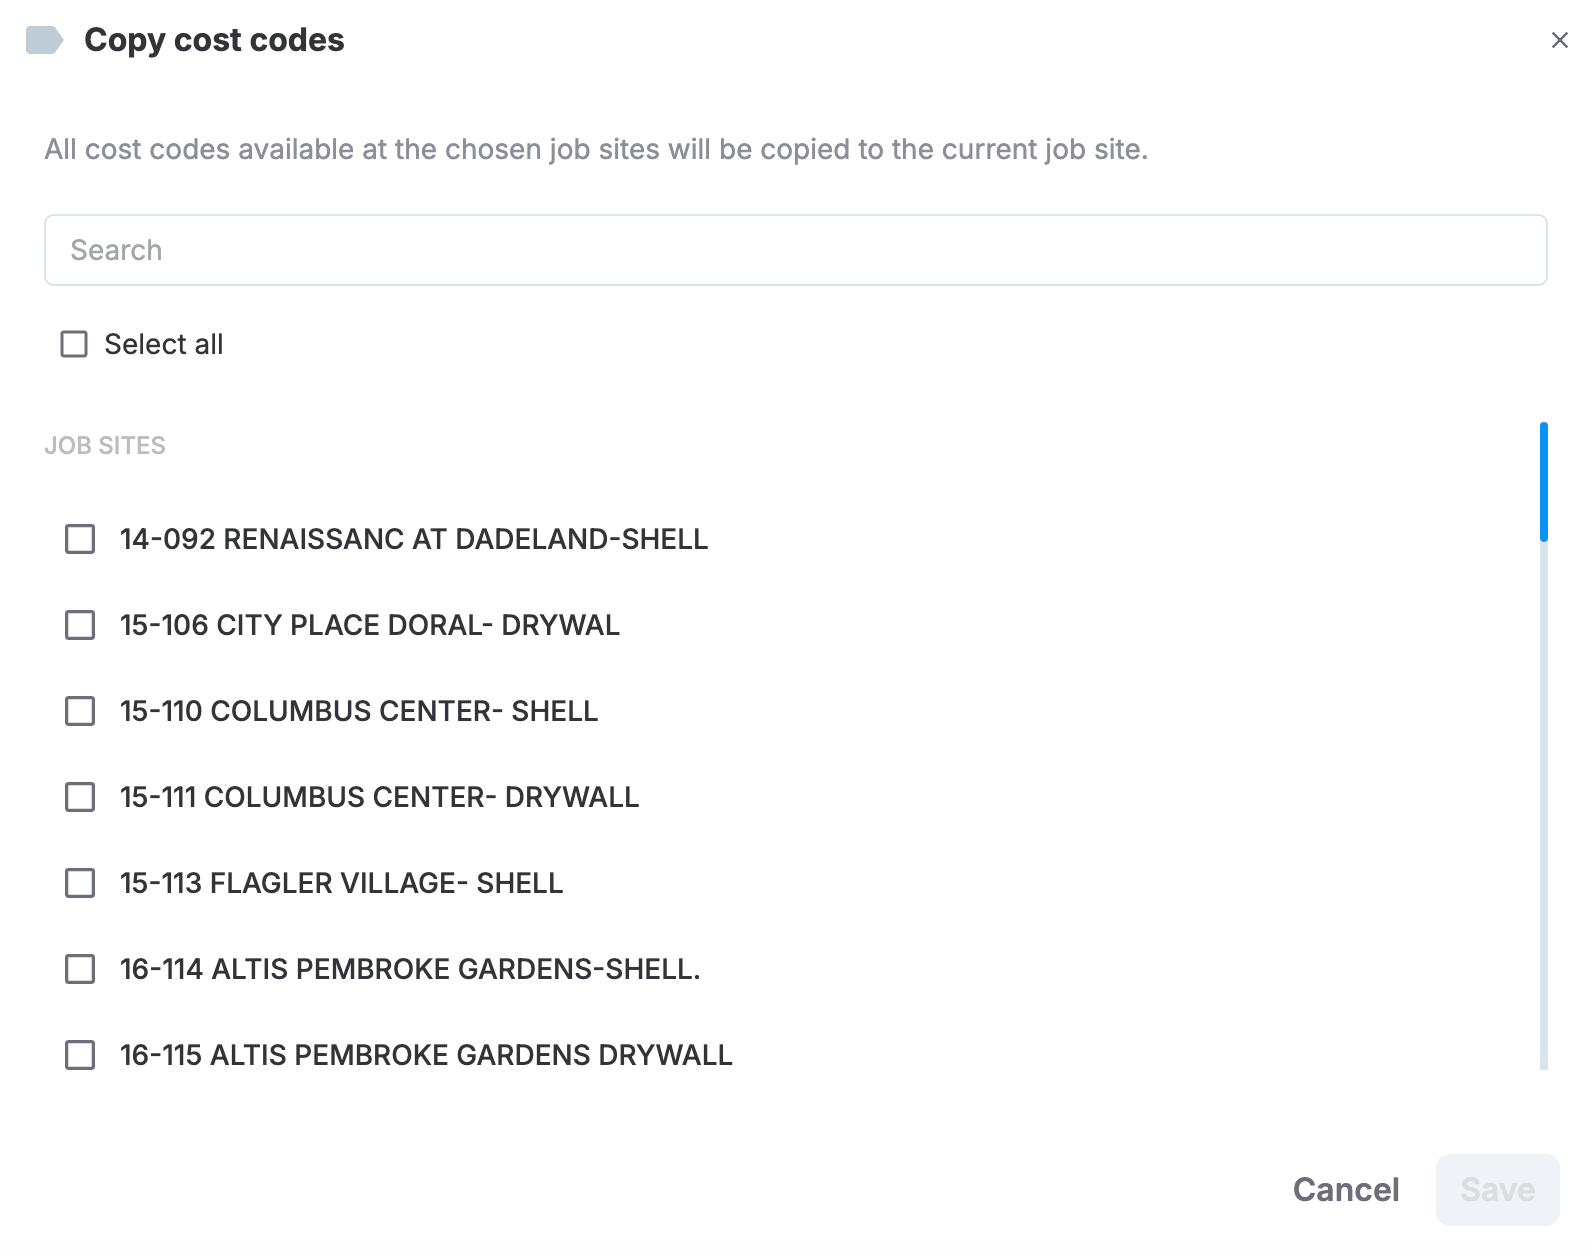
Copy from dialog
PERMISSIONSTo copy cost codes from another job site, you must have the Copy cost code permission enabled for your role in Administration > Role Permissions > Job sites.
Editing cost codes and adding more details
Now that you have added cost codes to your MobiClocks environment, you can view them in the cost code list, edit cost code details, as well as add more information. All of this is done in the cost codes list, which is located in the Cost codes tab of each job site's details. The following is a list of the fields where you can add or view new details or edit cost codes.
Synced status
The cost code list has a Synced status field that indicates how the cost code has been added to your environment. It can have the following values:
- Manual. The cost code has been created manually.
- Name of an integration. The name of the MobiClocks integrations that the cost code has been imported from.
Budget
Here, you can indicate a budget for the cost code.
Planned hours
This field is for specifying how many hours have been allocated for a given cost code.
Planned PQ
The Planned PQ field is for indicating the planned production quantity for a cost code. It is shown if the production quantity feature is enabled for the selected job site. See Production quantity for more information on production quantity and how it is set up.
Status
When a cost code is added to your environment, its status is Enabled by default. If you disable a cost code, it will no longer be available in the Cost Coding section to be applied to timelogs.
Edit and delete
Lastly, there is an Actions column in the cost codes list where you can edit cost code details or delete the cost code.
PERMISSIONSTo edit or delete a cost code, you must have the Edit/delete cost code permission enabled for your role in Administration > Role Permissions > Job sites.
Updated about 1 month ago