Import employees
What methods are available for employee bulk import.
You can import employee profiles either manually by uploading a file or by syncing with an integrated platform. This guide discusses these two options.
Manual employee import
You can use the manual import option to import an Excel file with a list of employees. This can be useful if you already have an employee database in a third-party system that is not integrated with MobiClocks.
PERMISSIONSYour role needs to have the Import employees permission activated under Administration > Role Permissions > Employees to be able to do a manual employee import.
NOTEIn case of a manual employee import, there are no auto-sync options. Therefore, you need to perform the import again manually in case your employee data has been updated externally and you want to update it in MobiClocks as well.
Download the template
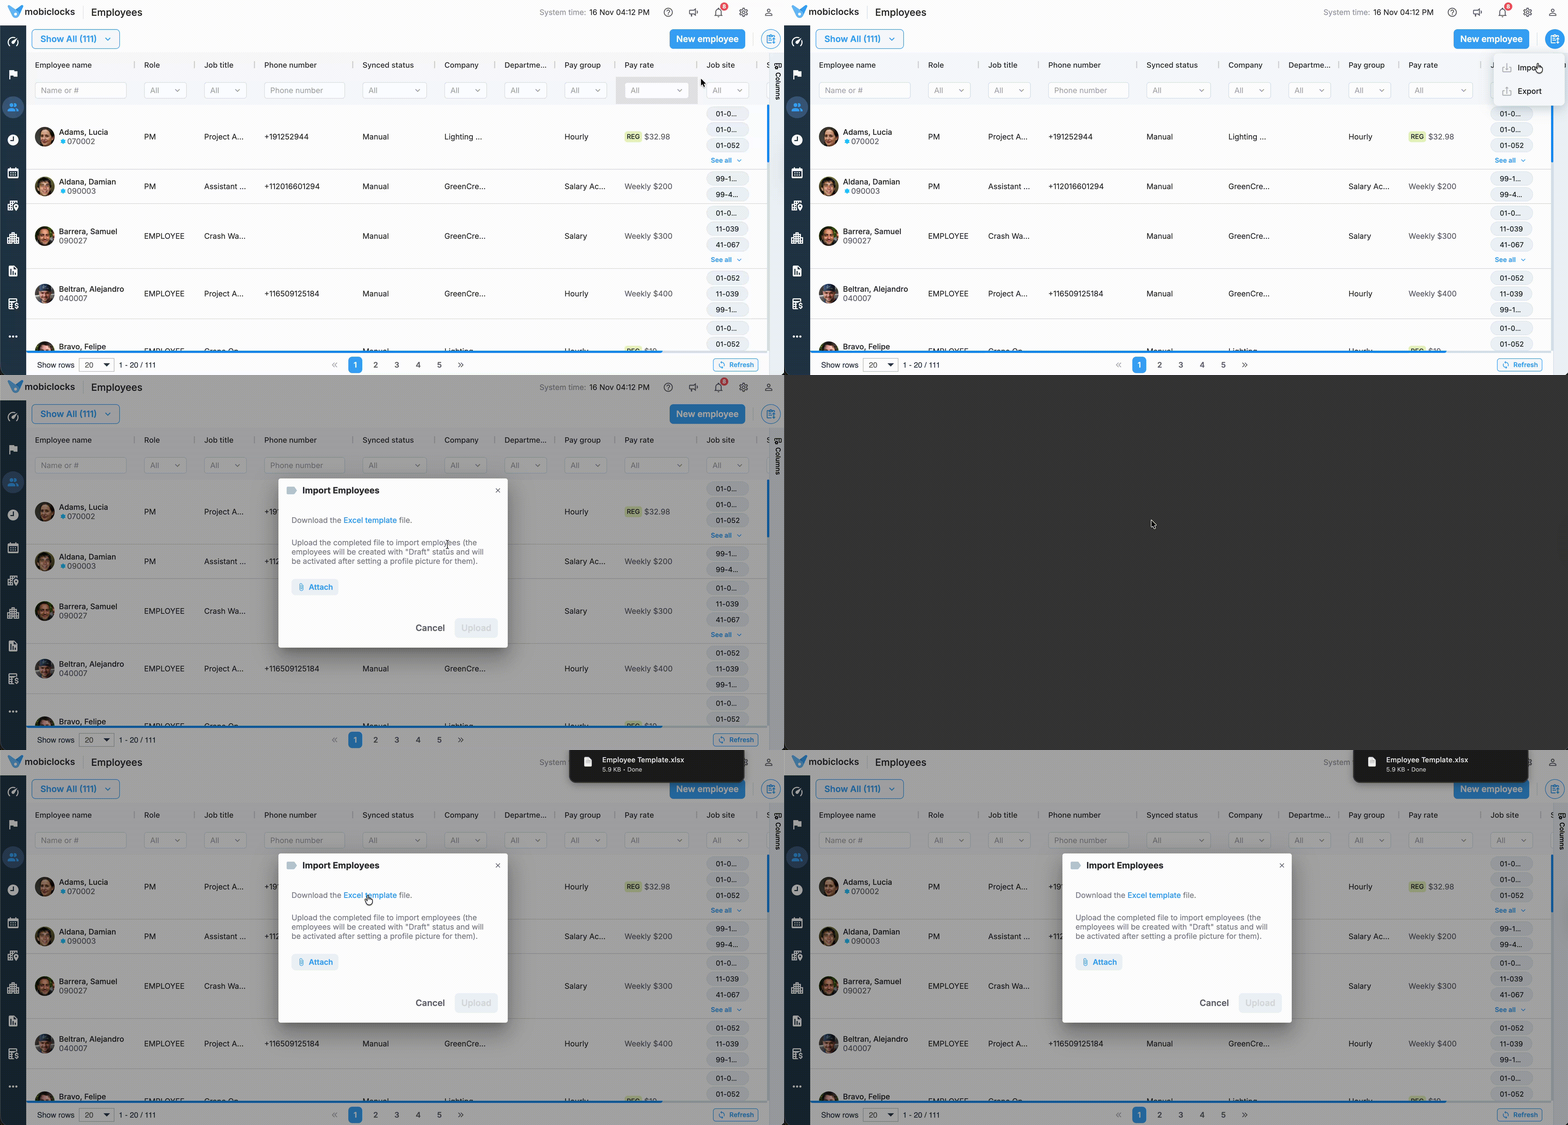
To start the import process, navigate to the Employees section from the left-hand navbar of your MobiClocks Web App. Next, select the Import/Export button and choose the Import option. In the dialog box that opens next, download the XLSX template. The following GIF illustrates the file download process.

Downloading the template
The template consists of the following optional and required fields:
- First Name (Required)
- Last Name (Required)
- Employee Number*(Optional or Required depending on the employee's company settings)*. If the employee number is set to be auto-generated from company details, then this field can be left blank for the employees who are part of that company. The number will be auto-generated for each employee upon import. Otherwise, if the auto-generate setting is deactivated, you need to provide a number for each employee inside the template.
- Pay Group(Required). Set a pay group. The value can be either
HOURLY,SALARY, orSALARY ACTUAL. - Company (Required). Specify the employee's company. The company needs to exist in your Mobiclocks environment prior to import in order to be mapped correctly. Please, note that the company name is case-sensitive.
- Email (Optional).
- Cell Phone Number (Optional).
- Pay Class (Optional). Specify a default pay class for the employee.
- Comp Code (Optional). Specify a comp code for the employee.
- REG Hourly Rate, OT Hourly Rate, and DT Hourly Rate (Optional). Three distinct fields for setting REG, OT, and DT rates. See Pay rates.
- Department (Optional). Specify a department.
- Job Tile (Optional). Specify a job title.
- Country (Optional)
- State (Optional)
- City (Optional)
- User-Defined Fields (Optional). All the existing user-defined fields are included in the template.
NOTE
- If Compliance reporting is enabled in your environment, the Social Security Number and Work Classification fields are included in the template.
- If your organization is converted to an enterprise structure, the Organization Unit field is included in the template.
Additionally, the template document includes a sheet with placeholder data that you can use to make sure your real data follows the correct formatting. The placeholder sheet is shown in the following screenshot.

Template with placeholder data
Import employees
When your document with a list of employees is ready, in the employee import dialog, select Attach to attach the file and then select Upload to import the file.
PERMISSIONSFor each employee profile field, your role must have the required permission to create or update data. See Employee profile editing to learn more about the permissions for each employee profile section.
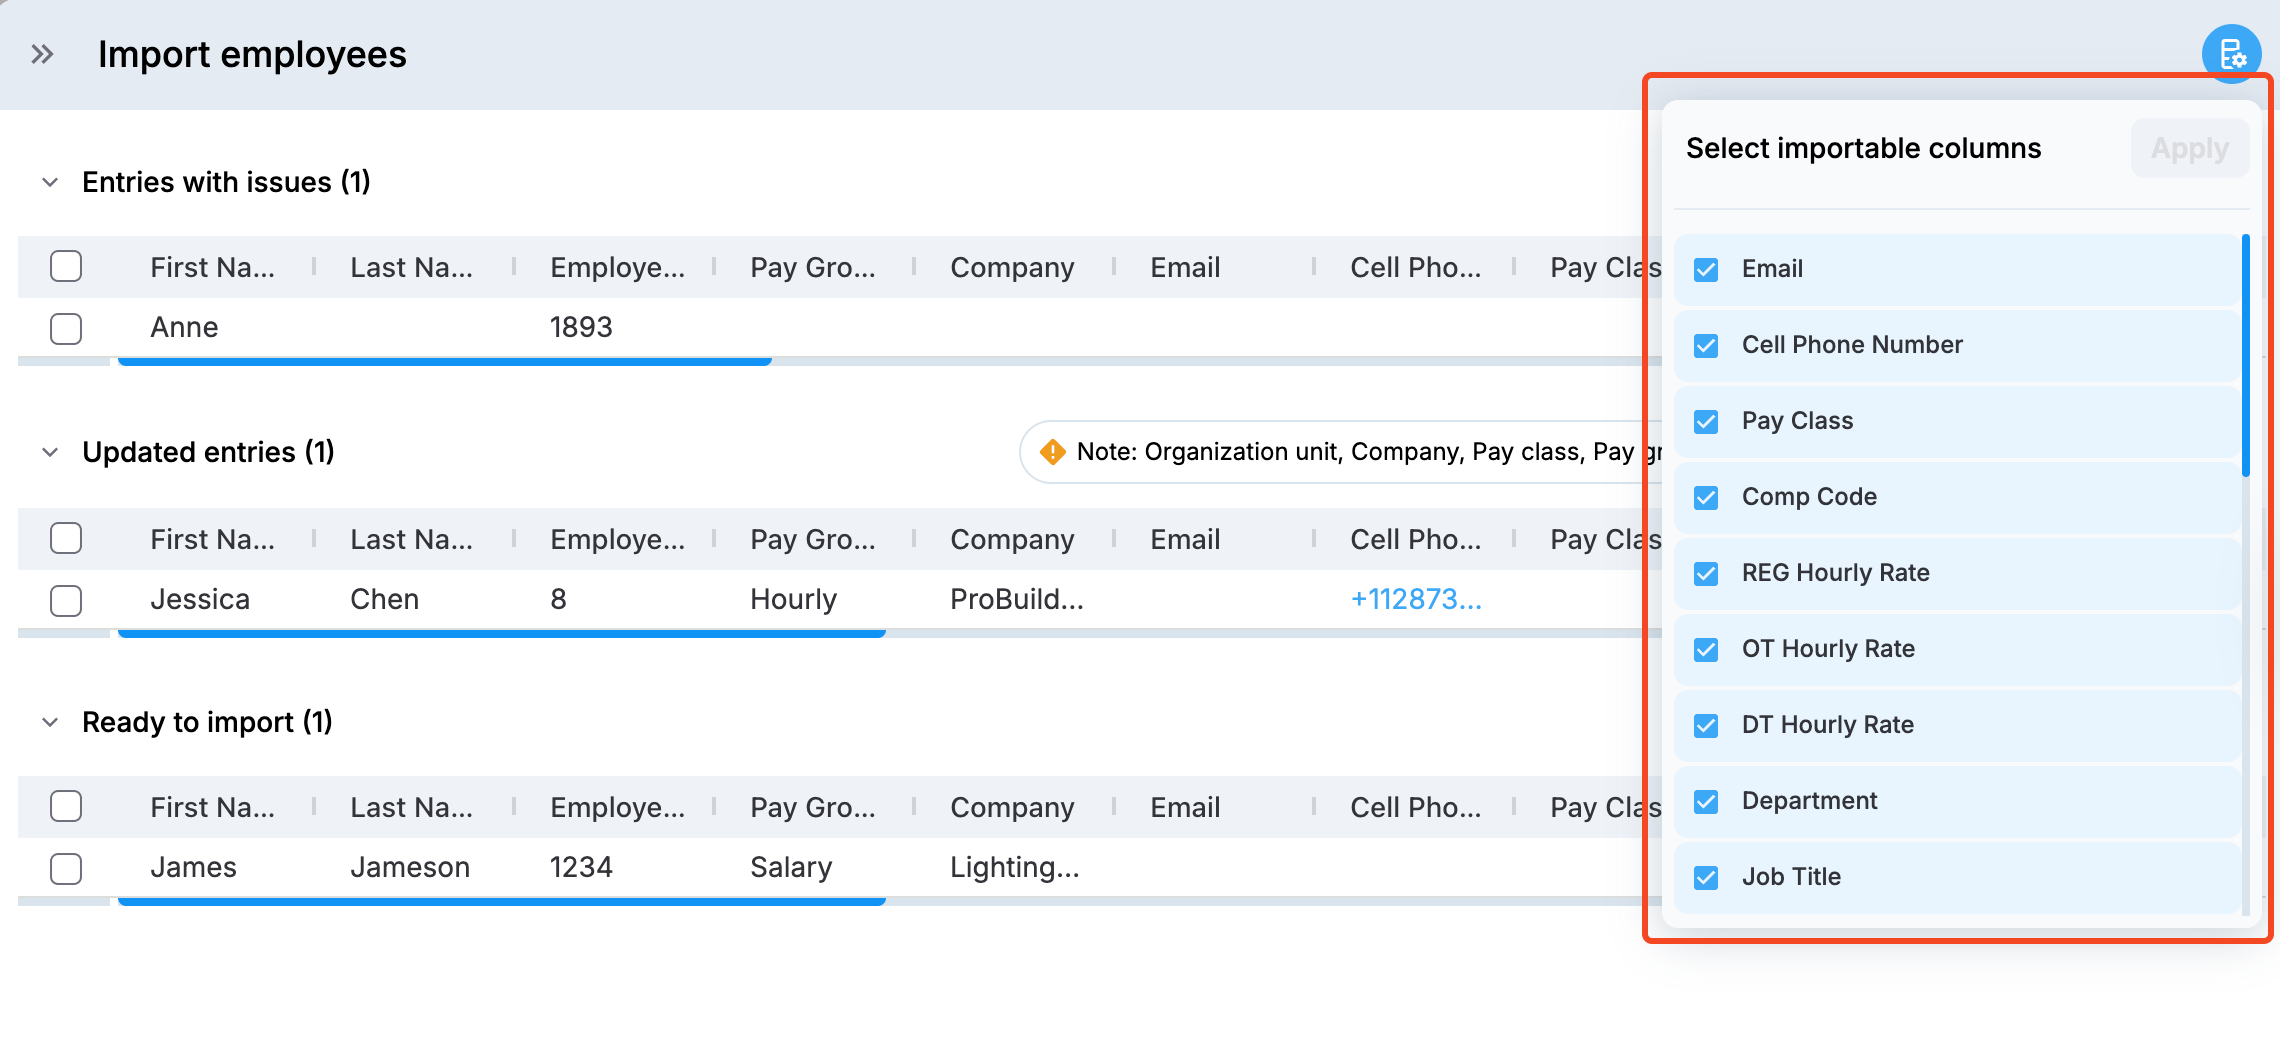
In the screen that opens next, you can customize your import as well as see the issues if there are any. First, you have an option to filter the fields that are imported, as highlighted in the following screnshot.

Importable columns filtering
Next, all your imported entries are grouped into the following three categories:
-
Entries with issues: This section includes all the entries that cannot be imported due to missing information or other problems. The entries table has an Issue description field that describes the issues for each entry.
-
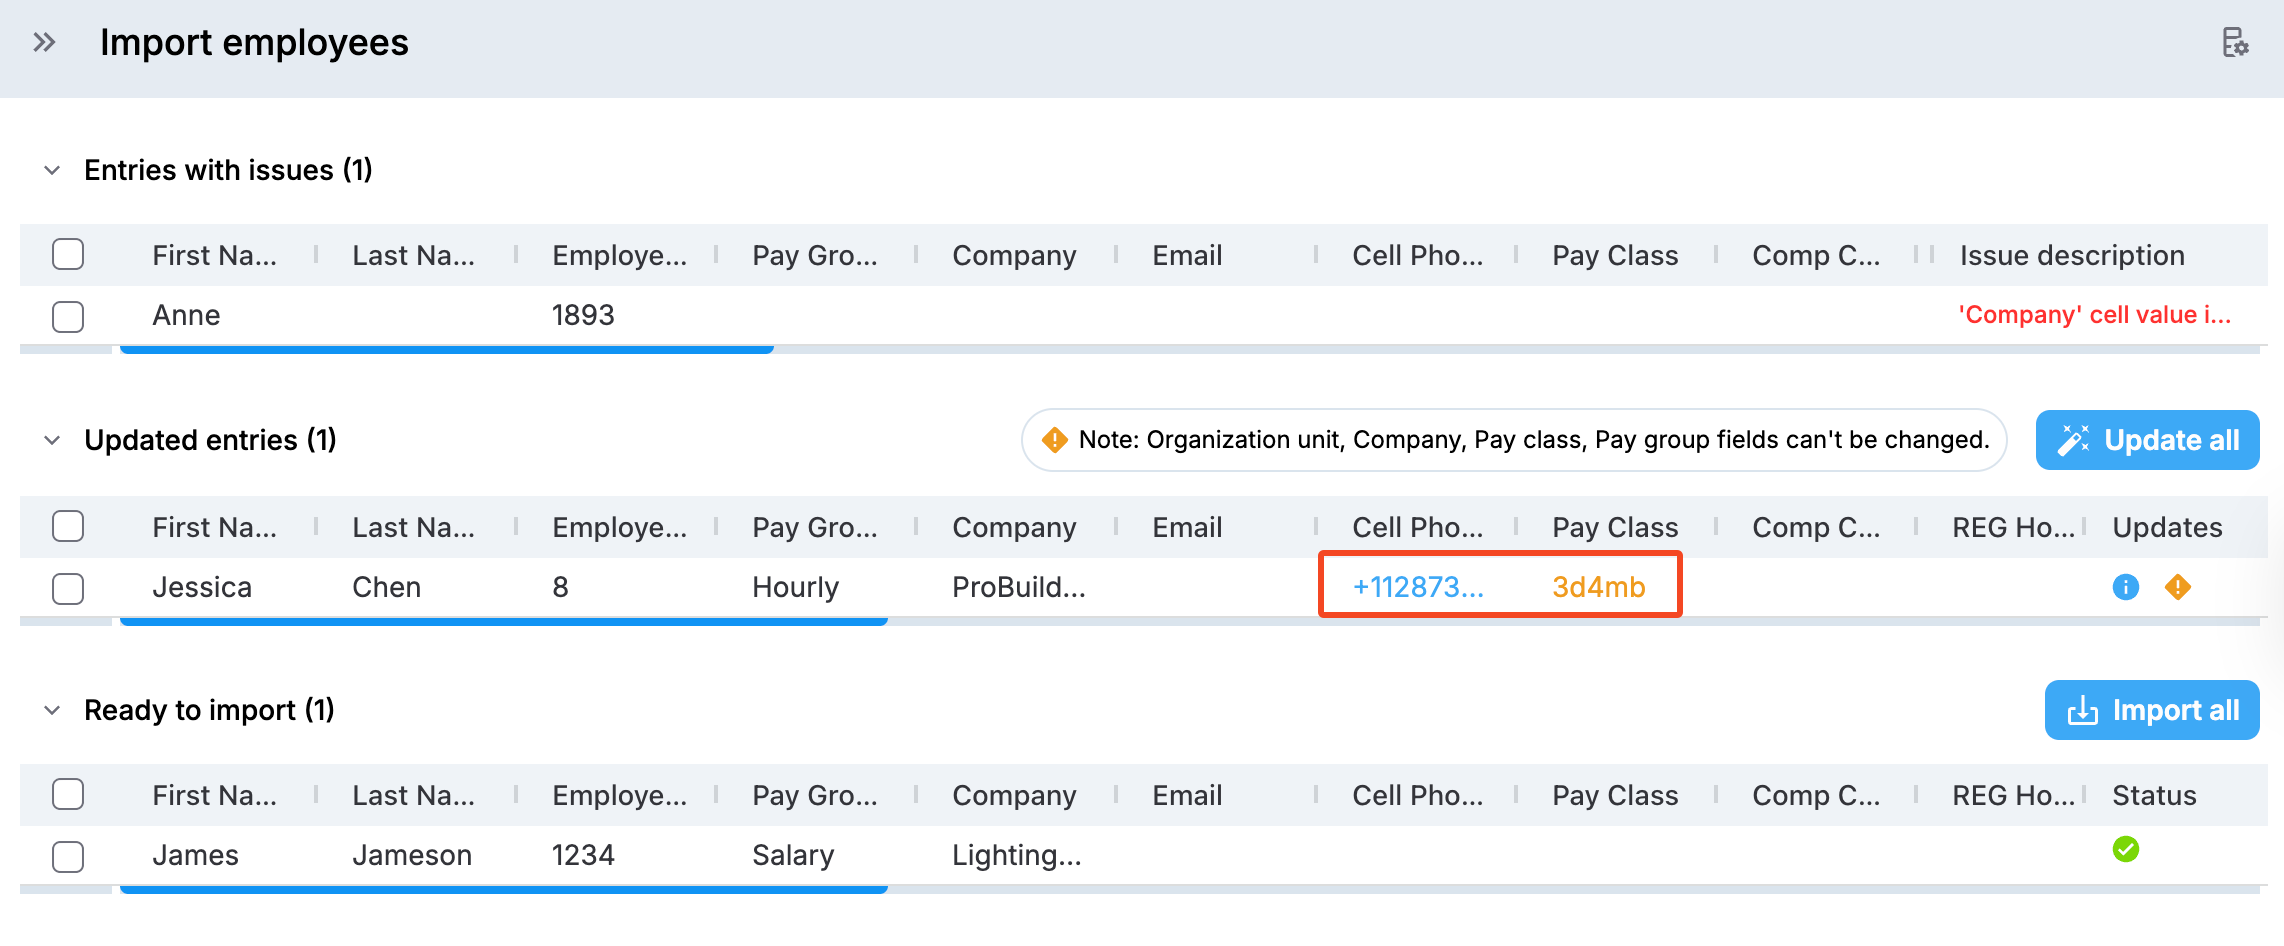
Updated entries: This section includes the entries that are going to update existing entries in your environment. Note that if your imported entry has blank cells, they won't overwrite existing values. In addition, Organization unit, Company, Pay class, and Pay group values cannot be changed. Therefore, updatable values are highlighted in blue, while non-updatable values are highlighted in orange. The following screenshot highlights examples of updatable and non-updatable values.

Updatable and non-updatable values
When you are ready, select Update all to apply all the updated incldued in this category.
-
Ready to import: This section includes all the entries that are ready to import and can be added to your list of employees immediately by selecting Import all.
NOTEThe imported employee profiles are assigned a Draft status, and you are able to activate them after adding profile pictures. Read more in Manually create an employee.
Importing employees from third-party platforms
Mobiclocks has a number of integrations, some of which also support employee import. To import the data, you first need to sync it from the connected platform to view it in MobiClocks and decide what to import to your environment. In such cases, the employee sync is a one-way synch and can take place from the third-party platform to Mobiclocks only and not vice versa.
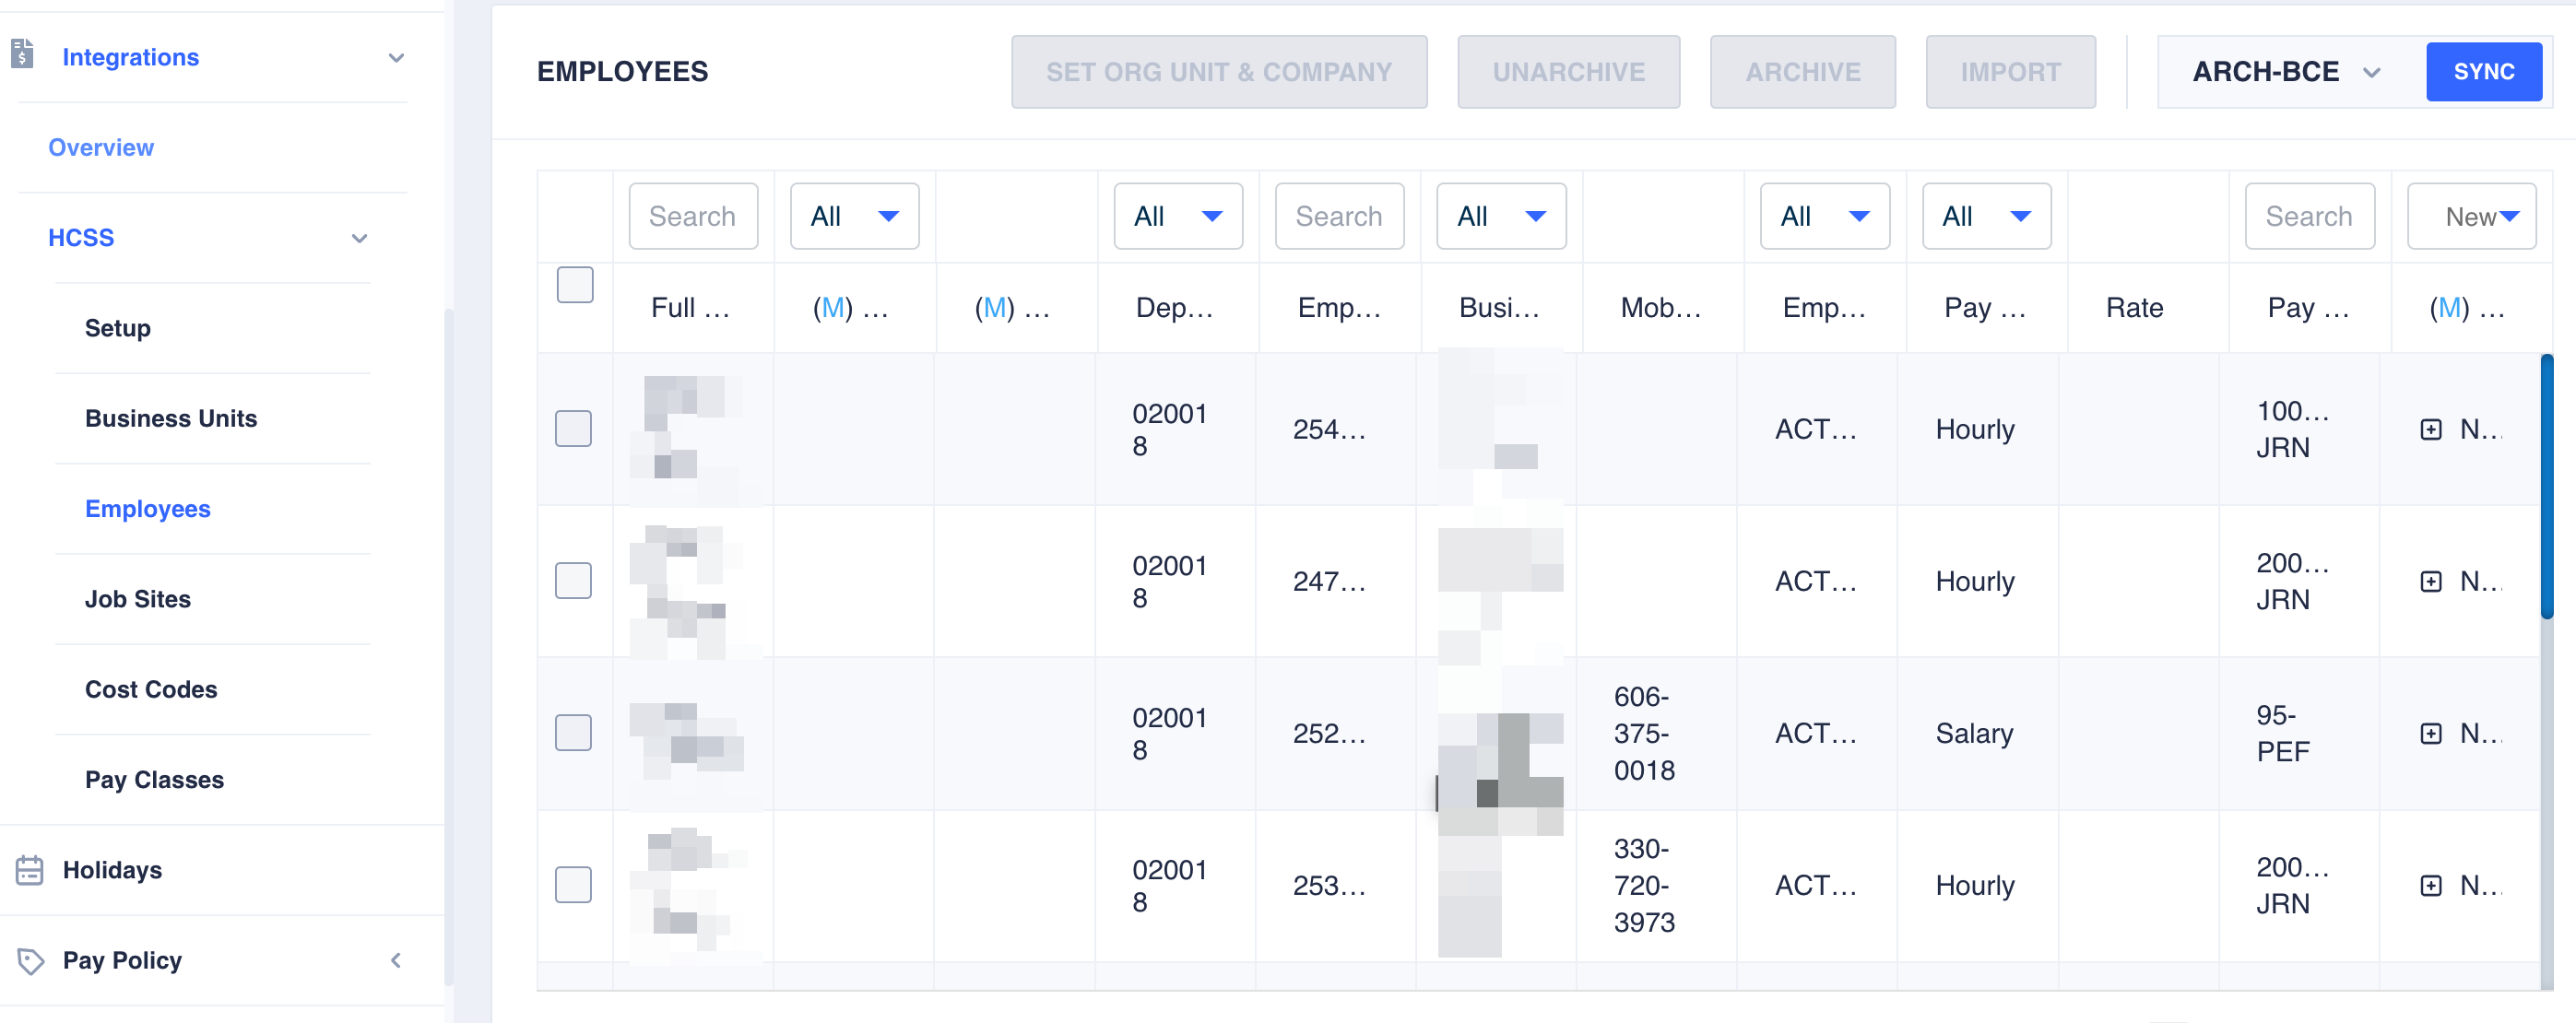
The integrations that support employee sync have a separate Employees tab where the list of employees is available. The following screenshot shows an example of the Employees tab of an HCSS integration.

HCSS Employees tab
See How integrations work to get familiar with importing data from third-party platforms. If an integration has some additional settings for employee import, these are discussed in the integration's documentation available in the Integrations section.
After importing employees, you must activate them. Proceed to the next section to learn how.
Employee activation
All the newly imported employee profiles are assigned a Draft status as they don't have a profile picture, which is a required property for an active employee. To activate the profile, you must add a profile picture and change the profile status. See Manually create an employee for more details on this.
An employee profile can also become Draft if any of the required employee profile fields are missing. For example, MobiClocks environments with an enterprise structure have a Set org unit and companyin HCSS or Vista. If you set an org unit but don't set a company for an employee profile that has already been imported to MobiClocks, you will update your MobiClocks employee profile with a missing company field, and the profile will become Draft.
Updated 3 months ago