
Manually create a timelog
How to manually create a timelog from Web App.
In this guide, you'll learn how to manually create a timelogs.
Perform the following steps:
- Navigate to the timelogs list.
- Choose a job site from the Job Sites navbar.
- Set a date for which you want to create a timelog.
- Select New timelog button.
The following screenshot highlights these steps on the timelogs list.
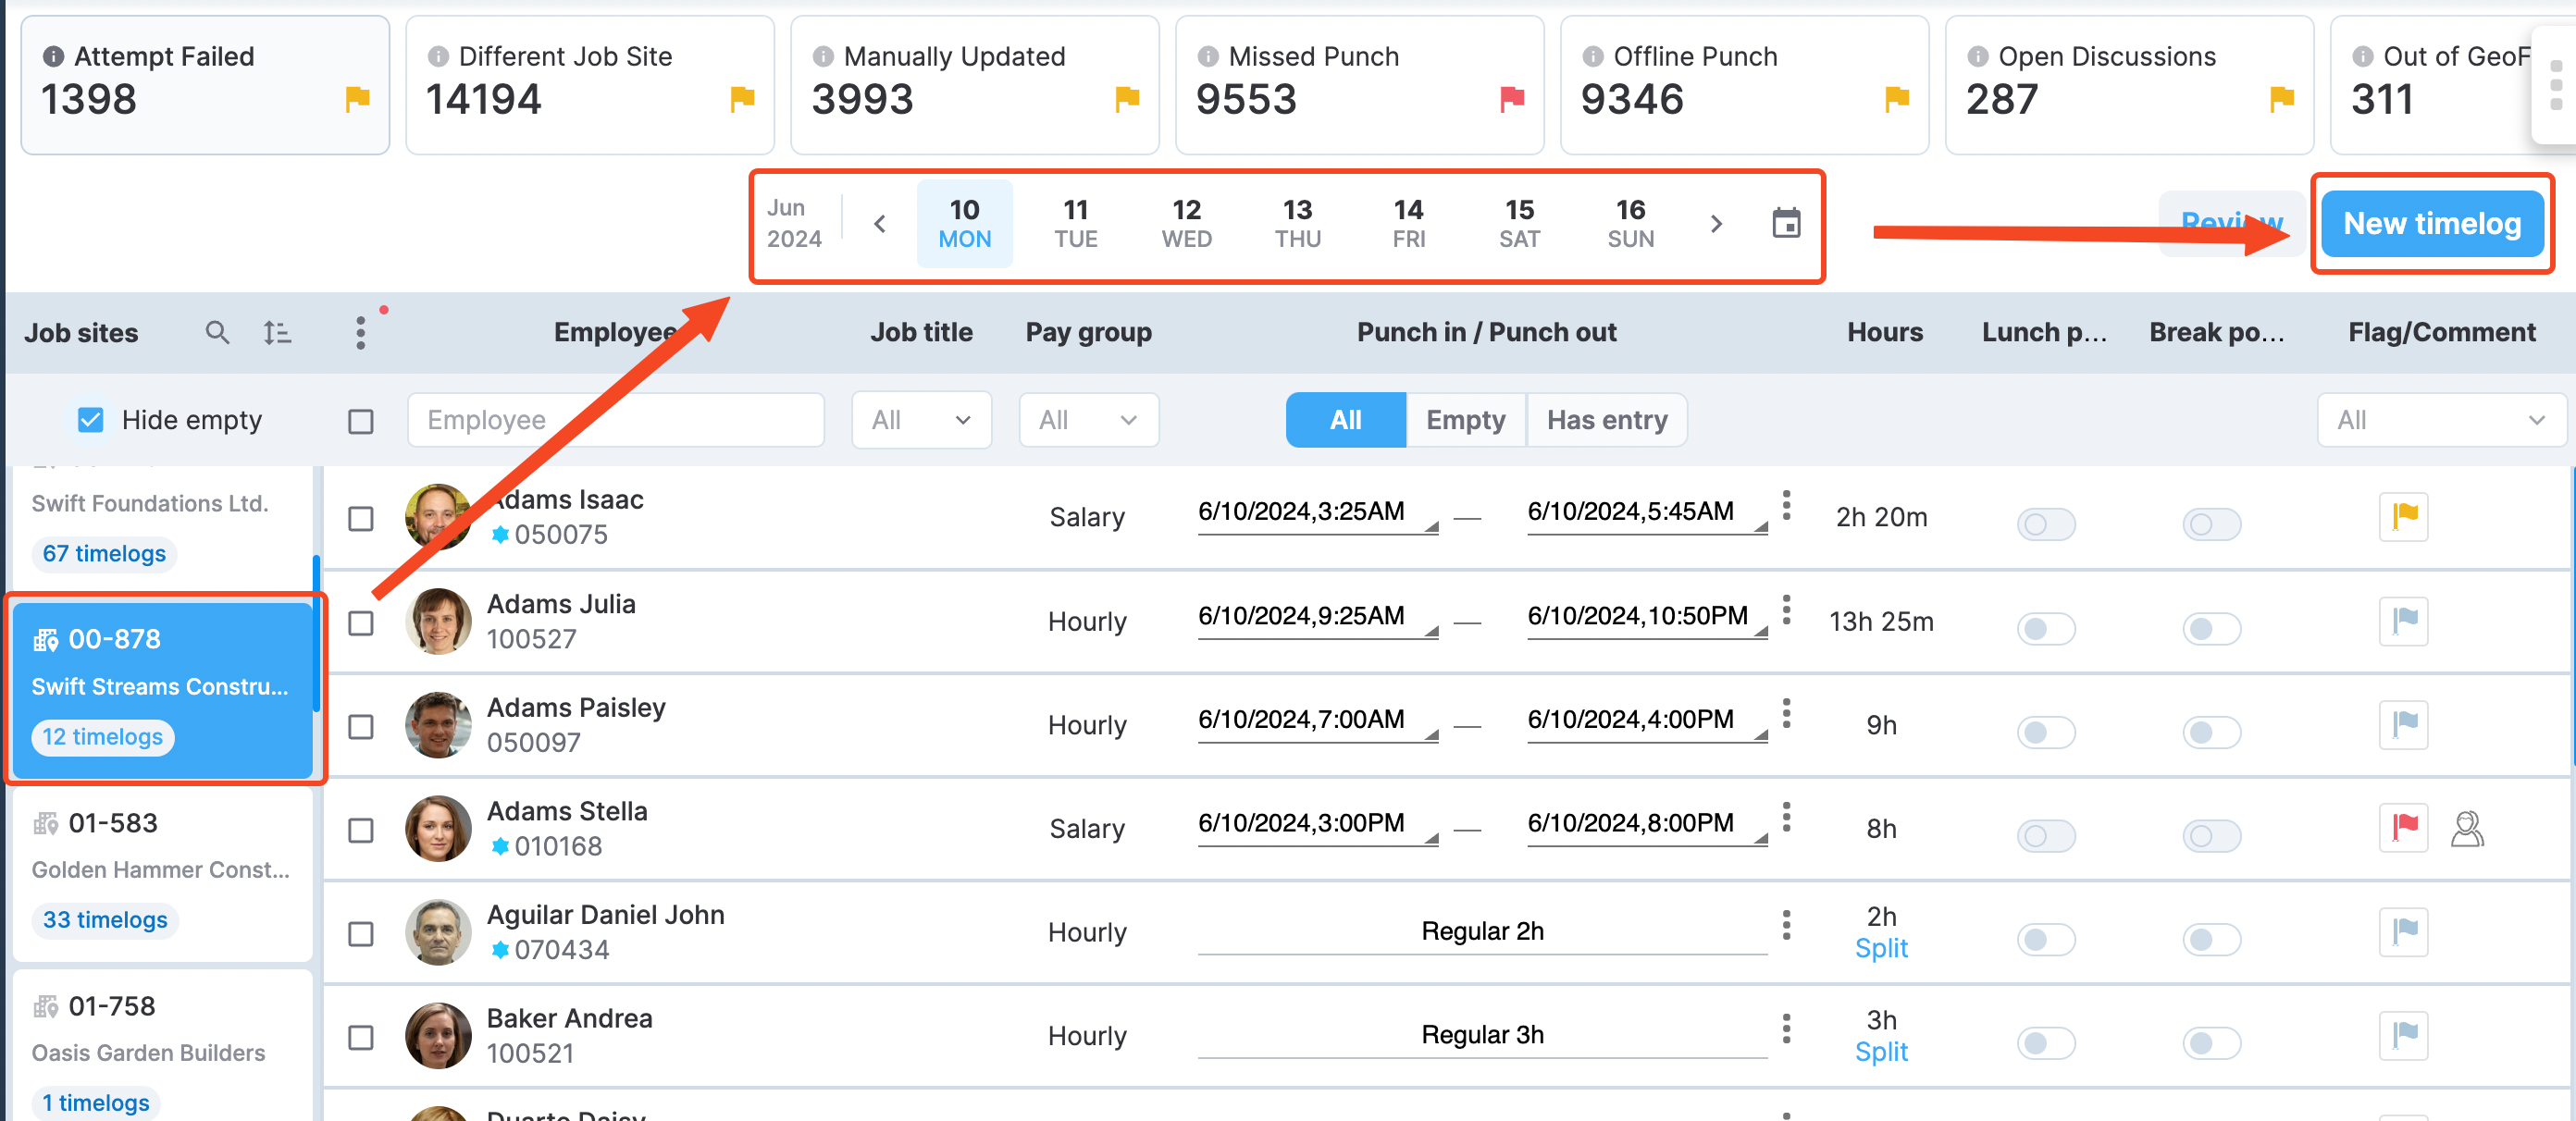
Creating a new timelog
In the dialog that opens next, choose whether you want to select from the job site's employees or access the complete employee list. The following screenshot highlights these two options in the timelog creation dialog.
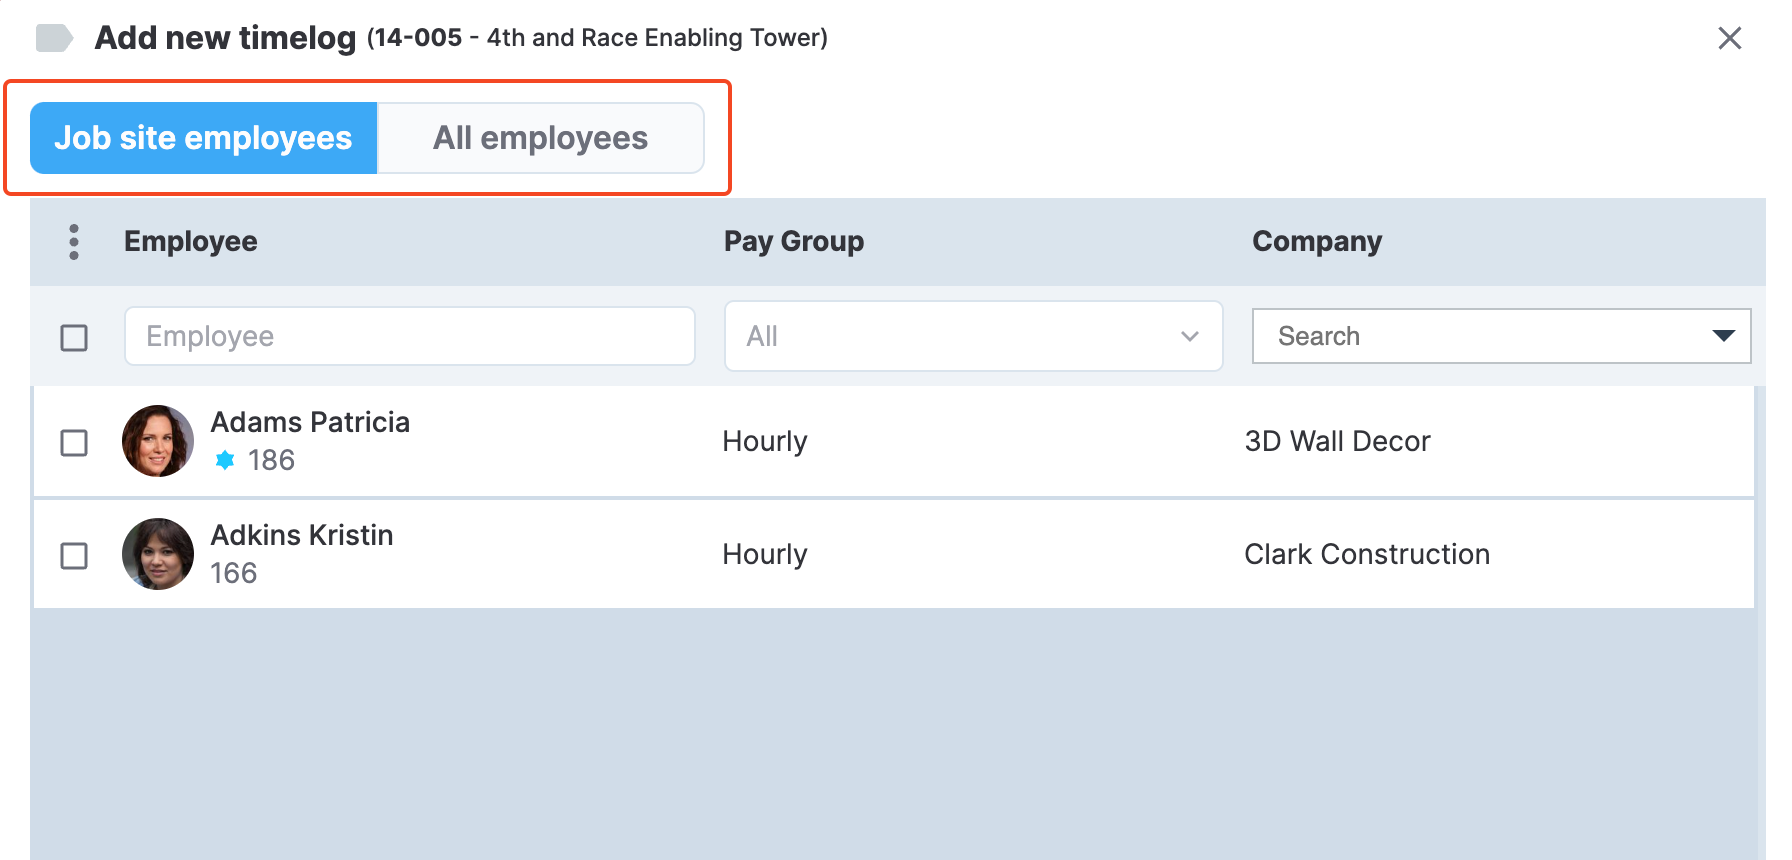
Job site employees and and All employees tabs
PERMISSIONSYou may create a timelog for the selected job site's employees if you have the Add new timelog from job site employees permission enabled for your role in Administration () > Role Permissions > Timelogs. Similarly, you may access the complete employee list and create a timelog if you have the Add new timelog from All employees permission enabled under the same role permission settings.
Select one or more employee profiles and then select the Add button, as shown in the following screenshot.
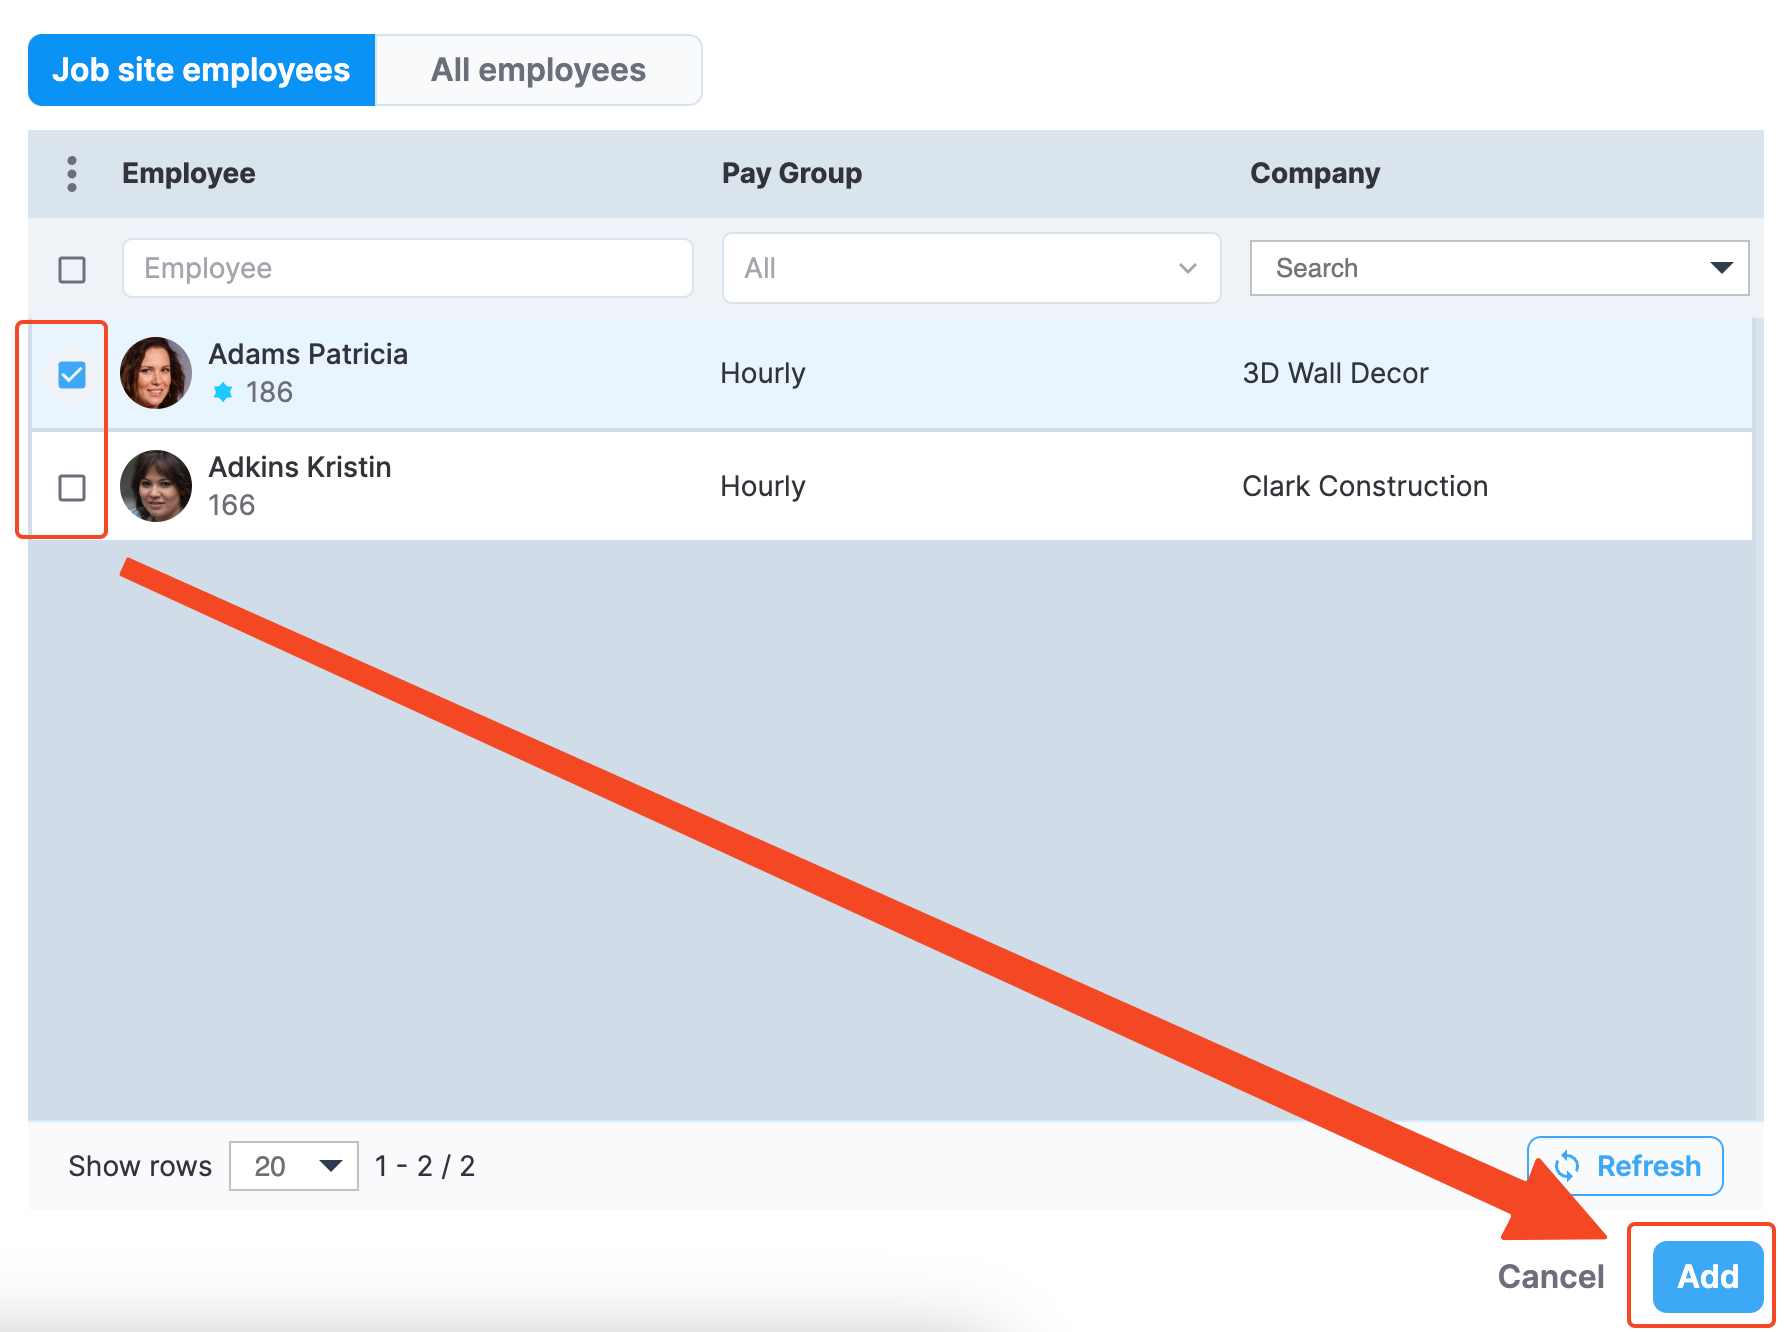
Adding a timelog for the selected employee(s)
When you select Add, the dialog closes, and you see a new empty timelog in the timelogs list. Proceed to the Edit and apply actions to timelogs topic to see how to edit an empty timelog and add entries.
Updated over 1 year ago