Job sites
View your job sites, see the list of employees, and edit documents.
In the Job sites section of the Personal App, you can view the list of job sites in your organization, see the list of employees for each job site, and edit job site documents.
PERMISSIONSYou may access the Job sites section if you have the View Job Sites tab permission enabled for your role in Administration () > Role Permissions > Job Sites.
The following screenshot shows the screen with the list of job sites.
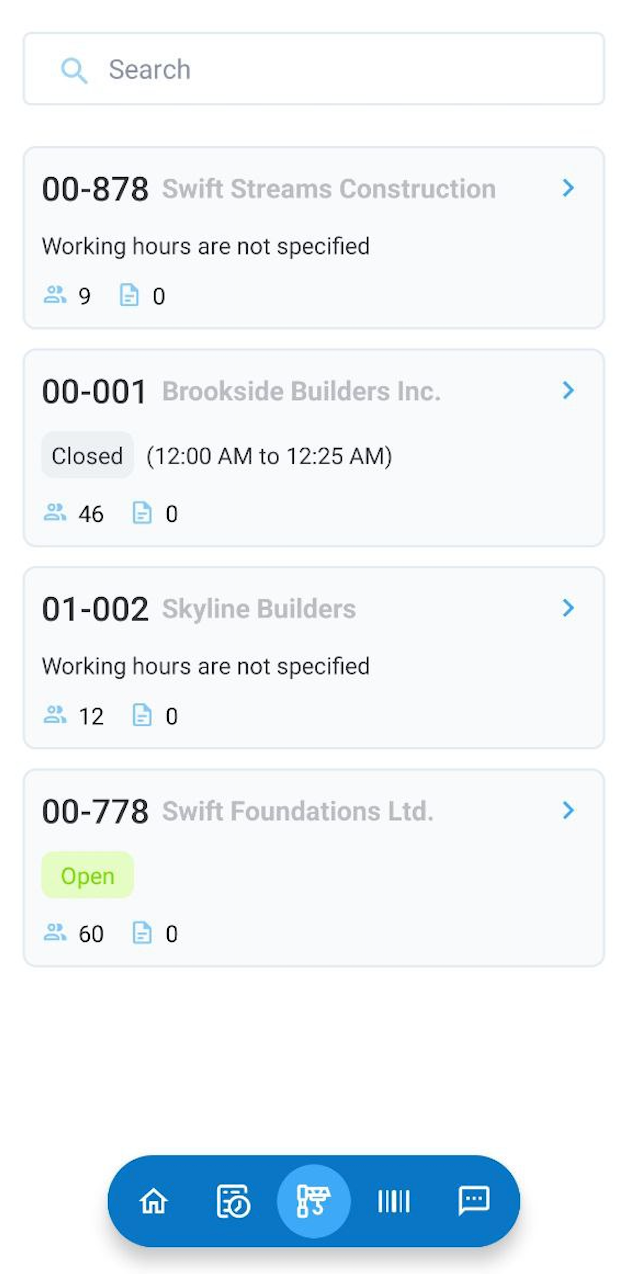
Job site list
Tap on the job site entry in the list to enter the details screen, which is divided into two subsections discussed next.
Staff
The first subsection is named Staff and contains the list of all the job site employees. Each entry includes the following fields:
- Employee's name and profile picture.
- Employee number.
- Employee's company.
The following screenshot shows the Staff section of a job site.
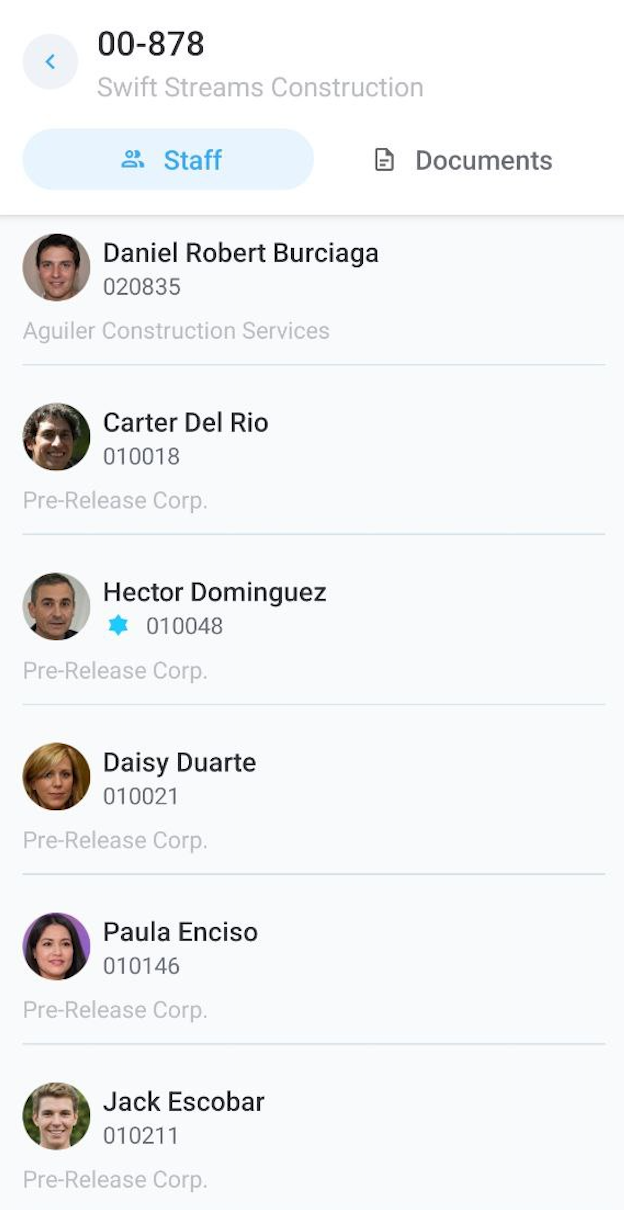
List of job site employees
Documents
The second subsection is named Documents and contains the documents attached to the job site. Here, you can view and edit existing documents as well as upload new ones.
VISIBILITYThe Documents subsection is available if the Job Site Documents setting is enabled under Web App > Administration ()> Settings > Job Site Setup.
PERMISSIONSThere are three permission settings associated with job site documents available under Web App > Administration () > Role Permissions > Job Sites:
- View/comment documents. If the permission is enabled for your role, you can view job site documents and comment on them.
- Upload/edit own documents. If the permission is enabled for your role, you can upload new documents as well as edit the documents you have uploaded.
- Delete/edit all documents. If the permission is enabled for your role, you can edit or delete any of the documents uploaded by you or others.
Note that you can only edit document Title, Description, or Tags but not replace the document itself.
Upload and edit documents
Documents can be uploaded in the following formats:
- .csv
- .xlsm
- .xlsx
- .jpeg
- .jpg
- .png
- .webp
- .heic
- .heif
- .doc
- .docx
To upload a file, select the Upload button and use the Attach button to upload your documents. You also need to add a Document title and can optionally add a Description and Tags. The following screenshot shows the screen for uploading documents.
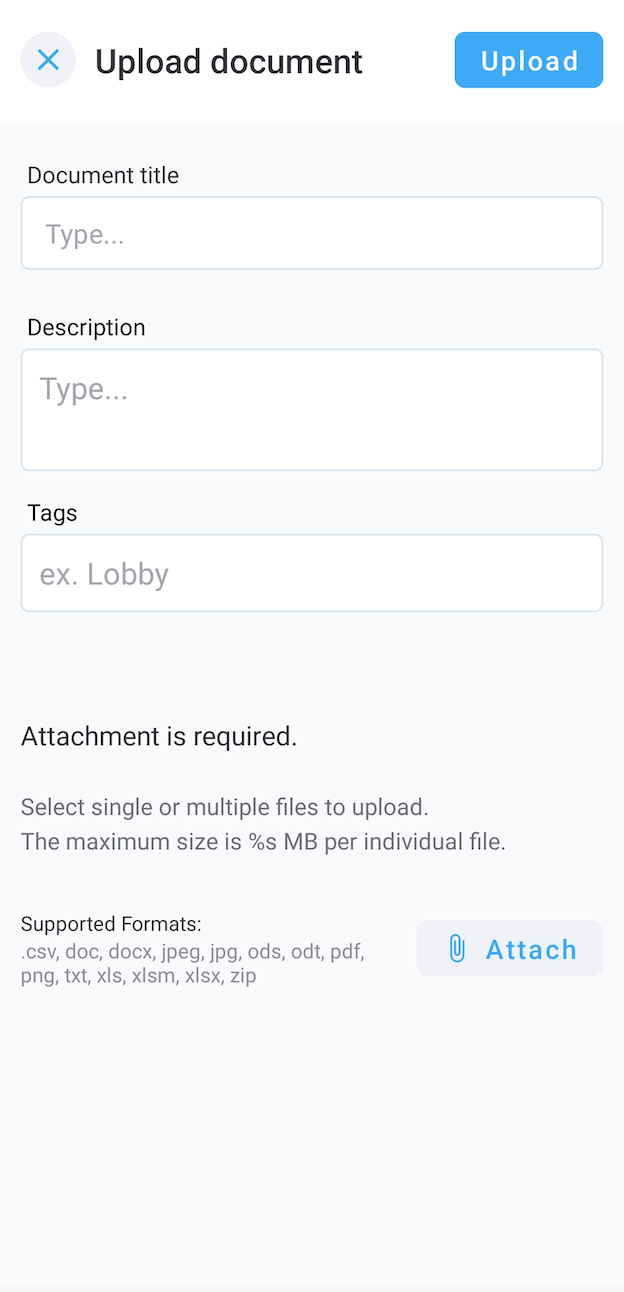
Document upload screen
Select the Upload button in the upper right corner of the screen to finalize the process. As soon as you're done, the document will start appearing in the list of job site documents.
Further on, you can select any of the documents in the list to view, edit, or comment on. The following screenshot shows the document details screen, highlighting the edit and comment actions.
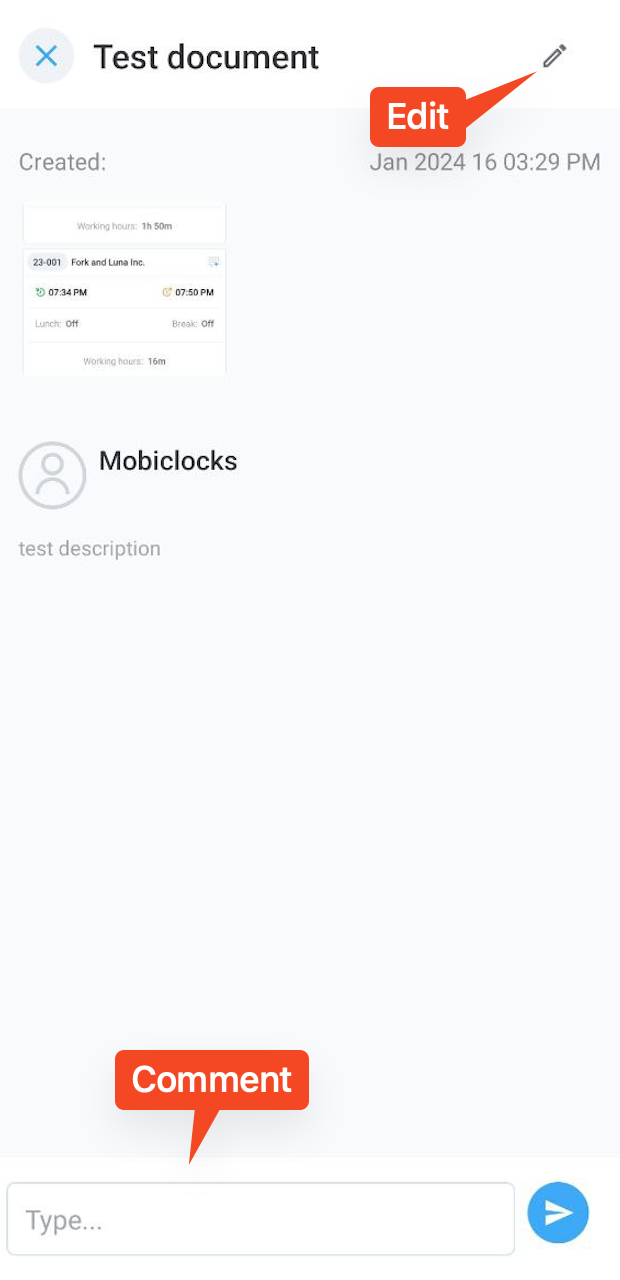
Document details screen
Search and filtering
There are search and filtering options to help you easily locate documents. You can search by document name as well as filter the list by date and format. The following screenshot highlights these options on the job site documents screen.
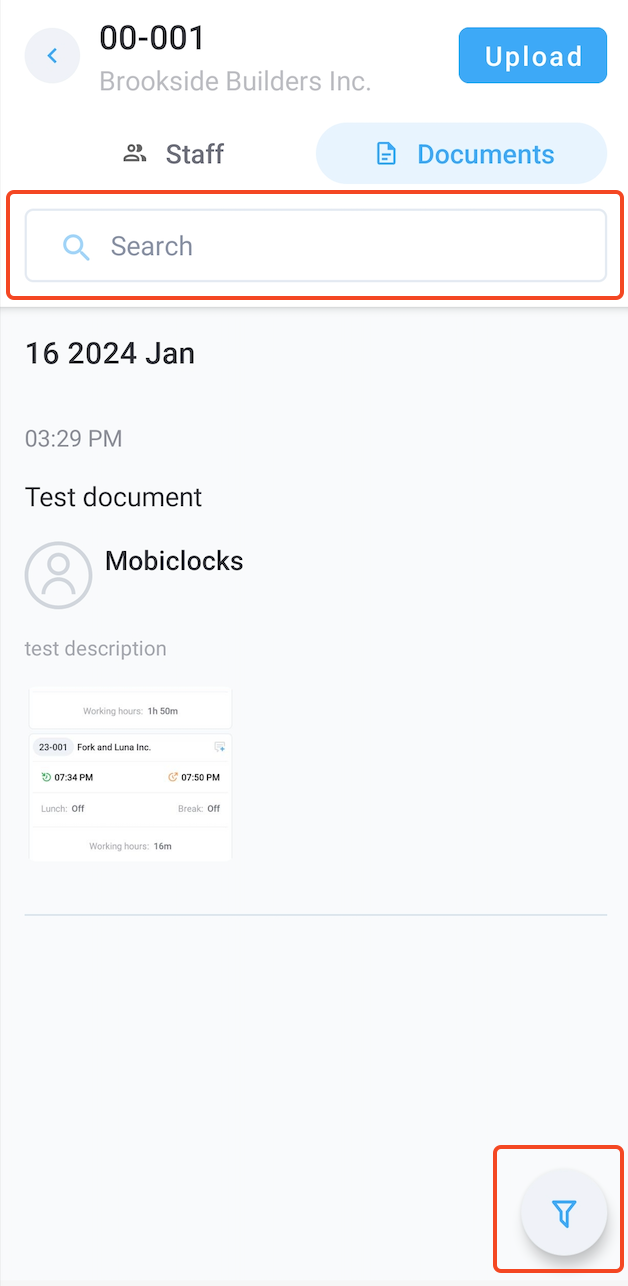
Document search and filtering
Updated 12 months ago