
Set up roles and permissions
Configure roles and set up permissions for them.
In the Role permissions section, you can define which actions each role may or may not perform in your MobiClocks environment as well as create and edit roles. Role permission settings apply to the actions performed in the MobiClocks Web App, Admin App, Personal App, and Kiosk App.
The permissions table has the existing roles as its column headings and the different actions that users can accomplish as its row labels. Thus, by marking a checkbox in the table, you grant a specific role with permission to perform the corresponding action. Make sure to select SAVE CHANGES after modifying the permissions to apply your changes. Additionally, row labels, which represent actions, are grouped into several categories such as Timelogs, Job Sites, and others.
PERMISSIONSYou may access the Role permissions page if you have the View "Role permissions" tab permission enabled for your role in Administration () > Role Permissions > Administration.
Throughout the MobiClocks documentation, in all the cases where a certain action has a corresponding permission setting in Role permissions, you will see a Permissions callout, similar to the one above, with details on that. See Permissions reference for the complete list of permissions with explanations.
The following sections discuss the concept of roles in MobiClocks and how roles are managed.
Roles
When you create a new user or an employee in your MobiClocks environment, you need to assign a role to them. The role defines the level of system access that is granted to the user or employee. You have several default roles that cover the most common cases, but you can also create new roles based on default role templates and adjust them to your organization's needs.
By default, there are four roles in MobiClocks:
- Admin. An administrator role that is usually assigned to back office personnel who manage the construction process or some of its aspects such as accounting, payroll, human resources, and so on.
- Super Admin. An admin with the highest permission level. For example, Super Admins have permissions for all the actions under the Administration category in Role permissions.
- PM. PM stands for Project Manager, and the role is assigned to front office management personnel that supervise employees at job sites. The roles derived from the PM template usually include foremen, superintendents, and others. In MobiClocks, a PM is formally a type of employee, and PM profiles are managed in the Employees section similar to the rest of the employee profiles.
- Employee. These are the job site workers. Employee profiles are managed in the Employees section.
Each role comes with a default selection of permissions, which you can modify. In addition, for some roles, certain actions are not available and the corresponding checkbox is disabled. This means that the action is not relevant to the role, and this is something that cannot be modified. The following screenshot shows an example of a disabled checkbox.
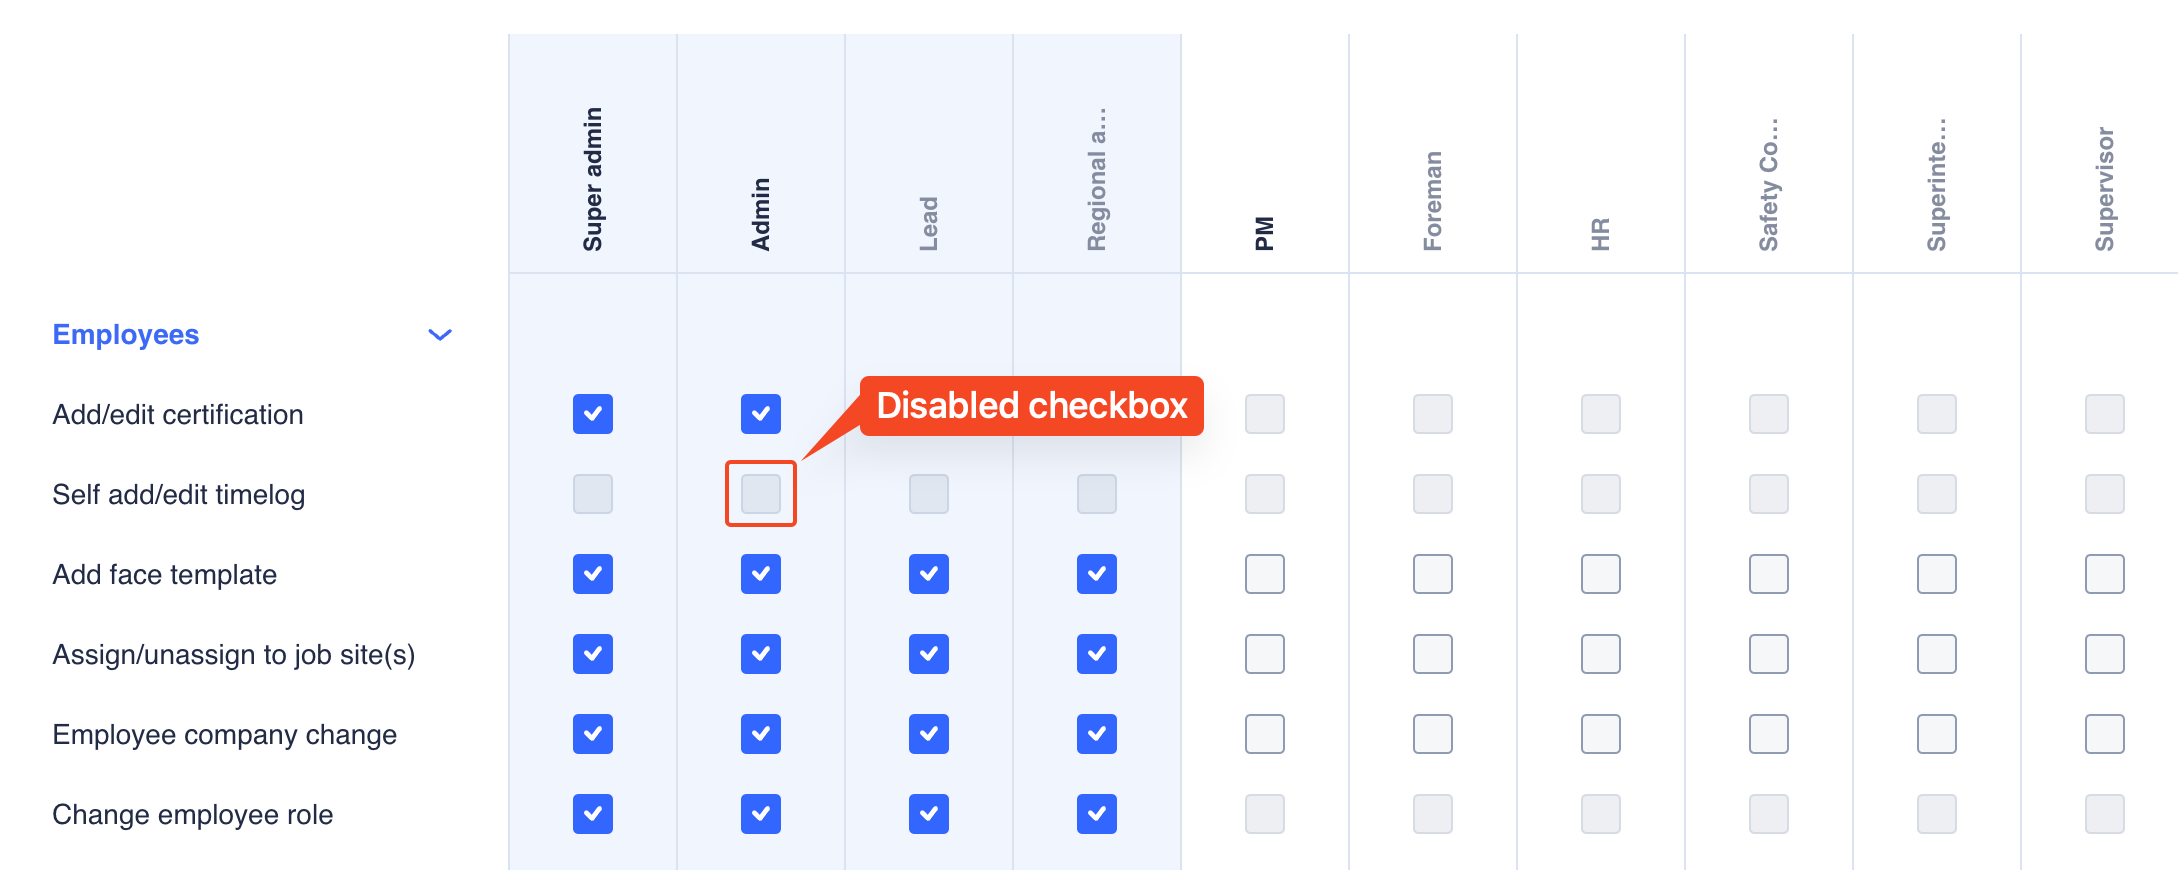
Disabled checkbox example
In this example, the Self Add/Edit timelog action is not available to Admins, as the role isn't supposed to have timelogs assigned to it.
Lastly, a role can have actions with a disabled checkbox in a selected state. This means that the action permission is activated for the role by default and cannot be modified. For example, this is the case with Administration actions and the Super Admin role as shown in the following screenshot.
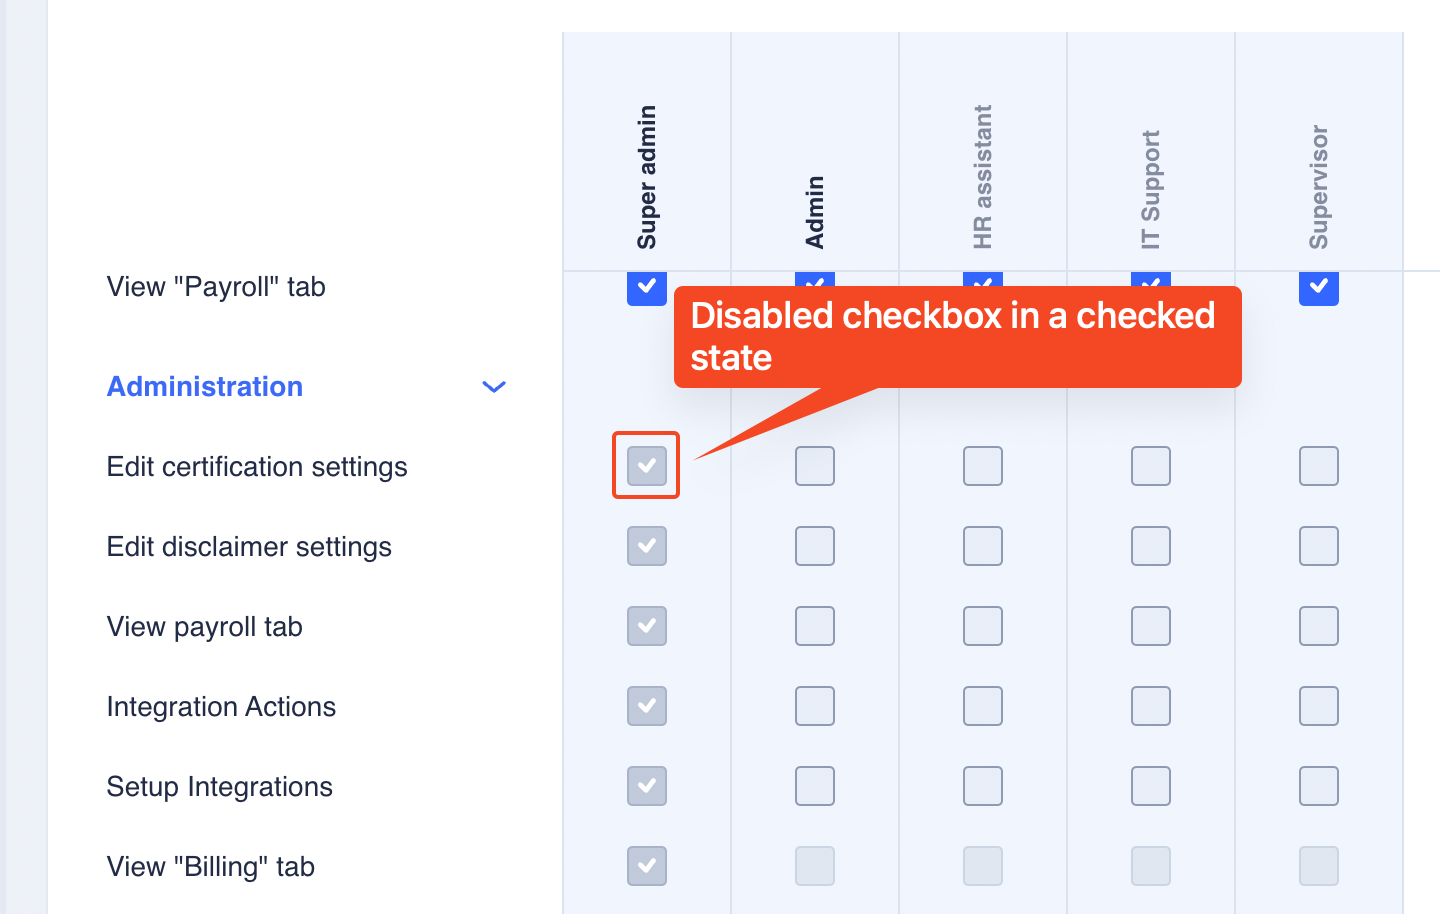
A selected checkbox that cannot be modified
Roles filter
You also have a Roles filter above the permissions table to specify which roles to display in the table. The following screenshot highlights the filter.
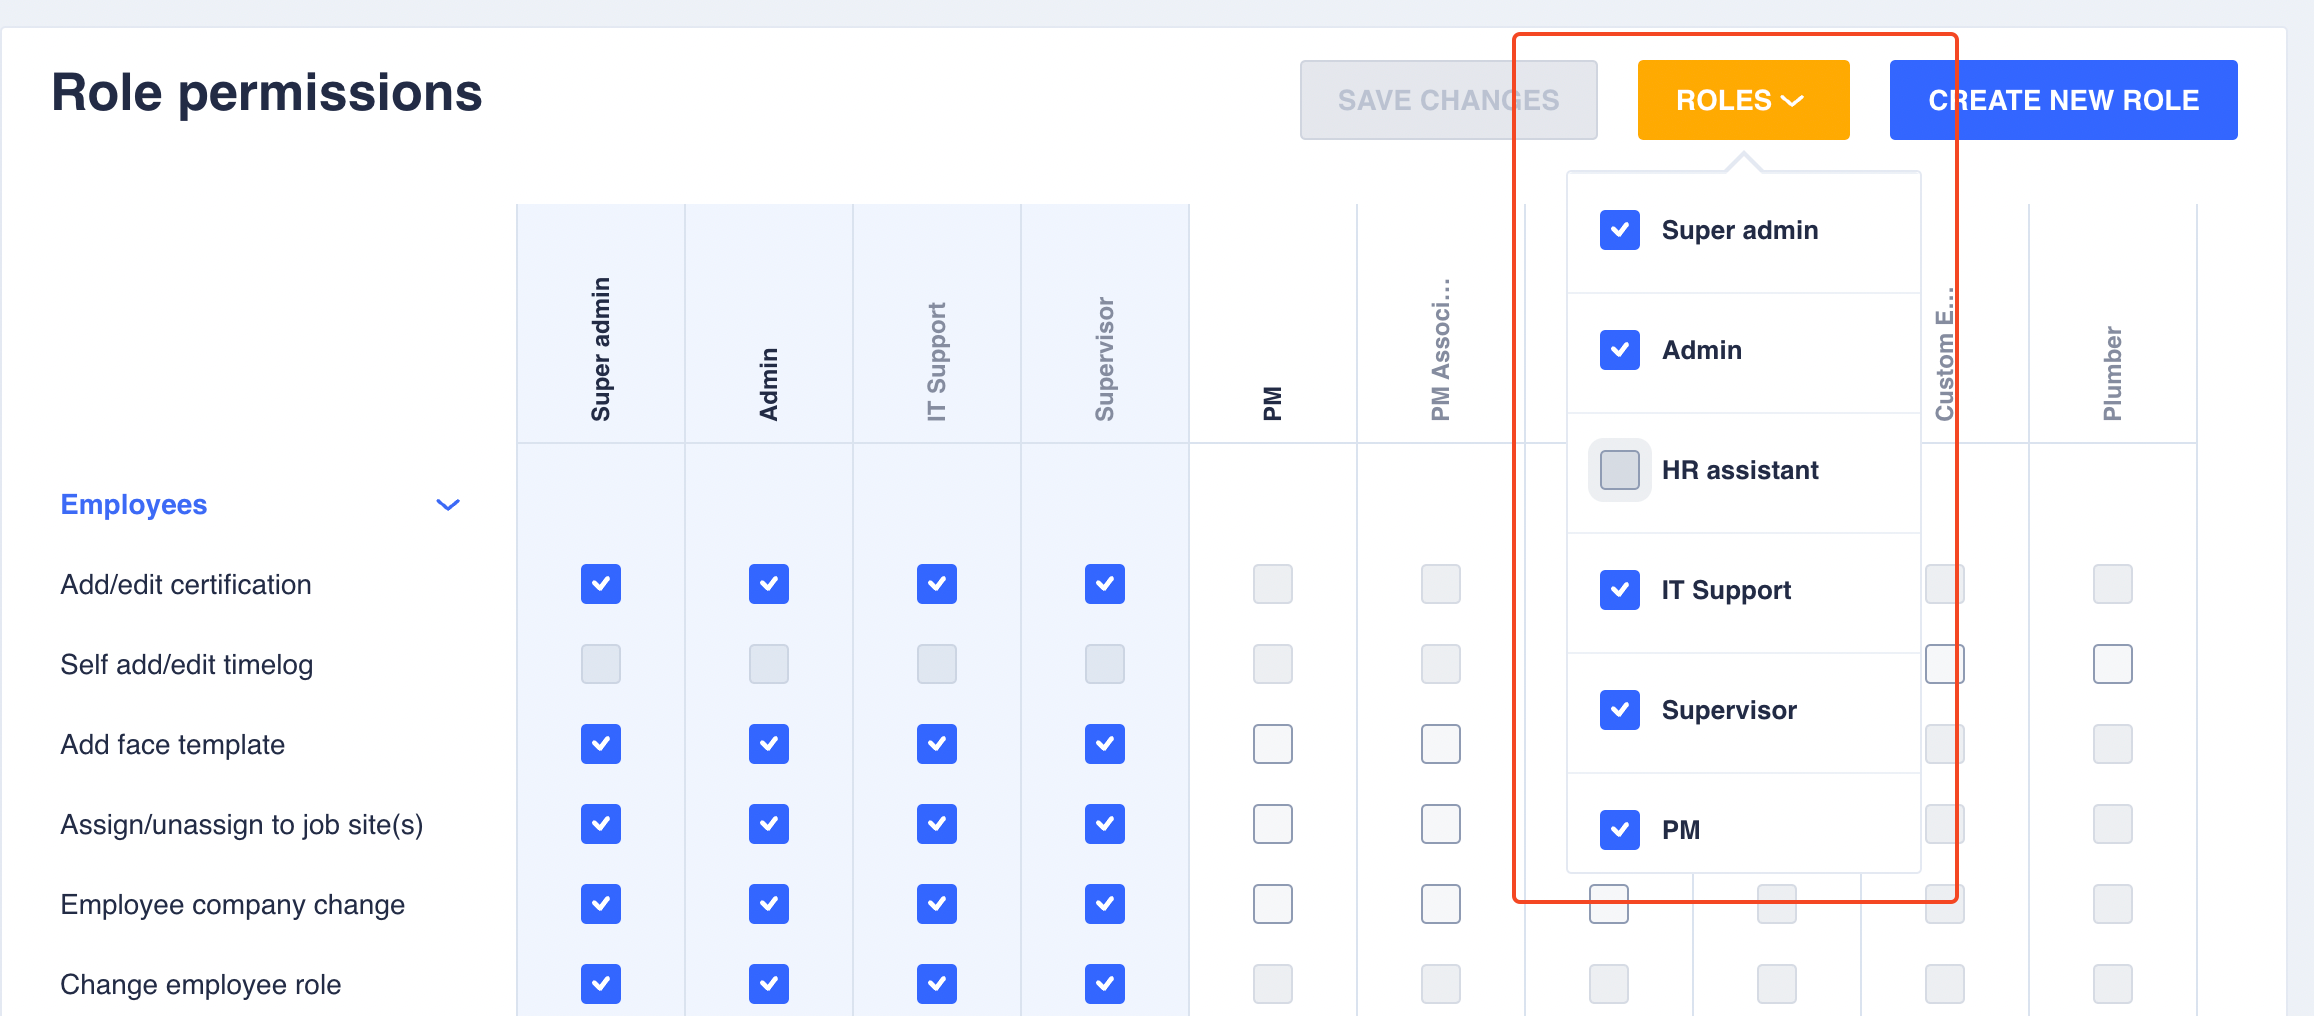
Roles filter
Create a new role
You can use the Create New Role button to add new roles on top of the existing default roles. In the Create role dialog, you need to add a name for the role and choose a role template to clone the new role from.
NOTEEach new role can only be created from an existing role template, cloning its default configuration and limitations. Thus, any new role still belongs to one of the four existing role templates: Super Admin, Admin, PM, or Employee.
The following screenshot shows the Create role dialog.
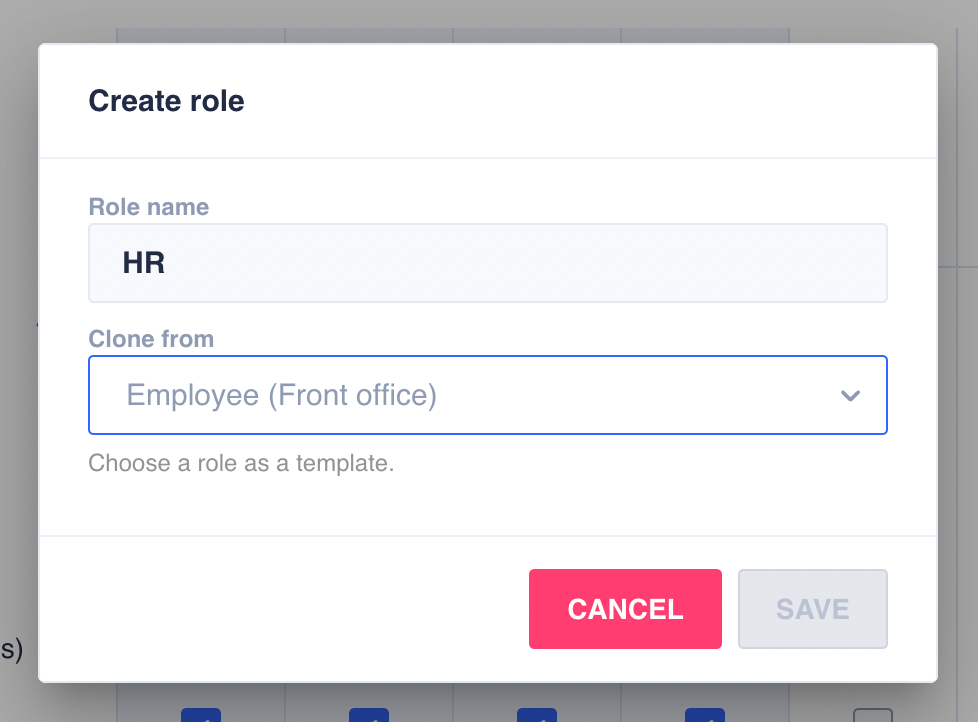
Create role dialog
After creating a new role, you can modify its permissions within the limitations of the role template and can also start using it when creating new MobiClocks users or employees.
Updated over 1 year ago