
Send an SMS
How to send an SMS.
To send a new SMS, navigate to the SMS log board section of the SMS module and select Send an SMS. In the dialog that opens next, complete the following steps.
Write the message
Write the SMS text in the Message text area. Write from scratch or choose Select template to select from the list of existing templates. You also have a Save as option to save the written message as a template. See Manage SMS templates for more details on templates.
Type $ to choose from available dynamic fields. The following dynamic fields are available:
- $recipient_full_name: Fills in the full name of the recipient for each message.
Spanish message
Select the Spanish message option to translate your message into Spanish. The Auto-translate option is enabled by default. Deactivate the Auto-translate option to edit the automatically translated message or add another one.
NOTEIf the Spanish message option is enabled, both the English and Spanish versions of the message are sent to the recipient.
Message checks
Before sending your SMS, you must validate the message. Apart from validating the message and making sure it is ready to send, the message check does the following:
- Rude words: Detects and removes inappropriate language from your message. Flagged words are automatically cleaned during the check.
- Grammar: Analyzes your message for grammatical errors and suggests improvements to enhance readability.
To run the checks, select Check the message. After receiving feedback, you can select Fix issues to apply the suggestions or proceed without any changes.
When you're done writing your message, select Next to proceed to the next step.
Select recipients
Specify who will receive the SMS in the Recipients step. You can select recipients from a contact list, individually, by role, by job site, or externally.
Select contact list
Use this option to choose from the list of existing contact lists. See Manage contact lists to learn more about contact lists.
Add by individual
To send an SMS to specific users, use the search field under the Add by individual section. Start typing an employee's or a user's name, and matching results appear in the list. Select a user to add them to your recipients.
Add by role
Select employees or users based on their role within your organization. This option is useful when you need to send messages to specific groups, such as project managers or supervisors. Optionally, you can filter by Company or Job site to narrow down your selection. When finished, use Add selected to add your selection to the list of recipients.
Add by job site
Select employees based on their association with a specific job site. This option is useful for sending site-specific communications or updates. After selecting the job site, choose whether to include employees who are assigned to that job site or have just punched there. Note that, when the Punched in at a job site option is selected, the system sends the SMS to all the employees who have punched in on that day up to the moment of sending the message. It works the same way when the selection is converted into a contact list.
You can select both options. When finished, use Add selected to add your selection to the list of recipients.
Add by external contacts
Select a job site to add all the external contacts attached to it. When finished, use Add selected to add your selection to the list of recipients.
Recipient summary
Selected individuals or groups (for example, contact lists or specific roles) appear as removable chips in the Recipient summary section. The total number of individual recipients is displayed as a link (for example, Total: 1 recipients), as shown in the following screenshot.
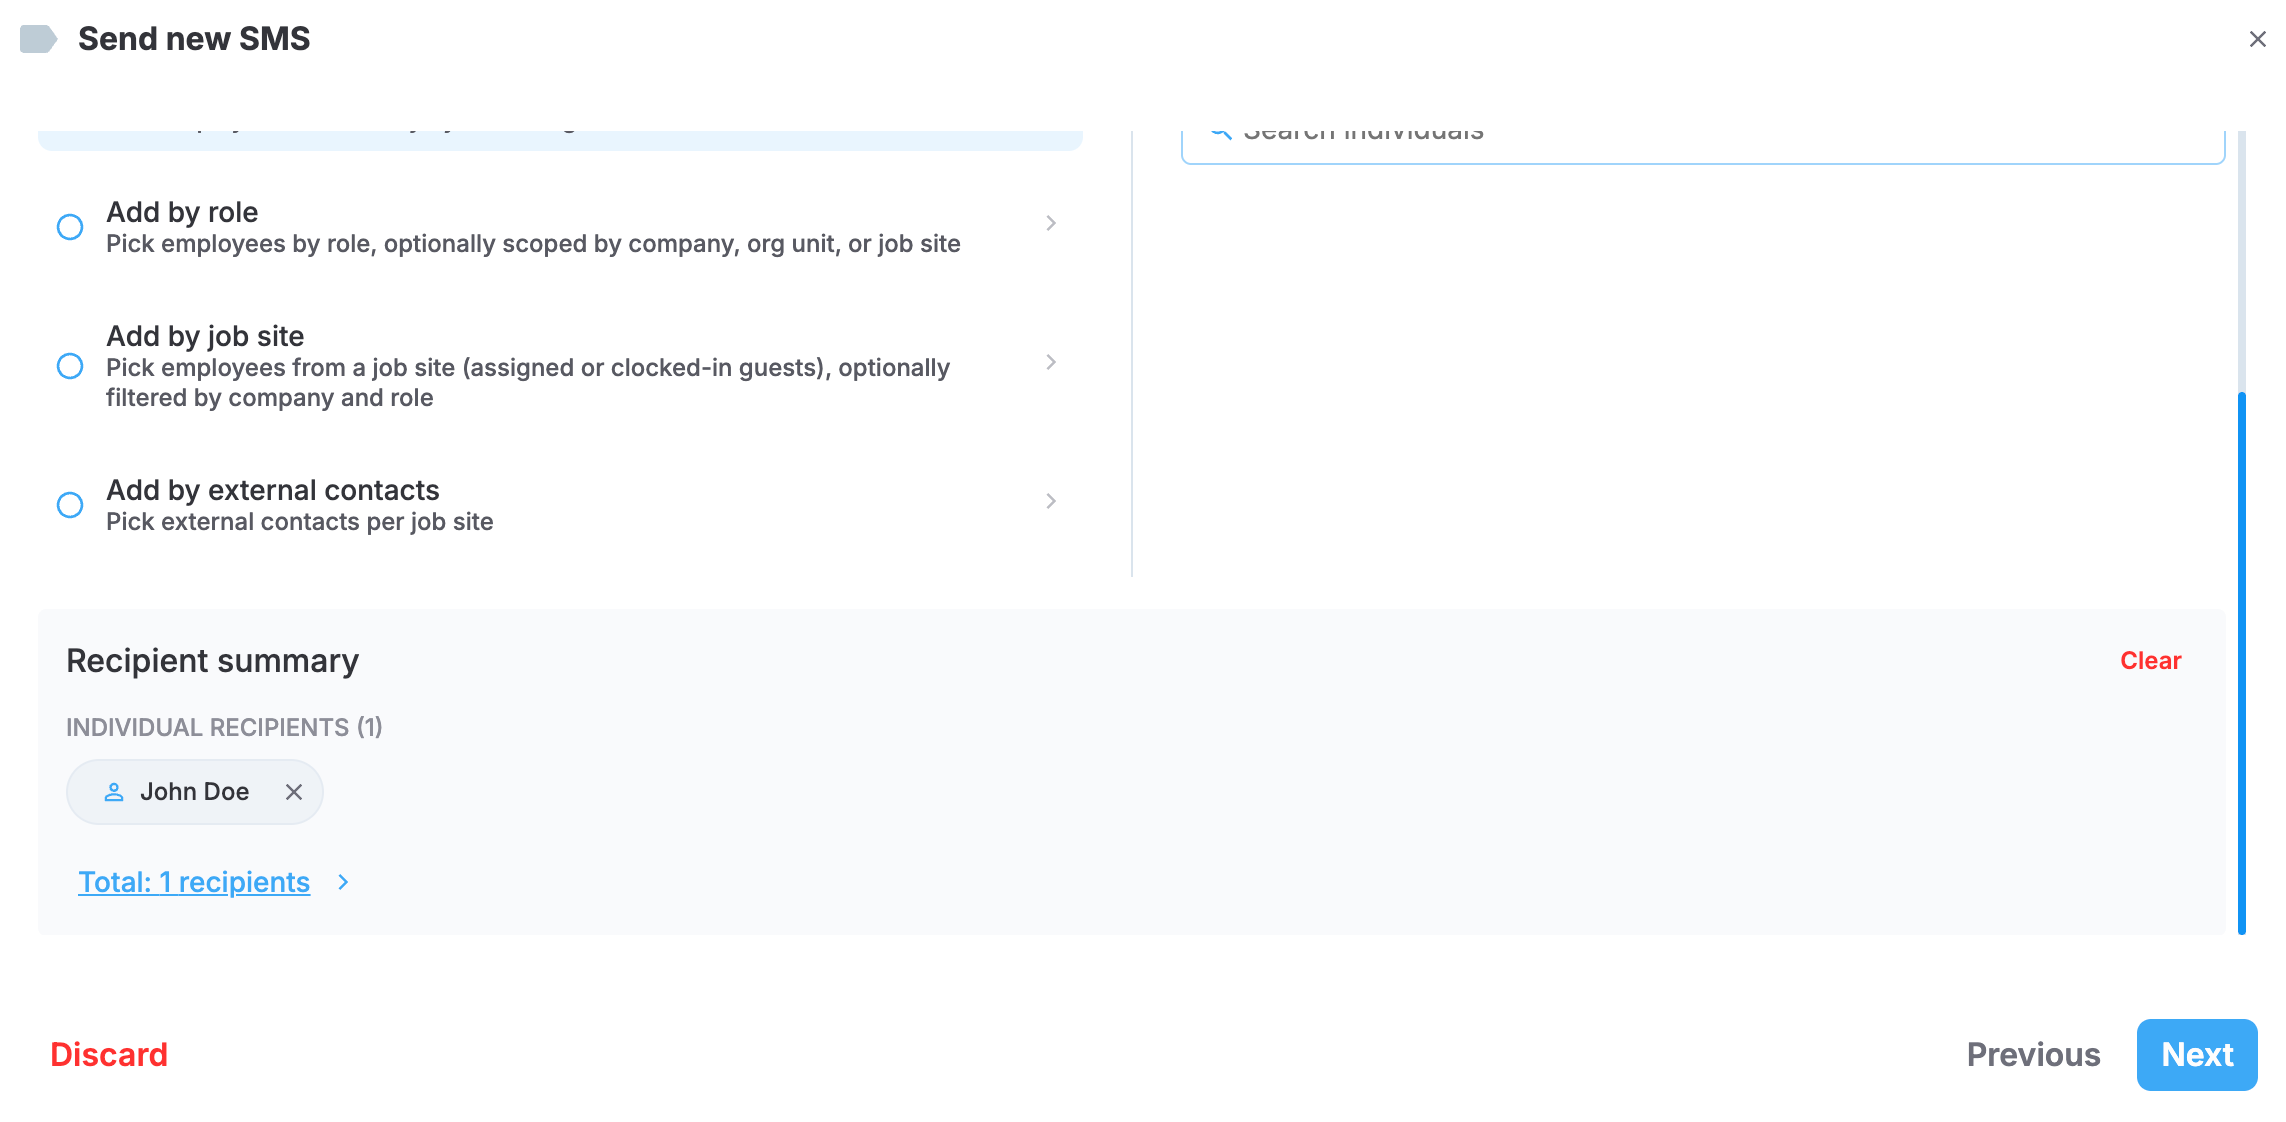
Selecting individual recipients
Select the recipient count link to open a detailed view showing:
- Recipient name
- Phone number (if available)
- Consent state: See Obtain recipient consent
Recipients without phone numbers are displayed with a dash (-) in the phone number column. Sending messages to such recipients will fail. See View sent SMS logs for more details.
Obtain recipient consent
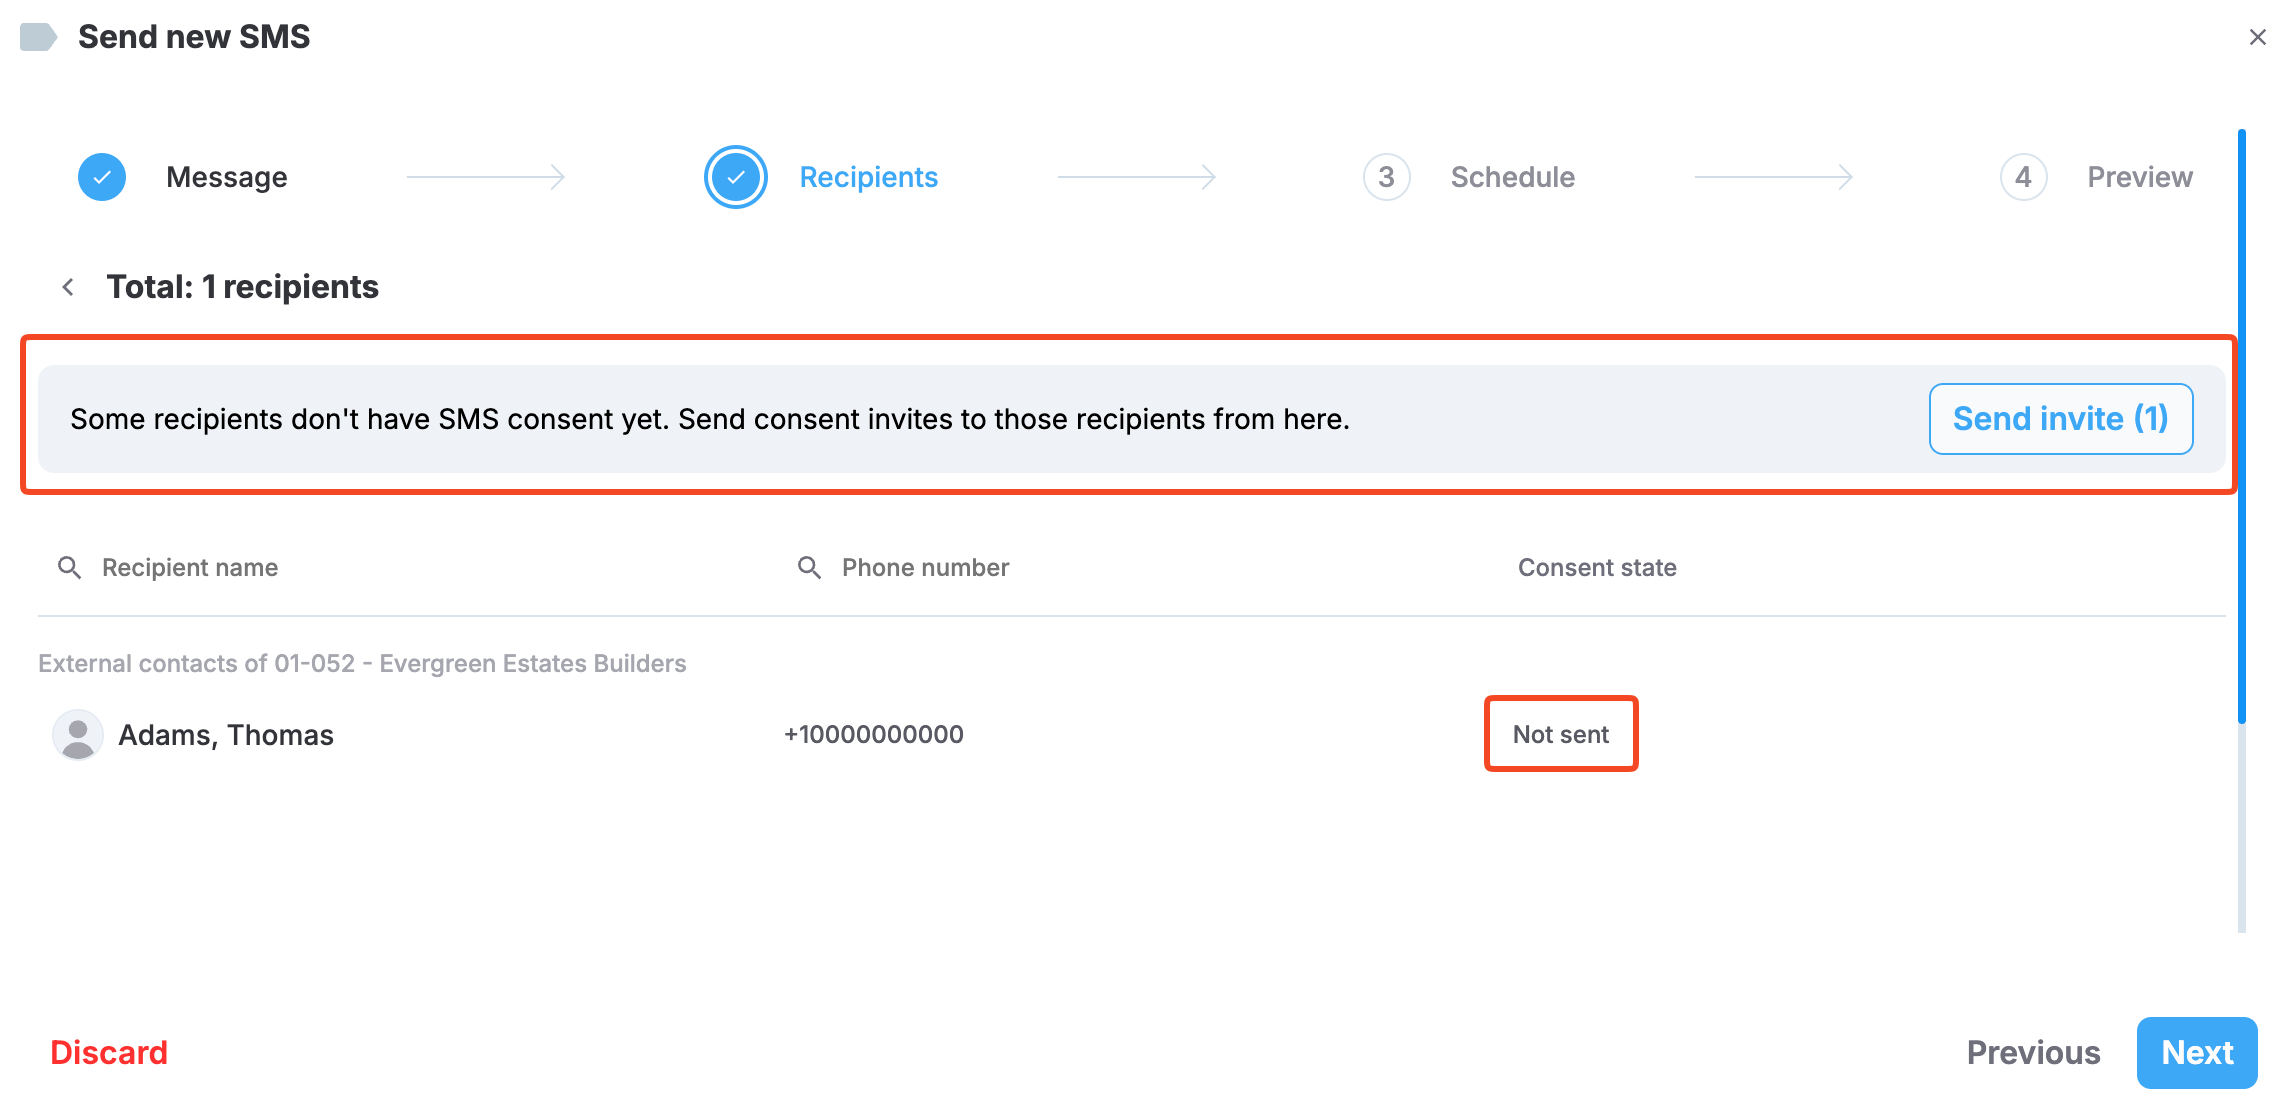
If one or multiple recipients from the list have not consented to receive SMS messages, you'll see a banner notifying about this and a Send invite option to send a consent invite to all the affected contacts at once. The number of affected contacts is displayed next to the Send invite action in parentheses, and all these contacts have a Not sent status in the Consent state column.
The following screenshot highlights the notification banner along with the Send invite option as well as the Not sent status for the corresponding contact.
Save as a contact list
Use the Save as option to save your current selection of recipients as a contact list.
Remove recipients
To remove recipients:
- Individual recipients: Select the X icon on the removable chip next to the recipient's name in the Recipient summary section.
- Contact lists, role-based recipients, job site-based recipients, or external contacts: Select the X icon on the group chip to remove all recipients associated with that selection.
After removing recipients, the total recipient count updates automatically.
Send the SMS
Now that you have finalized your message and the list of recipients, you are ready to send your SMS.
In the Schedule step, you have the fllowing options:
- Send now: Select this option to send the message immediately.
- Schedule for later: Choose this option if you want to schedule the message for a future date. See Schedule an SMS to learn more.
Select Next to proceed to the next step.
Preview the message
In this final step, you review your message content, scheduling settings, and recipient list. You have an Edit option next to each of those to make updates if needed. When everything is ready, select Confirm & Send to send your message.
Updated 3 months ago