
Job site employees
Overview of the Employees section in job site details.
PERMISSIONSYou may access Job Site Employees if you have the View "Employees" tab permission enabled for your role in Administration > Role Permissions > Job Sites.
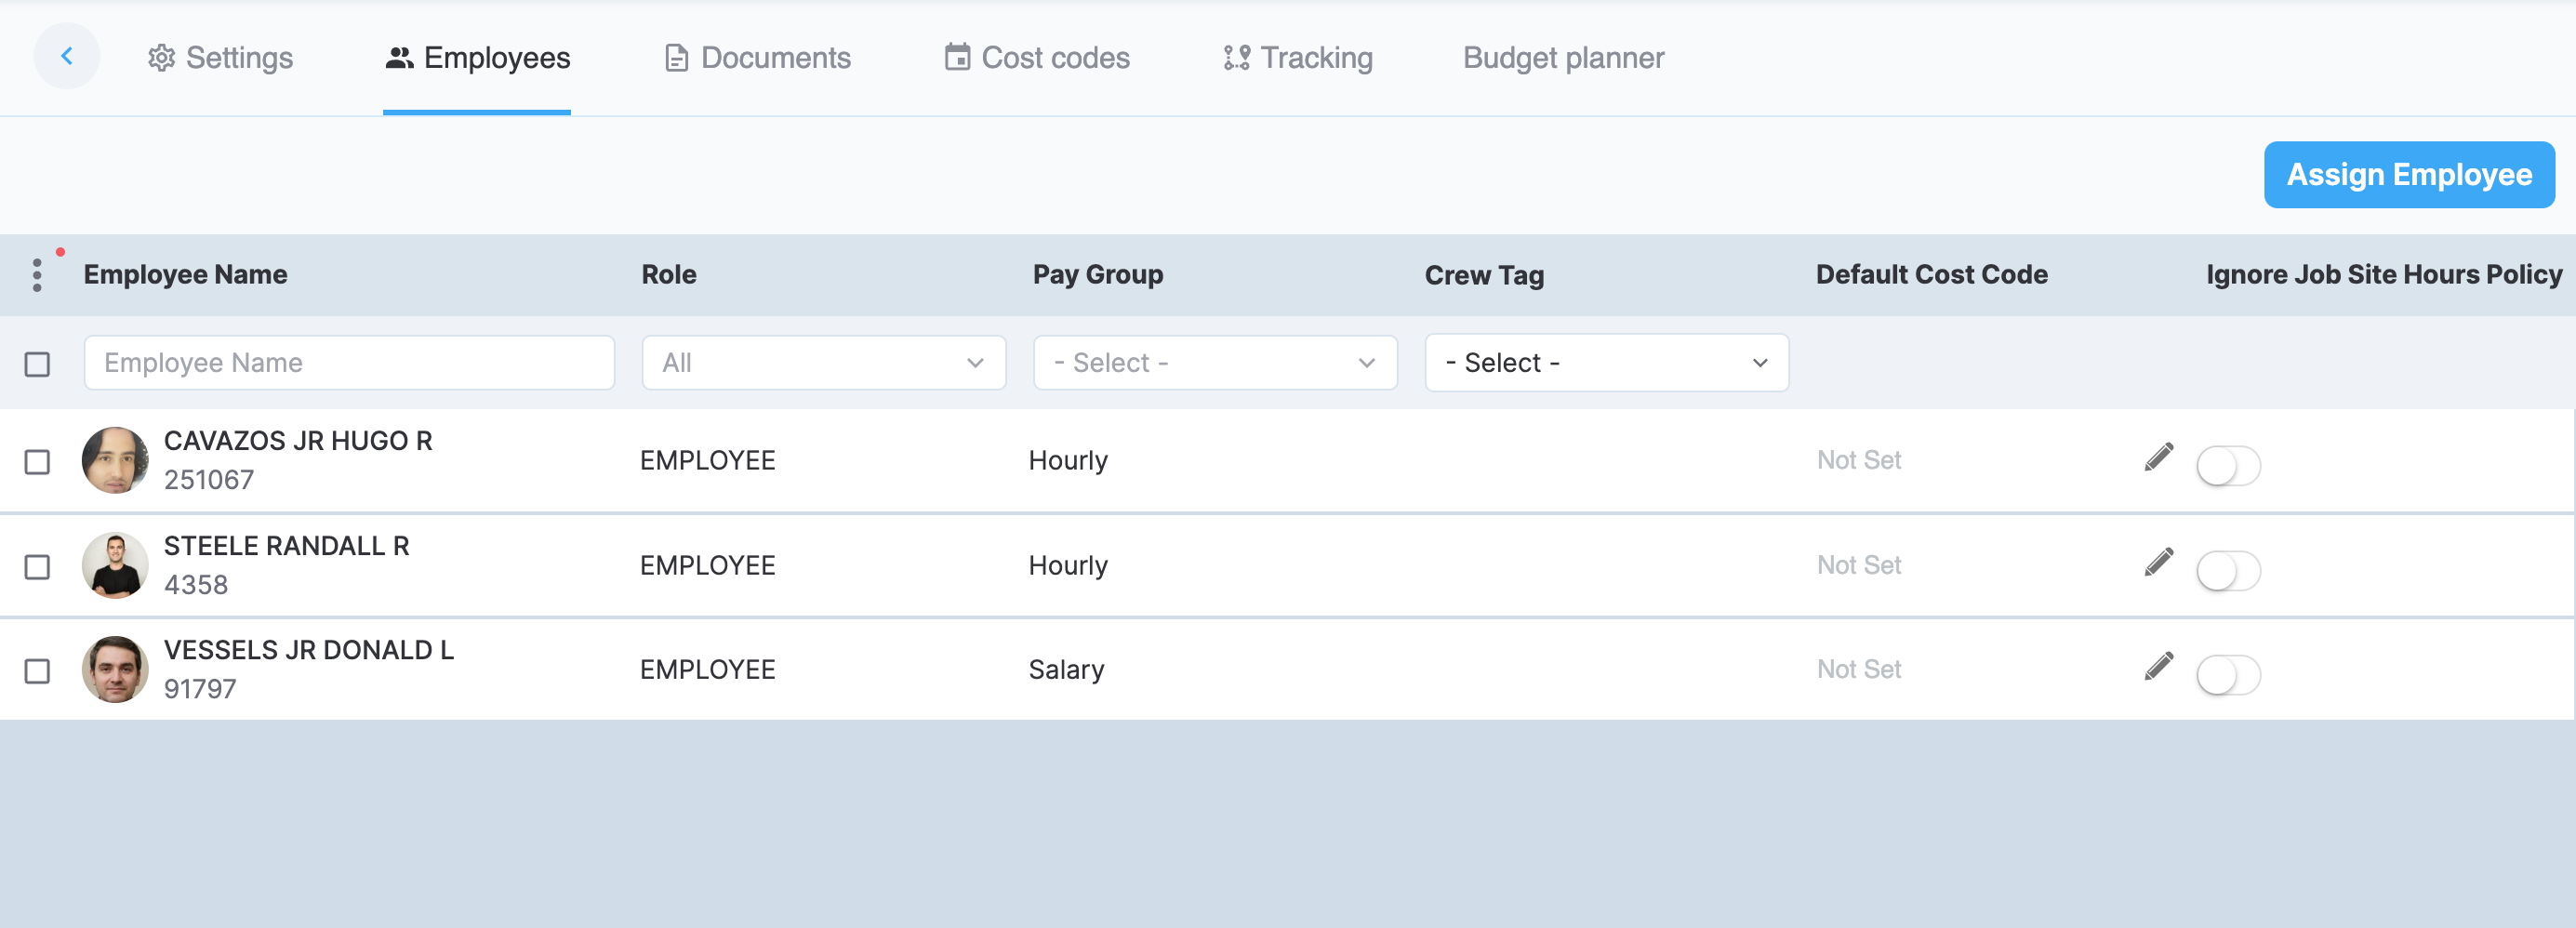
In the Employees tab of job site details, you see the list of all the employees that are assigned to the job site and are thus associated with the job site (for example, can punch in to and out of the job site). The following screenshot shows an example of an employee list in job site details.
Job site employees
The employee table has the following fields:
-
Employee Name
-
Role. The role of the employee.
-
Pay Group. Employee's pay group.
-
Shift. The shift assigned to the employee on this job site, if any. Select the field to assign or change the shift.
-
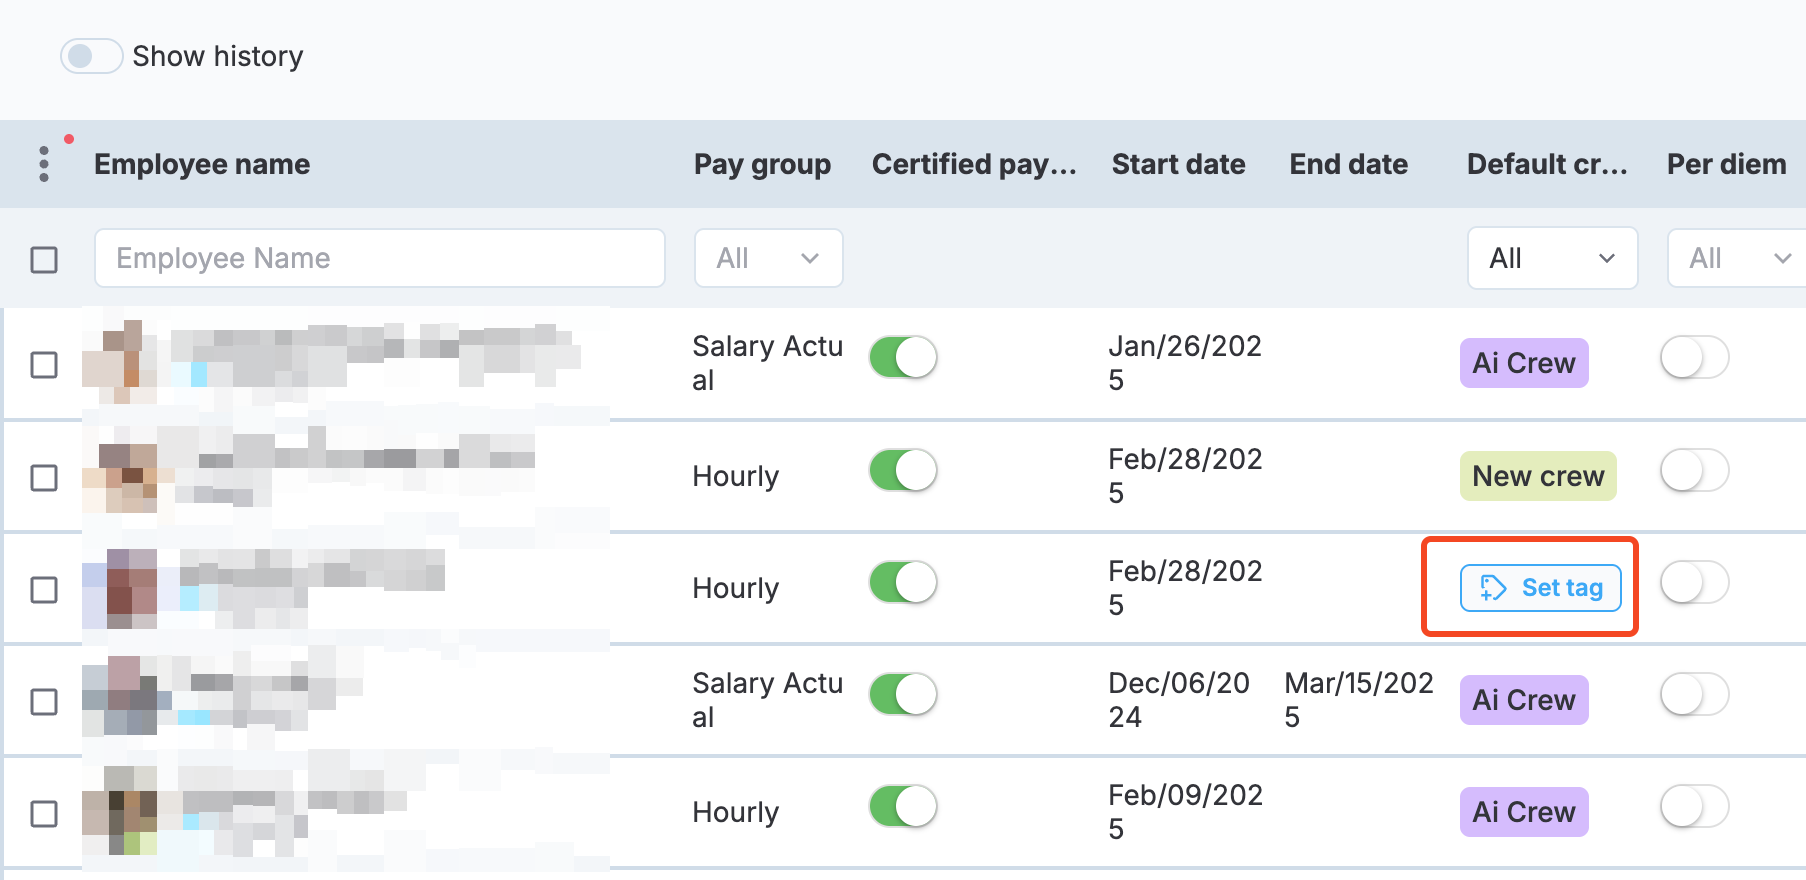
Default crew tag. View employee's default crew tag, assign default crew tags, or create new crew tags. The employee's default crew tag is assigned to all the timelogs by that employee by default, affecting newly created timelogs only. To assign a crew tag, select one or more employees and use the Set crew tag bulk action. Alternatively, use the Set tag option on the employee entry, as highlighted in the following screenshot.
Set tag
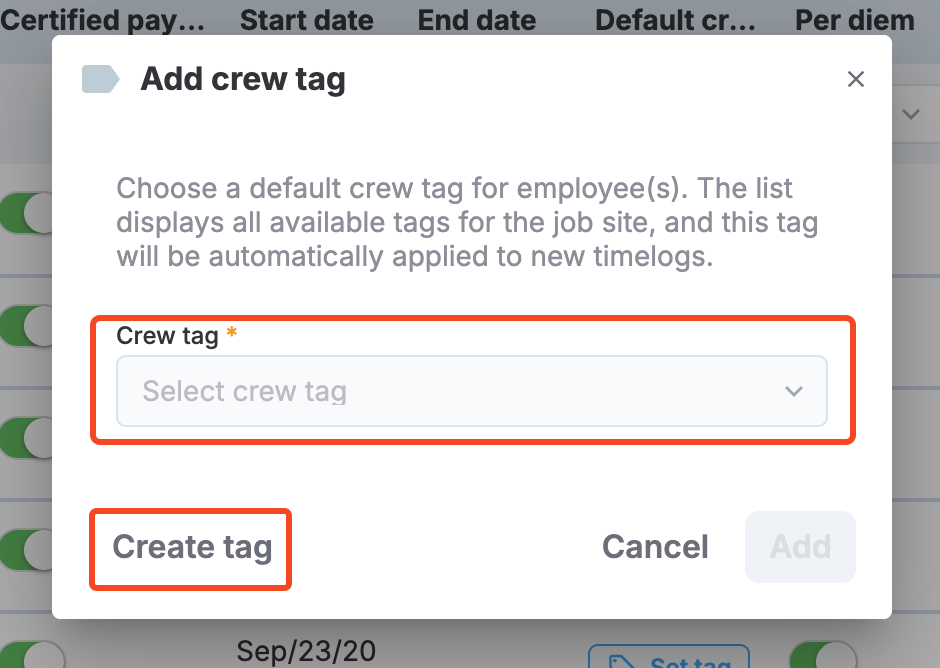
In the dialog that opens next, select from the existing crew tags or choose Create tag to create a new one. These two options are highlighted in the following screenshot.
Set tag dialog
The process of creating a new tag is described in Job site settings. Here, you can also edit default employee crew tags by selecting the crew tag on the employee entry and editing it in a dialog.
PERMISSIONSYou may assign and unassing crew tags to employees if you have the Assign/unassign crew tag to employee permission enabled for your role in Administration > Role Permissions > Job Sites.
Additionally, you may Add, edit, or copy crew tags if you have the Add/edit/copy crew tag permission enabled for your role in Administration > Role Permissions > Job Sites.
-
Default pay class. The pay class applied to the employee's hours by default. This column appears when Certified payroll is turned on for the job site. If Separate default pay classes for OT and DT is also turned on, two more columns appear:
- OT default pay class: The default pay class for the employee's overtime (OT) hours.
- DT default pay class: The default pay class for the employee's double time (DT) hours.
In this case, the Default pay class applies to the employee's regular (REG) hours and leave requests only..
NOTEIf the OT default pay class or DT default pay class is
Not Setfor an employee, the Default pay class isn't used instead. In this case, the pay class for those hours stays blank.
- Default cost code. Here, you can assign a default cost code to the employee. Default cost codes are suggested to employees on punch out if Self cost coding is enabled in Administration > Role Permissions > Employees. Moreover, you can use default cost codes to set up automatic cost coding.
PERMISSIONSYou may add or edit default cost codes if you have the Add/edit default cost code permission enabled for your role in Administration > Role Permissions > Job Sites.
- Ignore Job Site Hours Policy. If this setting is activated, the working hours policy set in job site settings is ignored for the employee. See Ignore job site hours policy to learn more.
Assign employees
Use the Assign Employee option to access the list of employees and assign employees to or unassign employees from the job site.
PERMISSIONSYou can assign and unassign employees to job sites if you have the Assign/unassign employee to job site permission enabled for your role in Administration > Role Permissions > Job Sites.
To assign employees to the job site:
- Select Assign Employee.
- In Assignment start date, keep Today or select a different date from the calendar.
- Select the employees you want to assign.
- Select Assign.
Assignment start date
The assignment start date is the date from which the assignment takes effect. It defaults to today, but you can select a future date or backdate it to as early as the first day of the previous payroll week. Earlier dates are unavailable in the calendar. Backdating is useful when employees start working on the job site before they're assigned to it.
The selected start date applies to all the employees you assign at the same time. Changing the date, searching, or filtering the list doesn't clear the employees you've already selected. Employees who are already assigned to the job site can't be selected again.
When you backdate an assignment, per diem calculations evaluate the employee's eligible timelogs from the start date forward and generate any missing per diem without creating duplicates.
View-only profiles
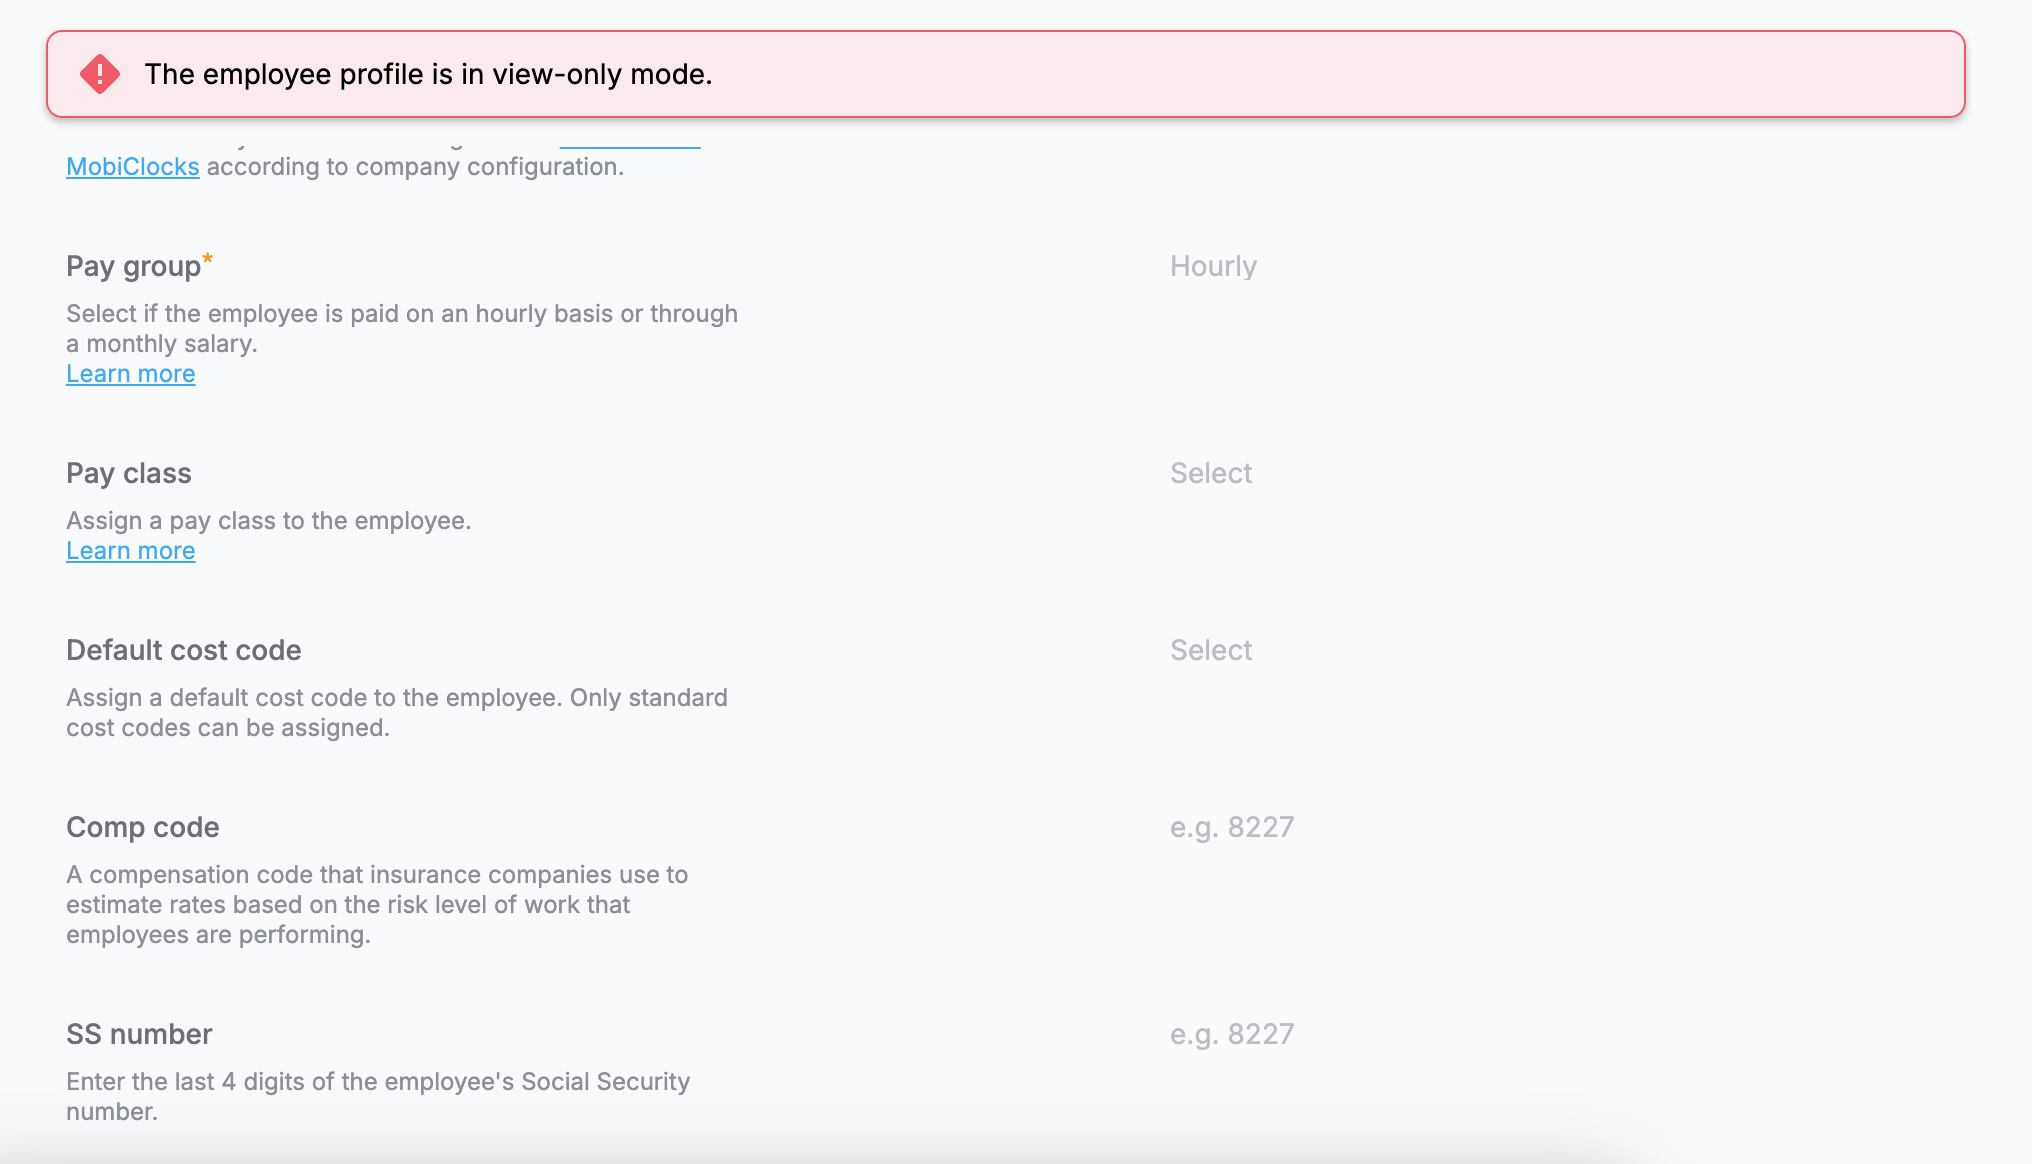
When you don't have permission to edit profiles outside of your assigned job sites (for example, if you have a PM or a similar role), you still see these profiles in the list of employees and can assign them to your job site. However, when you select such a profile, it's displayed in view-only mode. The following screenshot shows an example of a view-only employee profile, where a The employee profile is in view-only mode warning is displayed at the top and all the profile fields are disabled.
Employee profile in view-only mode
Bulk actions
Select multiple employees to perform bulk actions. The following actions are available.
Unassign
Unassign employees from the job site. See Assign employees to learn more.
Set crew tag and Remove crew tag
Set or remove a crew tag from the selected employees. Setting crew tags was discussed earlier in this topic under employee table fields.
Assign shift
Assign a shift to the selected employees, starting from the selected effective date. See Assign employees to shifts to learn more.
Set per diem
Set per diem eligibility and rates for the selected employees in one step. The selected values replace the employees' existing eligibility and rates.
VISIBILITYSet per diem appears if per diem is turned on for the job site and you have permission to edit employee per diem.
In the Set per diem dialog, fill in the following fields:
- Eligibility.
Daily,Weekly, orNot eligible. - Paid rate. Select Default job site rate to apply the per diem rate set for the job site, or Custom to enter a different rate for these employees.
- Effective date. The date from which the new values apply. The date defaults to today.
- Select Save.
MobiClocks checks each employee separately. Valid employees are updated, while employees that can't be updated are skipped and marked with an error icon. Hover over the icon to see the reason, for example, an effective date before the employee's job site assignment or a conflict between daily and weekly per diem. After saving, a message shows how many employees were updated, for example, Per Diem updated for 8 of 12 employees. 4 employees could not be updated.
Set pay classes
Set the default pay classes of the selected employees in one step.
VISIBILITYSet pay classes appears on job sites with Certified payroll turned on.
In the Set pay classes dialog, select the pay classes to apply:
- Base. The employees' Default pay class. It applies to regular (REG) hours, or to all hours if separate default pay classes for OT and DT aren't turned on.
- OT. The OT default pay class.
- DT. The DT default pay class.
- Select Save.
The OT and DT fields are available only if Separate default pay classes for OT and DT is turned on for the job site. All fields are optional, so you can update only the pay classes you need. Fields you leave empty don't change the employees' current pay classes.
Print badge
Print the badges of the selected employees. See Print multiple badges to learn more.
Updated 15 days ago